window KIA FORTE 2023 Navigation System Quick Reference Guide
[x] Cancel search | Manufacturer: KIA, Model Year: 2023, Model line: FORTE, Model: KIA FORTE 2023Pages: 324, PDF Size: 10.59 MB
Page 218 of 324
9-30
Horn Feedback (if equipped)
You can set to generate guiding beep when all doors are locked.
Remote Power Doors & Liftgate (if equipped)
Easily open the doors by pressing the unlock button on the smart key for more than 3
seconds.
2 Press Unlock (if equipped)
You can set to unlock all doors by pressing the door unlock button twice.
A
When you press the door unlock button once, only the driver's seat door is unlocked.
Smart Sliding Door (if equipped)
Set the sliding door to automatically open when you move close to the sliding door carrying
your smart key.
Power Trunk or Power Liftgate (if equipped)
Open or close the trunk (liftgate) automatically using the power trunk (liftgate) button.
A
The displayed name may differ depending on the vehicle model and specifications.
Power Trunk Opening Speed or Power Liftgate Opening Speed
(if equipped)
Set the opening speed for the power trunk (liftgate).
A
The displayed name may differ depending on the vehicle model and specifications.
Power Trunk Opening Height or Power Liftgate Opening Height
(if equipped)
Set the opening height for the power trunk (liftgate).
A
The displayed name may differ depending on the vehicle model and specifications.
Smart Trunk or Smart Liftgate (if equipped)
Opens the trunk (liftgate) automatically when approaching the trunk (liftgate) with the smart
key.
A
The displayed name may differ depending on the vehicle model and specifications.
Liftgate Auto Close (if equipped)
Set the liftgate to automatically close when you move away from the back of the liftgate while
carrying the smart key.
Remote Window Control (if equipped)
Turns on the remote window control function.
Page 251 of 324
9-63
Previous Destinations Settings
You can set to automatically save the previous destination and display the previous
destinations when the navigation system starts.
•Save Previous Destinations: The previous destination is automatically saved.
•Show Previous Destinations after Navigation Start-up: When the navigation system
starts, the list of recent destinations appear on a pop-up window.
Fuel Price Information (if equipped)
When displaying gas stations or LPG charging stations on the map, the fuel prices below a
specific range can be displayed.
A
Select Display Fuel Price Info on Map to view recommended fuel prices based on the
prices offered in the area.
A
Fuel prices on the map may differ from actual ones.
User Data
You can import location data from a USB device to the system, or export the data on the
system to a USB device.
A
When importing or exporting the location data, you can uses only the USB device
formatted in exFAT, FAT16/32, or NTFS.
•Import Address Book from USB Device: You can import the location data on a USB
device to the system.
A
The previous location data on the system is to be deleted.
A
If location information is imported from a different navigation device or system,
the locations may appear differently because the device/system uses a different
coordinate system.
•Export Address Book to USB Device: You can export the location data on the system to
a USB device.
A
The location data on the USB device is deleted.
Page 257 of 324
9-69
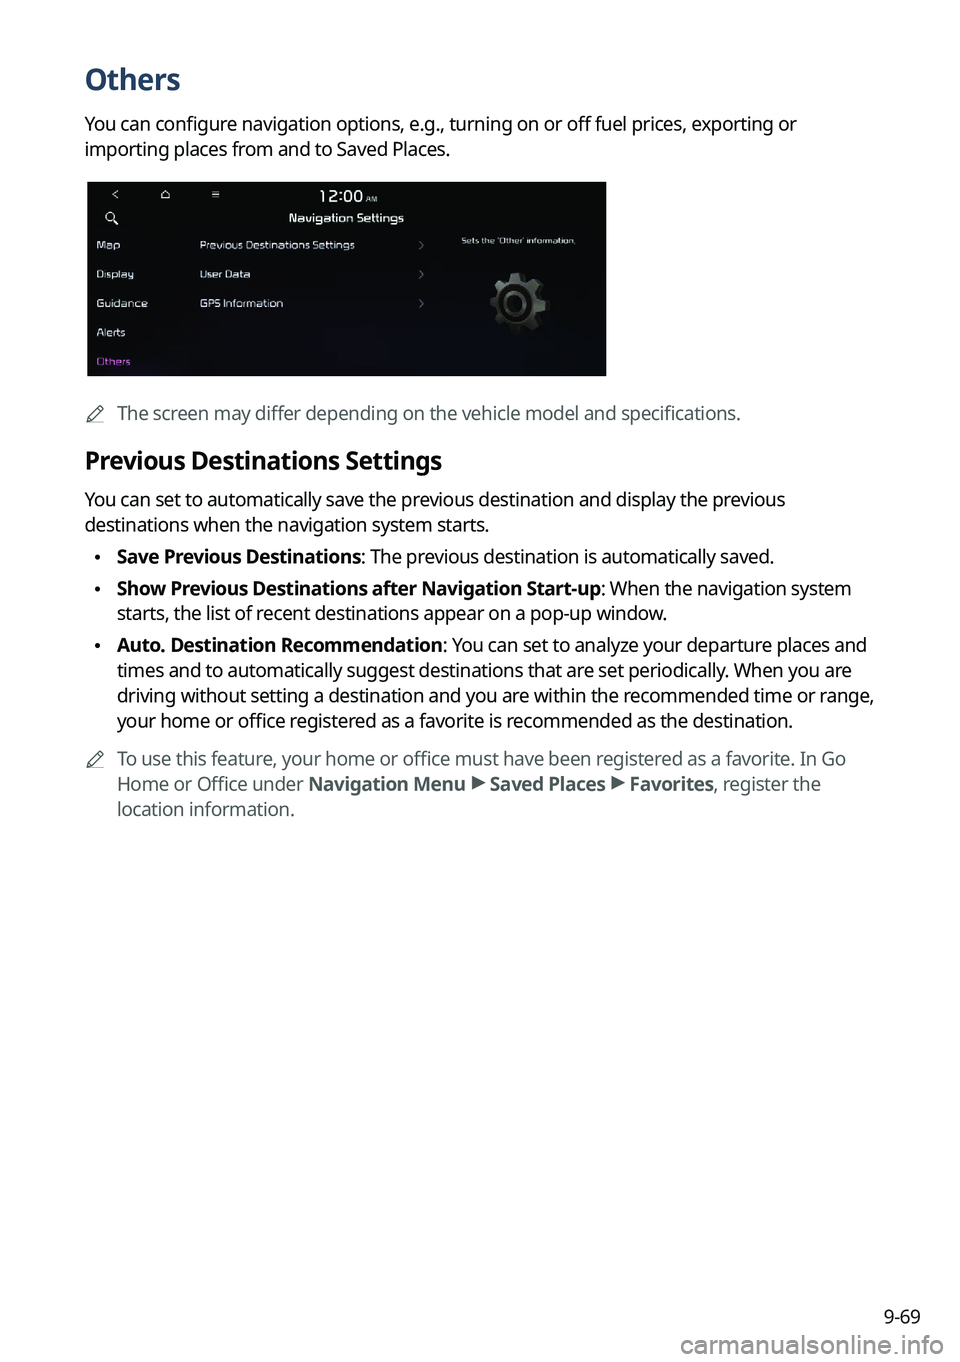
Others
You can configure navigation options, e.g., turning on or off fuel prices, exporting or
importing places from and to Saved Places.
AThe screen may differ depending on the vehicle model and specifications.
Previous Destinations Settings
You can set to automatically save the previous destination and display the previous
destinations when the navigation system starts.
•Save Previous Destinations: The previous destination is automatically saved.
•Show Previous Destinations after Navigation Start-up: When the navigation system
starts, the list of recent destinations appear on a pop-up window.
•Auto. Destination Recommendation: You can set to analyze your departure places and
times and to automatically suggest destinations that are set periodically. When you are
driving without setting a destination and you are within the recommended time or range,
your home or office registered as a favorite is recommended as the destination.
A
To use this feature, your home or office must have been registered as a favorite. In Go
Home or Office under Navigation Menu >
Saved Places >
Favorites, register the
location information.
Page 268 of 324
9-80
GPS Time
After receiving the time from GPS, it sets the system date and time automatically.
A
To manually set the date and time, uncheck GPS Time, press the current date and time
below GPS Time, and then set the date and time.
24 Hours
The system time is displayed in the 24-hour format.
Daylight Saving Time
Displays the system time in the format of Daylight Saving Time.
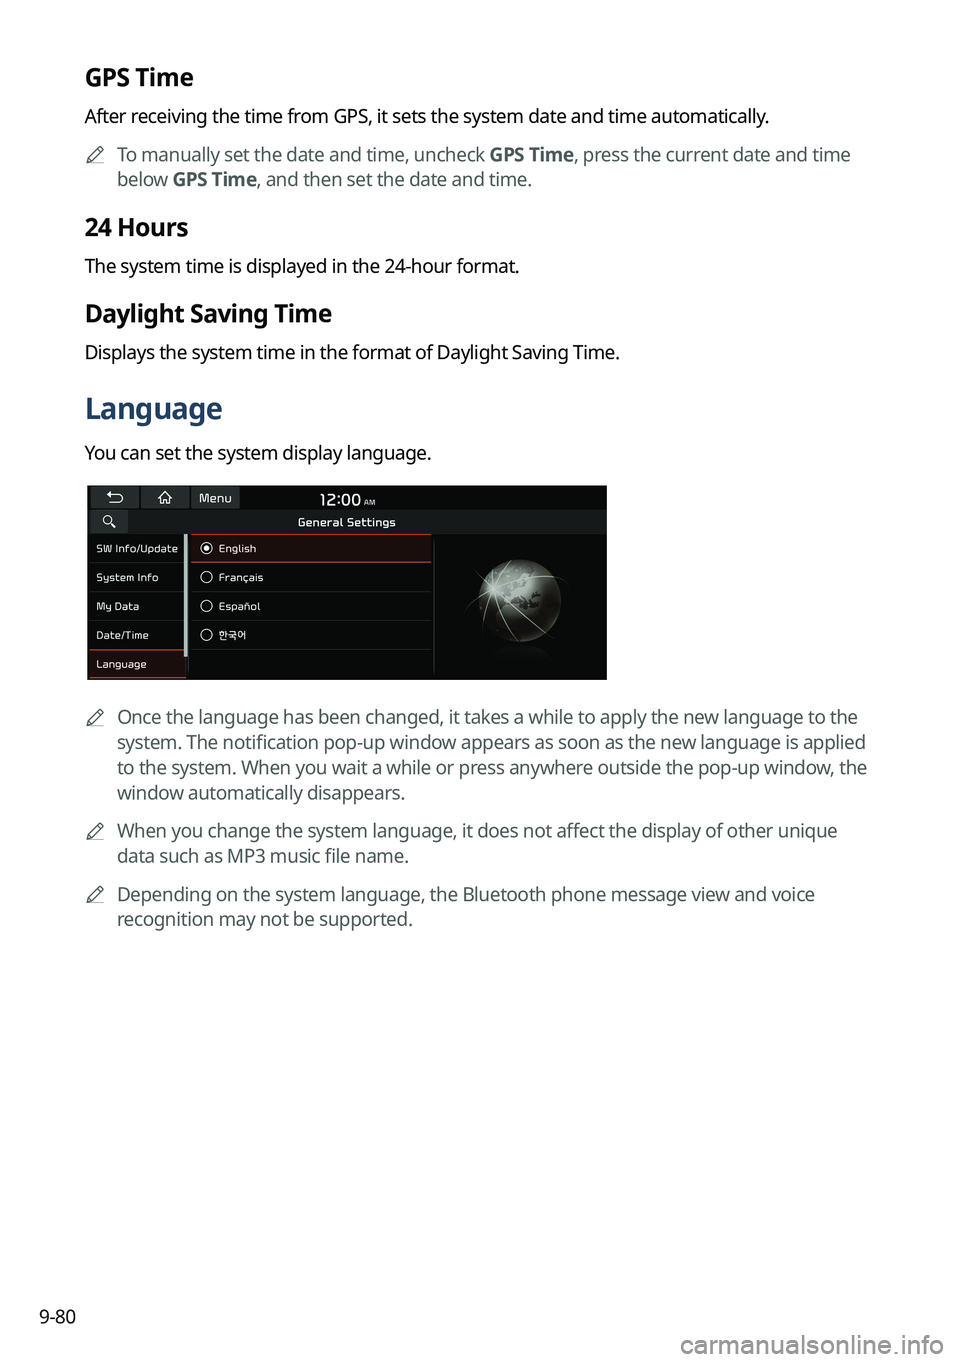
Language
You can set the system display language.
A
Once the language has been changed, it takes a while to apply the new language to the
system. The notification pop-up window appears as soon as the new language is applied
to the system. When you wait a while or press anywhere outside the pop-up window, the
window automatically disappears.
A
When you change the system language, it does not affect the display of other unique
data such as MP3 music file name.
A
Depending on the system language, the Bluetooth phone message view and voice
recognition may not be supported.
Page 273 of 324
9-85
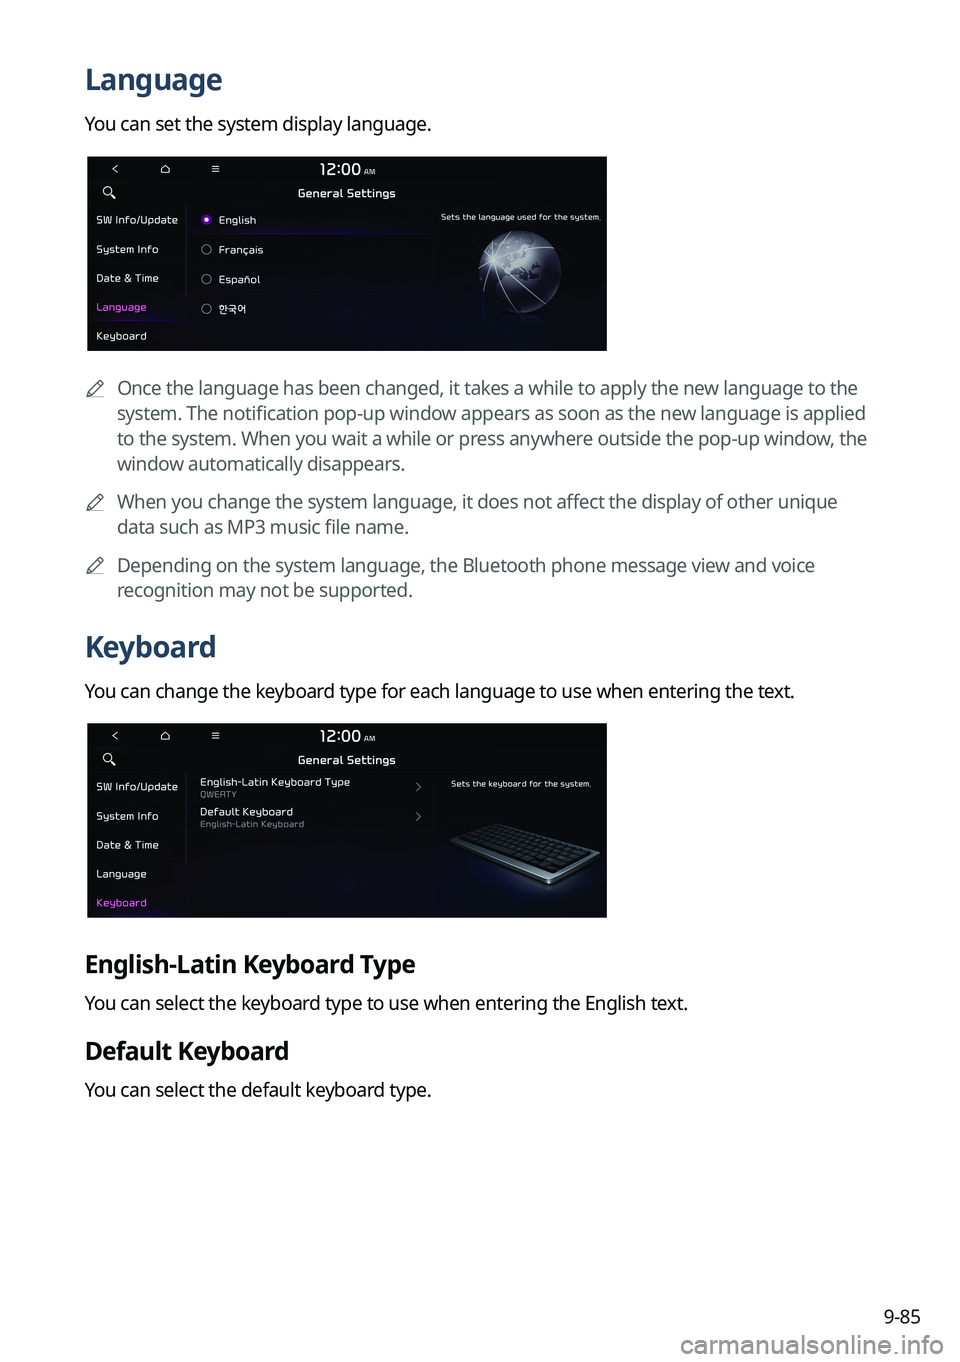
Language
You can set the system display language.
A
Once the language has been changed, it takes a while to apply the new language to the
system. The notification pop-up window appears as soon as the new language is applied
to the system. When you wait a while or press anywhere outside the pop-up window, the
window automatically disappears.
A
When you change the system language, it does not affect the display of other unique
data such as MP3 music file name.
A
Depending on the system language, the Bluetooth phone message view and voice
recognition may not be supported.
Keyboard
You can change the keyboard type for each language to use when entering the text.
English-Latin Keyboard Type
You can select the keyboard type to use when entering the English text.
Default Keyboard
You can select the default keyboard type.
Page 290 of 324
9-102
[Background Update
You can perform update while using the system.
1 On the SW Info/Update screen, press Update.
2 Press Background Update.
3 Press OK.
A
Compared to Update Now, it may take longer.
A
On the All Menus screen, press Setup >
General >
SW Info/Update to see the update
progress.
A
It is possible to start background updates only when the vehicle is on.
A
It is possible to continue to perform updates even after turning off the vehicle while
updates are in progress. On the notification window displayed when the vehicle is
turned off, press Update to perform the remaining updates to complete the process
successfully. For later update, press Later.
A
If the update process is not completed, a notification window appears asking if you want
to perform updates each time you turn off the vehicle.
A
All system functions, including the rear view camera, are disabled while updates are in
progress.
[Scheduling an update
When you set for scheduled update after downloading the latest data, the navigation map
and infotainment system can be updated while not using the vehicle.
1 On the SW Info/Update screen, press Update.
2 Press Install after Turning Off the Ignition.
3 Set the update time and press OK.
When scheduling the update is finished, the status indicator icon appears.
A
You can set to start the update within 12 hours or less after the vehicle is stopped.
4 Turn off the vehicle (ACC Off).
Page 291 of 324
9-103
A
Make sure that a USB device with update files is connected to the system before turning
off the vehicle.
A
When you set the update time to "0", the update notification window appears and then
the update starts.
To close the notification window and proceed with the update, press
Yes.
To cancel the update, press No.
A
Once the update has started, you cannot cancel it. After the update, the system
automatically turns off.
A
When you start the vehicle, the update complete notification appears to show the update
result. After update is completed, the SW Info/Update screen displays the updated
version.
A
When you turn on the system while updating, you can see its progress.
A
Scheduled update is canceled when:
Low battery is detected when turning off the vehicle.
The storage device with the update files is disconnected.
The vehicle is started before the update scheduled time.
The system has been turned off for more than 3 minutes with the vehicle turned off.
Page 304 of 324
10-12
QI bought a new mobile phone and want to replace my old phone with the new one to
connect the system. How can I register the new phone to the system?
AAn additional device can be registered in the same way as in registration of a new
device. You can register up to 6 devices in the list of Bluetooth devices. To delete
a previously registered device, press Delete Device(s) from the list of Bluetooth
devices, select the device to delete, and then press Delete.
> See "Deleting a registered
device."
QHow can I access the list of contacts while using a Bluetooth phone?
AApprove access to the contacts when connecting your mobile phone to the syste\
m
via Bluetooth. The list of contacts on the phone is downloaded to the system. To see
the downloaded list of contacts, press the Call button on the steering wheel and
press
on the call screen. You can search for a contact and make a call to the
contact, or add the contact to the favorites. > See " Dialing from the contacts."
Broadcast reception
QI turned on the radio while driving but I heard no sound but noise.
ADepending on the location, obstacles may cause reception to deteriorate.
Radio reception rate may also drop when an on-glass antenna is mounted on the
rear window and the window is tinted with metallic window films.
Self-inspection method upon failure
QThe system does not operate properly. What shall I do?
AInspect the system after referring to Troubleshooting Guide. > See "Solutions."
When the system failure persists after inspection, press and hold the Reset button to
reset the system.
If the problem persists, contact your place of purchase or dealer.