lock KIA FORTE KOUP 2017 Repair Manual
[x] Cancel search | Manufacturer: KIA, Model Year: 2017, Model line: FORTE KOUP, Model: KIA FORTE KOUP 2017Pages: 595, PDF Size: 11.53 MB
Page 182 of 595
Features of your vehicle
110 4
- The room lamp will stay on for
approximately 20 minutes if a
door is opened with the ignition
switch in the ACC or LOCK/OFF
position.
- The room lamp will stay on con-
tinuously if the door is opened
with the ignition switch in the ON
position.
- The room lamp will go out imme-
diately if the ignition switch is
changed to the ON position or all
doors are locked.Luggage room lamp
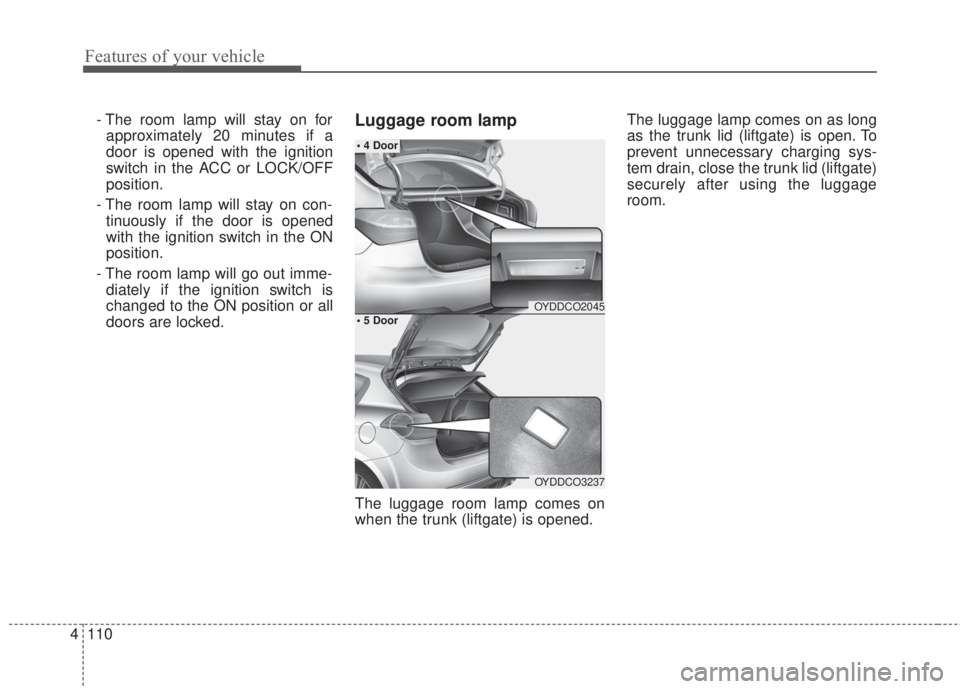
The luggage room lamp comes on
when the trunk (liftgate) is opened.The luggage lamp comes on as long
as the trunk lid (liftgate) is open. To
prevent unnecessary charging sys-
tem drain, close the trunk lid (liftgate)
securely after using the luggage
room.
OYDDCO2045
OYDDCO3237
• 4 Door
• 5 Door
Page 184 of 595
Features of your vehicle
112 4
Headlamp welcome
When the headlight(light switch in the
headlight or AUTO position) is on and
all doors (and trunk/liftgate) are
locked and closed, the headlight,
position light and tail light will come
on for 15 seconds if any of the below
is performed.
• Without smart key system
- When the door unlock button is
pressed on the transmitter.
• With the smart key system
- When the door unlock button is
pressed on the smart key.
At this time, if you press the door lock
button (on the transmitter or smart
key), the lights will turn off immediately.
Interior light welcome
When the interior light switch is in the
DOOR position and all doors (and
trunk/liftgate) are locked and closed,
the room lamp will come on for 30
seconds if any of the below is per-
for med.
• Without smart key system
- When the door unlock button is
pressed on the transmitter.
• With the smart key system
- When the door unlock button is
pressed on the smart key.
- When the button of the outside
door handle is pressed.
At this time, if you press the door lock
button, the lamps will turn off imme-
diately.
Puddle lamp and pocket lamp
(if equipped)
When all doors are locked and
closed, the puddle lamp and pocket
lamp will come on for 15 seconds if
any of the below is performed.
• With the smart key system
- When the door unlock button is
pressed on the smart key.
- When the button of the outside
door handle is pressed.
- When the vehicle is approached
with the smart key in possession.
At this time, if you press the door lock
button, the lamps will turn off imme-
diately.
WELCOME SYSTEM (IF EQUIPPED)
Page 192 of 595
Features of your vehicle
120 4
Air conditioning (if equipped)
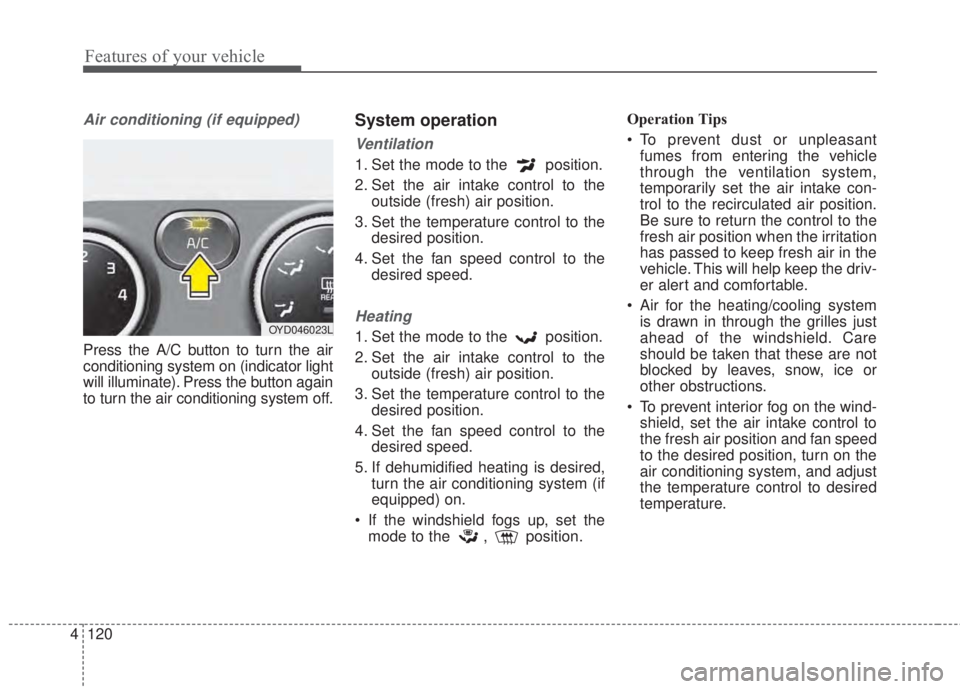
Press the A/C button to turn the air
conditioning system on (indicator light
will illuminate). Press the button again
to turn the air conditioning system off.
System operation
Ventilation
1. Set the mode to the position.
2. Set the air intake control to the
outside (fresh) air position.
3. Set the temperature control to the
desired position.
4. Set the fan speed control to the
desired speed.
Heating
1. Set the mode to the position.
2. Set the air intake control to the
outside (fresh) air position.
3. Set the temperature control to the
desired position.
4. Set the fan speed control to the
desired speed.
5. If dehumidified heating is desired,
turn the air conditioning system (if
equipped) on.
• If the windshield fogs up, set the
mode to the , position.Operation Tips
• To prevent dust or unpleasant
fumes from entering the vehicle
through the ventilation system,
temporarily set the air intake con-
trol to the recirculated air position.
Be sure to return the control to the
fresh air position when the irritation
has passed to keep fresh air in the
vehicle. This will help keep the driv-
er alert and comfortable.
• Air for the heating/cooling system
is drawn in through the grilles just
ahead of the windshield. Care
should be taken that these are not
blocked by leaves, snow, ice or
other obstructions.
• To prevent interior fog on the wind-
shield, set the air intake control to
the fresh air position and fan speed
to the desired position, turn on the
air conditioning system, and adjust
the temperature control to desired
temperature.OYD046023L
Page 204 of 595
Features of your vehicle
132 4
System operation
Ventilation
1. Set the mode to the position.
2. Set the air intake control to the
outside (fresh) air position.
3. Set the temperature control to the
desired position.
4. Set the fan speed control to the
desired speed.
Heating
1. Set the mode to the position.
2. Set the air intake control to the
outside (fresh) air position.
3. Set the temperature control to the
desired position.
4. Set the fan speed control to the
desired speed.
5. If dehumidified heating is desired,
turn the air conditioning system (if
equipped) on.
• If the windshield fogs up, set the
mode to the or position.Operation Tips
• To keep dust or unpleasant fumes
from entering the vehicle through
the ventilation system, temporarily
set the air intake control to the
recirculated air position. Be sure to
return the control to the fresh air
position when the irritation has
passed to keep fresh air in the
vehicle. This will help keep the driv-
er alert and comfortable.
• Air for the heating/cooling system
is drawn in through the grilles just
ahead of the windshield. Care
should be taken that these are not
blocked by leaves, snow, ice or
other obstructions.
• To prevent interior fog on the wind-
shield, set the air intake control to
the fresh air position and fan speed
to the desired position, turn on the
air conditioning system, and adjust
the temperature control to desired
temperature.
Air conditioning
Kia Air Conditioning Systems are
filled with R-134a refrigerant.
1. Start the engine. Press the air con-
ditioning button.
2. Set the mode to the position.
3. Set the air intake control to the out-
side air or recirculated air position.
4. Adjust the fan speed control and
temperature control to maintain
maximum comfort.
• When maximum cooling is desired,
set the temperature control to the
extreme left position, then set the
fan speed control to the highest
speed.
Page 212 of 595
Features of your vehicle
140 4
Sunglass holder (if equipped)
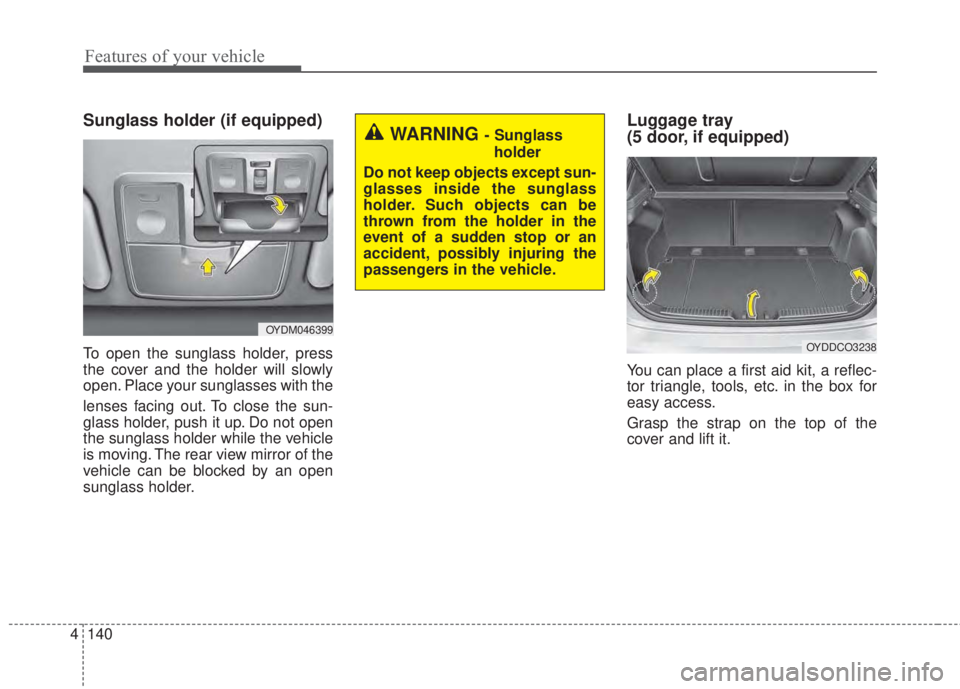
To open the sunglass holder, press
the cover and the holder will slowly
open. Place your sunglasses with the
lenses facing out. To close the sun-
glass holder, push it up. Do not open
the sunglass holder while the vehicle
is moving. The rear view mirror of the
vehicle can be blocked by an open
sunglass holder.
Luggage tray
(5 door, if equipped)
You can place a first aid kit, a reflec-
tor triangle, tools, etc. in the box for
easy access.
Grasp the strap on the top of the
cover and lift it.
OYDM046399
WARNING - Sunglass
holder
Do not keep objects except sun-
glasses inside the sunglass
holder. Such objects can be
thrown from the holder in the
event of a sudden stop or an
accident, possibly injuring the
passengers in the vehicle.
OYDDCO3238
Page 217 of 595
4 145
Features of your vehicle
Climate control seat
(if equipped)
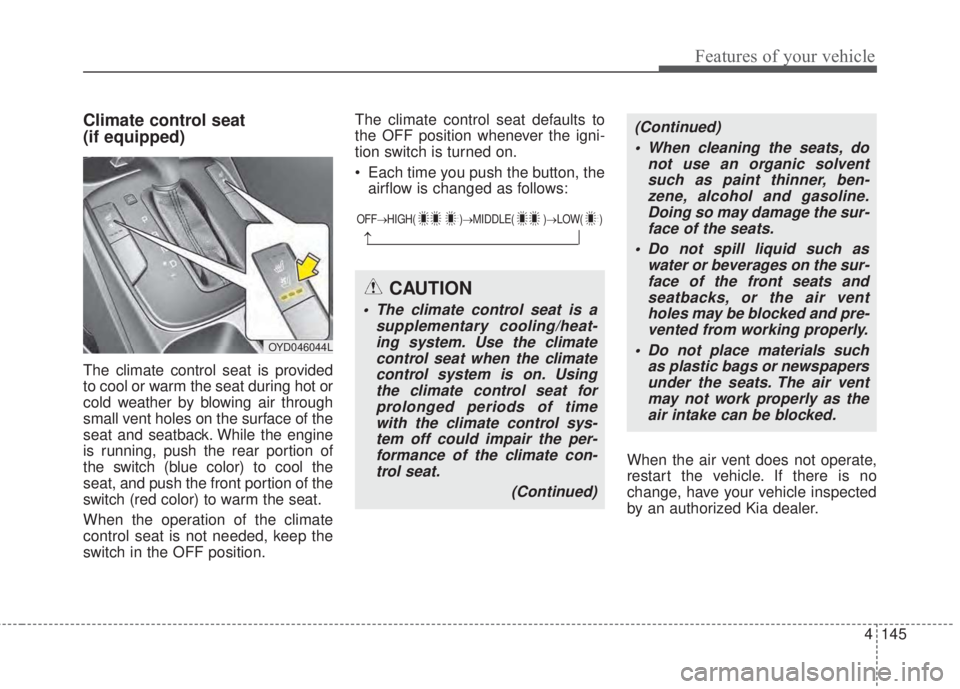
The climate control seat is provided
to cool or warm the seat during hot or
cold weather by blowing air through
small vent holes on the surface of the
seat and seatback. While the engine
is running, push the rear portion of
the switch (blue color) to cool the
seat, and push the front portion of the
switch (red color) to warm the seat.
When the operation of the climate
control seat is not needed, keep the
switch in the OFF position.The climate control seat defaults to
the OFF position whenever the igni-
tion switch is turned on.
• Each time you push the button, the
airflow is changed as follows:
When the air vent does not operate,
restart the vehicle. If there is no
change, have your vehicle inspected
by an authorized Kia dealer.
OYD046044L
OFF→HIGH( )→MIDDLE( )→LOW( )
→
CAUTION
• The climate control seat is a
supplementary cooling/heat-
ing system. Use the climate
control seat when the climate
control system is on. Using
the climate control seat for
prolonged periods of time
with the climate control sys-
tem off could impair the per-
formance of the climate con-
trol seat.
(Continued)
(Continued)
• When cleaning the seats, do
not use an organic solvent
such as paint thinner, ben-
zene, alcohol and gasoline.
Doing so may damage the sur-
face of the seats.
• Do not spill liquid such as
water or beverages on the sur-
face of the front seats and
seatbacks, or the air vent
holes may be blocked and pre-
vented from working properly.
• Do not place materials such
as plastic bags or newspapers
under the seats. The air vent
may not work properly as the
air intake can be blocked.
Page 219 of 595
4 147
Features of your vehicle
LCD monitor (clock)Whenever the battery terminals or
related fuses are disconnected, you
must reset the time.
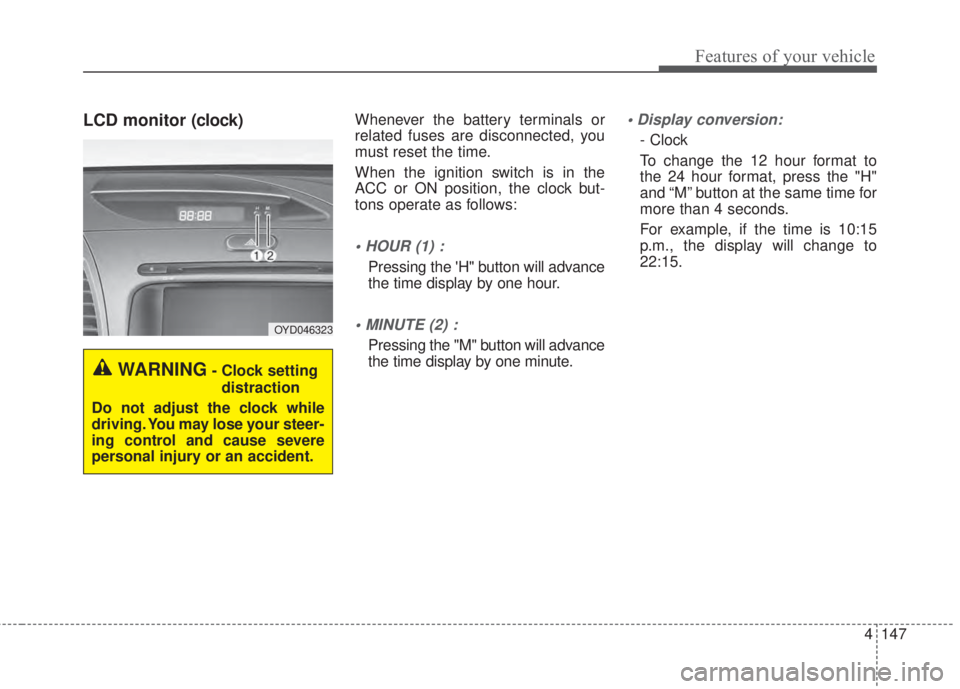
When the ignition switch is in the
ACC or ON position, the clock but-
tons operate as follows:
• HOUR (1) :
Pressing the 'H" button will advance
the time display by one hour.
• MINUTE (2) :
Pressing the "M" button will advance
the time display by one minute.
• Display conversion:
- Clock
To change the 12 hour format to
the 24 hour format, press the "H"
and “M” button at the same time for
more than 4 seconds.
For example, if the time is 10:15
p.m., the display will change to
22:15.
WARNING- Clock setting
distraction
Do not adjust the clock while
driving. You may lose your steer-
ing control and cause severe
personal injury or an accident.
OYD046323
Page 228 of 595
4 156
Features of your vehicle
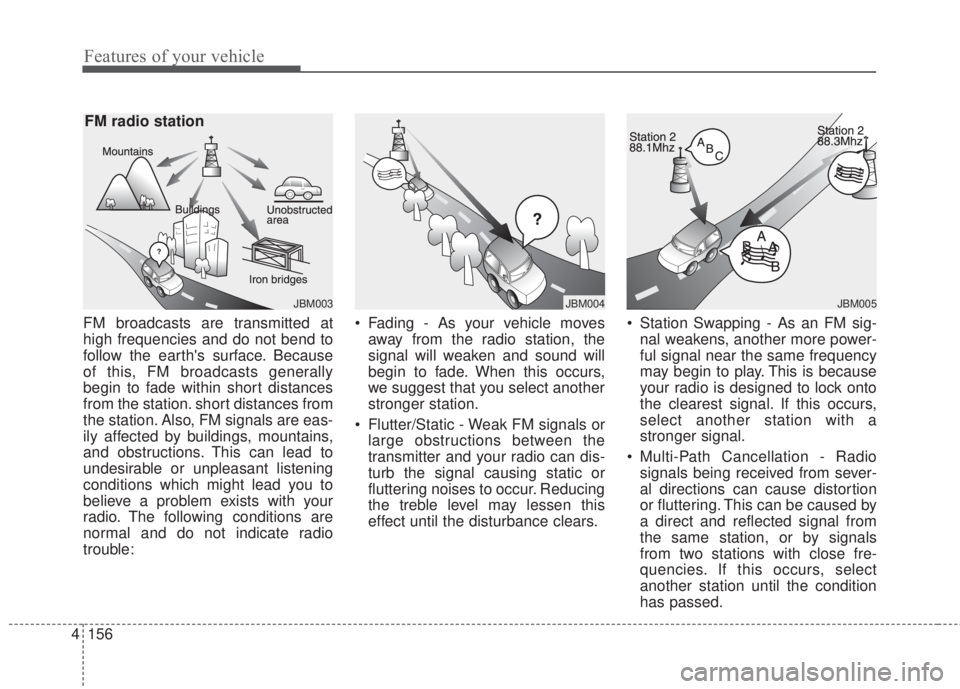
FM broadcasts are transmitted at
high frequencies and do not bend to
follow the earth's surface. Because
of this, FM broadcasts generally
begin to fade within short distances
from the station. short distances from
the station. Also, FM signals are eas-
ily affected by buildings, mountains,
and obstructions. This can lead to
undesirable or unpleasant listening
conditions which might lead you to
believe a problem exists with your
radio. The following conditions are
normal and do not indicate radio
trouble:• Fading - As your vehicle moves
away from the radio station, the
signal will weaken and sound will
begin to fade. When this occurs,
we suggest that you select another
stronger station.
• Flutter/Static - Weak FM signals or
large obstructions between the
transmitter and your radio can dis-
turb the signal causing static or
fluttering noises to occur. Reducing
the treble level may lessen this
effect until the disturbance clears.• Station Swapping - As an FM sig-
nal weakens, another more power-
ful signal near the same frequency
may begin to play. This is because
your radio is designed to lock onto
the clearest signal. If this occurs,
select another station with a
stronger signal.
• Multi-Path Cancellation - Radio
signals being received from sever-
al directions can cause distortion
or fluttering. This can be caused by
a direct and reflected signal from
the same station, or by signals
from two stations with close fre-
quencies. If this occurs, select
another station until the condition
has passed.
JBM003
FM radio station
JBM005
¢¢¢
JBM004
Page 292 of 595
4 220
Features of your vehicle
(Continued)
• Charging through the USB may
not work for some mobile devices.
• The device may not support nor-
mal operation when using a typi-
cal USB memory device (minia-
ture, keychain, etc.). For best
results, use a typical USB device
that has a metal case.
• The device may not support nor-
mal operation when using formats
such as HDD Type, CF, or SD
Memory.
• The device will not support files
locked by DRM (Digital Rights
Management.)
• USB memory sticks used by con-
necting an Adaptor (SD Type or
CF Type) may not be properly rec-
ognized.
• The device may not operate prop-
erly when using USB HDDs or
USBs subject to connection fail-
ures caused by vehicle vibrations.
(e.g. i-stick type)
(Continued)(Continued)
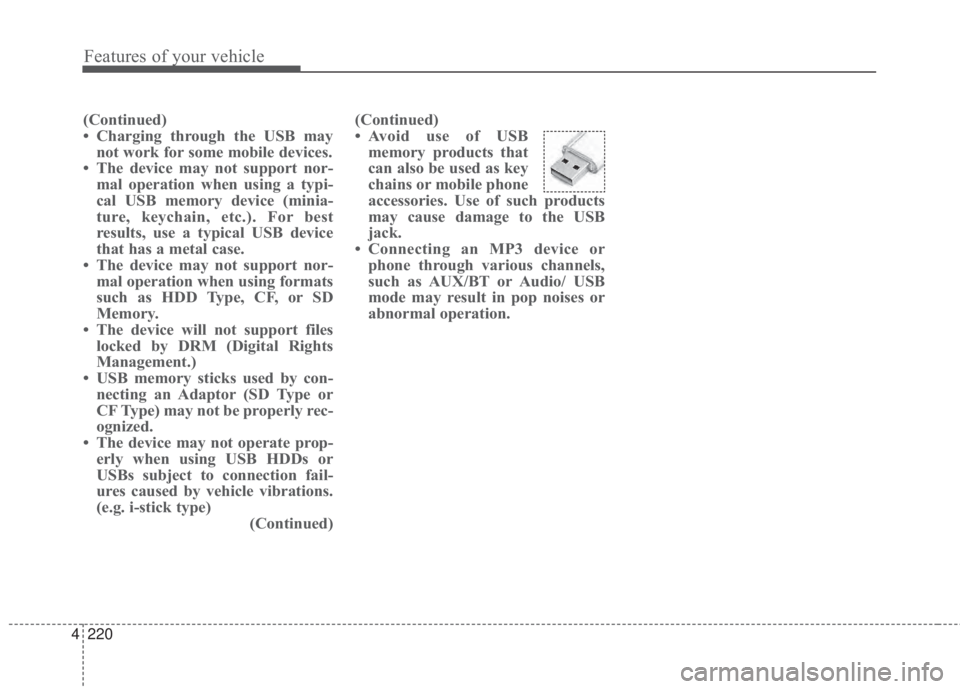
• Avoid use of USB
memory products that
can also be used as key
chains or mobile phone
accessories. Use of such products
may cause damage to the USB
jack.
• Connecting an MP3 device or
phone through various channels,
such as AUX/BT or Audio/ USB
mode may result in pop noises or
abnormal operation.
Page 344 of 595
Driving your vehicle
Before driving . . . . . . . . . . . . . . . . . . . . . . . . . . . . . . 5-4
• Before entering vehicle . . . . . . . . . . . . . . . . . . . . . . . . . 5-4
• Necessary inspections . . . . . . . . . . . . . . . . . . . . . . . . . 5-4
• Before starting . . . . . . . . . . . . . . . . . . . . . . . . . . . . . . . 5-4
Key positions . . . . . . . . . . . . . . . . . . . . . . . . . . . . . . . 5-6
• Illuminated ignition switch . . . . . . . . . . . . . . . . . . . . . . 5-6
• Ignition switch position . . . . . . . . . . . . . . . . . . . . . . . . . 5-6
Engine start/stop button . . . . . . . . . . . . . . . . . . . . . 5-8
• Illuminated Engine start/stop button . . . . . . . . . . . . . 5-8
• Engine start/stop button position. . . . . . . . . . . . . . . . . 5-8
Starting the engine . . . . . . . . . . . . . . . . . . . . . . . . . 5-11
• Starting the engine with an ignition key . . . . . . . . . . 5-11
• Starting the engine with a smart key . . . . . . . . . . . . 5-12
Manual transaxle . . . . . . . . . . . . . . . . . . . . . . . . . . 5-14
• Manual transaxle operation . . . . . . . . . . . . . . . . . . . . 5-14
• Good driving practices . . . . . . . . . . . . . . . . . . . . . . . . 5-16
Automatic transaxle . . . . . . . . . . . . . . . . . . . . . . . . 5-17
• Automatic transaxle operation . . . . . . . . . . . . . . . . . . 5-17
• Paddle shifter . . . . . . . . . . . . . . . . . . . . . . . . . . . . . . . . 5-21
• Good driving practices . . . . . . . . . . . . . . . . . . . . . . . . 5-22
Dual Clutch Transmission (DCT) . . . . . . . . . . . . . 5-23
• Dual clutch transmission operation . . . . . . . . . . . . . 5-23
• Paddle shifter . . . . . . . . . . . . . . . . . . . . . . . . . . . . . . . . 5-29
• Good driving practices . . . . . . . . . . . . . . . . . . . . . . . . 5-31
Brake system . . . . . . . . . . . . . . . . . . . . . . . . . . . . . . 5-32
• Power brakes . . . . . . . . . . . . . . . . . . . . . . . . . . . . . . . . 5-32
• Parking brake . . . . . . . . . . . . . . . . . . . . . . . . . . . . . . . 5-33
• Anti-lock brake system (ABS) . . . . . . . . . . . . . . . . . . 5-35
• Electronic stability control (ESC) . . . . . . . . . . . . . . . 5-37
• Hill-start assist control (HAC) . . . . . . . . . . . . . . . . . . 5-41
• Vehicle stability management (VSM) . . . . . . . . . . . . 5-41
• Good braking practices. . . . . . . . . . . . . . . . . . . . . . . . 5-43
Autonomous emergency braking (AEB) /
Forward collision warning (FCW) . . . . . . . . . . . 5-45
• System setting and activation . . . . . . . . . . . . . . . . . . . 5-45
• AEB warning message and system control . . . . . . . . 5-47
• Brake operation . . . . . . . . . . . . . . . . . . . . . . . . . . . . . . 5-48
• Sensor to detect the distance from the vehicle in front
(front radar). . . . . . . . . . . . . . . . . . . . . . . . . . . . . . . . 5-49
• System malfunction . . . . . . . . . . . . . . . . . . . . . . . . . . . 5-50
• Limitation of the system . . . . . . . . . . . . . . . . . . . . . . . 5-51
• Recognizing pedestrians . . . . . . . . . . . . . . . . . . . . . . . 5-54
Cruise Control system . . . . . . . . . . . . . . . . . . . . . . 5-56
• Cruise control switch . . . . . . . . . . . . . . . . . . . . . . . . . 5-56
• To set cruise control speed . . . . . . . . . . . . . . . . . . . . . 5-57
• To increase cruise control set speed. . . . . . . . . . . . . . 5-58
• To decrease the cruising speed . . . . . . . . . . . . . . . . . . 5-58
• To temporarily accelerate with the cruise control on . . . 5-58
• To cancel cruise control . . . . . . . . . . . . . . . . . . . . . . . 5-59
5