KIA K900 2018 Owners Manual
Manufacturer: KIA, Model Year: 2018, Model line: K900, Model: KIA K900 2018Pages: 544, PDF Size: 14.82 MB
Page 221 of 544
Features of your vehicle
4-140
Press the button toturn the rear lamp
on. To turn the
lamp off, press the
button again.
Press the button to operate the door
mode. The indicator on the button will
illuminate and lamps will turn on or off
as follows: - The front and rear lamp comeson when a door is opened. If the
door is closed, the lamps will go
out in 30 seconds.
- The front and rear lamp comes on for approximately 30 seconds
when doors are unlocked with
the smart key as long as the
doors are not opened.
- The front and rear lamp will stay on for approximately 20 minutes
if a door is opened with the
engine start/stop button in the
ACC or OFF position.
- The front and rear lamp will stay on continuously if the door is
opened with the engine
start/stop button in the ON posi-
tion. - The front and rear lamp will go
out immediately if the engine
start/stop button is changed to
the ON position or all doors are
locked.
To turn off the door mode, press the
button again. The indicator on the
button will turn off.
Press the button to operate the pri-
vacy mode. The indicator on the but-
ton will illuminate and lamps will turn
on or off as follows:
- If you open any door, the lamp for the open door will illuminate.
To turn off the privacy mode, press
the button again. The indicator on the
button will turn off.Rear lamp switch
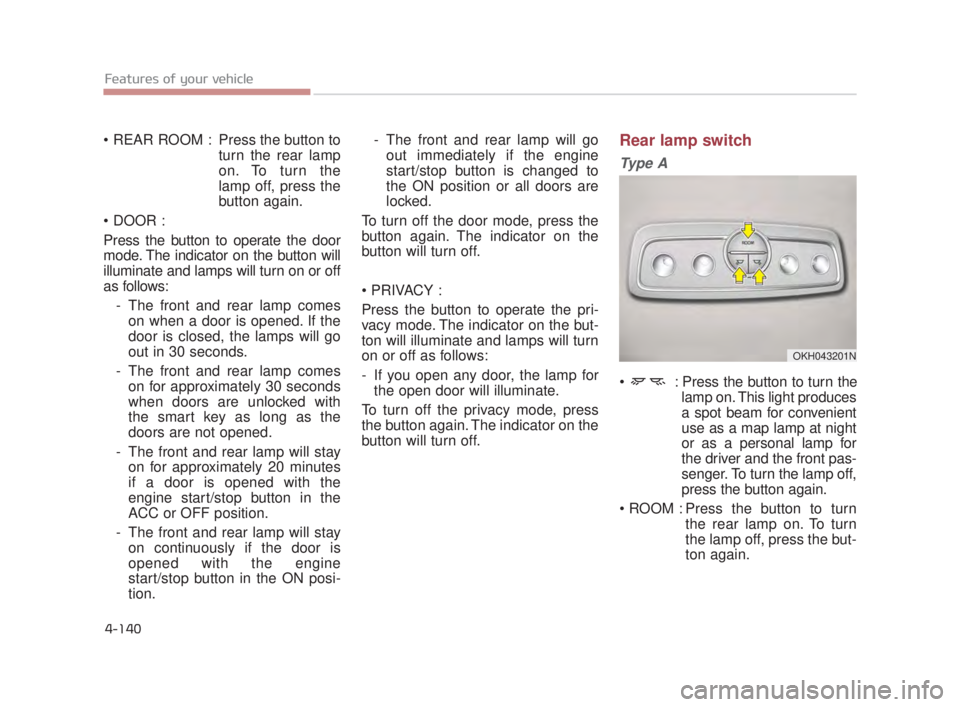
Ty p e A
: Press the button to turn the lamp on. This light produces
a spot beam for convenient
use as a map lamp at night
or as a personal lamp for
the driver and the front pas-
senger. To turn the lamp off,
press the button again.
Press the button to turn the rear lamp on. To turn
the lamp off, press the but-
ton again.
OKH043201N
KH USA 4:2018 4/18/2017 6:01 PM Page 140
Page 222 of 544
Features of your vehicle
4
4-141
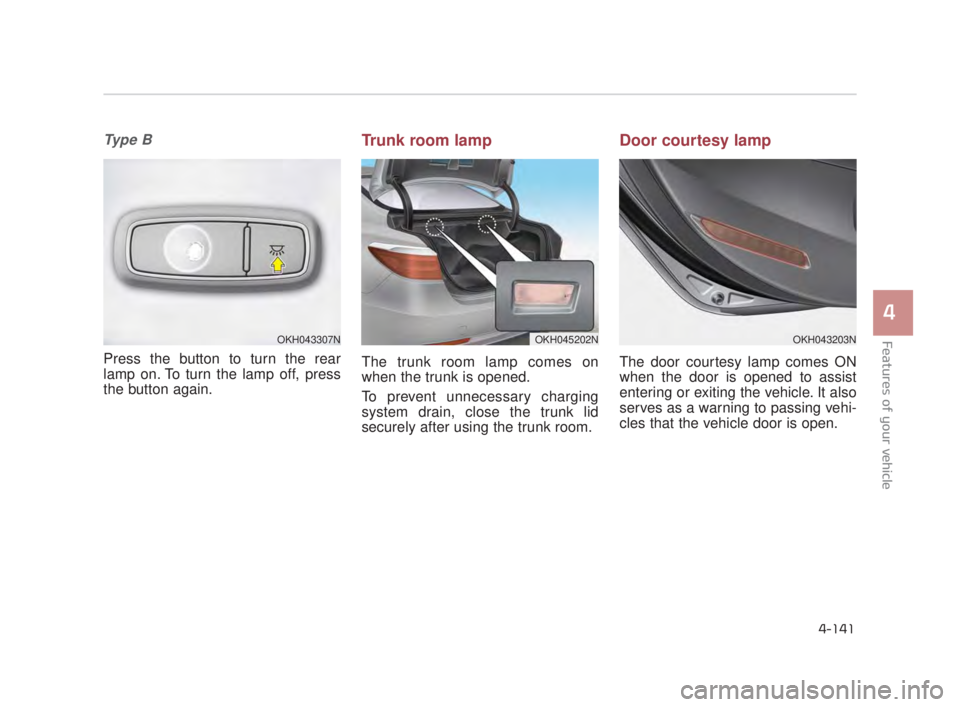
Ty p e B
Press the button to turn the rear
lamp on. To turn the lamp off, press
the button again.
Trunk room lamp
The trunk room lamp comes on
when the trunk is opened.
To prevent unnecessary charging
system drain, close the trunk lid
securely after using the trunk room.
Door courtesy lamp
The door courtesy lamp comes ON
when the door is opened to assist
entering or exiting the vehicle. It also
serves as a warning to passing vehi-
cles that the vehicle door is open.
OKH043307NOKH043203NOKH045202N
KH USA 4:2018 4/18/2017 6:01 PM Page 141
Page 223 of 544
Features of your vehicle
4-142
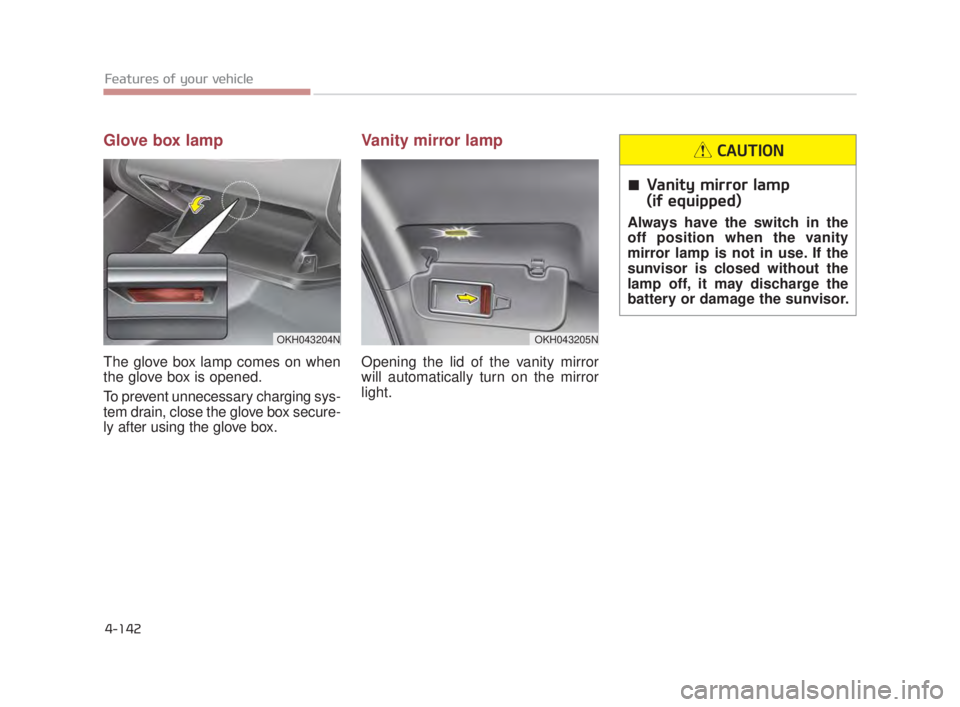
Glove box lamp
The glove box lamp comes on when
the glove box is opened.
To prevent unnecessary charging sys-
tem drain, close the glove box secure-
ly after using the glove box.
Vanity mirror lamp
Opening the lid of the vanity mirror
will automatically turn on the mirror
light.
Vanity mirror lamp
(if equipped)
Always have the switch in the
off position when the vanity
mirror lamp is not in use. If the
sunvisor is closed without the
lamp off, it may discharge the
battery or damage the sunvisor.
CAUTION
OKH043204NOKH043205N
KH USA 4:2018 4/18/2017 6:01 PM Page 142
Page 224 of 544
Features of your vehicle
4
4-143
✽NOTICE
If you want to defrost and defog the
front windshield, refer to
“Windshield Defrosting and
Defogging” in this section.
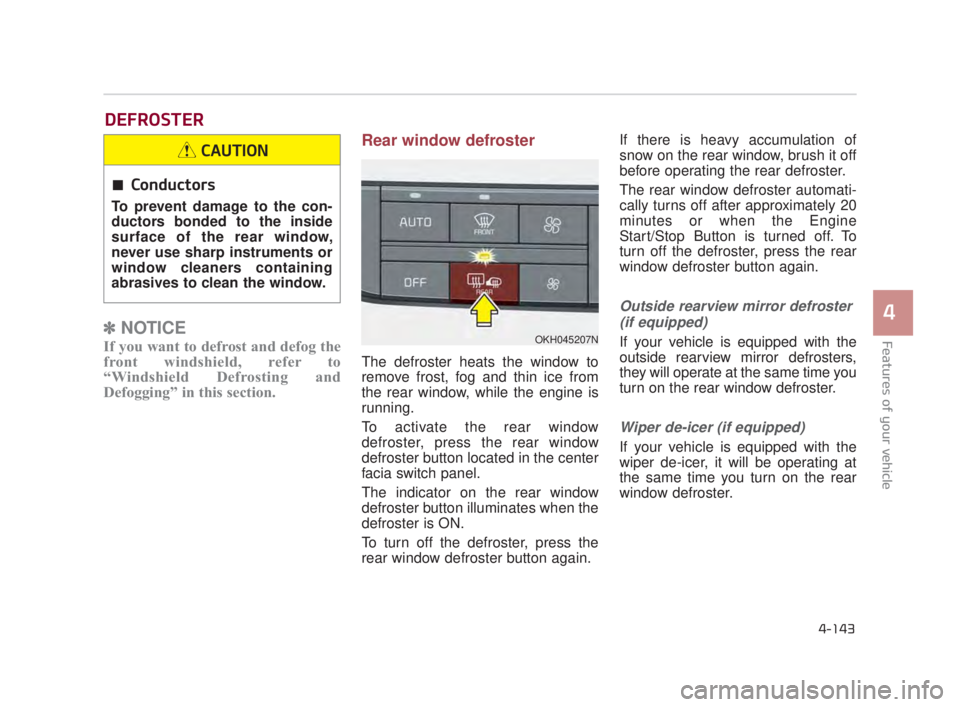
Rear window defroster
The defroster heats the window to
remove frost, fog and thin ice from
the rear window, while the engine is
running.
To activate the rear window
defroster, press the rear window
defroster button located in the center
facia switch panel.
The indicator on the rear window
defroster button illuminates when the
defroster is ON.
To turn off the defroster, press the
rear window defroster button again. If there is heavy accumulation of
snow on the rear window, brush it off
before operating the rear defroster.
The rear window defroster automati-
cally turns off after approximately 20
minutes or when the Engine
Start/Stop Button is turned off. To
turn off the defroster, press the rear
window defroster button again.
Outside rearview mirror defroster
(if equipped)
If your vehicle is equipped with the
outside rearview mirror defrosters,
they will operate at the same time you
turn on the rear window defroster.
Wiper de-icer (if equipped)
If your vehicle is equipped with the
wiper de-icer, it will be operating at
the same time you turn on the rear
window defroster.
DEFROSTER
OKH045207N
Conductors
To prevent damage to the con-
ductors bonded to the inside
surface of the rear window,
never use sharp instruments or
window cleaners containing
abrasives to clean the window.
CAUTION
KH USA 4:2018 4/18/2017 6:01 PM Page 143
Page 225 of 544
Features of your vehicle
4-144
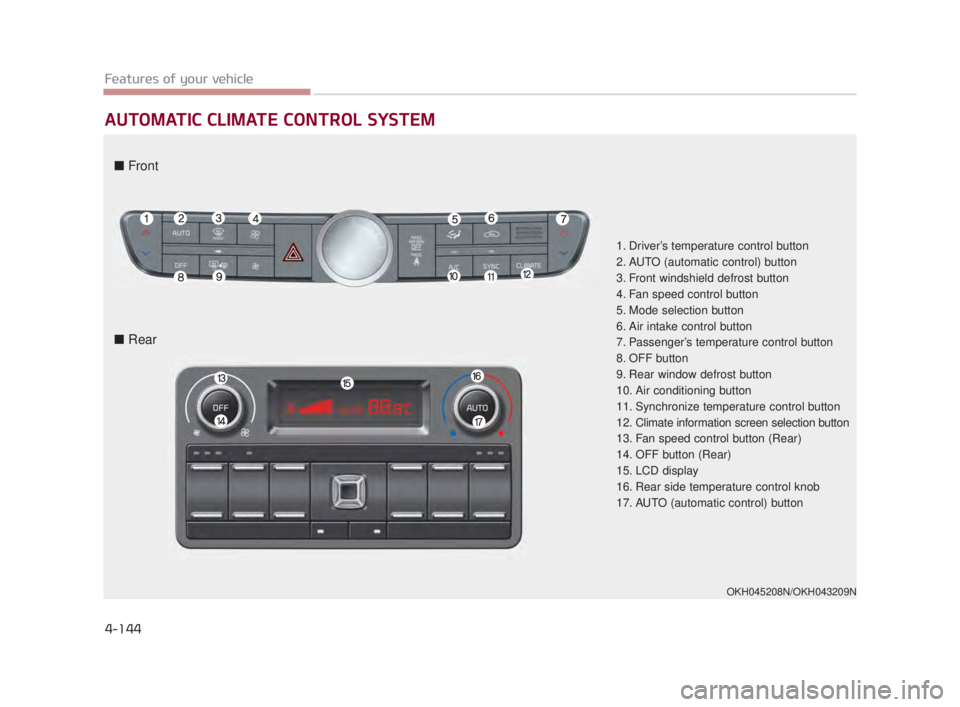
AUTOMATIC CLIMATE CONTROL SYSTEM
1. Driver’s temperature control button
2. AUTO (automatic control) button
3. Front windshield defrost button
4. Fan speed control button
5. Mode selection button
6. Air intake control button
7. Passenger’s temperature control button
8. OFF button
9. Rear window defrost button
10. Air conditioning button
11. Synchronize temperature control button
12. Climate information screen selection button
13. Fan speed control button (Rear)
14. OFF button (Rear)
15. LCD display
16. Rear side temperature control knob
17. AUTO (automatic control) button
OKH045208N/OKH043209N
■ Front
■ Rear
KH USA 4:2018 4/18/2017 6:02 PM Page 144
Page 226 of 544
Features of your vehicle
4
4-145
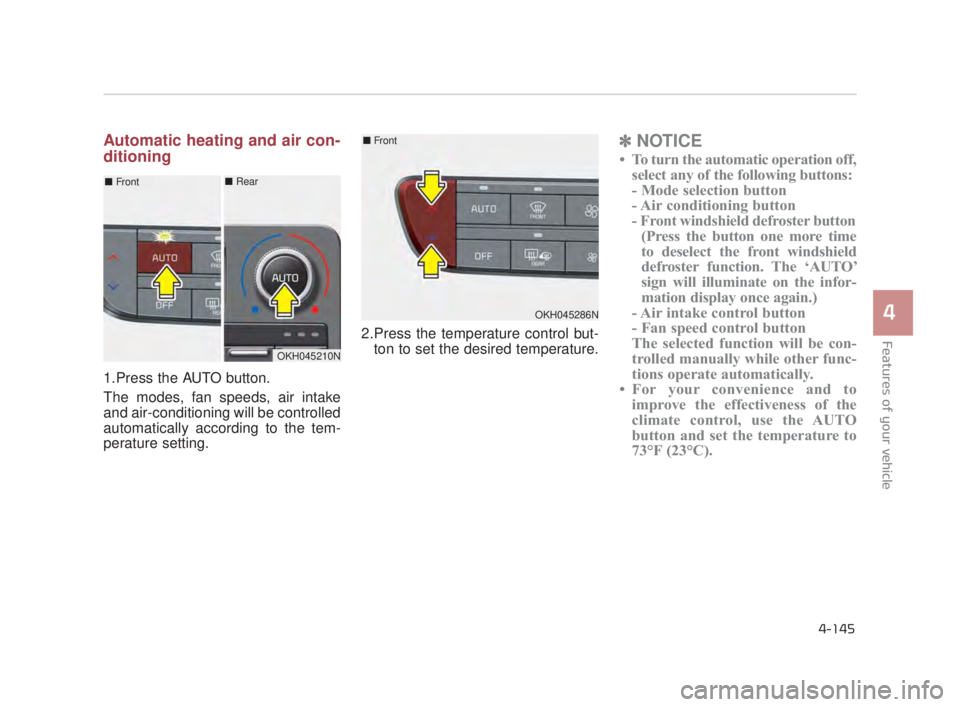
Automatic heating and air con-
ditioning
1.Press the AUTO button.
The modes, fan speeds, air intake
and air-conditioning will be controlled
automatically according to the tem-
perature setting.2.Press the temperature control but-
ton to set the desired temperature.
✽ NOTICE
• To turn the automatic operation off,
select any of the following buttons:
- Mode selection button
- Air conditioning button
- Front windshield defroster button(Press the button one more time
to deselect the front windshield
defroster function. The ‘AUTO’
sign will illuminate on the infor-
mation display once again.)
- Air intake control button
- Fan speed control button
The selected function will be con-
trolled manually while other func-
tions operate automatically.
• For your convenience and to improve the effectiveness of the
climate control, use the AUTO
button and set the temperature to
73°F (23°C).
OKH045210N
■ Front■Rear
OKH045286N
■Front
KH USA 4:2018 4/18/2017 6:02 PM Page 145
Page 227 of 544
Features of your vehicle
4-146
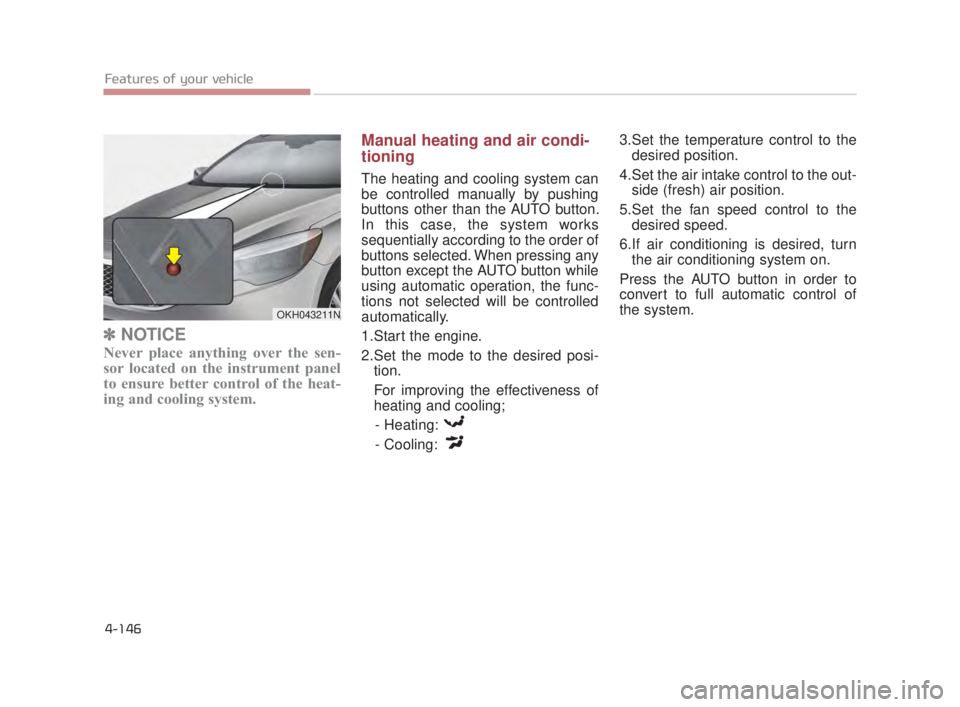
✽NOTICE
Never place anything over the sen-
sor located on the instrument panel
to ensure better control of the heat-
ing and cooling system.
Manual heating and air condi-
tioning
The heating and cooling system can
be controlled manually by pushing
buttons other than the AUTO button.
In this case, the system works
sequentially according to the order of
buttons selected. When pressing any
button except the AUTO button while
using automatic operation, the func-
tions not selected will be controlled
automatically.
1.Start the engine.
2.Set the mode to the desired posi-
tion.
For improving the effectiveness of
heating and cooling;
- Heating:
- Cooling: 3.Set the temperature control to the
desired position.
4.Set the air intake control to the out- side (fresh) air position.
5.Set the fan speed control to the desired speed.
6.If air conditioning is desired, turn the air conditioning system on.
Press the AUTO button in order to
convert to full automatic control of
the system.
OKH043211N
KH USA 4:2018 4/18/2017 6:02 PM Page 146
Page 228 of 544
Features of your vehicle
4
4-147
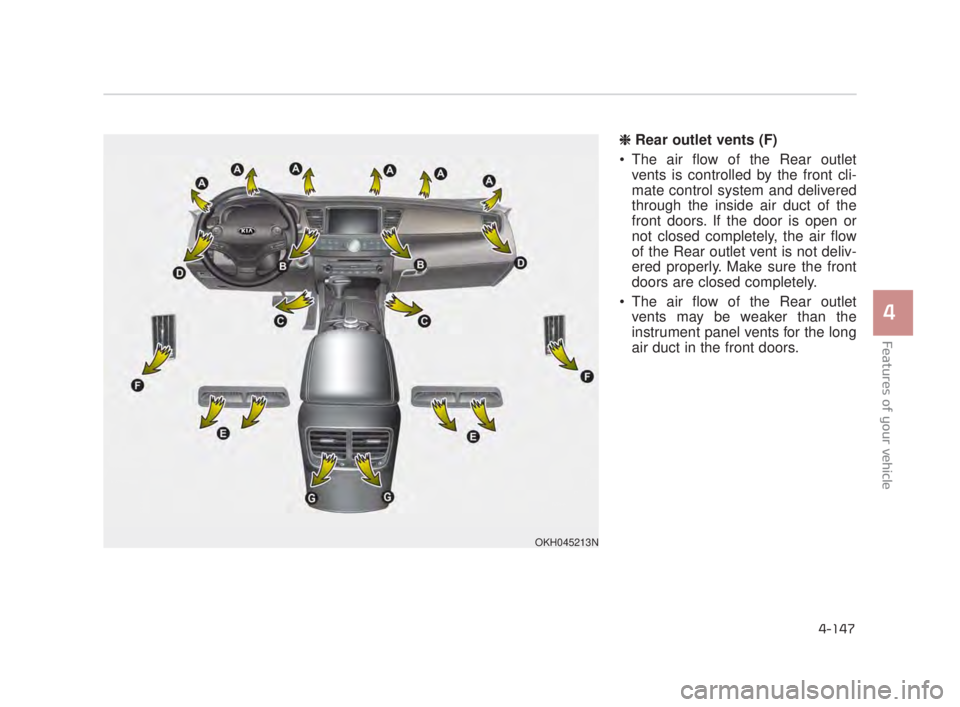
❈ Rear outlet vents (F)
The air flow of the Rear outlet vents is controlled by the front cli-
mate control system and delivered
through the inside air duct of the
front doors. If the door is open or
not closed completely, the air flow
of the Rear outlet vent is not deliv-
ered properly. Make sure the front
doors are closed completely.
The air flow of the Rear outlet vents may be weaker than the
instrument panel vents for the long
air duct in the front doors.
OKH045213N
KH USA 4:2018 4/18/2017 6:02 PM Page 147
Page 229 of 544
Features of your vehicle
4-148
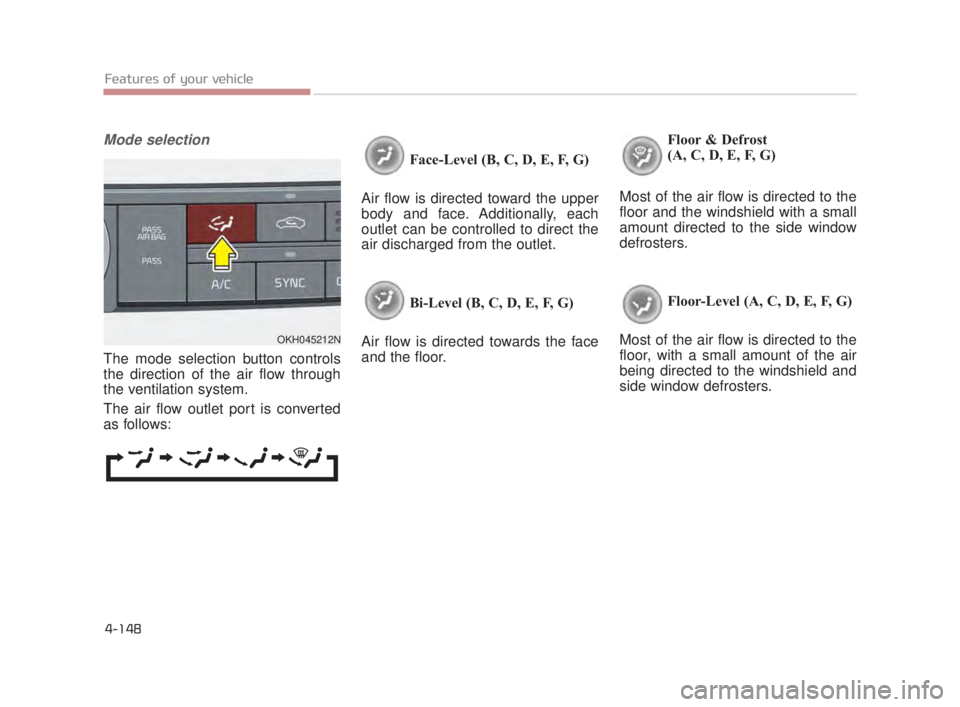
Mode selection
The mode selection button controls
the direction of the air flow through
the ventilation system.
The air flow outlet port is converted
as follows:Face-Level (B, C, D, E, F, G)
Air flow is directed toward the upper
body and face. Additionally, each
outlet can be controlled to direct the
air discharged from the outlet.
Bi-Level (B, C, D, E, F, G)
Air flow is directed towards the face
and the floor. Floor & Defrost
(A, C, D, E, F, G)
Most of the air flow is directed to the
floor and the windshield with a small
amount directed to the side window
defrosters.
Floor-Level (A, C, D, E, F, G)
Most of the air flow is directed to the
floor, with a small amount of the air
being directed to the windshield and
side window defrosters.
OKH045212N
KH USA 4:2018 4/18/2017 6:02 PM Page 148
Page 230 of 544
Features of your vehicle
4
4-149
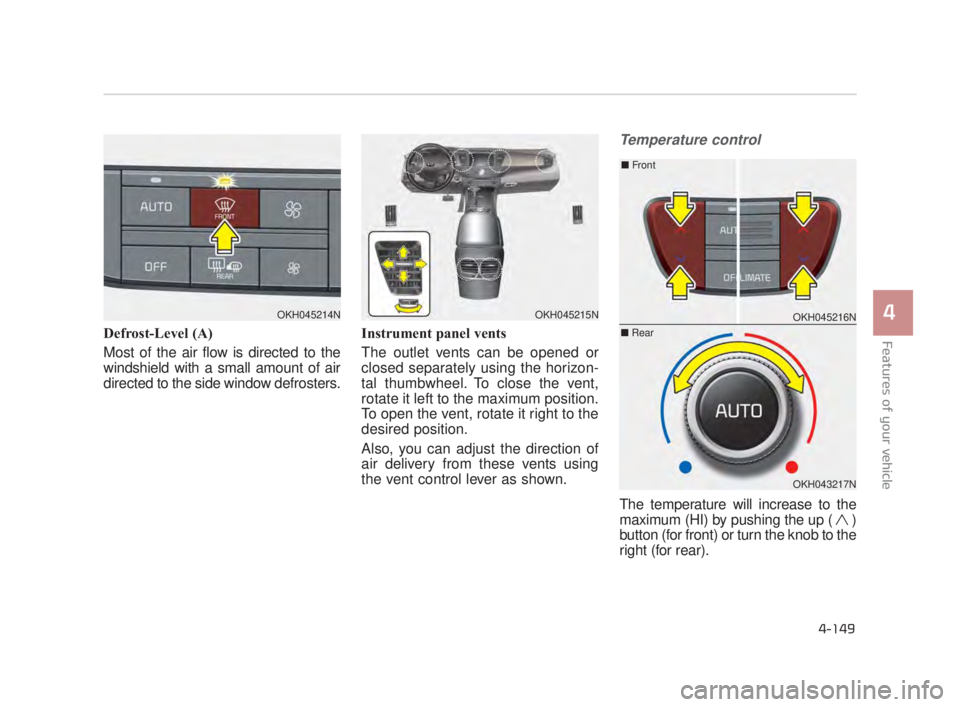
Defrost-Level (A)
Most of the air flow is directed to the
windshield with a small amount of air
directed to the side window defrosters.Instrument panel vents
The outlet vents can be opened or
closed separately using the horizon-
tal thumbwheel. To close the vent,
rotate it left to the maximum position.
To open the vent, rotate it right to the
desired position.
Also, you can adjust the direction of
air delivery from these vents using
the vent control lever as shown.
Temperature control
The temperature will increase to the
maximum (HI) by pushing the up ( )
button (for front) or turn the knob to the
right (for rear).
OKH045214NOKH045215NOKH045216N
OKH043217N
■
Front
■Rear
KH USA 4:2018 4/18/2017 6:02 PM Page 149