length KIA NIRO 2017 Owners Manual
[x] Cancel search | Manufacturer: KIA, Model Year: 2017, Model line: NIRO, Model: KIA NIRO 2017Pages: 552, PDF Size: 14.92 MB
Page 58 of 552

Safety features of your vehicle
22
3
Seat belt - Driver's 3-point system
with emergency locking retractor
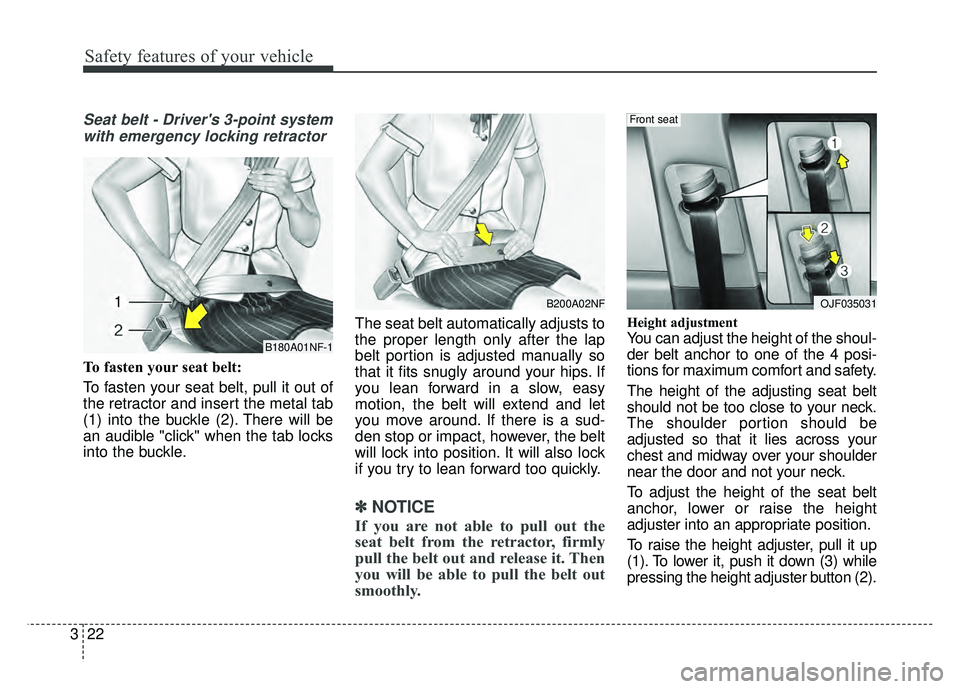
To fasten your seat belt:
To fasten your seat belt, pull it out of
the retractor and insert the metal tab
(1) into the buckle (2). There will be
an audible "click" when the tab locks
into the buckle. The seat belt automatically adjusts to
the proper length only after the lap
belt portion is adjusted manually so
that it fits snugly around your hips. If
you lean forward in a slow, easy
motion, the belt will extend and let
you move around. If there is a sud-
den stop or impact, however, the belt
will lock into position. It will also lock
if you try to lean forward too quickly.
✽ ✽
NOTICE
If you are not able to pull out the
seat belt from the retractor, firmly
pull the belt out and release it. Then
you will be able to pull the belt out
smoothly.
Height adjustment
You can adjust the height of the shoul-
der belt anchor to one of the 4 posi-
tions for maximum comfort and safety.
The height of the adjusting seat belt
should not be too close to your neck.
The shoulder portion should be
adjusted so that it lies across your
chest and midway over your shoulder
near the door and not your neck.
To adjust the height of the seat belt
anchor, lower or raise the height
adjuster into an appropriate position.
To raise the height adjuster, pull it up
(1). To lower it, push it down (3) while
pressing the height adjuster button (2).B180A01NF-1
B200A02NFOJF035031
Front seat
Page 59 of 552

323
Safety features of your vehicle
Release the button to lock the
anchor into position. Try sliding the
height adjuster to make sure that it
has locked into position.Seat belts - Front passenger andrear seat 3-point system withcombination locking retractor
To fasten your seat belt:
Combination retractor type seat belts
are installed in the rear seat posi-
tions to help accommodate the
installation of child restraint systems.
Although a combination retractor is
also installed in the front passenger
seat position, it is strongly recom-
mended that children always be
seated in the rear seat. NEVER
place any infant restraint system in
the front seat of the vehicle.
This type of seat belt combines the
features of both an emergency lock-
ing retractor seat belt and an auto-
matic locking retractor seat belt. To
fasten your seat belt, pull it out of the
retractor and insert the metal tab into
the buckle. There will be an audible
"click" when the tab locks into the
buckle. When not securing a child
restraint, the seat belt operates in the
same way as the driver's seat belt
(Emergency Locking Retractor Type). It automatically adjusts to the proper
length only after the lap belt portion
of the seat belt is adjusted manually
so that it fits snugly around your hips.
When the seat belt is fully extended
from the retractor to allow the instal-
lation of a child restraint system, the
seat belt operation changes to allow
the belt to retract, but not to extend
(Automatic Locking Retractor Type).
Refer to “Using a child restraint sys-
tem” in this section.
✽ ✽
NOTICE
Although the combination retractor
provides the same level of protection
for seated passengers in either emer-
gency or automatic locking modes,
have the seated passengers use the
emergency locking feature for improv-
ed convenience. The automatic locking
function is intended to facilitate child
restraint installation. To convert from
the automatic locking feature to the
emergency locking operation mode,
allow the unbuckled seat belt to fully
retract.
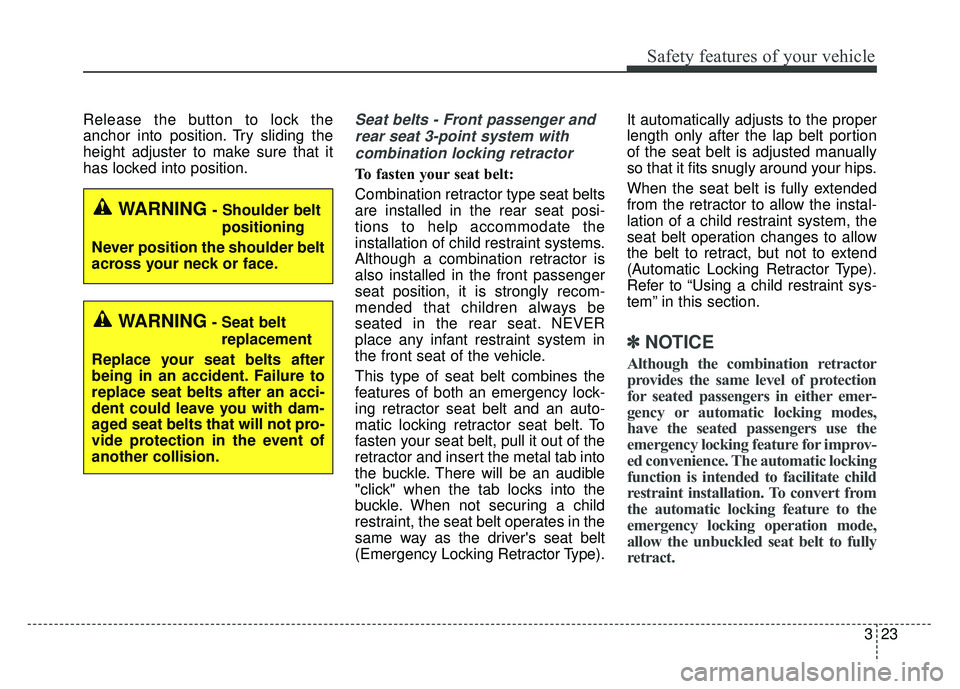
WARNING- Shoulder belt
positioning
Never position the shoulder belt
across your neck or face.
WARNING- Seat belt replacement
Replace your seat belts after
being in an accident. Failure to
replace seat belts after an acci-
dent could leave you with dam-
aged seat belts that will not pro-
vide protection in the event of
another collision.
Page 252 of 552

4149
Features of your vehicle
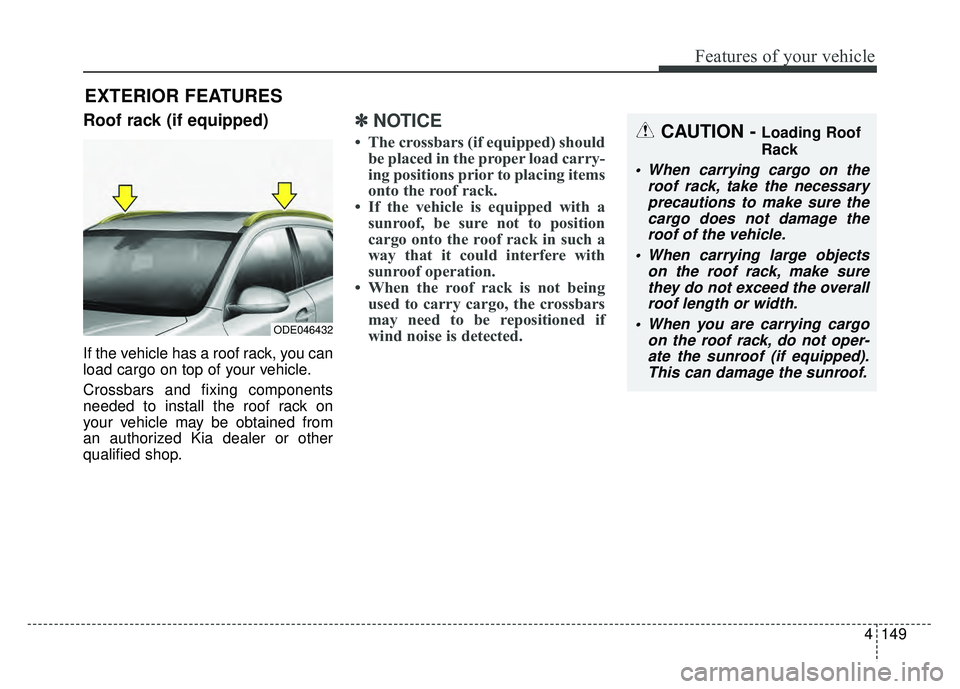
Roof rack (if equipped)
If the vehicle has a roof rack, you can
load cargo on top of your vehicle.
Crossbars and fixing components
needed to install the roof rack on
your vehicle may be obtained from
an authorized Kia dealer or other
qualified shop.
✽ ✽NOTICE
• The crossbars (if equipped) should
be placed in the proper load carry-
ing positions prior to placing items
onto the roof rack.
• If the vehicle is equipped with a sunroof, be sure not to position
cargo onto the roof rack in such a
way that it could interfere with
sunroof operation.
• When the roof rack is not being used to carry cargo, the crossbars
may need to be repositioned if
wind noise is detected.
EXTERIOR FEATURES
CAUTION - Loading Roof
Rack
When carrying cargo on the
roof rack, take the necessaryprecautions to make sure thecargo does not damage theroof of the vehicle.
When carrying large objects on the roof rack, make surethey do not exceed the overallroof length or width.
When you are carrying cargo on the roof rack, do not oper-ate the sunroof (if equipped).This can damage the sunroof.
ODE046432
Page 524 of 552

Specifications, Consumer information, Reporting safety defects
29
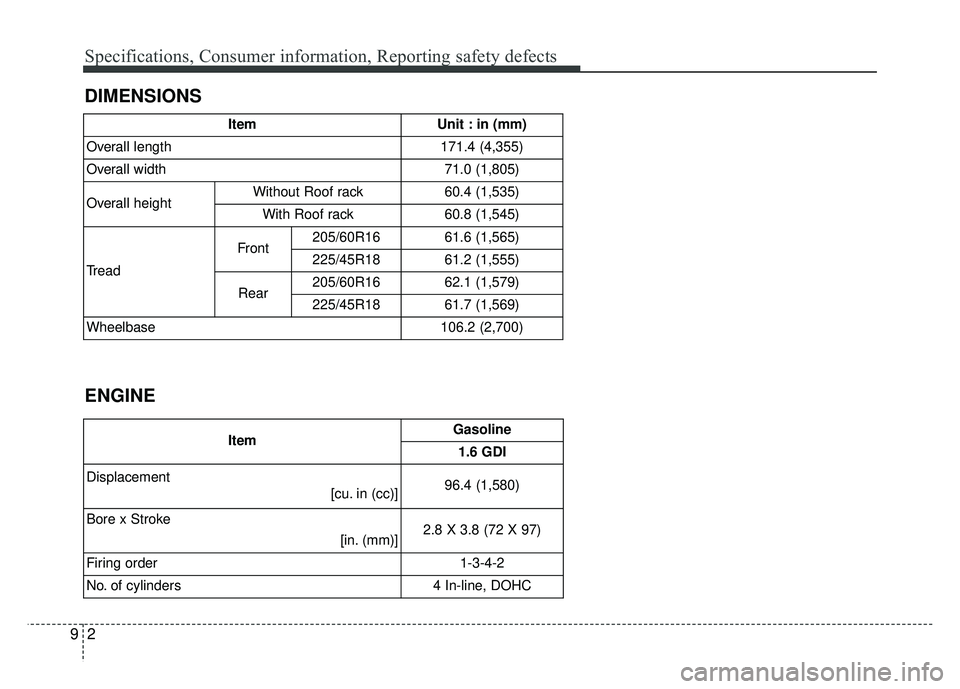
DIMENSIONS
ENGINE
ItemUnit : in (mm)
Overall length171.4 (4,355)
Overall width71.0 (1,805)
Overall heightWithout Roof rack60.4 (1,535)
With Roof rack60.8 (1,545)
Tread
Front205/60R1661.6 (1,565)
225/45R1861.2 (1,555)
Rear205/60R1662.1 (1,579)
225/45R1861.7 (1,569)
Wheelbase106.2 (2,700)
ItemGasoline
1.6 GDI
Displacement [cu. in (cc)]
96.4 (1,580)
Bore x Stroke [in. (mm)]
2.8 X 3.8 (72 X 97)
Firing order
1-3-4-2
No. of cylinders
4 In-line, DOHC