flat tire KIA NIRO EV 2021 Features and Functions Guide
[x] Cancel search | Manufacturer: KIA, Model Year: 2021, Model line: NIRO EV, Model: KIA NIRO EV 2021Pages: 66, PDF Size: 3.98 MB
Page 7 of 66

ALWAYS CHECK THE OWNER’S MANUAL FOR COMPLETE OPER ATING INFORMATION AND SAFET Y WARNINGS. *IF EQUIPPED5
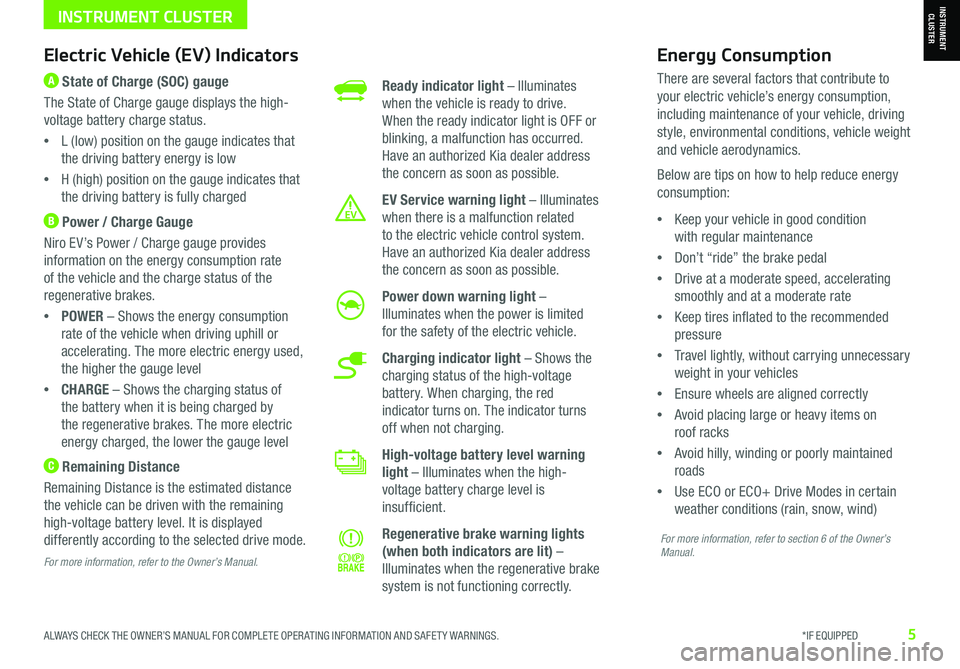
Ready indicator light – Illuminates
when the vehicle is ready to drive.
When the ready indicator light is OFF or
blinking, a malfunction has occurred.
Have an authorized Kia dealer address
the concern as soon as possible.
EV Service warning light – Illuminates
when there is a malfunction related
to the electric vehicle control system.
Have an authorized Kia dealer address
the concern as soon as possible.
Power down warning light –
Illuminates when the power is limited
for the safety of the electric vehicle.
Charging indicator light – Shows the
charging status of the high-voltage
battery. When charging, the red
indicator turns on. The indicator turns
off when not charging.
High-voltage battery level warning
light – Illuminates when the high-
voltage battery charge level is
insufficient.
Regenerative brake warning lights
(when both indicators are lit) –
Illuminates when the regenerative brake
system is not functioning correctly.
Electric Vehicle (EV) Indicators
A State of Charge (SOC) gauge
The State of Charge gauge displays the high-
voltage battery charge status.
•L (low) position on the gauge indicates that
the driving battery energy is low
•H (high) position on the gauge indicates that
the driving battery is fully charged
B Power / Charge Gauge
Niro EV’s Power / Charge gauge provides
information on the energy consumption rate
of the vehicle and the charge status of the
regenerative brakes.
•POWER – Shows the energy consumption
rate of the vehicle when driving uphill or
accelerating. The more electric energy used,
the higher the gauge level
•CHARGE – Shows the charging status of
the battery when it is being charged by
the regenerative brakes. The more electric
energy charged, the lower the gauge level
C Remaining Distance
Remaining Distance is the estimated distance
the vehicle can be driven with the remaining
high-voltage battery level. It is displayed
differently according to the selected drive mode.
For more information, refer to the Owner’s Manual.
Energy Consumption
There are several factors that contribute to
your electric vehicle’s energy consumption,
including maintenance of your vehicle, driving
style, environmental conditions, vehicle weight
and vehicle aerodynamics.
Below are tips on how to help reduce energy
consumption:
•Keep your vehicle in good condition
with regular maintenance
•Don’t “ride” the brake pedal
•Drive at a moderate speed, accelerating
smoothly and at a moderate rate
•Keep tires inflated to the recommended
pressure
•Travel lightly, without carrying unnecessary
weight in your vehicles
•Ensure wheels are aligned correctly
•Avoid placing large or heavy items on
roof racks
•Avoid hilly, winding or poorly maintained
roads
•Use ECO or ECO+ Drive Modes in certain
weather conditions (rain, snow, wind)
For more information, refer to section 6 of the Owner’s Manual.
INSTRUMENT CLUSTERINSTRUMENT CLUSTER
Page 10 of 66

*IF EQUIPPED †LEGAL DISCL AIMERS ON BACK INSIDE COVER8NIRO EV FEATURES & FUNCTIONS GUIDE
A
Tire Pressure Monitoring System (TPMS)†2 3
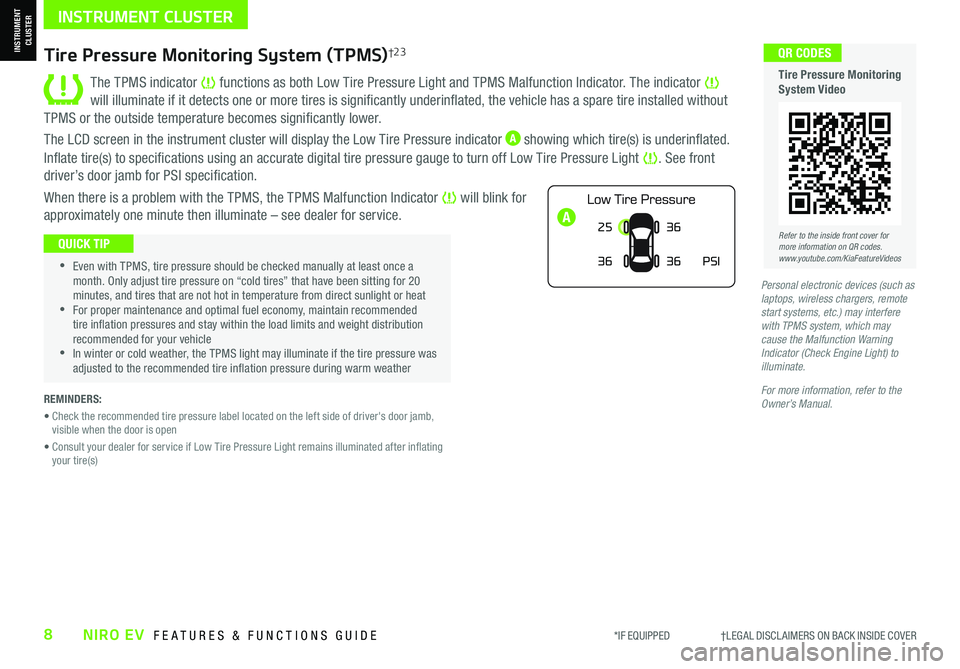
The TPMS indicator functions as both Low Tire Pressure Light and TPMS Malfunction Indicator. The indicator will illuminate if it detects one or more tires is significantly underinflated, the vehicle has a spare tire installed without
TPMS or the outside temperature becomes significantly lower.
The LCD screen in the instrument cluster will display the Low Tire Pressure indicator A showing which tire(s) is underinflated.
Inflate tire(s) to specifications using an accurate digital tire pressure gauge to turn off Low Tire Pressure Light . See front
driver’s door jamb for PSI specification.
When there is a problem with the TPMS, the TPMS Malfunction Indicator will blink for
approximately one minute then illuminate – see dealer for service.25
36 36
PSI
36
•Even with TPMS, tire pressure should be checked manually at least once a month. Only adjust tire pressure on “cold tires” that have been sitting for 20 minutes, and tires that are not hot in temperature from direct sunlight or heat •For proper maintenance and optimal fuel economy, maintain recommended tire inflation pressures and stay within the load limits and weight distribution recommended for your vehicle •In winter or cold weather, the TPMS light may illuminate if the tire pressure was adjusted to the recommended tire inflation pressure during warm weather
QUICK TIP
REMINDERS:
• Check the recommended tire pressure label located on the left side of driver's door jamb, visible when the door is open
• Consult your dealer for service if Low Tire Pressure Light remains illuminated after inflating your tire(s)
Personal electronic devices (such as laptops, wireless chargers, remote start systems, etc.) may interfere with TPMS system, which may cause the Malfunction Warning Indicator (Check Engine Light) to illuminate.
For more information, refer to the Owner’s Manual.
Refer to the inside front cover for more information on QR codes.www.youtube.com/KiaFeatureVideos
QR CODES
Tire Pressure Monitoring System Video
INSTRUMENT CLUSTER
INSTRUMENT CLUSTER
Page 14 of 66

*IF EQUIPPED12NIRO EV FEATURES & FUNCTIONS GUIDE
C
D
To help reduce energy consumption:
•Drive at a moderate speed, accelerating smoothly and at a moderate rate
•Keep tires inflated to the recommended pressure and wheels aligned properly
QUICK TIP
For more information on Driving Modes, refer to your Owner’s Manual or contact your local dealership.
Drive Modes
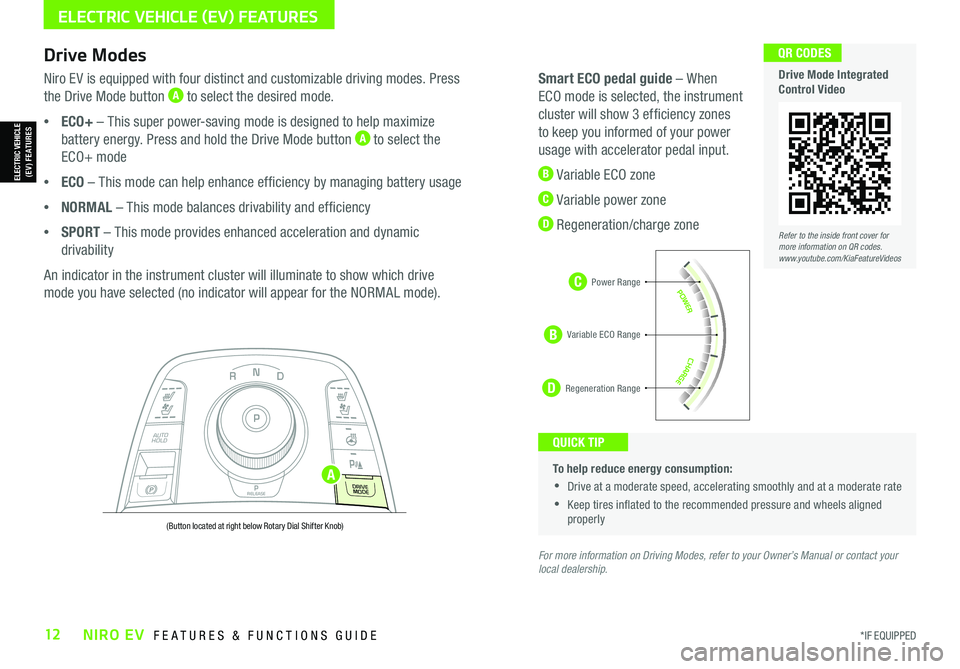
Niro EV is equipped with four distinct and customizable driving modes. Press
the Drive Mode button A to select the desired mode.
•ECO+ – This super power-saving mode is designed to help maximize
battery energy. Press and hold the Drive Mode button A to select the
ECO+ mode
•ECO – This mode can help enhance efficiency by managing battery usage
•NORMAL – This mode balances drivability and efficiency
•SPORT – This mode provides enhanced acceleration and dynamic
drivability
An indicator in the instrument cluster will illuminate to show which drive
mode you have selected (no indicator will appear for the NORMAL mode).
Smart ECO pedal guide – When
ECO mode is selected, the instrument
cluster will show 3 efficiency zones
to keep you informed of your power
usage with accelerator pedal input.
B Variable ECO zone
C Variable power zone
D Regeneration/charge zone
NP
PRELEASE
AUTO
HOLD
D
R
DRIVE
MODE
(Button located at right below Rotary Dial Shifter Knob)
Refer to the inside front cover for more information on QR codes.www.youtube.com/KiaFeatureVideos
QR CODES
Drive Mode Integrated Control Video
B
ELECTRIC VEHICLE (EV) FEATURES
ELECTRIC VEHICLE (EV) FEATURES
Power Range
Regeneration Range
Variable ECO Range
A
Page 58 of 66

Child-Protector Rear Door Lock
Locate these locks on the rear edge of the rear passenger doors. Move the
Child-Protector Rear Door Lock, with the mechanical ignition key, to the lock
position to disable the inner door handles from opening the rear doors.
REMINDER: Child-Protector Rear Door Lock is located on rear passenger’s door jamb.
REMINDER: Pressing the Smart Key remote liftgate button only unlocks the liftgate. To open liftgate, also press the Liftgate Release button & pull the liftgate up by the handle to open.
Tire Mobility Kit
The Tire Mobility Kit is designed to
temporarily seal certain types of tire
damage.
For operational information, please refer to
the Owner’s Manual.
B Sealant Bottle
C Compressor
•The Tire Mobility Kit is a temporary fix and is to be used for one tire only; the tire should be inspected as soon as possible •The kit should only be used for sealing/inflating passenger car tires; do not use for inflating any other type of tires •Some damaged tires cannot be sealed completely; do not use the kit if it appears a tire is damaged beyond repair
QUICK TIPS
REMINDERS:
•The above images are for illustration purposes only and may not reflect actual operation
•
After tire is properly sealed, drive cautiously and never exceed 50 mph or 120 miles on a tire that has been properly sealed with the Tire Mobility Kit
•Accessory spare tire kit is available for purchase
Liftgate Release Button*
The button is located on the bottom of the Liftgate lid. With doors
unlocked, press the Liftgate Release button A and pull the Liftgate
up by the handle to open.
•The Liftgate must be unlocked before it can be opened by the Liftgate Release Button
•The Liftgate unlocks automatically and then can be opened manually when the Smart Key* is within close proximity to the vehicle
QUICK TIPS
A
Refer to the inside front cover for more information on QR codes.www.youtube.com/KiaFeatureVideos
QR CODES
Tire Mobility Kit Video
Refer to section 6 in the Owner’s Manual for more information.
Refer to section 3 in the Owner’s Manual for more information.
Refer to section 4 in the Owner’s Manual for more information.
*IF EQUIPPED56NIRO EV FEATURES & FUNCTIONS GUIDE
B
C
OTHER KEY FEATURES
OTHER KEY FEATURES