fuse box KIA NIRO PHEV 2018 User Guide
[x] Cancel search | Manufacturer: KIA, Model Year: 2018, Model line: NIRO PHEV, Model: KIA NIRO PHEV 2018Pages: 616, PDF Size: 18.3 MB
Page 560 of 616

891
Maintenance
LIGHT BULBS
Bulb replacement precaution
Please keep extra bulbs on hand
with appropriate wattage ratings in
case of emergencies.
Refer to “Bulb Wattage” in chapter 9.
When changing lamps, first turn off
the engine at a safe place, firmly
apply the parking brake and detach
the battery’s negative (-) terminal.
Use only bulbs of the specifiedwattage.✽ ✽ NOTICE
• If the light bulb or lamp connector
is removed while the lamp is still
on, the fuse box's electronic sys-
tem may log it as a malfunction.
Therefore, a lamp malfunction
incident may be recorded as a
Diagnostic Trouble Code (DTC) in
the fuse box.
• It is normal for an operating lamp to flicker momentarily. This is due
to a stabilization function of the
vehicle’s electronic control device.
If the lamp lights up normally
after momentarily blinking, then
it is functioning as normal.
However, if the lamp continues to
flicker several times or turns off
completely, there may be an error
in the vehicle’s electronic control
device. Please have the vehicle
checked by an authorized Kia
dealer immediately.
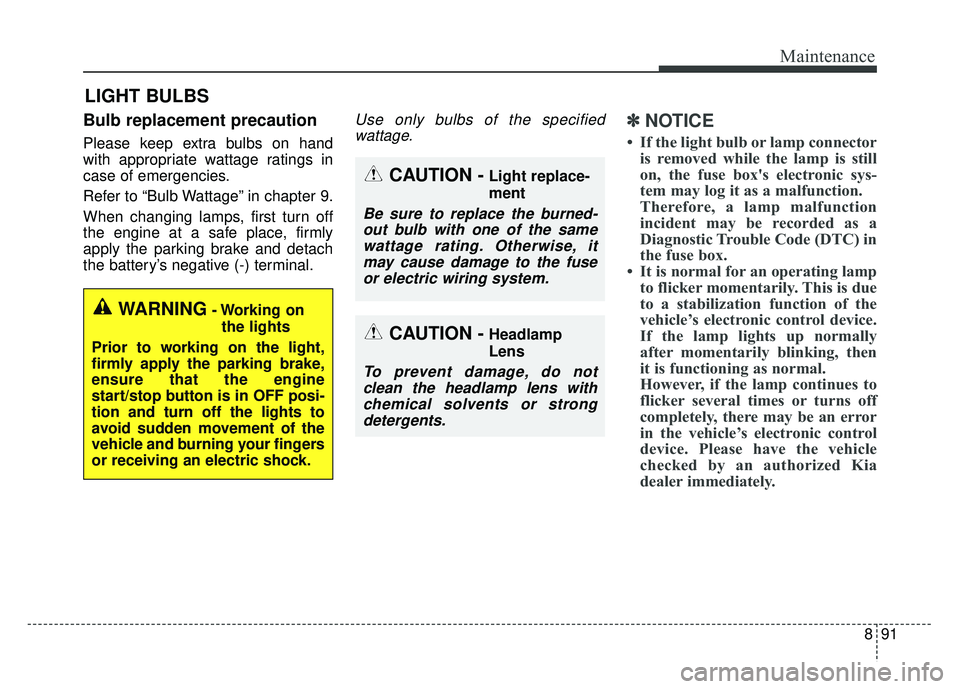
WARNING- Working on
the lights
Prior to working on the light,
firmly apply the parking brake,
ensure that the engine
start/stop button is in OFF posi-
tion and turn off the lights to
avoid sudden movement of the
vehicle and burning your fingers
or receiving an electric shock.
CAUTION -Light replace-
ment
Be sure to replace the burned- out bulb with one of the samewattage rating. Otherwise, itmay cause damage to the fuseor electric wiring system.
CAUTION -Headlamp
Lens
To prevent damage, do notclean the headlamp lens withchemical solvents or strongdetergents.
Page 561 of 616

Maintenance
92
8
If you don’t have the necessary tools,
the correct bulbs and the expertise,
consult an authorized Kia dealer. In
many cases, it is difficult to replace
vehicle light bulbs because other
parts of the vehicle must be removed
before you can get to the bulb. This is
especially true if you have to remove
the headlamp assembly to get to the
bulb(s).
Removing/installing the headlamp
assembly can result in damage to
the vehicle.
If non-genuine parts or substandard
bulbs are used, it may lead to blow-
ing a fuse or other wiring damages.
Do not install extra lamps or LEDs to
the vehicle. If additional lights are
installed, it may lead to lamp mal-
functions and flickering. Additionally,
the fuse box and other writing may
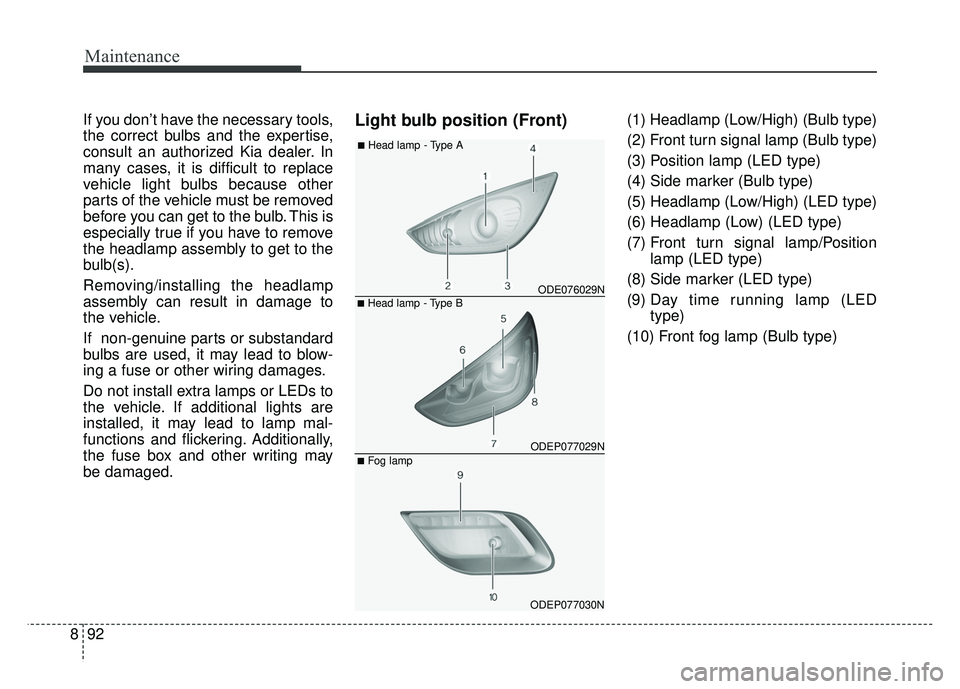
be damaged.Light bulb position (Front)(1) Headlamp (Low/High) (Bulb type)
(2) Front turn signal lamp (Bulb type)
(3) Position lamp (LED type)
(4) Side marker (Bulb type)
(5) Headlamp (Low/High) (LED type)
(6) Headlamp (Low) (LED type)
(7) Front turn signal lamp/Position
lamp (LED type)
(8) Side marker (LED type)
(9) Day time running lamp (LED type)
(10) Front fog lamp (Bulb type)
■Head lamp - Type B
■Head lamp - Type A
ODEP077029N■Fog lamp
ODE076029N
ODEP077030N
Page 608 of 616

I7
Index
Fuel filler lid (Plug-in Hybrid) . . . . . . . . . . . . . . . . . . . 4-35Opening the fuel filler lid. . . . . . . . . . . . . . . . . . . . . 4-35
Closing the fuel filler lid . . . . . . . . . . . . . . . . . . . . . 4-36
Fuel gauge. . . . . . . . . . . . . . . . . . . . . . . . . . . . . . . . . . . 4-\
59
Fuel requirements . . . . . . . . . . . . . . . . . . . . . . . . . . . . . . 1-2
Fuses . . . . . . . . . . . . . . . . . . . . . . . . . . . . . . . . . . . . \
. . . 8-63 Inner panel fuse replacement . . . . . . . . . . . . . . . . . . 8-64
Engine compartment fuse replacement . . . . . . . . . . 8-66
Fuse/relay panel description. . . . . . . . . . . . . . . . . . . 8-69
Gauges . . . . . . . . . . . . . . . . . . . . . . . . . . . . . . . . . . . . \
. 4-57
Glove box . . . . . . . . . . . . . . . . . . . . . . . . . . . . . . . . . . 4-14\
9
Gross vehicle weight. . . . . . . . . . . . . . . . . . . . . . . . . . . . 9-5
Hazard warning flasher . . . . . . . . . . . . . . . . . . . . . . . . . . 7-2
Hazardous driving conditions . . . . . . . . . . . . . . . . . . . . 6-89
Headlamp (HID type) bulb replacement . . . . . . . . . . . 8-94
Headlamp (High/Low beam) bulb replacement . . . . . . 8-95
Headlamp (LED type) replacement . . . . . . . . . . . . . . . 8-95
Headlight (Headlamp) escort function . . . . . . . . . . . . 4-116
Headlight position. . . . . . . . . . . . . . . . . . . . . . . . . . . . 4-117
Headrest (Rear) . . . . . . . . . . . . . . . . . . . . . . . . . . . . . . . 3-14
Headrest (Front) . . . . . . . . . . . . . . . . . . . . . . . . . . . . . . 3-11
Heated steering wheel. . . . . . . . . . . . . . . . . . . . . . . . . . 4-46 High - beam operation . . . . . . . . . . . . . . . . . . . . . . . . 4-118
High mounted stop lamp bulb replacement . . . . . . . . 8-100
Highway driving . . . . . . . . . . . . . . . . . . . . . . . . . . . . . . 6-93
Hill-start assist control (HAC) . . . . . . . . . . . . . . . . . . . 6-34
Hood . . . . . . . . . . . . . . . . . . . . . . . . . . . . . . . . . . . . \
. . . 4-32
Opening the hood . . . . . . . . . . . . . . . . . . . . . . . . . . . 4-32
Hood open warning . . . . . . . . . . . . . . . . . . . . . . . . . 4-33
Closing the hood . . . . . . . . . . . . . . . . . . . . . . . . . . . 4-33
Horn . . . . . . . . . . . . . . . . . . . . . . . . . . . . . . . . . . . . \
. . . 4-47
"Hybrid Battery SOC (State of Charge) Gauge" . . . . . 4-59
Hybrid System Gauge. . . . . . . . . . . . . . . . . . . . . . . . . . 4-58
If an accident occurs . . . . . . . . . . . . . . . . . . . . . . . . . . . 7-33
Ignition switch illumination . . . . . . . . . . . . . . . . . . . . . . 6-6
Ignition switch position . . . . . . . . . . . . . . . . . . . . . . . . . 6-6
Immobilizer system . . . . . . . . . . . . . . . . . . . . . . . . . . . 4-15
Important safety precautions . . . . . . . . . . . . . . . . . . . . . 3-2
Indicator lights . . . . . . . . . . . . . . . . . . . . . . . . . . . . . . 4-102
Inside rearview mirror . . . . . . . . . . . . . . . . . . . . . . . . . 4-48
Instrument cluster . . . . . . . . . . . . . . . . . . . . . . . . . . . . . 4-53 Indicator lights . . . . . . . . . . . . . . . . . . . . . . . . . . . . 4-102
Instrument cluster control . . . . . . . . . . . . . . . . . . . . 4-56
LCD window control . . . . . . . . . . . . . . . . . . . . . . . . 4-56
Gauges . . . . . . . . . . . . . . . . . . . . . . . . . . . . . . . . . . . 4-\
57
Warning lights . . . . . . . . . . . . . . . . . . . . . . . . . . . . . 4-94
Instrument panel overview . . . . . . . . . . . . . . . . . . . . . . . 2-5
H
I
G