Emergency KIA NIRO PHEV 2019 User Guide
[x] Cancel search | Manufacturer: KIA, Model Year: 2019, Model line: NIRO PHEV, Model: KIA NIRO PHEV 2019Pages: 611, PDF Size: 15.28 MB
Page 95 of 611

Safety features of your vehicle
28
3
❈ The actual position of seat belt pre-
tensioner system components may dif-
fer from the illustration.
The seat belt pre-tensioner system
consists mainly of the following com-
ponents. Their locations are shown in
the illustration:
(1) SRS air bag warning light
(2) Retractor pre-tensioner assembly
(3) SRS control module
(4) Emergency fastening device (EFD)
✽ ✽ NOTICE
• Both the driver's and front pas-
senger's seat belt pre-tensioner sys-
tem may be activated not only in
certain frontal collision, but also in
certain side collisions or rollovers,
if the vehicle is equipped with a
side or curtain air bag.
• Because the sensor that activates the SRS air bag is connected with
the pre-tensioner seat belt, the
SRS air bag warning light on
the instrument panel will illumi-
nate for approximately 6 seconds
after engine start/stop button has
been changed to ON position, and
then it should turn off.
If the pre-tensioner seat belt system
is not working properly, this warning
light will illuminate even if there is not
a malfunction with the SRS air bag. If
the SRS air bag warning light does
not illuminate when engine start/stop
button has been changed to ON, or if
it remains illuminated after illuminat-
ing for approximately 6 seconds, or if
it illuminates while the vehicle is
being driven, have an authorized Kia
dealer inspect the pre-tensioner seat
belt and SRS air bag system as soon
as possible.
✽ ✽ NOTICE
Do not attempt to service or repair
the pre-tensioner seat belt system in
any manner. Do not attempt to
inspect or replace the pre-tensioner
seat belts yourself. This must be
done by an authorized Kia dealer.
WARNING - Skin Irritation
Wash all exposed skin areas
thoroughly after an accident in
which the pre-tensioner seat
belts were activated. The fine
dust from the pre-tensioner
activation may cause skin irrita-
tion and should not be breathed
for prolonged periods.
ODMESA2024
Page 107 of 611

Safety features of your vehicle
40
3
To install the tether anchor:
1. Route the child restraint tether
strap over the child restraint seat-
back. Route the tether strap under
the head restraint and between
the head restraint posts, or route
the tether strap over the top of the
vehicle seatback. Make sure the
strap is not twisted.
2. Connect the tether strap hook to the tether anchor, then tighten the
tether strap according to the child
seat manufacturer’s instructions to
firmly secure the child restraint to
the seat. 3. Check that the child restraint is
securely attached to the seat by
pushing and pulling the seat for-
ward and from side-to-side.
Securing a child restraint with a
lap/shoulder belt
When not using the LATCH system,
all child restraints must be secured to
a vehicle rear seat with the lap part
of a lap/shoulder belt.
Automatic locking mode
Since all passenger seat belts move
freely under normal conditions and
only lock under extreme or emer-
gency conditions (emergency locking
mode), you must manually pull the
seat belt all the way out to shift the
retractor to the “Automatic Locking”
mode to secure a child restraint.
The “Automatic Locking” mode will
help prevent the normal movement
of the child in the vehicle from caus-
ing the seat belt to loosen and com-
promise the child restraint system. To
secure a child restraint system, use
the following procedure.
ODE036033 OLMB033044
Page 108 of 611

341
Safety features of your vehicle
To install a child restraint system on
the rear seats, do the following:
1.Place the child restraint system ona rear seat and route the lap/ shoul-
der belt around or through the child
restraint, following the restraint
manufacturer’s instructions.
Be sure the seat belt webbing is
not twisted.
2. Fasten the lap/shoulder belt latchinto the buckle. Listen for the dis-
tinct “click” sound.
Position the release button so that
it is easy to access in case of an
emergency. 3. Pull the shoulder portion of the
seat belt all the way out. When the
shoulder portion of the seat belt is
fully extended, it will shift the
retractor to the “Automatic
Locking” (child restraint) mode.
OEN036101OEN036102
Page 109 of 611

Safety features of your vehicle
42
3
4. Slowly allow the shoulder portion
of the seat belt to retract and listen
for an audible "clicking" or "ratchet-
ing" sound. This indicates that the
retractor is in the "Automatic
Locking" mode. If no distinct sound
is heard, repeat steps 3 and 4. 5. Remove as much slack from the
belt as possible by pushing down
on the child restraint system while
feeding the shoulder belt back into
the retractor.
6. Push and pull on the child restraint system to confirm that the seat
belt is holding it firmly in place. If it
is not, release the seat belt and
repeat steps 2 through 6.
7. Double check that the retractor is in the "Automatic Locking" mode
by attempting to pull more of the
seat belt out of the retractor. If you
cannot, the retractor is in the
"Automatic Locking" mode.
If your CRS manufacturer instructs or
recommends you to use a tether
anchor with the lap/shoulder belt,
refer to the previous pages for more
information.
✽ ✽ NOTICE
When the seat belt is allowed to
retract to its fully stowed position,
the retractor will automatically
switch from the "Automatic
Locking" mode to the emergency
lock mode for normal adult usage.
To remove the child restraint, press
the release button on the buckle and
then pull the lap/shoulder belt out of
the restraint and allow the seat belt
to retract fully.
OEN036103
WARNING - Auto lock
mode
Set the retractor to Automatic
Lock mode when installing any
child restraint system. If the
retractor is not in the Automatic
Locking mode, the child restraint
can move when your vehicle
turns or stops suddenly.
Page 161 of 611

Features of your vehicle
26
4
Emergency liftgate safety
release
Your vehicle is equipped with the
emergency liftgate safety release
lever located on the bottom of the lift-
gate. When someone is inadvertent-
ly locked in the luggage compart-
ment. The liftgate can be opened by
doing as follows:
1. Input the mechanical key into the
hole.
2. Push the mechanical key to the right (1).
3. Push up the liftgate.
WARNING- Rear cargo area
Occupants should never ride in
the rear cargo area where no
restraints are available.
Occupants should always be
properly restrained.
WARNING- Exhaust fumes
The liftgate should always be
kept completely closed while
the vehicle is in motion. If it is
left open or ajar, poisonous
exhaust gases may enter the
vehicle and serious illness or
death may result.WARNING
No one should be allowed to occupy the cargo area of the
vehicle at any time. The cargo
area is a very dangerous loca-
tion in the event of a crash.
Use the release lever for emergencies only. Use with
extreme caution, especially
while the vehicle is in motion.
ODE046009NCAUTION
Make sure nothing is near theliftgate latch and striker whileclosing the liftgate. It may dam-age the liftgate's latch.
Page 217 of 611

Features of your vehicle
82
4
Smart Cruise Control Response (if
equipped) : Choose the sensitivi-
ty(Slow/Normal/Fast) of the smart
cruise control.
❈ For more details, refer to “Smart
Cruise Control System” in chapter
6.
Autonomous Emergency Braking (if equipped) : If this item is
checked, the AEB function will be
activated.
❈ For more details, refer to
“Autonomous Emergency Braking
(AEB)” in chapter 6.
Forward Collision Warning (if equipped) : Choose the sensitivity
of the forward collision warning.
- Late/Normal/Early
❈ For more details, refer to
“Autonomous Emergency Braking
(AEB)” in chapter 6. BSD (Blind Spot Detection) Sound
(if equipped) : If this item is
checked, the blind spot detection
sound will be activated.
❈ For more details, refer to “Blind Spot
Detection System” in chapter 6.
Rear Cross Traffic Alert (if equipped) : If this item is checked,
the rear cross traffic alert function
will be activate
❈ For more details, refer to “Blind Spot
Detection System” in chapter 6.
Coasting Guide (if equipped) : To activate or deactivate the Coasting
Guide system and sound.
❈ For more information, refer to
“Coasting Guide” in this chapter.
Start Coasting (if equipped) : To adjust the
sensitivity(Late/Normal/Early) of
the Coasting Guide.
❈ For more information, refer to
“Coasting Guide” in this chapter. Door
Automatic Lock
- Enable on Speed : All doors willbe automatically locked when the
vehicle speed exceeds 9.3 mph
(15 km/h).
- Enable on Shift: All doors will be automatically locked if the trans-
mission shift lever is shifted from
the P (Park) position to the R
(Reverse), N (Neutral), or D
(Drive) position.
Automatic Unlock - Disable : The auto door unlockoperation will be canceled.
- Vehicle Off : All doors will be auto- matically unlocked when the
Engine Start/Stop button is set to
the OFF position.
- On Shift to P : All doors will be auto- matically unlocked if the shift lever
is shifted to the P (Park) position.
Two Press Unlock : If this item is checked, the two press unlock will
be activated.
Page 236 of 611

4101
Features of your vehicle
Autonomous EmergencyBraking (AEB) Warninglight (if equipped)
This indicator light illuminates:
When there is a malfunction with the AEB.
In this case, have the vehicle inspect-
ed by an authorized Kia dealer.
Engine Coolant Temperature WarningLight
This warning light illuminates:
When the engine coolant tempera- ture is above 248°F (120°C). This
means that the engine is overheat-
ed and may be damaged.
If your vehicle is overheated, refer
to “Overheating” in chapter 7.
LED Headlamp Warning
Light (if equipped)
This warning light illuminates:
Once you set the ignition switch or Engine Start/Stop Button to the ON
position.
- It illuminates for approximately 3seconds and then goes off.
When there is a malfunction with the LED headlamp.
In this case, have your vehicle inspect-
ed by an authorized Kia dealer.
This warning light blinks:
When there is a malfunction with a LED headlamp related part.
In this case, have your vehicle inspect-
ed by an authorized Kia dealer.
CAUTION - Engine
Overheating
Do not continue driving with the engine overheated. Otherwisethe engine may be damaged.
CAUTION - LED
Headlamp Warning Light
Continuous driving with the LED Headlamp Warning Lighton or blinking can reduce LEDheadlamp (low beam) life.
Page 240 of 611

4105
Features of your vehicle
ECO Indicator Light(if equipped)
This indicator light illuminates :
When the Active ECO system is activated by pressing the DRIVE
mode button.
The ECO indicator (green) will illu- minate to show that the Active
ECO is operating.
❈ For more details, refer to “Drive
Mode Integrated Control System"
in chapter 6.
SPORT Mode Indicator
Light (if equipped)
This indicator light illuminates:
When you select “SPORT” mode as drive mode.
❈ For more details, refer to “Drive
Mode” in chapter 6.
EV Mode Indicator
This indicator illuminates when the
vehicle is driven by the electric
motor.
Ready Indicator
This indicator illuminates :
When the vehicle is ready to be driv-
en.
- ON : Normal driving is possible.
- OFF : Normal driving is not possi-
ble, or a problem has occurred.
- Blinking : Emergency driving.
When the ready indicator goes OFF
or blinks, there is a problem with the
system. In this case, have your vehi-
cle inspected by an authorized Kia
dealer.
EV
Page 337 of 611

Driving your vehicle
Before driving . . . . . . . . . . . . . . . . . . . . . . . . . . . . . . 6-4
• Before entering vehicle . . . . . . . . . . . . . . . . . . . . . . . . . 6-4
. . . . . . . . . . . . . . . . . . . . . . . . . . 6-4
. . . . . . . . . . . . . . . . . . . . . . . . . . . . . . . 6-4
Key positions . . . . . . . . . . . . . . . . . . . . . . . . . . . . . . . 6-6
. . . . . . . . . . . . . . . . . . . . . . 6-6
. . . . . . . . . . . . . . . . . . . . . . . . . 6-6
. . . . . . . . . . . . . . . . . . . . . . 6-7
Engine start/stop button . . . . . . . . . . . . . . . . . . . . . 6-9
engine start/stopbutton . . . . . . . . . . . . 6-9
position. . . . . . . . . . . . . . . . . 6-9
. . . . . . . . . . . . . . . . . . . . . 6-11
Dual Clutch Transmission (DCT) . . . . . . . . . . . . . 6-14
. . . . . . . . . . . . 6-14
. . . . . . . . . . . . . . . . . . . . . . . . 6-21
Brake system . . . . . . . . . . . . . . . . . . . . . . . . . . . . . . 6-23
. . . . . . . . . . . . . . . . . . . . . . . . . . . . . . . . 6-23
. . . . . . . . . . . . . . . . . . . . . 6-25
. . . . . . . . . . . . . . . . . . 6-27
. . . . . . . . . . . . . . 6-29
. . . . . . . . . . . . 6-32
. . . . . . . . . . . . . . . . . 6-34
Autonomous Emergency Braking (AEB) . . . . . . . 6-36
. . . . . . . . . . . . . . . . . . . 6-36
. . . . . . . . 6-39
. . . . . . . . . . . . . . . . . . . . . . . . . . . . . . 6-40
in front (front radar). . . . . . . . . . . . . . . . . . . . . . . . . 6-41
. . . . . . . . . . . . . . . . . . . . . . . . . . . 6-42
. . . . . . . . . . . . . . . . . . . . . . . 6-43
Cruise control system. . . . . . . . . . . . . . . . . . . . . . . 6-48
. . . . . . . . . . . . . . . . . . . . . 6-49
. . . . . . . . . . . . . . 6-49
. . . . . . . . . . . . . . . . . . 6-50
control on . . . . . . . . . . . . . . . . . . . . . . . . . . . . . . . . . . 6-50\
do one of the following . . . 6-50
approximately 20 mph (30 km/h) . . . . . . . . . . . . . . 6-51
do one of the following . . 6-51
Smart Cruise Control system (SCC) . . . . . . . . . . 6-52
. . . . . . . . . 6-58
. 6-61
. . . . . . . . . . . . . . . 6-61
. . . . . . . . . . . . . . . . . . . . . . 6-62
6
Page 345 of 611
69
Driving your vehicle
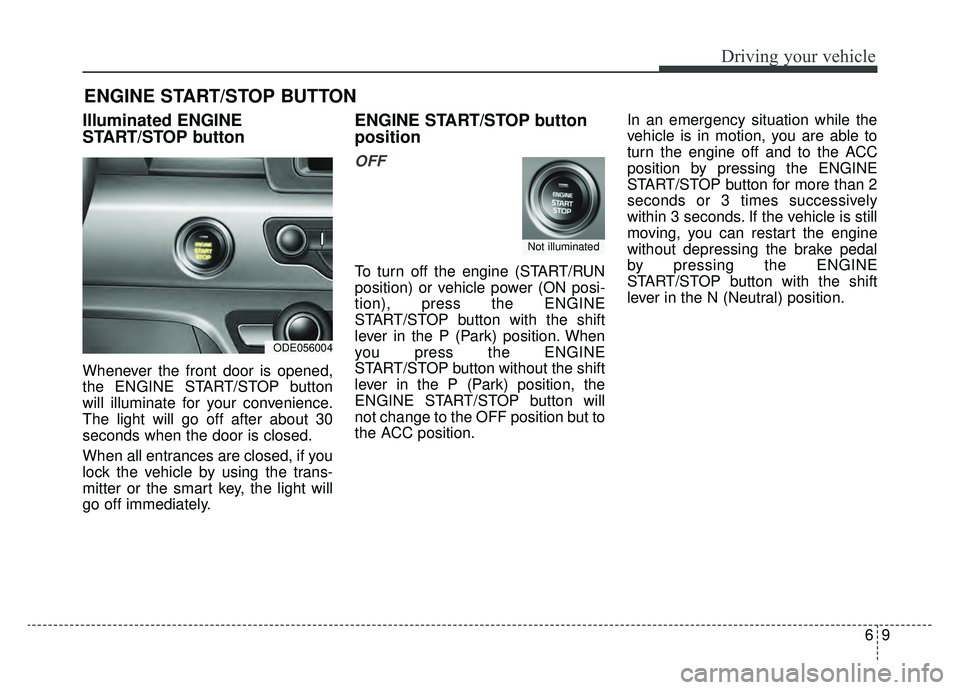
Illuminated ENGINE
START/STOP button
Whenever the front door is opened,
the ENGINE START/STOP button
will illuminate for your convenience.
The light will go off after about 30
seconds when the door is closed.
When all entrances are closed, if you
lock the vehicle by using the trans-
mitter or the smart key, the light will
go off immediately.
ENGINE START/STOP button
position
OFF
To turn off the engine (START/RUN
position) or vehicle power (ON posi-
tion), press the ENGINE
START/STOP button with the shift
lever in the P (Park) position. When
you press the ENGINE
START/STOP button without the shift
lever in the P (Park) position, the
ENGINE START/STOP button will
not change to the OFF position but to
the ACC position.In an emergency situation while the
vehicle is in motion, you are able to
turn the engine off and to the ACC
position by pressing the ENGINE
START/STOP button for more than 2
seconds or 3 times successively
within 3 seconds. If the vehicle is still
moving, you can restart the engine
without depressing the brake pedal
by pressing the ENGINE
START/STOP button with the shift
lever in the N (Neutral) position.
ENGINE START/STOP BUTTON
ODE056004
Not illuminated