bulb KIA NIRO PHEV 2019 User Guide
[x] Cancel search | Manufacturer: KIA, Model Year: 2019, Model line: NIRO PHEV, Model: KIA NIRO PHEV 2019Pages: 611, PDF Size: 15.28 MB
Page 565 of 611
891
Maintenance
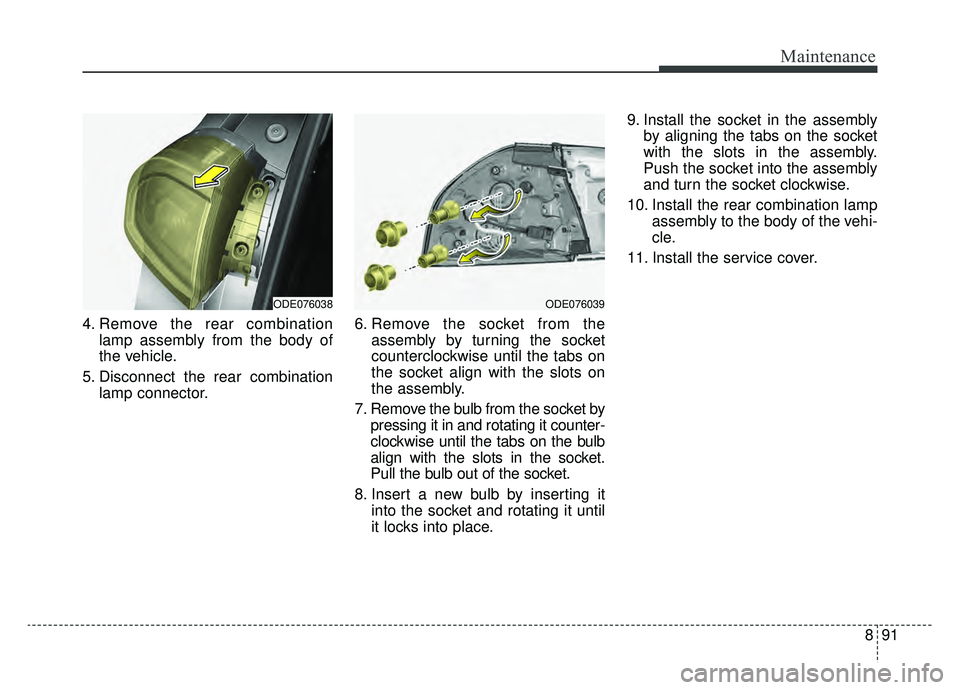
4. Remove the rear combinationlamp assembly from the body of
the vehicle.
5. Disconnect the rear combination lamp connector. 6. Remove the socket from the
assembly by turning the socket
counterclockwise until the tabs on
the socket align with the slots on
the assembly.
7. Remove the bulb from the socket by pressing it in and rotating it counter-
clockwise until the tabs on the bulb
align with the slots in the socket.
Pull the bulb out of the socket.
8. Insert a new bulb by inserting it into the socket and rotating it until
it locks into place. 9. Install the socket in the assembly
by aligning the tabs on the socket
with the slots in the assembly.
Push the socket into the assembly
and turn the socket clockwise.
10. Install the rear combination lamp assembly to the body of the vehi-
cle.
11. Install the service cover.
ODE076038ODE076039
Page 566 of 611
Maintenance
92
8
Tail lamp (inside) bulb replace-
ment
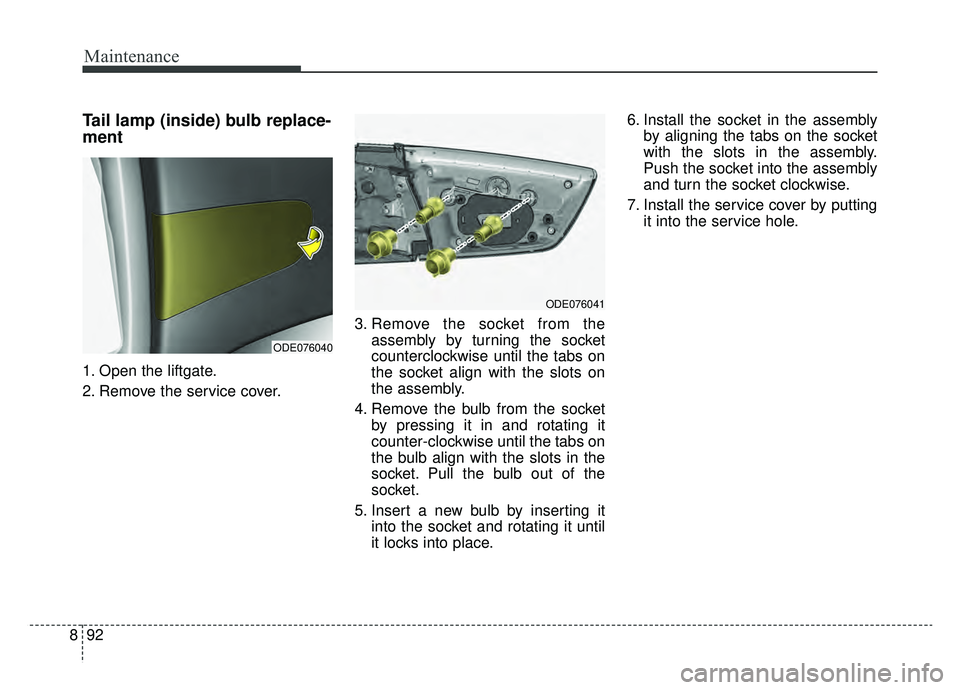
1. Open the liftgate.
2. Remove the service cover. 3. Remove the socket from the
assembly by turning the socket
counterclockwise until the tabs on
the socket align with the slots on
the assembly.
4. Remove the bulb from the socket by pressing it in and rotating it
counter-clockwise until the tabs on
the bulb align with the slots in the
socket. Pull the bulb out of the
socket.
5. Insert a new bulb by inserting it into the socket and rotating it until
it locks into place. 6. Install the socket in the assembly
by aligning the tabs on the socket
with the slots in the assembly.
Push the socket into the assembly
and turn the socket clockwise.
7. Install the service cover by putting it into the service hole.
ODE076040
ODE076041
Page 567 of 611
893
Maintenance
Stop and tail lamp (LED type)
bulb replacement
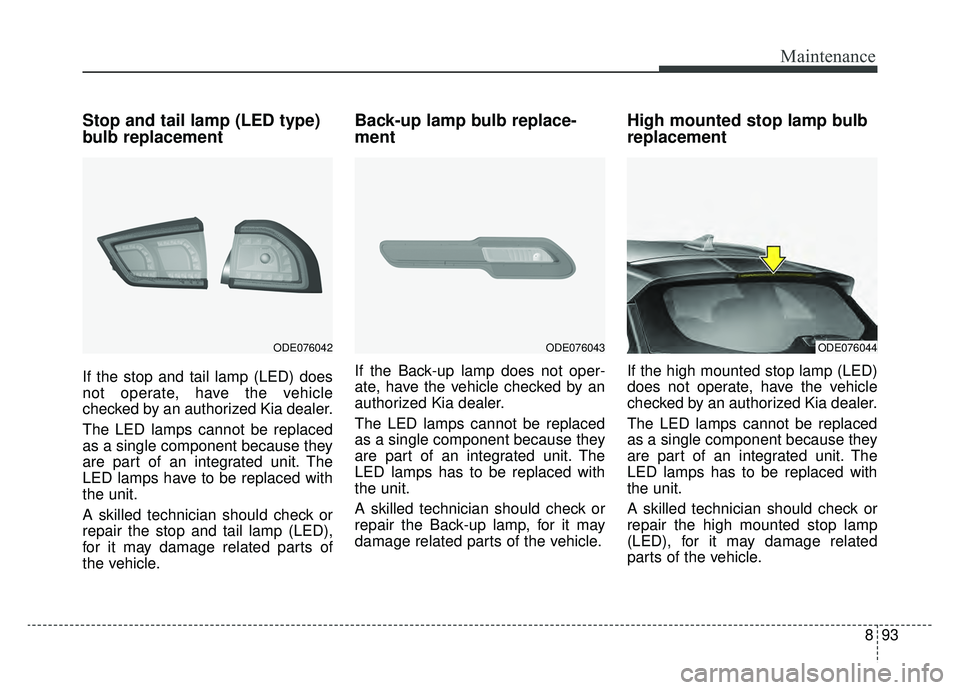
If the stop and tail lamp (LED) does
not operate, have the vehicle
checked by an authorized Kia dealer.
The LED lamps cannot be replaced
as a single component because they
are part of an integrated unit. The
LED lamps have to be replaced with
the unit.
A skilled technician should check or
repair the stop and tail lamp (LED),
for it may damage related parts of
the vehicle.
Back-up lamp bulb replace-
ment
If the Back-up lamp does not oper-
ate, have the vehicle checked by an
authorized Kia dealer.
The LED lamps cannot be replaced
as a single component because they
are part of an integrated unit. The
LED lamps has to be replaced with
the unit.
A skilled technician should check or
repair the Back-up lamp, for it may
damage related parts of the vehicle.
High mounted stop lamp bulb
replacement
If the high mounted stop lamp (LED)
does not operate, have the vehicle
checked by an authorized Kia dealer.
The LED lamps cannot be replaced
as a single component because they
are part of an integrated unit. The
LED lamps has to be replaced with
the unit.
A skilled technician should check or
repair the high mounted stop lamp
(LED), for it may damage related
parts of the vehicle.
ODE076042ODE076043ODE076044
Page 568 of 611
Maintenance
94
8
License plate lamp bulb
replacement
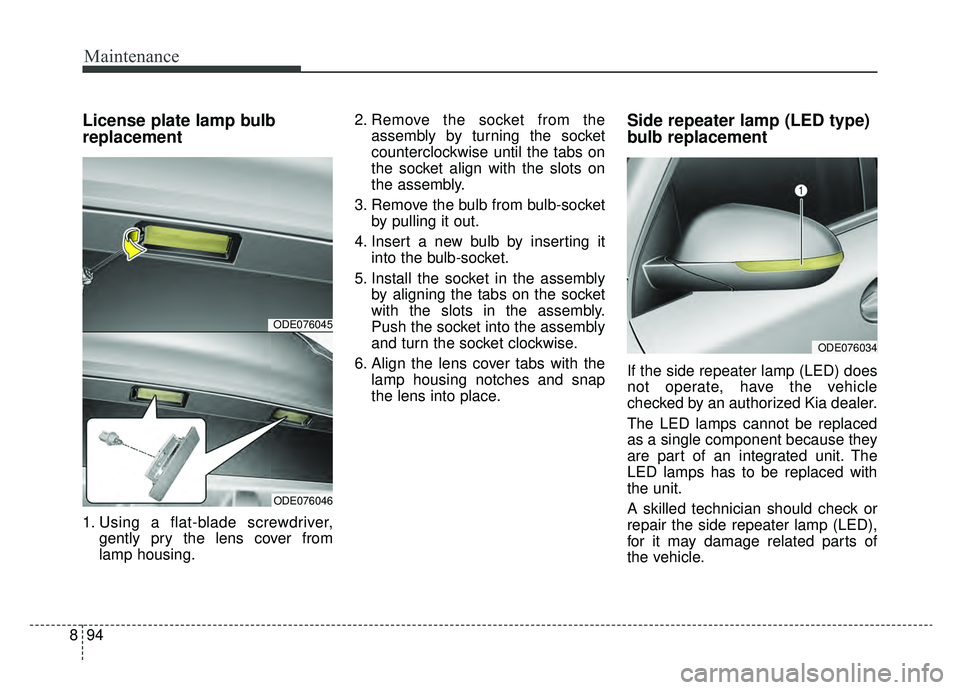
1. Using a flat-blade screwdriver,
gently pry the lens cover from
lamp housing. 2. Remove the socket from the
assembly by turning the socket
counterclockwise until the tabs on
the socket align with the slots on
the assembly.
3. Remove the bulb from bulb-socket by pulling it out.
4. Insert a new bulb by inserting it into the bulb-socket.
5. Install the socket in the assembly by aligning the tabs on the socket
with the slots in the assembly.
Push the socket into the assembly
and turn the socket clockwise.
6. Align the lens cover tabs with the lamp housing notches and snap
the lens into place.
Side repeater lamp (LED type)
bulb replacement
If the side repeater lamp (LED) does
not operate, have the vehicle
checked by an authorized Kia dealer.
The LED lamps cannot be replaced
as a single component because they
are part of an integrated unit. The
LED lamps has to be replaced with
the unit.
A skilled technician should check or
repair the side repeater lamp (LED),
for it may damage related parts of
the vehicle.
ODE076045
ODE076046
ODE076034
Page 569 of 611
895
Maintenance
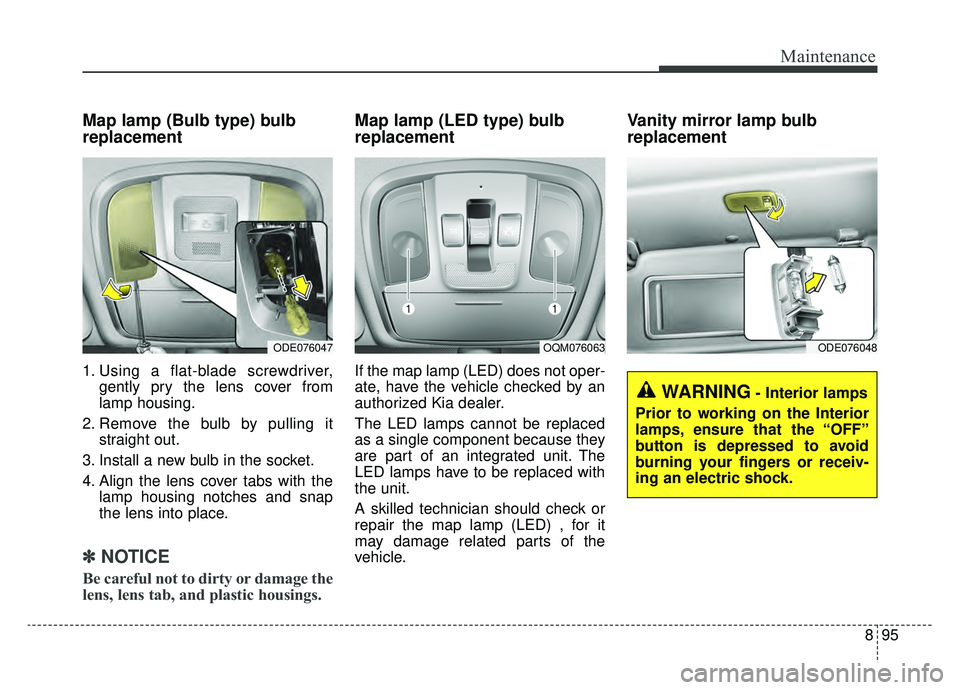
Map lamp (Bulb type) bulb
replacement
1. Using a flat-blade screwdriver,gently pry the lens cover from
lamp housing.
2. Remove the bulb by pulling it straight out.
3. Install a new bulb in the socket.
4. Align the lens cover tabs with the lamp housing notches and snap
the lens into place.
✽ ✽NOTICE
Be careful not to dirty or damage the
lens, lens tab, and plastic housings.
Map lamp (LED type) bulb
replacement
If the map lamp (LED) does not oper-
ate, have the vehicle checked by an
authorized Kia dealer.
The LED lamps cannot be replaced
as a single component because they
are part of an integrated unit. The
LED lamps have to be replaced with
the unit.
A skilled technician should check or
repair the map lamp (LED) , for it
may damage related parts of the
vehicle.
Vanity mirror lamp bulb
replacement
OQM076063
WARNING- Interior lamps
Prior to working on the Interior
lamps, ensure that the “OFF”
button is depressed to avoid
burning your fingers or receiv-
ing an electric shock.
ODE076048ODE076047
Page 570 of 611
Maintenance
96
8
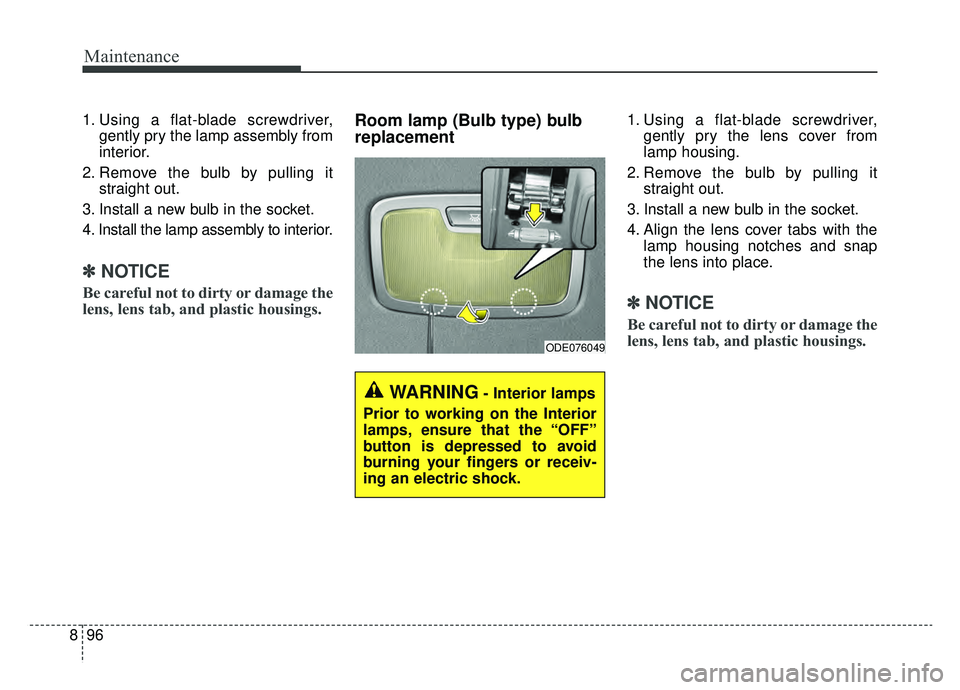
1. Using a flat-blade screwdriver,
gently pry the lamp assembly from
interior.
2. Remove the bulb by pulling it straight out.
3. Install a new bulb in the socket.
4. Install the lamp assembly to interior.
✽ ✽ NOTICE
Be careful not to dirty or damage the
lens, lens tab, and plastic housings.
Room lamp (Bulb type) bulb
replacement1. Using a flat-blade screwdriver,
gently pry the lens cover from
lamp housing.
2. Remove the bulb by pulling it straight out.
3. Install a new bulb in the socket.
4. Align the lens cover tabs with the lamp housing notches and snap
the lens into place.
✽ ✽NOTICE
Be careful not to dirty or damage the
lens, lens tab, and plastic housings.
ODE076049
WARNING- Interior lamps
Prior to working on the Interior
lamps, ensure that the “OFF”
button is depressed to avoid
burning your fingers or receiv-
ing an electric shock.
Page 571 of 611
897
Maintenance
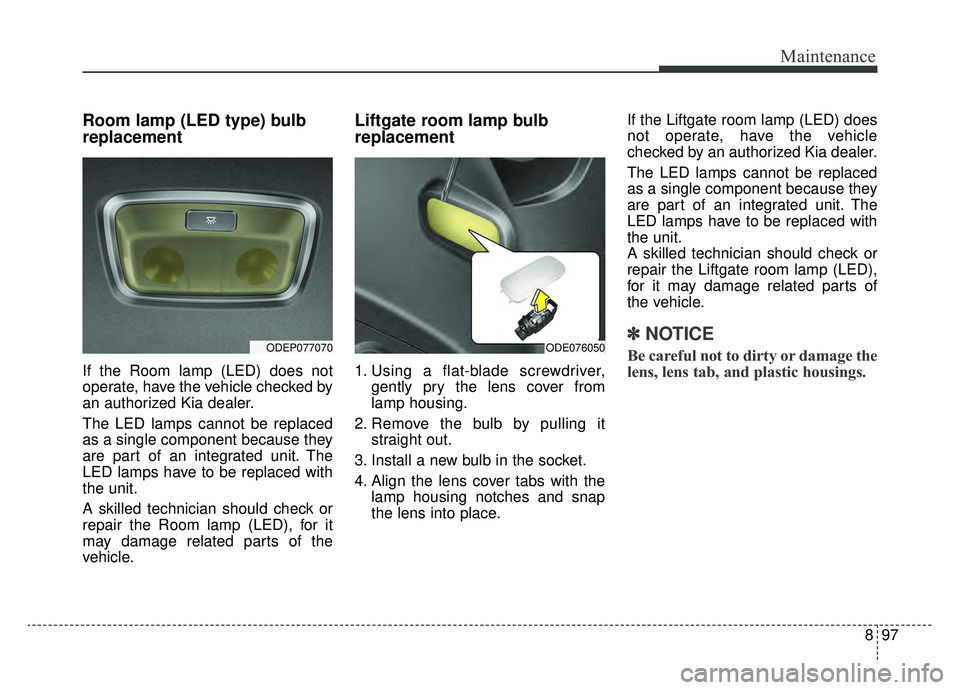
Room lamp (LED type) bulb
replacement
If the Room lamp (LED) does not
operate, have the vehicle checked by
an authorized Kia dealer.
The LED lamps cannot be replaced
as a single component because they
are part of an integrated unit. The
LED lamps have to be replaced with
the unit.
A skilled technician should check or
repair the Room lamp (LED), for it
may damage related parts of the
vehicle.
Liftgate room lamp bulb
replacement
1. Using a flat-blade screwdriver,gently pry the lens cover from
lamp housing.
2. Remove the bulb by pulling it straight out.
3. Install a new bulb in the socket.
4. Align the lens cover tabs with the lamp housing notches and snap
the lens into place. If the Liftgate room lamp (LED) does
not operate, have the vehicle
checked by an authorized Kia dealer.
The LED lamps cannot be replaced
as a single component because they
are part of an integrated unit. The
LED lamps have to be replaced with
the unit.
A skilled technician should check or
repair the Liftgate room lamp (LED),
for it may damage related parts of
the vehicle.
✽ ✽
NOTICE
Be careful not to dirty or damage the
lens, lens tab, and plastic housings.ODE076050ODEP077070
Page 584 of 611
Specifications, Consumer information and Reporting safety defects
Dimensions . . . . . . . . . . . . . . . . . . . . . . . . . . . . . . . . 9-2
Engine . . . . . . . . . . . . . . . . . . . . . . . . . . . . . . . . . . . . \
9-2
Bulb wattage . . . . . . . . . . . . . . . . . . . . . . . . . . . . . . . 9-3
Tires and wheels . . . . . . . . . . . . . . . . . . . . . . . . . . . . 9-4
Gross vehicle weight. . . . . . . . . . . . . . . . . . . . . . . . . 9-5
Luggage volume . . . . . . . . . . . . . . . . . . . . . . . . . . . . 9-6
Air conditioning system . . . . . . . . . . . . . . . . . . . . . . 9-6
Recommended lubricants and capacities . . . . . . . . 9-7
• Recommended SAE viscosity number. . . . . . . . . . . . . 9-8
Vehicle identification number (VIN) . . . . . . . . . . . 9-9
Vehicle certification label. . . . . . . . . . . . . . . . . . . . 9-10
Tire specification and pressure label . . . . . . . . . . 9-10
Engine number . . . . . . . . . . . . . . . . . . . . . . . . . . . . 9-10
Air conditioner compressor label . . . . . . . . . . . . . 9-11
Refrigerant label. . . . . . . . . . . . . . . . . . . . . . . . . . . 9-11 Consumer Assistance (U.S. only) . . . . . . . . . . . . . 9-12
•
Toll free consumer assistance . . . . . . . . . . . . . . . . . . . 9-12
• Emergency roadside assistance . . . . . . . . . . . . . . . . . 9-12
• Trip interruption . . . . . . . . . . . . . . . . . . . . . . . . . . . . . 9-13
• Registering your vehicle in a foreign country . . . . . 9-14
Electrical Equipment (U.S. only) . . . . . . . . . . . . . 9-15
• Installation of a mobile two-way radio system . . . . . 9-15
Reporting Safety Defects (U.S. only) . . . . . . . . . . 9-16
Online factory authorized manuals (U.S. only) . . 9-16
• Service manual. . . . . . . . . . . . . . . . . . . . . . . . . . . . . . . 9-16
• Electrical troubleshooting manual. . . . . . . . . . . . . . . 9-16
• Owner's manual . . . . . . . . . . . . . . . . . . . . . . . . . . . . . 9-
16
9
Page 586 of 611
93
Specifications, Consumer information, Reporting safety defects
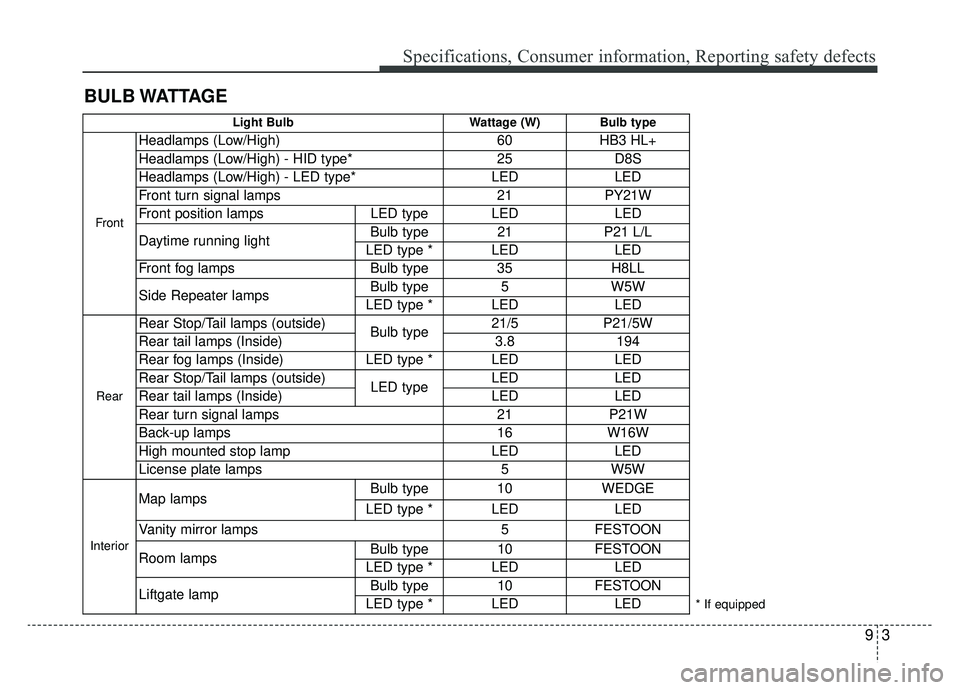
BULB WATTAGE
Light BulbWattage (W) Bulb type
Front
Headlamps (Low/High) 60HB3 HL+
Headlamps (Low/High) - HID type* 25D8S
Headlamps (Low/High) - LED type* LEDLED
Front turn signal lamps 21PY21W
Front position lamps LED type LED LED
Daytime running light Bulb type 21
P21 L/L
LED type *LEDLED
Front fog lamps Bulb type 35 H8LL
Side Repeater lamps Bulb type
5W5W
LED type * LED LED
Rear
Rear Stop/Tail lamps (outside)
Bulb type21/5 P21/5W
Rear tail lamps (Inside) 3.8194
Rear fog lamps (Inside) LED type * LED LED
Rear Stop/Tail lamps (outside) LED typeLED
LED
Rear tail lamps (Inside) LEDLED
Rear turn signal lamps 21P21W
Back-up lamps 16W16W
High mounted stop lamp LEDLED
License plate lamps 5W5W
Interior
Map lamps Bulb type 10 WEDGE
LED type * LED LED
Vanity mirror lamps 5 FESTOON
Room lamps Bulb type 10 FESTOON
LED type * LED LED
Liftgate lamp Bulb type 10 FESTOON
LED type *LEDLED* If equipped
Page 602 of 611
I3
Index
Before driving . . . . . . . . . . . . . . . . . . . . . . . . . . . . . . . . . 6-4Before entering vehicle . . . . . . . . . . . . . . . . . . . . . . . 6-4
Before starting . . . . . . . . . . . . . . . . . . . . . . . . . . . . . . 6-4
Necessary inspections . . . . . . . . . . . . . . . . . . . . . . . . 6-4
Blind Spot Detection system (BSD). . . . . . . . . . . . . . . 6-68 BSD (Blind Spot Detection) /LCA (Lane Change Assist) . . . . . . . . . . . . . . . . . . 6-69
Limitations condition . . . . . . . . . . . . . . . . . . . . . . . . 6-74
RCTA (Rear Cross Traffic Alert) . . . . . . . . . . . . . . . 6-72
Brake fluid . . . . . . . . . . . . . . . . . . . . . . . . . . . . . . . . . . 8-26\
Checking the brake fluid level . . . . . . . . . . . . . . . . . 8-26
Brake system. . . . . . . . . . . . . . . . . . . . . . . . . . . . . . . . . 6-23 Anti-lock Brake System (ABS) . . . . . . . . . . . . . . . . 6-27
Electronic Stability Control (ESC) . . . . . . . . . . . . . 6-29
Good braking practices . . . . . . . . . . . . . . . . . . . . . . 6-34
Hill-start Assist Control (HAC) . . . . . . . . . . . . . . . . 6-34
Parking brake – Foot type . . . . . . . . . . . . . . . . . . . . 6-25
Power brakes . . . . . . . . . . . . . . . . . . . . . . . . . . . . . . 6-23
Vehicle Stability Management (VSM) . . . . . . . . . . . 6-32
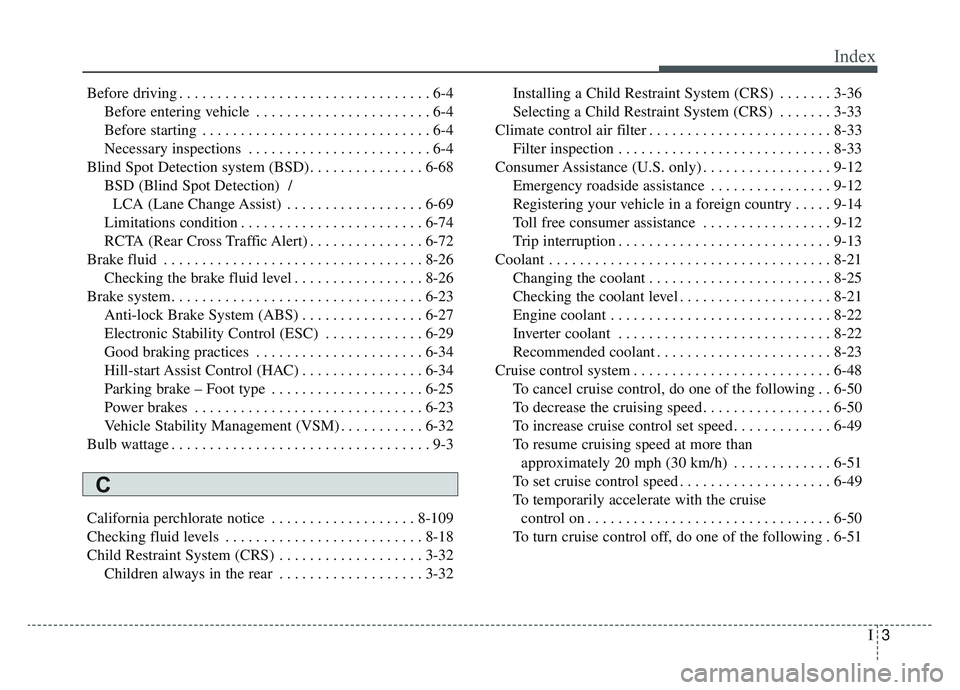
Bulb wattage . . . . . . . . . . . . . . . . . . . . . . . . . . . . . . . . . . 9-3
California perchlorate notice . . . . . . . . . . . . . . . . . . . 8-109
Checking fluid levels . . . . . . . . . . . . . . . . . . . . . . . . . . 8-18
Child Restraint System (CRS) . . . . . . . . . . . . . . . . . . . 3-32 Children always in the rear . . . . . . . . . . . . . . . . . . . 3-32 Installing a Child Restraint System (CRS) . . . . . . . 3-36
Selecting a Child Restraint System (CRS) . . . . . . . 3-33
Climate control air filter . . . . . . . . . . . . . . . . . . . . . . . . 8-33 Filter inspection . . . . . . . . . . . . . . . . . . . . . . . . . . . . 8-33
Consumer Assistance (U.S. only) . . . . . . . . . . . . . . . . . 9-12 Emergency roadside assistance . . . . . . . . . . . . . . . . 9-12
Registering your vehicle in a foreign country . . . . . 9-14
Toll free consumer assistance . . . . . . . . . . . . . . . . . 9-12
Trip interruption . . . . . . . . . . . . . . . . . . . . . . . . . . . . 9-13
Coolant . . . . . . . . . . . . . . . . . . . . . . . . . . . . . . . . . . . . \
. 8-21 Changing the coolant . . . . . . . . . . . . . . . . . . . . . . . . 8-25
Checking the coolant level . . . . . . . . . . . . . . . . . . . . 8-21
Engine coolant . . . . . . . . . . . . . . . . . . . . . . . . . . . . . 8-22
Inverter coolant . . . . . . . . . . . . . . . . . . . . . . . . . . . . 8-22
Recommended coolant . . . . . . . . . . . . . . . . . . . . . . . 8-23
Cruise control system . . . . . . . . . . . . . . . . . . . . . . . . . . 6-48 To cancel cruise control, do one of the following . . 6-50
To decrease the cruising speed . . . . . . . . . . . . . . . . . 6-50
To increase cruise control set speed . . . . . . . . . . . . . 6-49
To resume cruising speed at more thanapproximately 20 mph (30 km/h) . . . . . . . . . . . . . 6-51
To set cruise control speed . . . . . . . . . . . . . . . . . . . . 6-49
To temporarily accelerate with the cruise control on . . . . . . . . . . . . . . . . . . . . . . . . . . . . . . . . 6-50
To turn cruise control off, do one of the following . 6-51
C