steering KIA NIRO PHEV 2020 Repair Manual
[x] Cancel search | Manufacturer: KIA, Model Year: 2020, Model line: NIRO PHEV, Model: KIA NIRO PHEV 2020Pages: 687, PDF Size: 11.43 MB
Page 521 of 687
629
What to do in an emergency
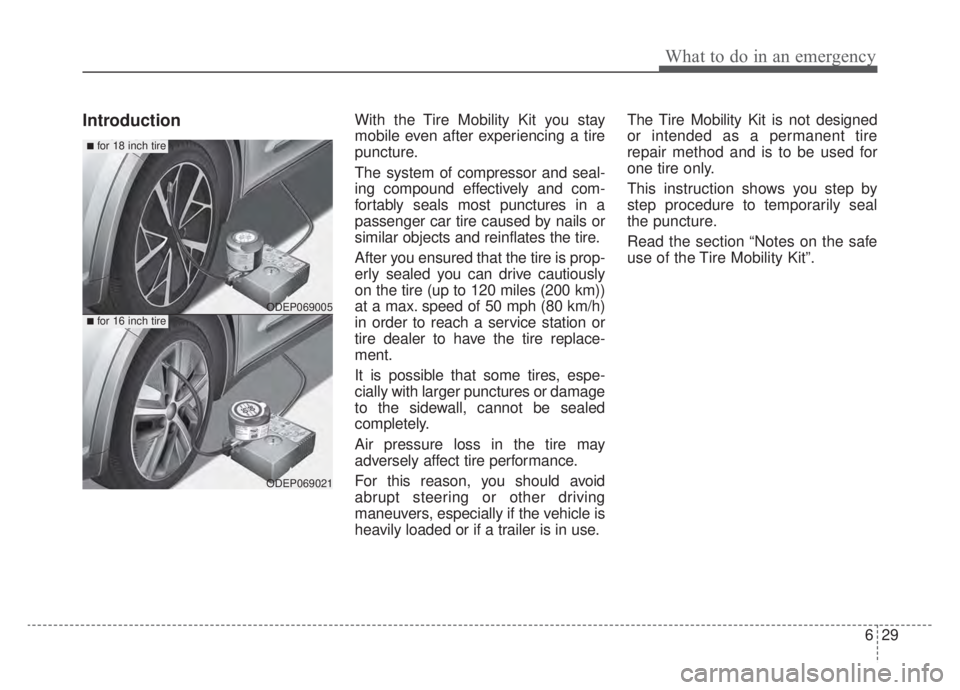
IntroductionWith the Tire Mobility Kit you stay
mobile even after experiencing a tire
puncture.
The system of compressor and seal-
ing compound effectively and com-
fortably seals most punctures in a
passenger car tire caused by nails or
similar objects and reinflates the tire.
After you ensured that the tire is prop-
erly sealed you can drive cautiously
on the tire (up to 120 miles (200 km))
at a max. speed of 50 mph (80 km/h)
in order to reach a service station or
tire dealer to have the tire replace-
ment.
It is possible that some tires, espe-
cially with larger punctures or damage
to the sidewall, cannot be sealed
completely.
Air pressure loss in the tire may
adversely affect tire performance.
For this reason, you should avoid
abrupt steering or other driving
maneuvers, especially if the vehicle is
heavily loaded or if a trailer is in use.The Tire Mobility Kit is not designed
or intended as a permanent tire
repair method and is to be used for
one tire only.
This instruction shows you step by
step procedure to temporarily seal
the puncture.
Read the section “Notes on the safe
use of the Tire Mobility Kit”.
ODEP069005
ODEP069021
■for 18 inch tire
■for 16 inch tire
Page 525 of 687
633
What to do in an emergency
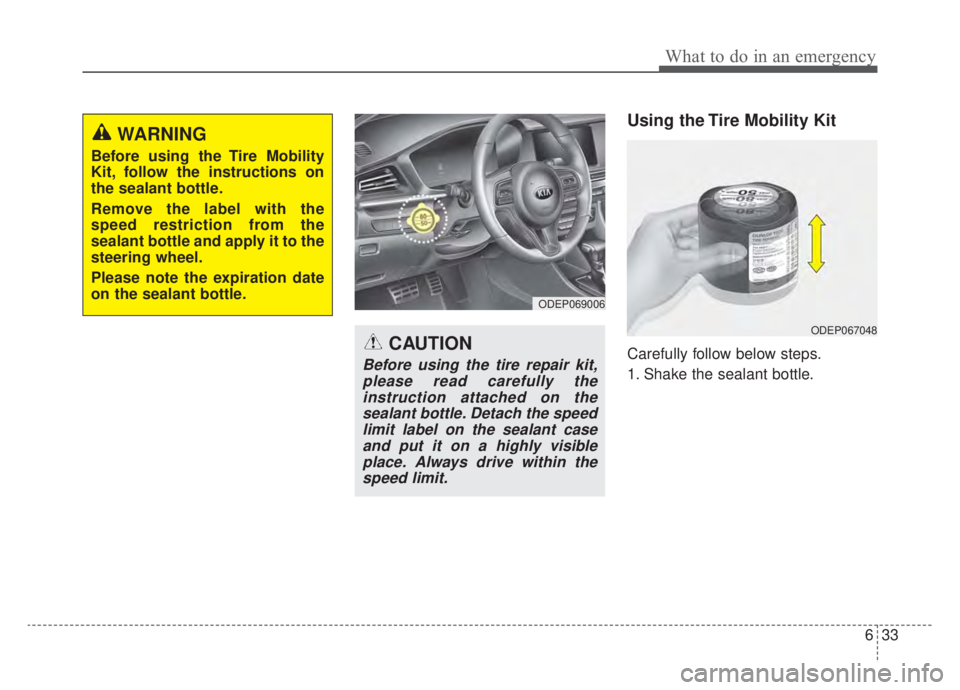
Using the Tire Mobility Kit
Carefully follow below steps.
1. Shake the sealant bottle.
ODEP069006
ODEP067048
WARNING
Before using the Tire Mobility
Kit, follow the instructions on
the sealant bottle.
Remove the label with the
speed restriction from the
sealant bottle and apply it to the
steering wheel.
Please note the expiration date
on the sealant bottle.
CAUTION
Before using the tire repair kit,please read carefully theinstruction attached on thesealant bottle. Detach the speedlimit label on the sealant caseand put it on a highly visibleplace. Always drive within thespeed limit.
Page 533 of 687
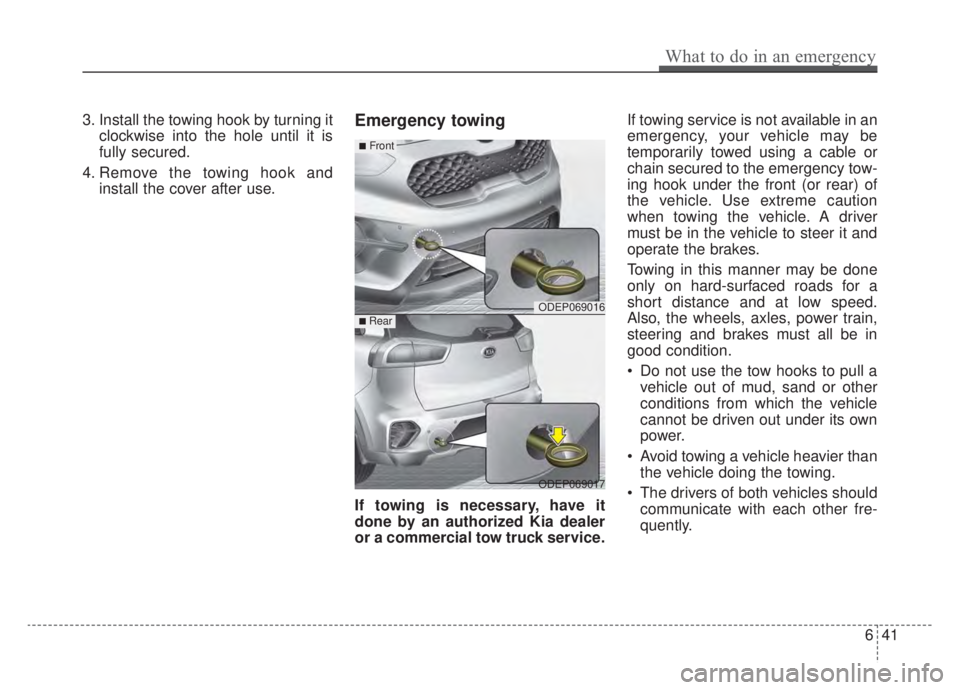
3. Install the towing hook by turning itclockwise into the hole until it is
fully secured.
4. Remove the towing hook and install the cover after use.Emergency towing
If towing is necessary, have it
done by an authorized Kia dealer
or a commercial tow truck service. If towing service is not available in an
emergency, your vehicle may be
temporarily towed using a cable or
chain secured to the emergency tow-
ing hook under the front (or rear) of
the vehicle. Use extreme caution
when towing the vehicle. A driver
must be in the vehicle to steer it and
operate the brakes.
Towing in this manner may be done
only on hard-surfaced roads for a
short distance and at low speed.
Also, the wheels, axles, power train,
steering and brakes must all be in
good condition.
Do not use the tow hooks to pull a
vehicle out of mud, sand or other
conditions from which the vehicle
cannot be driven out under its own
power.
Avoid towing a vehicle heavier than the vehicle doing the towing.
The drivers of both vehicles should communicate with each other fre-
quently.
ODEP069016
ODEP069017
■Front
■ Rear
What to do in an emergency
41
6
Page 534 of 687
Attach a towing strap to the towhook.
Use only a cable or chain specifical- ly intended for use in towing vehi-
cles. Securely fasten the cable or
chain to the towing hook provided.
Accelerate or decelerate the vehicle in a slow and gradual manner while
maintaining tension on the tow rope
or chain to start or drive the vehicle,
otherwise tow hooks and the vehi-
cle may be damaged.
Before emergency towing, check if the hook is not broken or damaged.
Fasten the towing cable or chain securely to the hook.
Do not jerk the hook. Apply it steadily and with even force.
To avoid damaging the hook, do not pull from the side or at a vertical
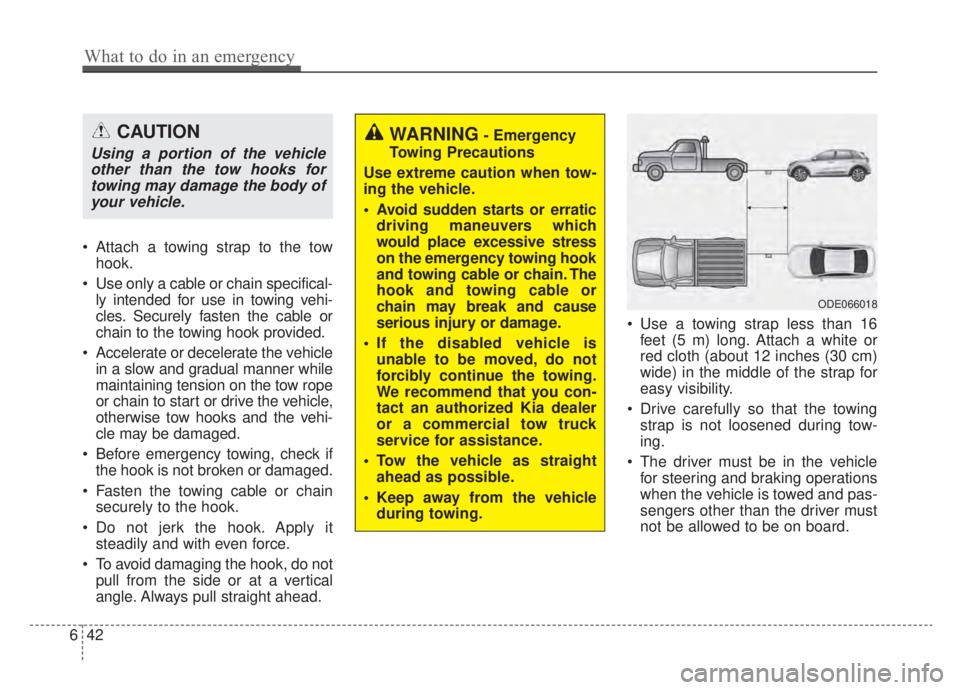
angle. Always pull straight ahead. Use a towing strap less than 16
feet (5 m) long. Attach a white or
red cloth (about 12 inches (30 cm)
wide) in the middle of the strap for
easy visibility.
Drive carefully so that the towing strap is not loosened during tow-
ing.
The driver must be in the vehicle for steering and braking operations
when the vehicle is towed and pas-
sengers other than the driver must
not be allowed to be on board.
CAUTION
Using a portion of the vehicleother than the tow hooks fortowing may damage the body ofyour vehicle.
WARNING- Emergency
Towing Precautions
Use extreme caution when tow-
ing the vehicle.
Avoid sudden starts or erratic driving maneuvers which
would place excessive stress
on the emergency towing hook
and towing cable or chain. The
hook and towing cable or
chain may break and cause
serious injury or damage.
If the disabled vehicle is unable to be moved, do not
forcibly continue the towing.
We recommend that you con-
tact an authorized Kia dealer
or a commercial tow truck
service for assistance.
Tow the vehicle as straight ahead as possible.
Keep away from the vehicle during towing.
ODE066018
642
What to do in an emergency
Page 535 of 687
Emergency towing precautions
Turn the ignition switch to ACC sothe steering wheel isn’t locked.
Place the transmission shift lever in N (Neutral).
Release the parking bake.
Press the brake pedal with more force than normal since you will
have reduced brake performance.
More steering effort will be required because the power steer-
ing system will be disabled.
If you are driving down a long hill, the brakes may overheat and brake
performance will be reduced. Stop
often and let the brakes cool off.
The vehicle should be towed at a speed of 15 mph (25 km/h) or less
within the distance of 12 miles (20
km). If the car is being towed with all
four wheels on the ground, it can
be towed only from the front. Be
sure that the transmission is in N
(Neutral). Be sure the steering is
unlocked by placing the ignition
switch in the ACC position. A driver
must be in the towed vehicle to
operate the steering and brakes.
CAUTION - Dual clutchtransmission
To avoid serious damage to the
dual clutch transmission, limitthe vehicle speed to 10 mph(15 km/h) and drive less than 1mile (1.5 km) when towing.
Before towing, check the dual clutch transmission for fluidleaks under your vehicle. If thedual clutch transmission fluidis leaking, flatbed equipmentor a towing dolly must beused.
What to do in an emergency
43
6
Page 543 of 687
77
Maintenance
OWNER MAINTENANCE
The following lists are vehicle checks
and inspections that should be per-
formed by the owner or an author-
ized Kia dealer at the frequencies
indicated to help ensure safe,
dependable operation of your vehi-
cle.
Any adverse conditions should be
brought to the attention of your deal-
er as soon as possible.
These Owner Maintenance Checks
are generally not covered by war-
ranties and you may be charged for
labor, parts and lubricants used.Owner maintenance schedule
When you stop for fuel:
Check the engine oil level.
Check the coolant level in coolantreservoir.
Check the windshield washer fluid level.
Look for low or under-inflated tires.
While operating your vehicle:
Note any changes in the sound of the exhaust or any smell of
exhaust fumes in the vehicle.
Check for vibrations in the steering wheel. Notice any increased steer-
ing effort or looseness in the steer-
ing wheel, or change in its straight-
ahead position.
Notice if your vehicle constantly turns slightly or “pulls” to one side
when traveling on smooth, level
road.
When stopping, listen and check for unusual sounds, pulling to one
side, increased brake pedal travel
or “hard-to-push” brake pedal.
If any slipping or changes in the operation of your transmission
occurs, check the transmission
fluid level.
Check the dual clutch transmission P (Park) function.
Check the parking brake.
Check for fluid leaks under your vehicle (water dripping from the air
conditioning system during or after
use is normal).
WARNING- Hot coolant
Be careful when checking your
engine coolant level when the
engine is hot. Scalding hot
coolant and steam may blow
out under pressure.
WARNING
When you open the engine
hood, turn the Hybrid system
off. If not, it may result in death
or serious injury because of the
high voltage flow.
Page 547 of 687
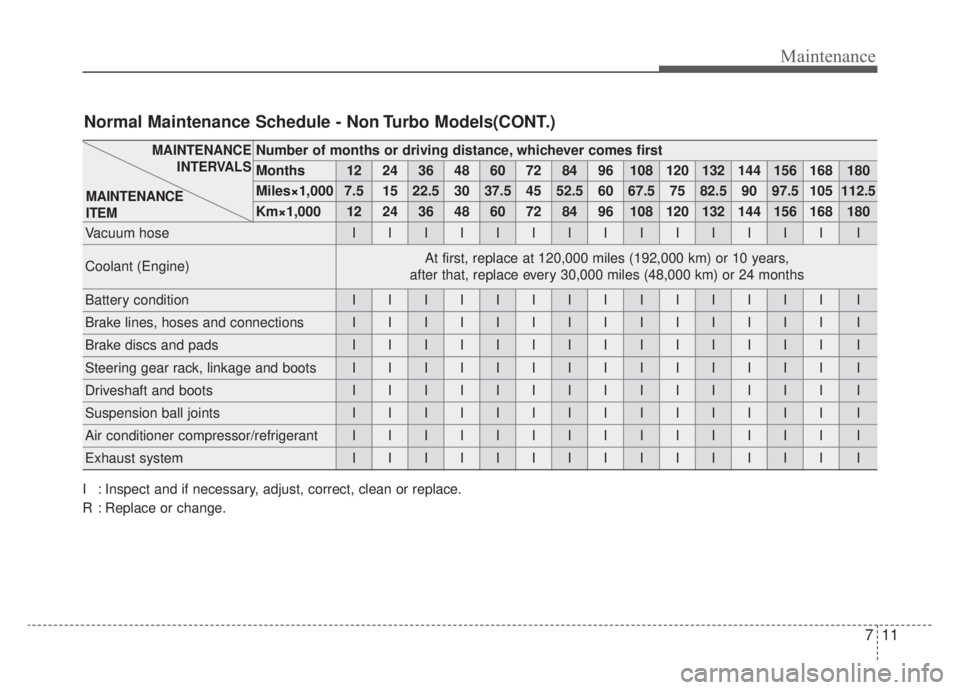
711
Maintenance
Number of months or driving distance, whichever comes first
Months1224364860728496108120132144156168180
Miles×1,0007.51522.530 37.5 45 52.5 60 67.5 75 82.5 90 97.5 105 112.5
Km×1,00012 24 36 48 60 72 84 96 108 120 132 144 156 168 180
Vacuum hoseIIIIIIIIIIIIIII
Coolant (Engine)At first, replace at 120,000 miles (192,000 km) or 10 years,
after that, replace every 30,000 miles (48,000 km) or 24 months
Battery conditionIIIIIIIIIIIIIII
Brake lines, hoses and connectionsIIIIIIIIIIIIIII
Brake discs and padsIIIIIIIIIIIIIII
Steering gear rack, linkage and bootsIIIIIIIIIIIIIII
Driveshaft and bootsIIIIIIIIIIIIIII
Suspension ball jointsIIIIIIIIIIIIIII
Air conditioner compressor/refrigerantIIIIIIIIIIIIIII
Exhaust systemIIIIIIIIIIIIIII
MAINTENANCE INTERVALS
MAINTENANCE
ITEM
Normal Maintenance Schedule - Non Turbo Models(CONT.)
I : Inspect and if necessary, adjust, correct, clean or replace.
R : Replace or change.
Page 549 of 687

713
Maintenance
Maintenance Under Severe Usage Conditions - Non Turbo Models
The following items must be serviced more frequently on cars normally used under severe driving conditions. Refer
to the chart below for the appropriate maintenance intervals.
R : Replace I : Inspect and, after inspection, clean, adjust, repair or replace if neces\
sary
MAINTENANCE ITEMMAINTENANCEOPERATIONMAINTENANCE INTERVALSDRIVING
CONDITION
Engine oil and engine oil filterREvery 3,750 miles (6,000 km) or 6 monthsA, B, C, D, E,
F, G, H, I, J, K
Air cleaner filterRMore frequentlyC, E
Spark plugs RMore frequentlyA, B, F, G, H, I, K
Dual clutch transmission fluidREvery 75,000 miles (120,000 km)C, D, E, F, G, H, I, J
HSG (Hybrid Starter & Generator) belt
REvery 30,000 miles (48,000 km) or 24 monthsC, D, E, K
IEvery 3,750 miles (6,000 km)or 6 monthsC, D, E, K
Brake discs and pads, calipers and rotorsIMore frequentlyC, D, E, G, H
Parking brakeIMore frequentlyC, D, G, H
Steering gear rack, linkage and bootsIMore frequentlyC, D, E, F, G
Suspension ball jointsIMore frequentlyC, D, E, F, G
Page 554 of 687

Maintenance
18
7
Exhaust pipe and muffler
Visually inspect the exhaust pipes,
muffler and hangers for cracks, dete-
rioration, or damage. Start the
engine and listen carefully for any
exhaust gas leakage. Tighten con-
nections or replace parts as neces-
sary.
Suspension mounting bolts
Check the suspension connections
for looseness or damage. Retighten
to the specified torque.
Steering gear box, linkage &
boots/lower arm ball joint
With the vehicle stopped and engine
off, check for excessive free-play in
the steering wheel.
Check the linkage for bends or dam-
age. Check the dust boots and ball
joints for deterioration, cracks, or
damage. Replace any damaged
parts.
Drive shafts and boots
Check the drive shafts, boots and
clamps for cracks, deterioration, or
damage. Replace any damaged
parts and, if necessary, repack the
grease.
Air conditioning refrigerant
Check the air conditioning lines and
connections for leakage and dam-
age. When checking engine oil, engine
coolant, brake fluid, and washer fluid,
always be sure to clean the area
around any filler plug, drain plug, or
dipstick before checking or draining
any lubricant or fluid. This is espe-
cially important in dusty or sandy
areas and when the vehicle is used
on unpaved roads. Cleaning the plug
and dipstick areas will prevent dirt
and grit from entering the engine and
other mechanisms that could be
damaged.
CHECKING FLUID LEVELS
Page 603 of 687

767
Maintenance
Fuse NameFuse ratingCircuit Protected
MODULE 210AEngine Room Junction Block (Power Outlet Relay), Wireless Charger, BCM (Body Control Module), USB
Charger, Smart Key Control Module, Audio, BMS (Battery Management System) Control Module,
Audio/Video & Navigation Head Unit, Driver Power Outside Mirror Switch, AMP (Amplifier)
PDM 37.5A[Without Smart Key] Immobilizer Module
[With Smart Key] Smart Key Control Module
MEMORY 110AInstrument Cluster, Driver IMS (Integrated memory system) Module, BCM (Body Control Module), Air
Conditioner Control Module, Auto Light & Photo Sensor, Driver Door Module, Passenger Door Module,
ECM (Electric Chromic Mirror)
MULTI MEDIA15AAudio, Audio/Video & Navigation Head Unit
EWP10AElectric Water Pump (HEV)
MDPS7.5AMDPS (Motor Driven Power Steering) Unit
TAIL GATE10ATail Gate Relay, ICM Relay Box (Fuel Filler Door Relay), Fuel Filler Switch
PDM 115ASmart Key Control Module
MODULE 77.5AFront Seat Warmer Control Module, AC Inverter (110V), Front Air Ventilation Seat Control Module, Rear
Seat Warmer Module, AC Inverter Module
WIPER (RR)15AEngine Room Junction Block (Wiper RR Relay), Rear Wiper Motor
HEATED
STEERING15ABCM (Body Control Module)
SUNROOF20ASunroof Motor