Replace battery KIA NIRO PHEV 2022 User Guide
[x] Cancel search | Manufacturer: KIA, Model Year: 2022, Model line: NIRO PHEV, Model: KIA NIRO PHEV 2022Pages: 710, PDF Size: 10.35 MB
Page 355 of 710

Driving your vehicle
32
5
Wet brakes may impair the vehicle’s
ability to safely slow down; the vehi-
cle may also pull to one side when
the brakes are applied. Applying the
brakes lightly will indicate whether
they have been affected in this way.
Always test your brakes in this fash-
ion after driving through deep water.
To dry the brakes, apply them lightly
while maintaining a safe forward
speed until brake performance
returns to normal.
✽ ✽
NOTICE
Do not depress the brake pedal con-
tinuously without the “ ” indica-
tor ON. The battery may be dis-
charged.
In the event of brake failure
If service brakes fail to operate while
the vehicle is in motion, you can
make an emergency stop with the
parking brake. The stopping dis-
tance, however, will be much greater
than normal.
Disc brakes wear indicator
When your brake pads are worn and
new pads are required, you will hear
a high-pitched warning sound from
your front brakes or rear brakes. You
may hear this sound come and go or
it may occur whenever you depress
the brake pedal.
Please remember that some driving
conditions or climates may cause a
brake squeal when you first apply (or
lightly apply) the brakes. This is nor-
mal and does not indicate a problem
with your brakes.
Always replace the front or rear
brake pads as pairs.
WARNING- Parking
brake
Avoid applying the parking
brake to stop the vehicle while it
is moving except in an emer-
gency situation. Applying the
parking brake while the vehicle
is moving at normal speeds can
cause a sudden loss of control
of the vehicle. If you must use
the parking brake to stop the
vehicle, use great caution in
applying the brake.
CAUTION- Replace brake pads
Do not continue to drive withworn brake pads. Continuing todrive with worn brake pads candamage the braking system andresult in costly brake repairs.
Page 513 of 710
Driving your vehicle
190
5
The use of chains may adversely
affect vehicle handling.
Do not exceed 20 mph (30 km/h) or the chain manufacturer’s recom-
mended speed limit, whichever is
lower.
Drive carefully and avoid bumps, holes, sharp turns, and other road
hazards, which may cause the
vehicle to bounce.
Avoid sharp turns or locked-wheel braking.Use high quality ethylene gly-
col coolant
Your vehicle is delivered with high
quality ethylene glycol coolant in the
cooling system. It is the only type of
coolant that should be used because
it helps prevent corrosion in the cool-
ing system, lubricates the water
pump and prevents freezing. Be sure
to replace or replenish your coolant
in accordance with the maintenance
schedule in chapter 8. Before winter,
have your coolant tested to assure
that its freezing point is sufficient for
the temperatures anticipated during
the winter.
Check battery and cables
Winter puts additional burdens on
the battery system. Visually inspect
the battery and cables as described
in chapter 8. The level of charge in
your battery can be checked by an
authorized Kia dealer or a service
station.
Change to "winter weight" oil
if necessary
In some climates it is recommended
that a lower viscosity "winter weight"
oil be used during cold weather. See
chapter 9 for recommendations. If
you aren't sure what weight oil you
should use, consult an authorized
Kia dealer.
Check spark plugs and ignition
system
Inspect your spark plugs as
described in chapter 8 and replace
them if necessary. Also check all
ignition wiring and components to be
sure they are not cracked, worn or
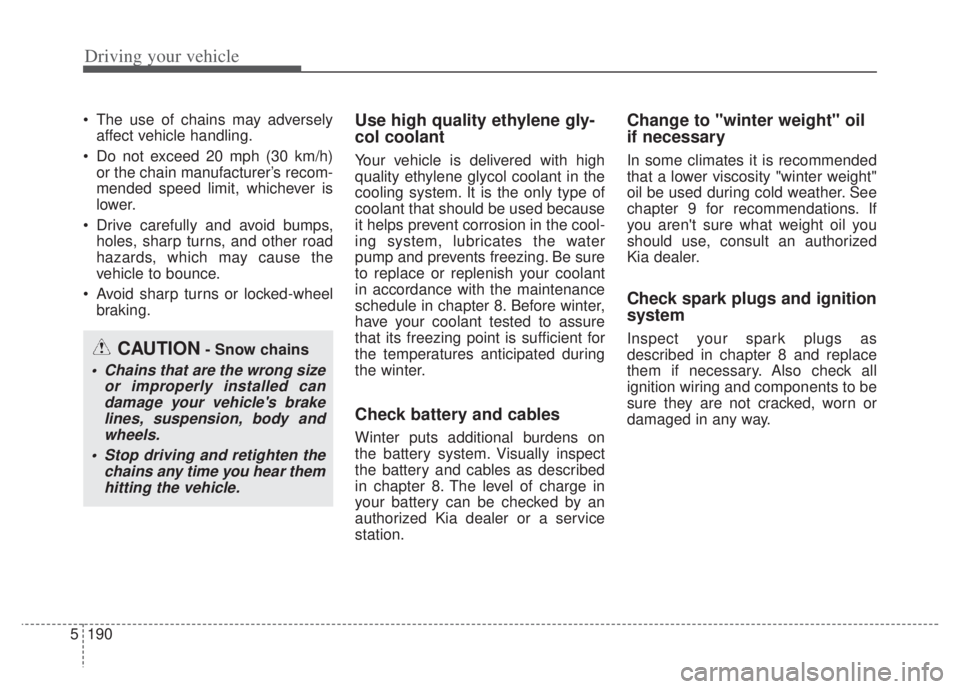
damaged in any way.CAUTION- Snow chains
Chains that are the wrong size or improperly installed candamage your vehicle's brakelines, suspension, body andwheels.
Stop driving and retighten the chains any time you hear themhitting the vehicle.
Page 564 of 710
Maintenance
7
Engine compartment . . . . . . . . . . . . . . . . . . . . . . . . 7-4
Maintenance services . . . . . . . . . . . . . . . . . . . . . . . . 7-5
• Owner’s responsibility . . . . . . . . . . . . . . . . . . . . . . . . . 7-5
• Owner maintenance precautions . . . . . . . . . . . . . . . . . 7-6
Owner maintenance . . . . . . . . . . . . . . . . . . . . . . . . . 7-7
• Owner maintenance schedule . . . . . . . . . . . . . . . . . . . 7-7
Scheduled maintenance service. . . . . . . . . . . . . . . . 7-9
Explanation of scheduled maintenance items . . . 7-15
Checking fluid levels . . . . . . . . . . . . . . . . . . . . . . . 7-18
Engine oil. . . . . . . . . . . . . . . . . . . . . . . . . . . . . . . . . 7-19
• Checking the engine oil level . . . . . . . . . . . . . . . . . . . 7-19
• Changing the engine oil and filter . . . . . . . . . . . . . . . 7-20
Coolant . . . . . . . . . . . . . . . . . . . . . . . . . . . . . . . . . . 7-22\
• Checking the coolant level . . . . . . . . . . . . . . . . . . . . . 7-22
• Engine coolant . . . . . . . . . . . . . . . . . . . . . . . . . . . . . . 7-23
• Inverter coolant . . . . . . . . . . . . . . . . . . . . . . . . . . . . . . 7-23
• Recommended coolant . . . . . . . . . . . . . . . . . . . . . . . . 7-24
• Changing the coolant . . . . . . . . . . . . . . . . . . . . . . . . . 7-26
Brake fluid . . . . . . . . . . . . . . . . . . . . . . . . . . . . . . . 7-27
• Checking the brake fluid level . . . . . . . . . . . . . . . . . . 7-27
Engine clutch actuator fluid . . . . . . . . . . . . . . . . . 7-29
• Checking the engine clutch actuator fluid level . . . . 7-29
Washer fluid . . . . . . . . . . . . . . . . . . . . . . . . . . . . . . 7-31
• Checking the washer fluid level . . . . . . . . . . . . . . . . . 7-31
Parking brake . . . . . . . . . . . . . . . . . . . . . . . . . . . . . 7-32
• Checking the parking brake. . . . . . . . . . . . . . . . . . . . 7-32
Air cleaner. . . . . . . . . . . . . . . . . . . . . . . . . . . . . . . . 7-33
• Filter replacement . . . . . . . . . . . . . . . . . . . . . . . . . . . . 7-33
Climate control air filter . . . . . . . . . . . . . . . . . . . . 7-35
• Filter inspection . . . . . . . . . . . . . . . . . . . . . . . . . . . . . . 7-35
Wiper blades . . . . . . . . . . . . . . . . . . . . . . . . . . . . . . 7-37
• Blade inspection . . . . . . . . . . . . . . . . . . . . . . . . . . . . . . 7-37
• Blade replacement . . . . . . . . . . . . . . . . . . . . . . . . . . . . 7-37
Battery (Plug-in Hybrid) . . . . . . . . . . . . . . . . . . . . 7-40
• For best battery service . . . . . . . . . . . . . . . . . . . . . . . 7-40
• Recharging the battery . . . . . . . . . . . . . . . . . . . . . . . . 7-41
• Reset items . . . . . . . . . . . . . . . . . . . . . . . . . . . . . . . . . . 7-42\
Tires and wheels . . . . . . . . . . . . . . . . . . . . . . . . . . . 7-43
• Tire care . . . . . . . . . . . . . . . . . . . . . . . . . . . . . . . . . . . . \
7-43
• Recommended cold tire inflation pressures . . . . . . . 7-43
• Tire pressure . . . . . . . . . . . . . . . . . . . . . . . . . . . . . . . . 7-44
• Checking tire inflation pressure. . . . . . . . . . . . . . . . . 7-44
• Tire rotation . . . . . . . . . . . . . . . . . . . . . . . . . . . . . . . . . 7-45
• Wheel alignment and tire balance . . . . . . . . . . . . . . . 7-46
• Tire replacement . . . . . . . . . . . . . . . . . . . . . . . . . . . . . 7-47
• Wheel replacement . . . . . . . . . . . . . . . . . . . . . . . . . . . 7-47
• Tire traction . . . . . . . . . . . . . . . . . . . . . . . . . . . . . . . . . 7-48
• Tire maintenance . . . . . . . . . . . . . . . . . . . . . . . . . . . . 7-48
• Tire sidewall labeling . . . . . . . . . . . . . . . . . . . . . . . . . 7-48
Page 617 of 710

Maintenance
54
7
Occupant Distribution: Designated
seating positions.
Outward Facing Sidewall: The side
of a asymmetrical tire that has a par-
ticular side that faces outward when
mounted on a vehicle. The outward
facing sidewall bears white lettering
or bears manufacturer, brand, and/or
model name molding that is higher or
deeper than the same moldings on
the inner facing sidewall.
Passenger (P-Metric) Tire: A tire
used on passenger cars and some
light duty trucks and multipurpose
vehicles.
Ply: A layer of rubber-coated parallel
cords
Pneumatic tire: A mechanical
device made of rubber, chemicals,
fabric and steel or other materials,
that, when mounted on an automo-
tive wheel, provides the traction and
contains the gas or fluid that sustains
the load. Production options weight:
The
combined weight of installed regular
production options weighing over 5
lb.(2.3 kg) in excess of the standard
items which they replace, not previ-
ously considered in curb weight or
accessory weight, including heavy
duty brakes, ride levelers, roof rack,
heavy duty battery, and special trim.
Recommended Inflation Pressure:
Vehicle manufacturer's recommend-
ed tire inflation pressure and shown
on the tire placard.
Radial Ply Tire: A pneumatic tire in
which the ply cords that extend to the
beads are laid at 90 degrees to the
centerline of the tread.
Rim: A metal support for a tire and
upon which the tire beads are seat-
ed.
Sidewall: The portion of a tire
between the tread and the bead. Speed Rating:
An alphanumeric
code assigned to a tire indicating the
maximum speed at which a tire can
operate.
Traction: The friction between the
tire and the road surface. The
amount of grip provided.
Tread: The portion of a tire that
comes into contact with the road.
Treadwear Indicators: Narrow
bands, sometimes called "wear
bars," that show across the tread of a
tire when only 1/16 inch of tread
remains.
UTQGS: Uniform Tire Quality
Grading Standards, a tire information
system that provides consumers with
ratings for a tire's traction, tempera-
ture and treadwear. Ratings are
determined by tire manufacturers
using government testing proce-
dures. The ratings are molded into
the sidewall of the tire.
Vehicle Capacity Weight: The num-
ber of designated seating positions
multiplied by 150 lbs. (68kg) plus the
rated cargo and luggage load.
Page 622 of 710
759
Maintenance
FUSES
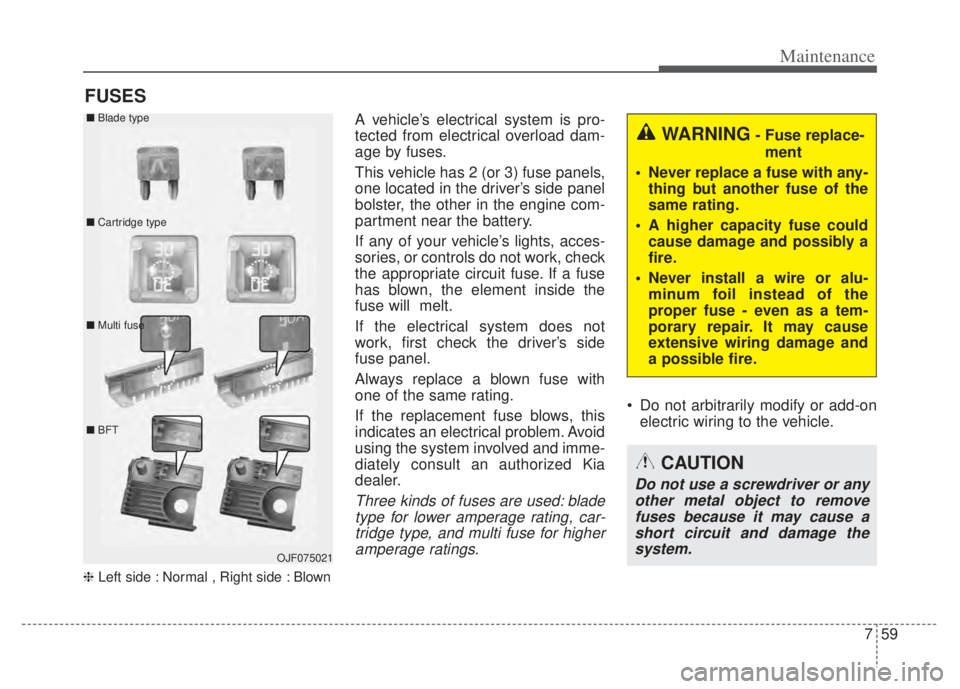
❈Left side : Normal , Right side : Blown
A vehicle’s electrical system is pro-
tected from electrical overload dam-
age by fuses.
This vehicle has 2 (or 3) fuse panels,
one located in the driver’s side panel
bolster, the other in the engine com-
partment near the battery.
If any of your vehicle’s lights, acces-
sories, or controls do not work, check
the appropriate circuit fuse. If a fuse
has blown, the element inside the
fuse will melt.
If the electrical system does not
work, first check the driver’s side
fuse panel.
Always replace a blown fuse with
one of the same rating.
If the replacement fuse blows, this
indicates an electrical problem. Avoid
using the system involved and imme-
diately consult an authorized Kia
dealer.
Three kinds of fuses are used: blade
type for lower amperage rating, car-tridge type, and multi fuse for higheramperage ratings.
Do not arbitrarily modify or add-on electric wiring to the vehicle.
WARNING- Fuse replace-
ment
Never replace a fuse with any- thing but another fuse of the
same rating.
A higher capacity fuse could cause damage and possibly a
fire.
Never install a wire or alu- minum foil instead of the
proper fuse - even as a tem-
porary repair. It may cause
extensive wiring damage and
a possible fire.
CAUTION
Do not use a screwdriver or anyother metal object to removefuses because it may cause ashort circuit and damage thesystem.
OJF075021
■
Blade type
■ Cartridge type
■ Multi fuse
■ BFT
Page 623 of 710
Maintenance
60
7
✽ ✽
NOTICE
• When replacing fuse, turn the
ignition “OFF” and turn off
switches of all electrical devices
then remove battery (-) terminal.
• The actual fuse/relay panel label may differ from equipped items.
Inner panel fuse replacement
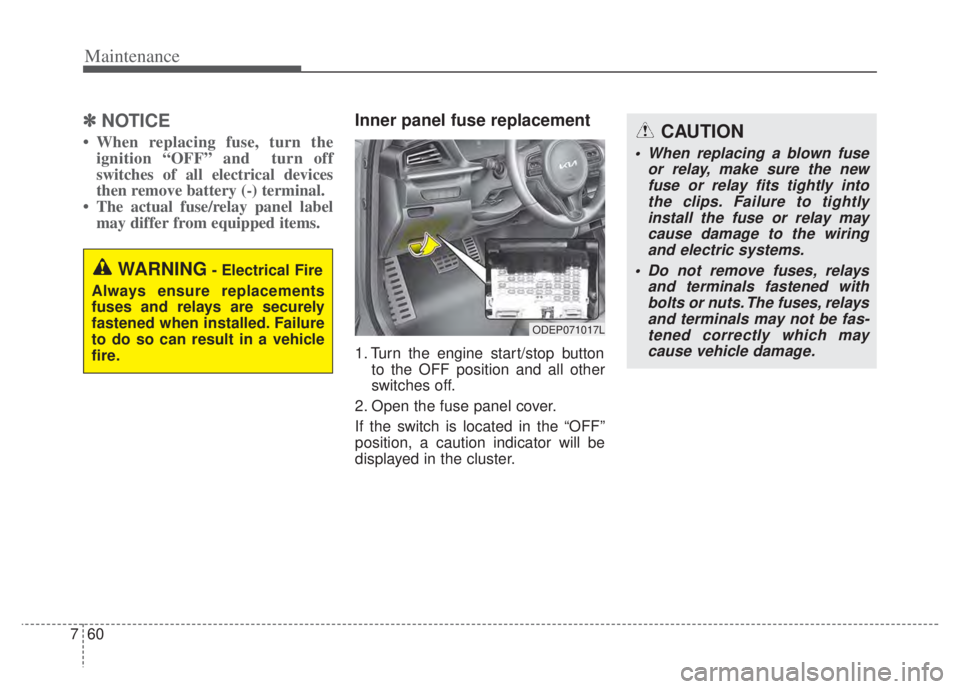
1. Turn the engine start/stop button
to the OFF position and all other
switches off.
2. Open the fuse panel cover.
If the switch is located in the “OFF”
position, a caution indicator will be
displayed in the cluster.
WARNING- Electrical Fire
Always ensure replacements
fuses and relays are securely
fastened when installed. Failure
to do so can result in a vehicle
fire.
CAUTION
When replacing a blown fuse or relay, make sure the newfuse or relay fits tightly intothe clips. Failure to tightlyinstall the fuse or relay maycause damage to the wiringand electric systems.
Do not remove fuses, relays and terminals fastened withbolts or nuts. The fuses, relaysand terminals may not be fas-tened correctly which maycause vehicle damage.
ODEP071017L
Page 626 of 710

763
Maintenance
3. Check the removed fuse; replace itif it is blown. To remove or insert
the fuse, use the fuse puller in the
engine compartment fuse panel.
4. Push in a new fuse of the same rating, and make sure it fits tightly
in the clips. If it fits loosely, consult
an authorized Kia dealer.Multi fuse
If the multi fuse is blown, it must be
removed as follows:
1. Turn off the engine.
2. Disconnect the negative batterycable.
3. Remove the nuts shown in the pic- ture above.
4. Replace the fuse with a new one of the same rating.
5. Reverse these steps to reinstall the multi fuse.
✽ ✽NOTICE
Do not disassemble nor assemble the
multi fuse when it is secured with
nuts and bolts. Incorrect or partial
assembly torque may cause a fire.
Have the vehicle checked by an
authorized Kia dealer.
ODEP079022
CAUTION
After checking the fuse panel in
the engine compartment,securely install the fuse panelcover to protect against anyelectrical failure which mayoccur from water contact. Listenfor the audible clicking sound toensure the fuse panel cover issecurely fastened.
Page 627 of 710
Maintenance
64
7
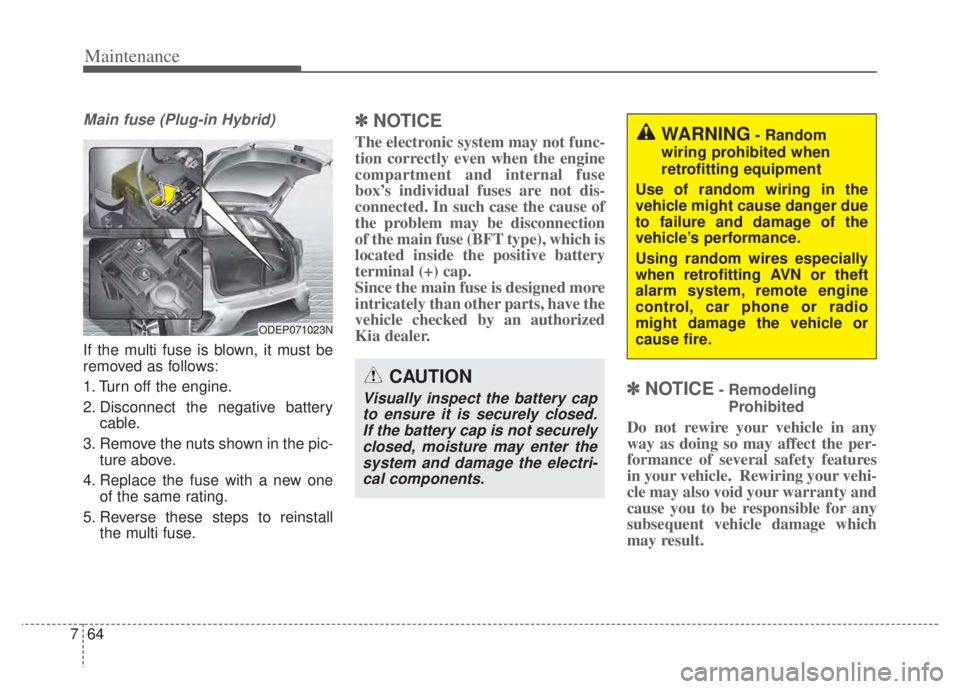
Main fuse (Plug-in Hybrid)
If the multi fuse is blown, it must be
removed as follows:
1. Turn off the engine.
2. Disconnect the negative battery
cable.
3. Remove the nuts shown in the pic- ture above.
4. Replace the fuse with a new one of the same rating.
5. Reverse these steps to reinstall the multi fuse.
✽ ✽NOTICE
The electronic system may not func-
tion correctly even when the engine
compartment and internal fuse
box’s individual fuses are not dis-
connected. In such case the cause of
the problem may be disconnection
of the main fuse (BFT type), which is
located inside the positive battery
terminal (+) cap.
Since the main fuse is designed more
intricately than other parts, have the
vehicle checked by an authorized
Kia dealer.
✽ ✽NOTICE- Remodeling
Prohibited
Do not rewire your vehicle in any
way as doing so may affect the per-
formance of several safety features
in your vehicle. Rewiring your vehi-
cle may also void your warranty and
cause you to be responsible for any
subsequent vehicle damage which
may result.
CAUTION
Visually inspect the battery capto ensure it is securely closed.If the battery cap is not securelyclosed, moisture may enter thesystem and damage the electri-cal components.
WARNING- Random
wiring prohibited when
retrofitting equipment
Use of random wiring in the
vehicle might cause danger due
to failure and damage of the
vehicle’s performance.
Using random wires especially
when retrofitting AVN or theft
alarm system, remote engine
control, car phone or radio
might damage the vehicle or
cause fire.
ODEP071023N
Page 650 of 710
787
Maintenance
LIGHT BULBS
Bulb replacement precaution
Please keep extra bulbs on hand
with appropriate wattage ratings in
case of emergencies.
Refer to “Bulb Wattage” in chapter 8.
When changing lamps, first turn off
the engine at a safe place, firmly
apply the parking brake and detach
the battery’s negative (-) terminal.
Use only bulbs of the specifiedwattage.✽ ✽ NOTICE
• If the light bulb or lamp connector
is removed while the lamp is still
on, the fuse box's electronic sys-
tem may log it as a malfunction.
Therefore, a lamp malfunction
incident may be recorded as a
Diagnostic Trouble Code (DTC) in
the fuse box.
• It is normal for an operating lamp to flicker momentarily. This is due
to a stabilization function of the
vehicle’s electronic control device.
If the lamp lights up normally
after momentarily blinking, then
it is functioning as normal.
However, if the lamp continues to
flicker several times or turns off
completely, there may be an error
in the vehicle’s electronic control
device. Please have the vehicle
checked by an authorized Kia
dealer immediately.
✽ ✽ NOTICE
We recommend that the headlight
aiming be adjusted by an authorized
Kia dealer after an accident or after
the headlight assembly is reinstalled.
WARNING- Working on
the lights
Prior to working on the light,
firmly apply the parking brake,
ensure that the engine
start/stop button is in OFF posi-
tion and turn off the lights to
avoid sudden movement of the
vehicle and burning your fingers
or receiving an electric shock.
CAUTION -Light replace-
ment
Be sure to replace the burned- out bulb with one of the samewattage rating. Otherwise, itmay cause damage to the fuseor electric wiring system.
CAUTION -Headlamp
Lens
To prevent damage, do notclean the headlamp lens withchemical solvents or strongdetergents.
Page 700 of 710

Index
2I
Air bag - advanced supplemental restraint system . . . . 3-47Adding equipment to or modifying your air bag-equipped vehicle . . . . . . . . . . . . . . . . . . . . . . . . . . 3-73
Air bag warning label. . . . . . . . . . . . . . . . . . . . . . . . 3-73
Air bag warning light . . . . . . . . . . . . . . . . . . . . . . . . 3-50
Curtain air bag . . . . . . . . . . . . . . . . . . . . . . . . . . . . . 3-67
Driver's and passenger's front air bag . . . . . . . . . . . 3-62
How does the air bag system operate? . . . . . . . . . . . 3-48
Occupant Detection System (ODS) . . . . . . . . . . . . . 3-54
Side air bag. . . . . . . . . . . . . . . . . . . . . . . . . . . . . . . . 3-65
SRS Care . . . . . . . . . . . . . . . . . . . . . . . . . . . . . . . . . 3-72
SRS components and functions . . . . . . . . . . . . . . . . 3-51
Air cleaner . . . . . . . . . . . . . . . . . . . . . . . . . . . . . . . . . . 7-33\
Filter replacement. . . . . . . . . . . . . . . . . . . . . . . . . . . 7-33
Air conditioner compressor label . . . . . . . . . . . . . . . . . 8-12
Air conditioning system . . . . . . . . . . . . . . . . . . . . . . . . . 8-7
Appearance care . . . . . . . . . . . . . . . . . . . . . . . . . . . . . 7-105 Exterior care . . . . . . . . . . . . . . . . . . . . . . . . . . . . . . 7-105
Interior care . . . . . . . . . . . . . . . . . . . . . . . . . . . . . . 7-111
Automatic climate control system . . . . . . . . . . . . . . . 4-141 Air Conditioning refrigerant label . . . . . . . . . . . . . 4-155
Automatic heating and air conditioning. . . . . . . . . 4-142
Automatic ventilation . . . . . . . . . . . . . . . . . . . . . . . 4-152
Checking the amount of air conditioner refrigerantand compressor lubricant . . . . . . . . . . . . . . . . . . . 4-156
Climate control air filter. . . . . . . . . . . . . . . . . . . . . 4-154 Manual heating and air conditioning . . . . . . . . . . . 4-144
Recirculated air at washer fluid spray . . . . . . . . . . 4-153
Sunroof inside air recirculation . . . . . . . . . . . . . . . 4-153
System operation . . . . . . . . . . . . . . . . . . . . . . . . . . 4-150
Battery (Plug-in Hybrid). . . . . . . . . . . . . . . . . . . . . . . . 7-40 For best battery service . . . . . . . . . . . . . . . . . . . . . . 7-40
Recharging the battery . . . . . . . . . . . . . . . . . . . . . . . 7-41
Reset items . . . . . . . . . . . . . . . . . . . . . . . . . . . . . . . . 7-42
Before driving . . . . . . . . . . . . . . . . . . . . . . . . . . . . . . . . . 5-5 Before entering vehicle . . . . . . . . . . . . . . . . . . . . . . . 5-5
Before starting . . . . . . . . . . . . . . . . . . . . . . . . . . . . . . 5-5
Necessary inspections . . . . . . . . . . . . . . . . . . . . . . . . 5-5
Blind-Spot Collision Warning (BCW) . . . . . . . . . . . . . 5-96 Blind-Spot Collision Warning setting and activ ation. 5-97
Warning message and function control . . . . . . . . . . 5-99
Brake fluid . . . . . . . . . . . . . . . . . . . . . . . . . . . . . . . . . . 7-27\
Checking the brake fluid level . . . . . . . . . . . . . . . . . 7-27
Brake system. . . . . . . . . . . . . . . . . . . . . . . . . . . . . . . . . 5-31 Anti-lock brake system (ABS) . . . . . . . . . . . . . . . . . 5-45
AUTO HOLD . . . . . . . . . . . . . . . . . . . . . . . . . . . . . . 5-41
Electronic Parking Brake (EPB) . . . . . . . . . . . . . . . 5-35
Electronic Stability Control (ESC) . . . . . . . . . . . . . 5-47
Good braking practices . . . . . . . . . . . . . . . . . . . . . . 5-53
Hill-start Assist Control (HAC) . . . . . . . . . . . . . . . . 5-52
Parking brake – Foot type . . . . . . . . . . . . . . . . . . . . 5-33
A
B