brake KIA Opirus 2004 1.G Workshop Manual
[x] Cancel search | Manufacturer: KIA, Model Year: 2004, Model line: Opirus, Model: KIA Opirus 2004 1.GPages: 296, PDF Size: 29.34 MB
Page 237 of 296
In case of an emergency24
6
1
2
3
4
5
6
7
8
9
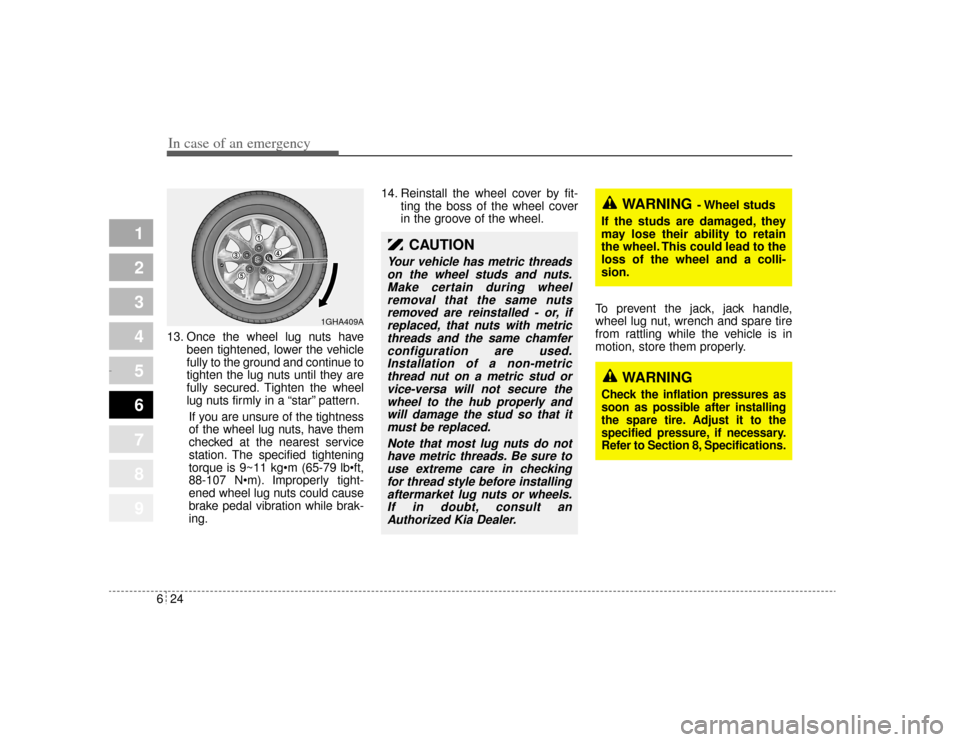
13. Once the wheel lug nuts have
been tightened, lower the vehicle
fully to the ground and continue to
tighten the lug nuts until they are
fully secured. Tighten the wheel
lug nuts firmly in a “star” pattern.
If you are unsure of the tightness
of the wheel lug nuts, have them
checked at the nearest service
station. The specified tightening
torque is 9~11 kg m (65-79 lbft,
88-107 N m). Improperly tight-
ened wheel lug nuts could cause
brake pedal vibration while brak-
ing. 14. Reinstall the wheel cover by fit-
ting the boss of the wheel cover
in the groove of the wheel.
To prevent the jack, jack handle,
wheel lug nut, wrench and spare tire
from rattling while the vehicle is in
motion, store them properly.
1GHA409A
CAUTION
Your vehicle has metric threadson the wheel studs and nuts.Make certain during wheelremoval that the same nutsremoved are reinstalled - or, ifreplaced, that nuts with metricthreads and the same chamferconfiguration are used.Installation of a non-metricthread nut on a metric stud orvice-versa will not secure thewheel to the hub properly andwill damage the stud so that itmust be replaced.
Note that most lug nuts do nothave metric threads. Be sure touse extreme care in checkingfor thread style before installingaftermarket lug nuts or wheels.If in doubt, consult anAuthorized Kia Dealer.
WARNING
- Wheel studs
If the studs are damaged, they
may lose their ability to retain
the wheel. This could lead to the
loss of the wheel and a colli-
sion.
WARNING
Check the inflation pressures as
soon as possible after installing
the spare tire. Adjust it to the
specified pressure, if necessary.
Refer to Section 8, Specifications.
Opirus CAN 6-1.qxd 7/8/03 2:22 PM Page 24
Page 238 of 296
1
2
3
4
5
6
7
8
91
2
3
4
5
6
7
8
9
Maintenance services / 7-3
Maintenance schedule / 7-5
Owner maintenance / 7-11
Engine compartment / 7-14
Engine oil and oil filter / 7-15
Engine cooling system / 7-18
Brakes / 7-21
Parking brake / 7-22
Drive belts / 7-23
Power steering / 7-24
Steering wheel / 7-25
Automatic transaxle / 7-25
Lubricants and fluids / 7-28
Air cleaner / 7-29
Air conditioner air filter / 7-30
Wiper blades / 7-32
Battery / 7-34
Tires and wheels / 7-37
Bulb replacement / 7-44
Maintenance
Opirus CAN 7-1.qxd 7/8/03 2:25 PM Page 1
Page 245 of 296
Maintenance87
1
2
3
4
5
6
7
8
9
OWNER MAINTENANCE Owner maintenance schedule The following lists are vehicle checks
and inspections that should be per-
formed by the owner or qualified
service technician at the frequencies
indicated to help ensure safe,
dependable operation of your vehi-
cle.
Any adverse conditions should be
brought to the attention of your deal-
er or qualified service technician or
service advice as soon as possible.
These Owner Maintenance Checks
are generally not covered by war-
ranties and you may be charged for
labor, parts and lubricants used.
When you stop for fuel: Check the engine oil level.
Check coolant level in coolantreservoir.
Check the windshield washer fluid level.
Look for low or under-inflated tires.
While operating your vehicle: Note any changes in the sound of the exhaust or any smell of
exhaust fumes in the vehicle.
Check for vibrations in the steering wheel. Notice any increased steer-
ing effort or looseness in the steer-
ing wheel, or change in its straight-
ahead position.
Notice if your vehicle constantly turns slightly or “pulls” to one side
when traveling on smooth, level
road.
When stopping, listen and check for strange sounds, pulling to one
side, increased brake pedal travel
or “hard-to-push” brake pedal.
If any slipping or changes in the operation of your transaxle occurs,
check the transaxle fluid level.
Check automatic transaxle P (Park) function.
Check parking brake.
Check for fluid leaks under your vehicle (water dripping from the air
conditioning system after use is
normal).
WARNING
Be careful when checking your
engine coolant level when the
engine is hot. Scalding hot
coolant and steam may blow out
under pressure. This could
cause serious injury.
Opirus CAN 7-1.qxd 7/8/03 2:25 PM Page 8
Page 246 of 296
79
Maintenance
1
2
3
4
5
6
7
8
9
At least monthly: Check coolant level in the coolantrecovery reservoir.
Check the operation of all exterior lights, including the stoplights, turn
signals and hazard warning flash-
ers.
Check the inflation pressures of all tires including the spare.
At least twice a year
(i.e., every Spring and Fall) : Check radiator, heater and air con- ditioning hoses for leaks or da-
mage.
Check windshield washer spray and wiper operation. Clean wiper
blades with clean cloth dampened
with washer fluid.
Check headlight alignment.
Check muffler, exhaust pipes, shields and clamps.
Check the lap/shoulder belts for wear and function.
Check for worn tires and loose wheel lug nuts.
At least once a year : Clean body and door drain holes.
Lubricate door hinges and checks,and hood hinges.
Lubricate door and hood locks and latches.
Lubricate door rubber weather- strips.
Check the air conditioning system before the warm weather season.
Check the power steering fluid level.
Inspect and lubricate automatic transaxle linkage and controls.
Clean battery and terminals.
Check the brake fluid level.
Opirus CAN 7-1.qxd 7/8/03 2:25 PM Page 9
Page 248 of 296
711
Maintenance
1
2
3
4
5
6
7
8
9
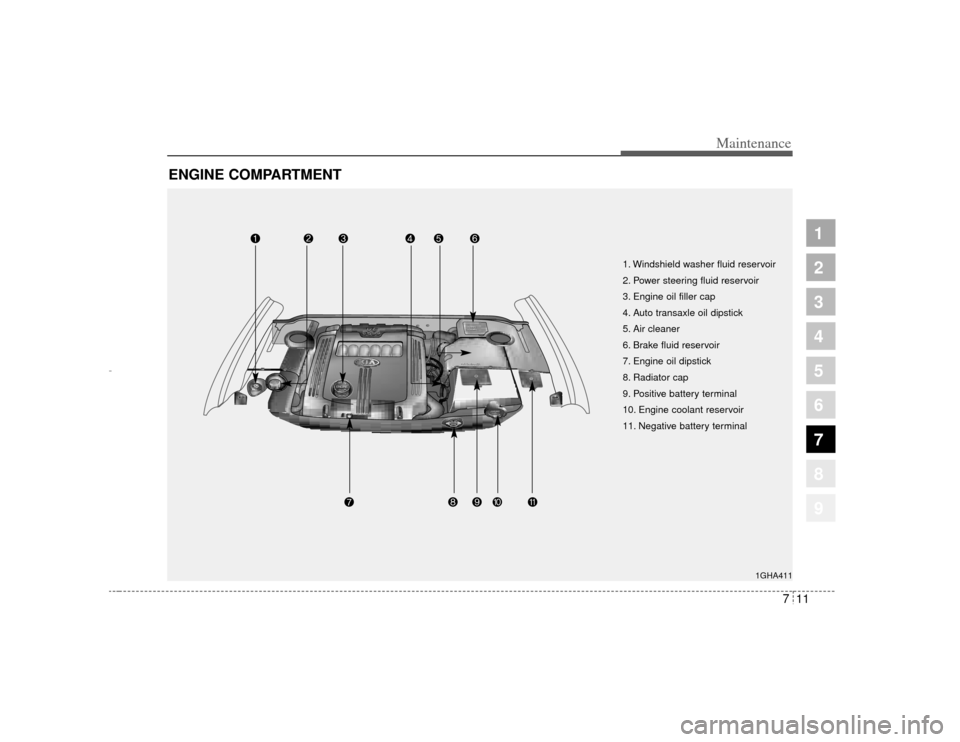
ENGINE COMPARTMENT
1GHA411
1. Windshield washer fluid reservoir
2. Power steering fluid reservoir
3. Engine oil filler cap
4. Auto transaxle oil dipstick
5. Air cleaner
6. Brake fluid reservoir
7. Engine oil dipstick
8. Radiator cap
9. Positive battery terminal
10. Engine coolant reservoir
11. Negative battery terminal
Opirus CAN 7-1.qxd 7/8/03 2:25 PM Page 11
Page 255 of 296
Maintenance18
7
1
2
3
4
5
6
7
8
9
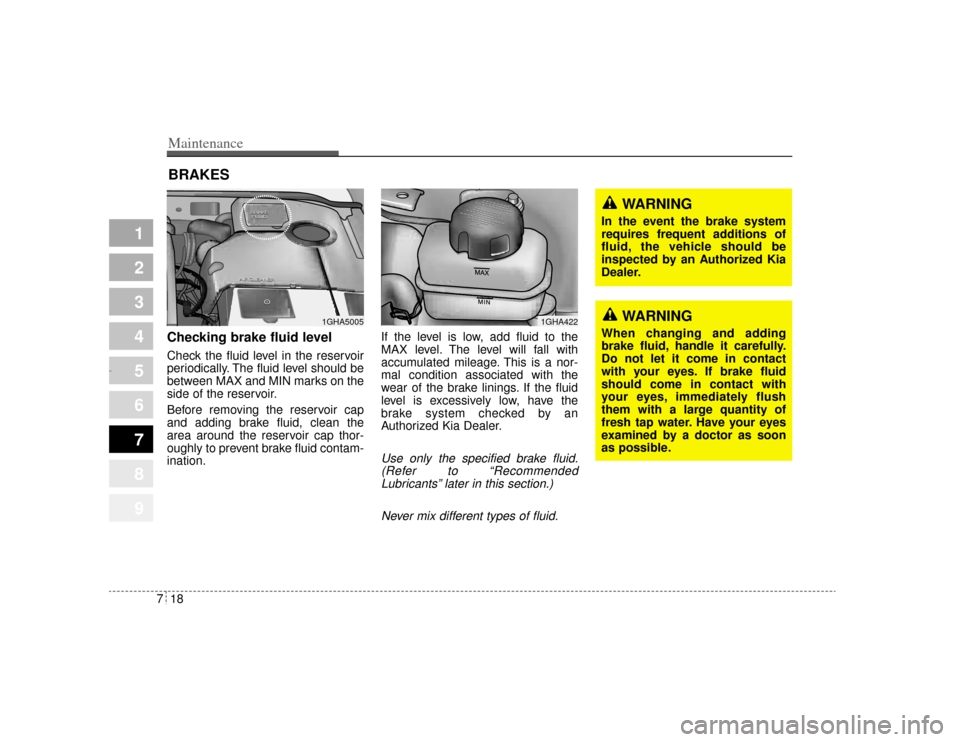
BRAKESChecking brake fluid level Check the fluid level in the reservoir
periodically. The fluid level should be
between MAX and MIN marks on the
side of the reservoir.
Before removing the reservoir cap
and adding brake fluid, clean the
area around the reservoir cap thor-
oughly to prevent brake fluid contam-
ination. If the level is low, add fluid to the
MAX level. The level will fall with
accumulated mileage. This is a nor-
mal condition associated with the
wear of the brake linings. If the fluid
level is excessively low, have the
brake system checked by an
Authorized Kia Dealer.
Use only the specified brake fluid.
(Refer to “RecommendedLubricants” later in this section.)
Never mix different types of fluid.
1GHA422
WARNING
When changing and adding
brake fluid, handle it carefully.
Do not let it come in contact
with your eyes. If brake fluid
should come in contact with
your eyes, immediately flush
them with a large quantity of
fresh tap water. Have your eyes
examined by a doctor as soon
as possible.
WARNING
In the event the brake system
requires frequent additions of
fluid, the vehicle should be
inspected by an Authorized Kia
Dealer.
1GHA5005
Opirus CAN 7-1.qxd 7/8/03 2:25 PM Page 18
Page 256 of 296
719
Maintenance
1
2
3
4
5
6
7
8
9
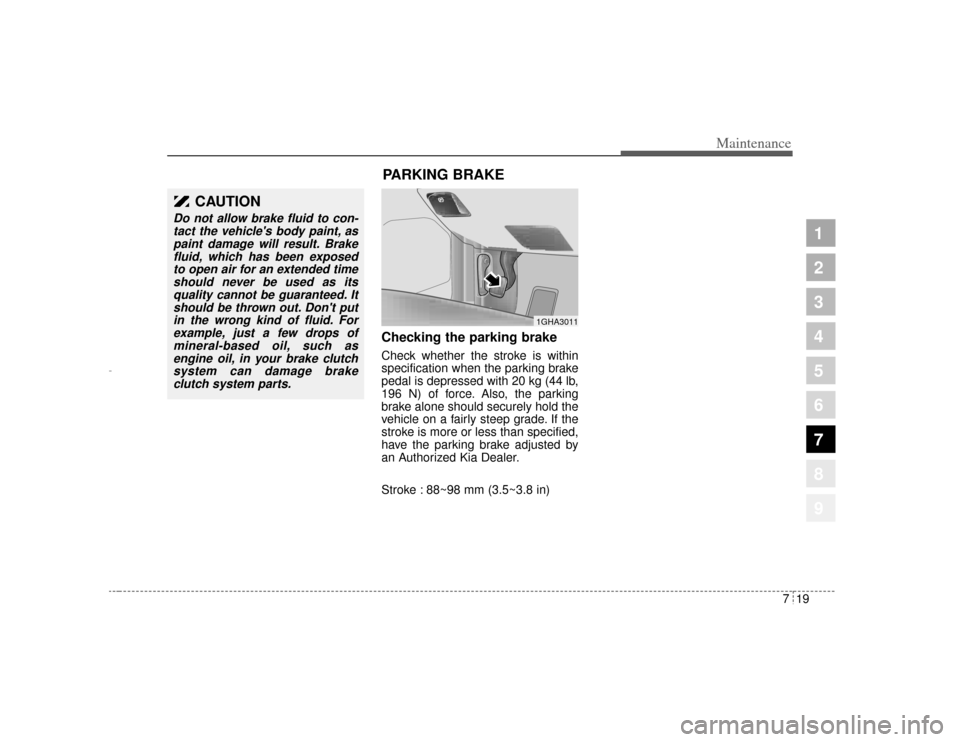
Checking the parking brake Check whether the stroke is within
specification when the parking brake
pedal is depressed with 20 kg (44 lb,
196 N) of force. Also, the parking
brake alone should securely hold the
vehicle on a fairly steep grade. If the
stroke is more or less than specified,
have the parking brake adjusted by
an Authorized Kia Dealer.
Stroke : 88~98 mm (3.5~3.8 in)
1GHA3011
PARKING BRAKE
CAUTION
Do not allow brake fluid to con-tact the vehicle's body paint, aspaint damage will result. Brakefluid, which has been exposedto open air for an extended timeshould never be used as itsquality cannot be guaranteed. Itshould be thrown out. Don't putin the wrong kind of fluid. Forexample, just a few drops ofmineral-based oil, such asengine oil, in your brake clutchsystem can damage brakeclutch system parts.
Opirus CAN 7-1.qxd 7/8/03 2:25 PM Page 19
Page 259 of 296
Maintenance22
7
1
2
3
4
5
6
7
8
9
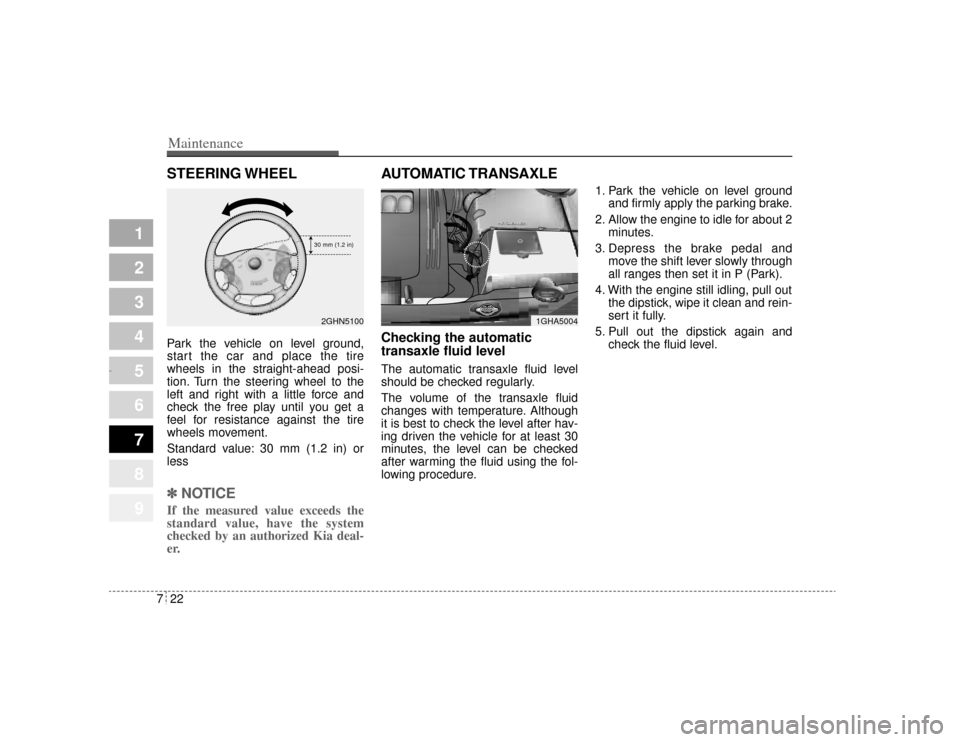
STEERING WHEELPark the vehicle on level ground,
start the car and place the tire
wheels in the straight-ahead posi-
tion. Turn the steering wheel to the
left and right with a little force and
check the free play until you get a
feel for resistance against the tire
wheels movement.
Standard value: 30 mm (1.2 in) or
less✽ ✽
NOTICEIf the measured value exceeds the
standard value, have the system
checked by an authorized Kia deal-
er.
AUTOMATIC TRANSAXLEChecking the automatic
transaxle fluid level The automatic transaxle fluid level
should be checked regularly.
The volume of the transaxle fluid
changes with temperature. Although
it is best to check the level after hav-
ing driven the vehicle for at least 30
minutes, the level can be checked
after warming the fluid using the fol-
lowing procedure. 1. Park the vehicle on level ground
and firmly apply the parking brake.
2. Allow the engine to idle for about 2 minutes.
3. Depress the brake pedal and move the shift lever slowly through
all ranges then set it in P (Park).
4. With the engine still idling, pull out the dipstick, wipe it clean and rein-
sert it fully.
5. Pull out the dipstick again and check the fluid level.
1.2 in (30 mm)2GHN5100
1GHA5004
30 mm (1.2 in)
Opirus CAN 7-1.qxd 7/8/03 2:25 PM Page 22
Page 260 of 296
723
Maintenance
1
2
3
4
5
6
7
8
9
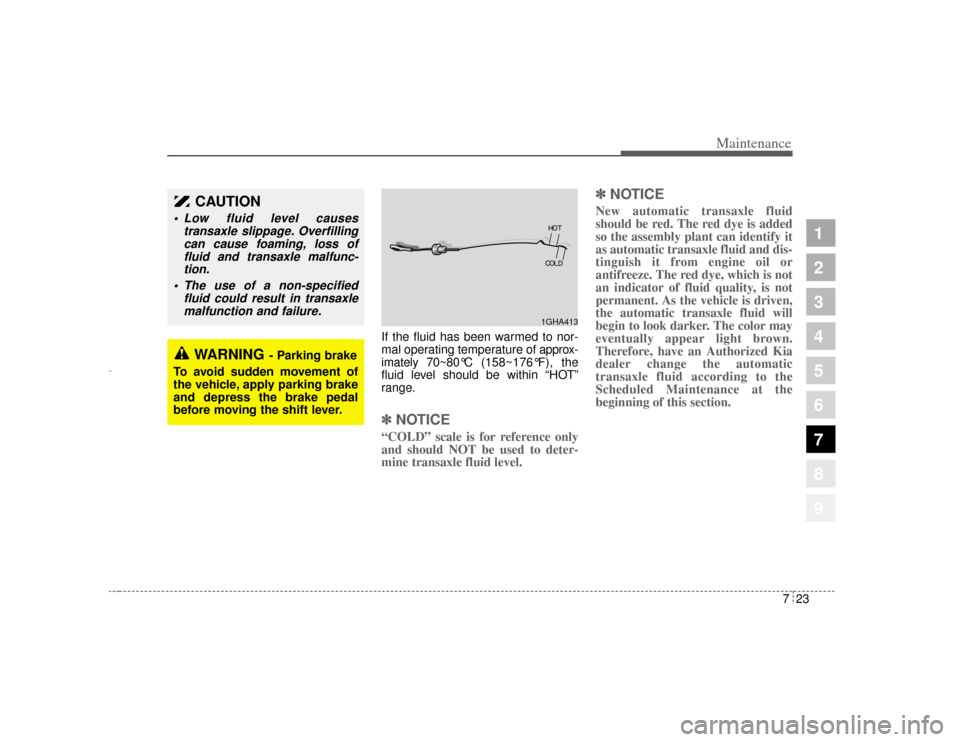
If the fluid has been warmed to nor-
mal operating temperature of approx-
imately 70~80° C (158~176°F), the
fluid level should be within “HOT”
range.✽ ✽ NOTICE“COLD” scale is for reference only
and should NOT be used to deter-
mine transaxle fluid level.
✽ ✽NOTICENew automatic transaxle fluid
should be red. The red dye is added
so the assembly plant can identify it
as automatic transaxle fluid and dis-
tinguish it from engine oil or
antifreeze. The red dye, which is not
an indicator of fluid quality, is not
permanent. As the vehicle is driven,
the automatic transaxle fluid will
begin to look darker. The color may
eventually appear light brown.
Therefore, have an Authorized Kia
dealer change the automatic
transaxle fluid according to the
Scheduled Maintenance at the
beginning of this section.
CAUTION
Low fluid level causes
transaxle slippage. Overfillingcan cause foaming, loss offluid and transaxle malfunc-tion.
The use of a non-specified fluid could result in transaxlemalfunction and failure.
WARNING
- Parking brake
To avoid sudden movement of
the vehicle, apply parking brake
and depress the brake pedal
before moving the shift lever.
1GHA413
Opirus CAN 7-1.qxd 7/8/03 2:25 PM Page 23
Page 273 of 296
Maintenance36
7
1
2
3
4
5
6
7
8
9
Disc brake pads should be inspected
for wear whenever tires are rotated.✽ ✽ NOTICERotate radial tires that have an
asymmetric tread pattern only from
front to rear and not from right to
left.
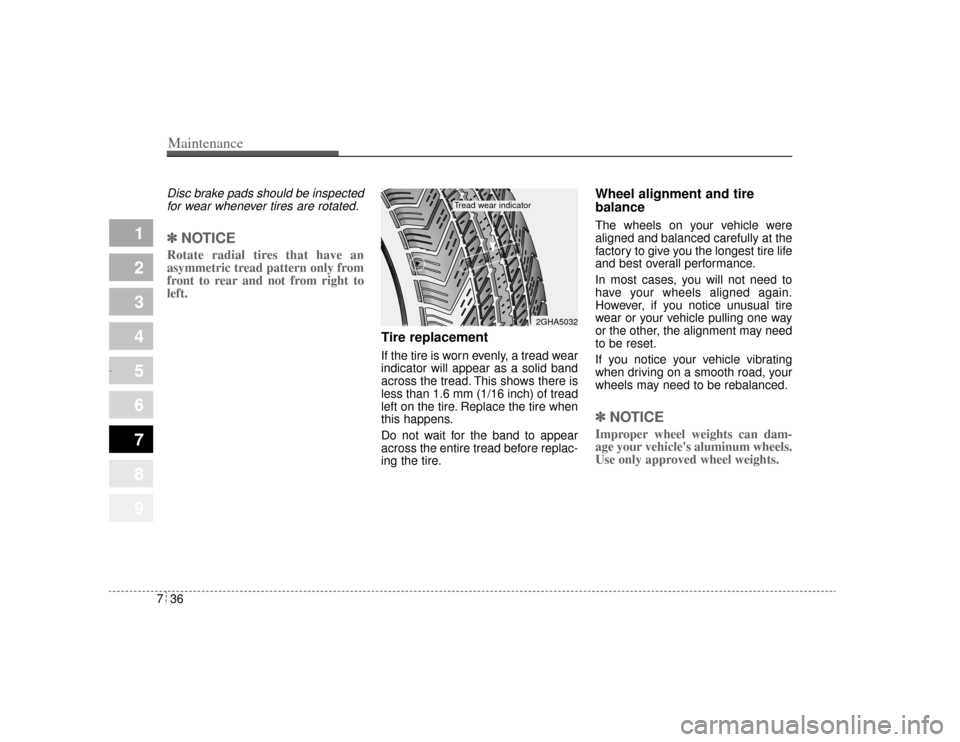
Tire replacementIf the tire is worn evenly, a tread wear
indicator will appear as a solid band
across the tread. This shows there is
less than 1.6 mm (1/16 inch) of tread
left on the tire. Replace the tire when
this happens.
Do not wait for the band to appear
across the entire tread before replac-
ing the tire.
Wheel alignment and tire
balance The wheels on your vehicle were
aligned and balanced carefully at the
factory to give you the longest tire life
and best overall performance.
In most cases, you will not need to
have your wheels aligned again.
However, if you notice unusual tire
wear or your vehicle pulling one way
or the other, the alignment may need
to be reset.
If you notice your vehicle vibrating
when driving on a smooth road, your
wheels may need to be rebalanced.✽ ✽NOTICEImproper wheel weights can dam-
age your vehicle's aluminum wheels.
Use only approved wheel weights.
2GHA5032
Tread wear indicator
Opirus CAN 7-1.qxd 7/8/03 2:26 PM Page 36