clock KIA Opirus 2007 1.G User Guide
[x] Cancel search | Manufacturer: KIA, Model Year: 2007, Model line: Opirus, Model: KIA Opirus 2007 1.GPages: 283, PDF Size: 18.42 MB
Page 131 of 283
![KIA Opirus 2007 1.G User Guide 3121
Knowing your vehicle
✦
✦
In case that you’d like to know
driving time (DT).
Please select the mode of driving time by
adjusting [TRIP] button, mode transition
function key of the concentrat KIA Opirus 2007 1.G User Guide 3121
Knowing your vehicle
✦
✦
In case that you’d like to know
driving time (DT).
Please select the mode of driving time by
adjusting [TRIP] button, mode transition
function key of the concentrat](/img/2/2890/w960_2890-130.png)
3121
Knowing your vehicle
✦
✦
In case that you’d like to know
driving time (DT).
Please select the mode of driving time by
adjusting [TRIP] button, mode transition
function key of the concentration key.
[Mode screen of driving time]
The figure that is displayed in the dis-play part of trip information displays
driving time until the present.
The range displayed driving time is from 0:00 to 99:59 and driving time is
accumulated from 0:00 again when
driving time is beyond 99:59.
The driving time is displayed by ‘---’ when ACC becomes on in off status.
If [RESET] button of concentration key is pressed more than one second, the
driving time is initialized into 0:00 and
the driving time is accumulated again
from the current.
✦ ✦
In the case that you’d like to
adjust the clock and the calen-
dar
To adjust clock & calendar, push [CLOCK
MODE] button briefly on the concentra-
tion key.
[The screen of clock]
This is always displayed after ACC ison.
Push [CLOCK MODE]to change mode. ‘HOUR’➟ ‘MINUTE’➟ ‘MONTH’➟‘DAY’
light up every 0.5 second.
If [CLOCK MODE] button is pressed, time can be set up and change with the
part of hour flicker in the same time. In
this time, please set up the change of
time by using [ ], [ ] buttons of
concentration key. In order to set up minute after seting up
hour, please press [CLOCK MODE]
button. The method to changing the
minute like that of changing the hour is
to set up by using [ ], [ ] of con-
centration key.
When ‘DAY’ blinks, push [CLOCK MODE] to cancel time adjust mode
and time setting is finished.
The adjustment mode will be canceled when you press the CLOCK SET but-
ton. The 'second' will start from ‘0’.
The other buttons are not operated within ten seconds after [CLOCK
MODE] button is pressed, modified
mode is dismissed.
If [ ], [ ] buttons of the concentra- tion key have been pressed for more
two seconds [ ], [ ] buttons
become FAST COUNT.
Flashing
Flashing
Page 224 of 283
611
In case of an emergency
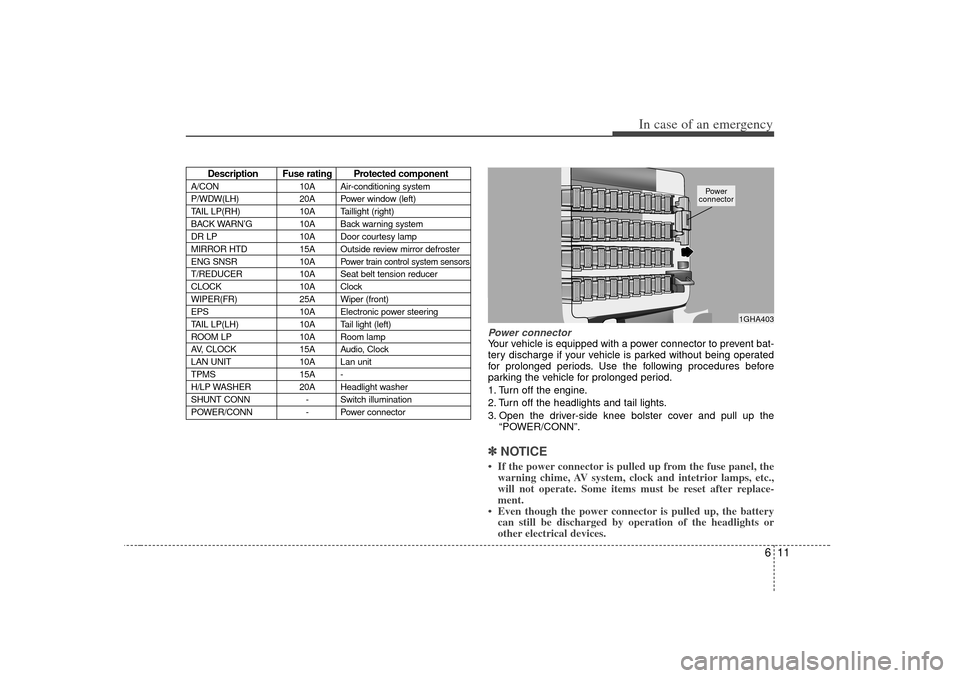
Power connectorYour vehicle is equipped with a power connector to prevent bat-
tery discharge if your vehicle is parked without being operated
for prolonged periods. Use the following procedures before
parking the vehicle for prolonged period.
1. Turn off the engine.
2. Turn off the headlights and tail lights.
3. Open the driver-side knee bolster cover and pull up the“POWER/CONN”.✽ ✽NOTICE• If the power connector is pulled up from the fuse panel, the
warning chime, AV system, clock and intetrior lamps, etc.,
will not operate. Some items must be reset after replace-
ment.
• Even though the power connector is pulled up, the battery can still be discharged by operation of the headlights or
other electrical devices.
Description Fuse rating Protected component
A/CON 10A Air-conditioning system
P/WDW(LH) 20A Power window (left)
TAIL LP(RH) 10A Taillight (right)
BACK WARN’G 10A Back warning system
DR LP 10A Door courtesy lamp
MIRROR HTD 15A Outside review mirror defroster
ENG SNSR 10A
Power train control system sensors
T/REDUCER10A Seat belt tension reducer
CLOCK 10A Clock
WIPER(FR) 25A Wiper (front)
EPS 10A Electronic power steering
TAIL LP(LH) 10A Tail light (left)
ROOM LP 10A Room lamp
AV, CLOCK 15A Audio, Clock
LAN UNIT 10A Lan unit
TPMS 15A -
H/LP WASHER 20A Headlight washer
SHUNT CONN - Switch illumination
POWER/CONN - Power connector
1GHA403
Power
connector
Page 230 of 283
617
In case of an emergency
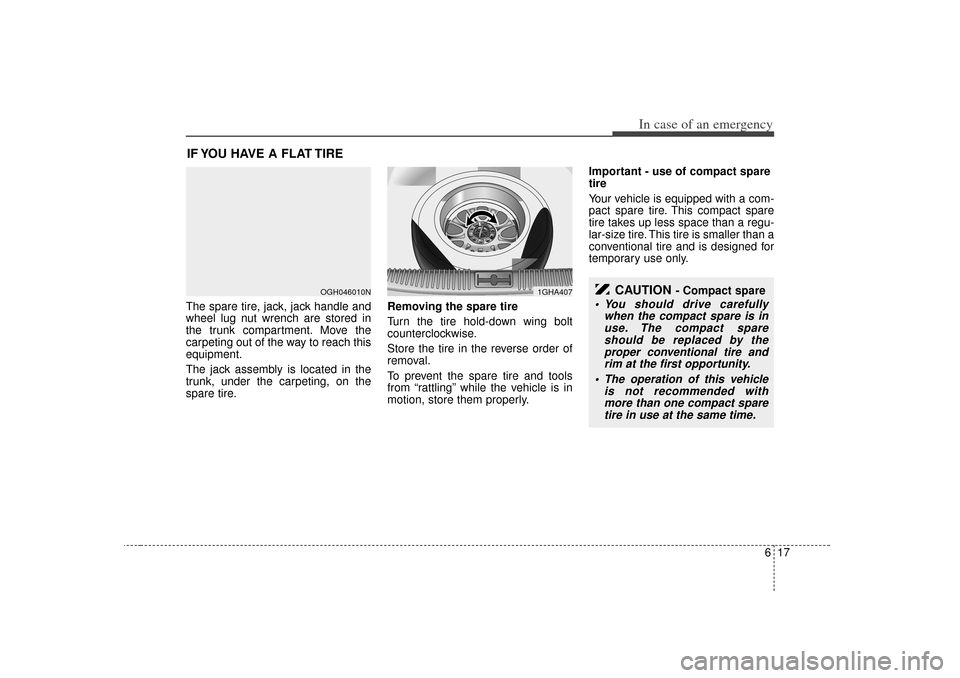
IF YOU HAVE A FLAT TIRE The spare tire, jack, jack handle and
wheel lug nut wrench are stored in
the trunk compartment. Move the
carpeting out of the way to reach this
equipment.
The jack assembly is located in the
trunk, under the carpeting, on the
spare tire.Removing the spare tire
Turn the tire hold-down wing bolt
counterclockwise.
Store the tire in the reverse order of
removal.
To prevent the spare tire and tools
from “rattling” while the vehicle is in
motion, store them properly.Important - use of compact spare
tire
Your vehicle is equipped with a com-
pact spare tire. This compact spare
tire takes up less space than a regu-
lar-size tire. This tire is smaller than a
conventional tire and is designed for
temporary use only.
OGH046010N
1GHA407
CAUTION
- Compact spare
You should drive carefully
when the compact spare is inuse. The compact spareshould be replaced by theproper conventional tire andrim at the first opportunity.
The operation of this vehicle is not recommended withmore than one compact sparetire in use at the same time.
Page 234 of 283
621
In case of an emergency
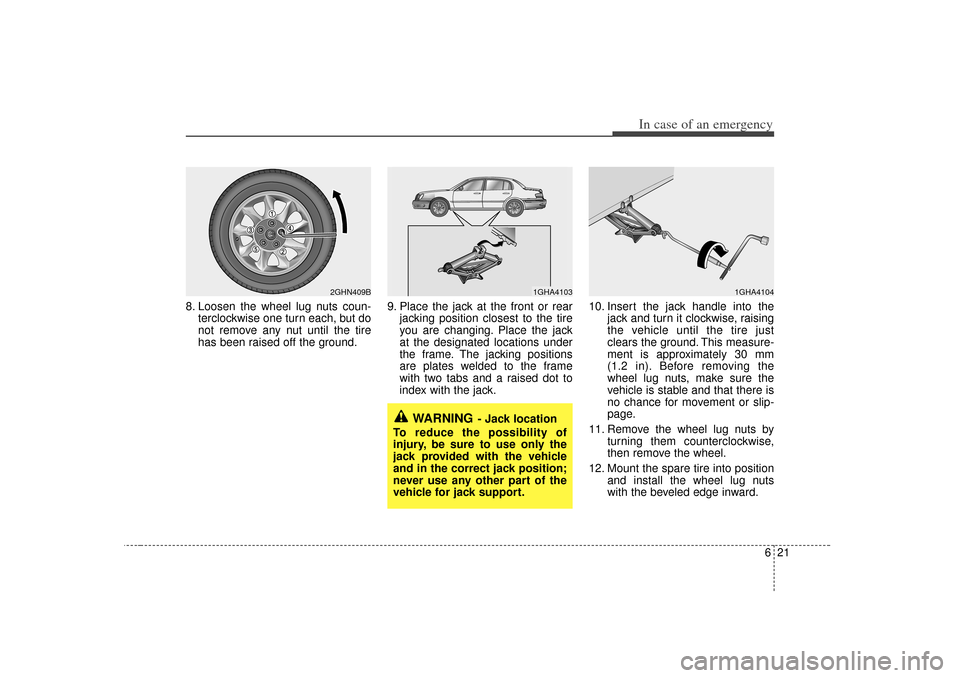
8. Loosen the wheel lug nuts coun-terclockwise one turn each, but do
not remove any nut until the tire
has been raised off the ground. 9. Place the jack at the front or rear
jacking position closest to the tire
you are changing. Place the jack
at the designated locations under
the frame. The jacking positions
are plates welded to the frame
with two tabs and a raised dot to
index with the jack. 10. Insert the jack handle into the
jack and turn it clockwise, raising
the vehicle until the tire just
clears the ground. This measure-
ment is approximately 30 mm
(1.2 in). Before removing the
wheel lug nuts, make sure the
vehicle is stable and that there is
no chance for movement or slip-
page.
11. Remove the wheel lug nuts by turning them counterclockwise,
then remove the wheel.
12. Mount the spare tire into position and install the wheel lug nuts
with the beveled edge inward.
WARNING
- Jack location
To reduce the possibility of
injury, be sure to use only the
jack provided with the vehicle
and in the correct jack position;
never use any other part of the
vehicle for jack support.
1GHA4104
1GHA4103
2GHN409B
Page 247 of 283
Maintenance12
7ENGINE COOLING SYSTEM The high-pressure cooling system has a
reservoir filled with year-round antifreeze
coolant. The reservoir is filled at the fac-
tory.
Check the antifreeze protection and
coolant level at least once a year, at the
beginning of the winter season, and
before traveling to a colder climate.Checking the coolant level
Check the condition and connections of
all cooling system hoses and heater
hoses. Replace any swollen or deterio-
rated hoses.
The coolant level should be filled
between F and L marks on the level
gauge attached to the coolant reservoir
cap when the engine is cool.
If the coolant level is low, add enough
specified coolant to provide protection
against freezing and corrosion. Bring the
level to F, but do not overfill. If frequent
additions are required, see an Authorized
Kia Dealer for a cooling system inspec-
tion.
WARNING
- Removing
radiator cap
Never attempt to remove the radi-
ator cap while the engine is oper-
ating or hot. Doing so might lead
to cooling system and engine
damage and could result in seri-
ous personal injury from escap-
ing hot coolant or steam.
(Continued)
(Continued)
Turn the engine off and wait untilit cools down. Even then, use
extreme care when removing the
radiator cap. Wrap a thick towel
around it, and turn it counter-
clockwise slowly to the first stop.
Step back while the pressure is
released from the cooling system.
When you are sure all the pres-
sure has been released, press
down on the cap, using a thick
towel, and continue turning coun-
terclockwise to remove it.
Even if the engine is not operat- ing, do not remove the radiator
cap or the drain plug while the
engine and radiator are hot. Hot
coolant and steam may still blow
out under pressure, causing seri-
ous injury.
OGH076003N
Page 258 of 283
723
Maintenance
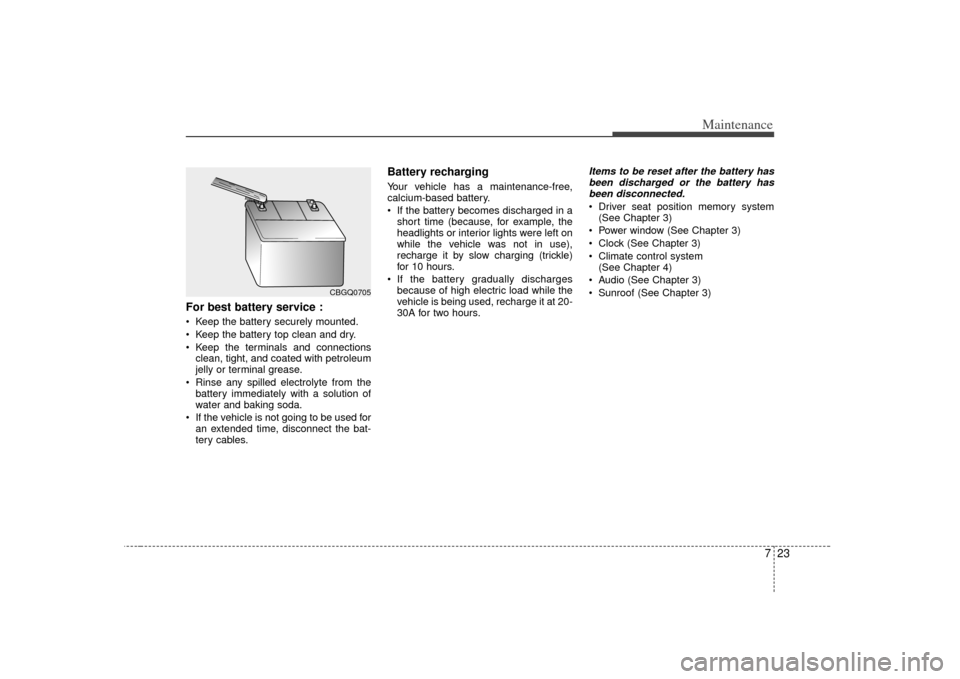
For best battery service : Keep the battery securely mounted.
Keep the battery top clean and dry.
Keep the terminals and connectionsclean, tight, and coated with petroleum
jelly or terminal grease.
Rinse any spilled electrolyte from the battery immediately with a solution of
water and baking soda.
If the vehicle is not going to be used for an extended time, disconnect the bat-
tery cables.
Battery recharging Your vehicle has a maintenance-free,
calcium-based battery.
If the battery becomes discharged in ashort time (because, for example, the
headlights or interior lights were left on
while the vehicle was not in use),
recharge it by slow charging (trickle)
for 10 hours.
If the battery gradually discharges because of high electric load while the
vehicle is being used, recharge it at 20-
30A for two hours.
Items to be reset after the battery hasbeen discharged or the battery has been disconnected. Driver seat position memory system (See Chapter 3)
Power window (See Chapter 3)
Clock (See Chapter 3)
Climate control system (See Chapter 4)
Audio (See Chapter 3)
Sunroof (See Chapter 3)
CBGQ0705