air conditioning KIA Opirus 2008 1.G Owner's Manual
[x] Cancel search | Manufacturer: KIA, Model Year: 2008, Model line: Opirus, Model: KIA Opirus 2008 1.GPages: 283, PDF Size: 20.47 MB
Page 174 of 283

443
Driving your vehicle
AUTOMATIC CLIMATE CONTROL SYSTEM
OGH026051N/OGH026052
1. A/C display
2. Driver’s temperature control button
3. AUTO (automatic control) button
4. Air conditioning button
5. Fan speed control button
6. Mode selection button
7. Dual temperature control selection button8. Front windshield defrost button
9. Rear window defrost button
10. OFF button
11. Recirculated air position button
12. Outside (fresh) air position button
13. Passenger’s temperature control button
14. Rear climate control selection button
Page 175 of 283
Driving your vehicle
444
Automatic operation
The automatic climate control system is
controlled by simply setting the desired
temperature.
The Full Automatic Temperature Control
(FATC) system automatically controls the
heating and cooling system as follows;
1. Push the AUTO button. The indicatorlight will come on and the modes, fan
speeds, air intake and air-conditioning
will be controlled automatically by tem-
perature setting. 2. Push the TEMP button to set the
desired temperature.
If the temperature is set to the lowest
setting 17°C/62°F (Lo), the air condi-
tioning system will operate continu-
ously.
3. To turn the automatic operation off, press any button except temperature
control button. If you press the mode
selection button, air-conditioning but-
ton, defrost button, recirculated air
position button, outside (fresh) air
position button or fan speed button,
the selected function will be controlled
manually while other functions operate
automatically.
Regardless of the temperature setting,
when using automatic operation, the air
conditioning system will automatically
turn on to decrease the humidity inside
the vehicle, even if the temperature is set
to warm.
✽ NOTICE
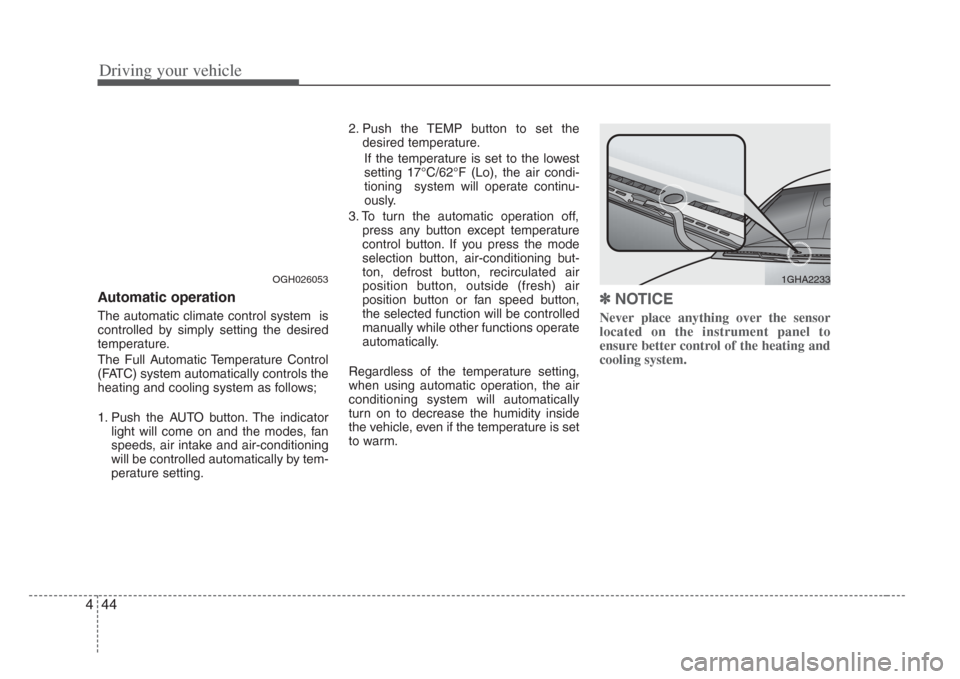
Never place anything over the sensor
located on the instrument panel to
ensure better control of the heating and
cooling system.
OGH0260531GHA2233
Page 176 of 283
445
Driving your vehicle
Manual operation
The heating and cooling system can be
controlled manually as well by pushing
buttons other than the AUTO button. In
this case, the system works sequentially
according to the order of buttons select-
ed.
When pressing any button except AUTO,
the functions of the buttons not selected
will be controlled automatically.
Press the AUTO button in order to con-
vert to full automatic control of the sys-
tem.
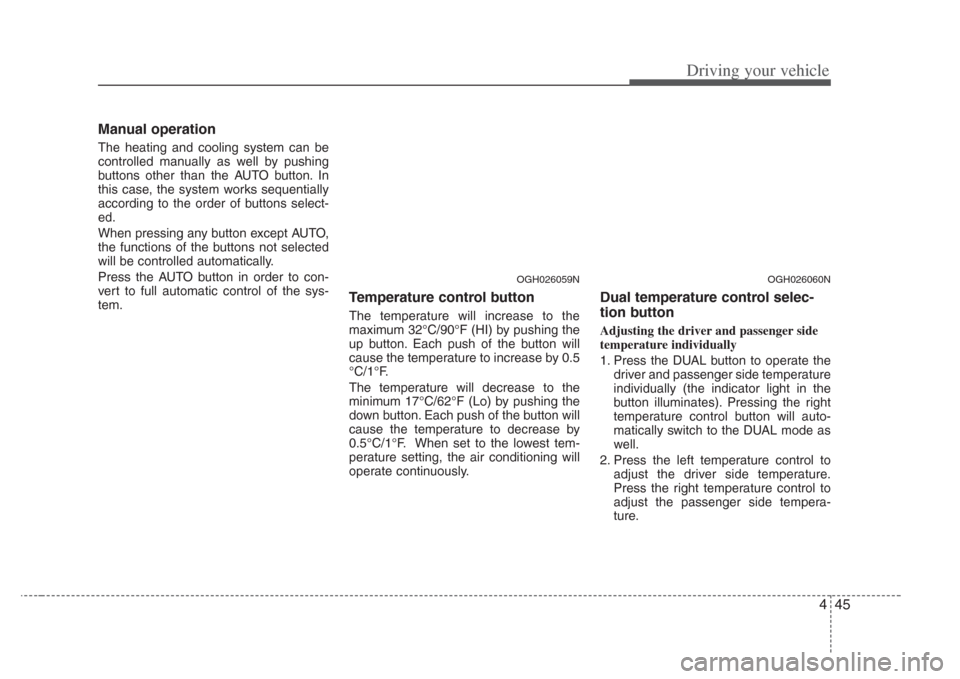
Temperature control button
The temperature will increase to the
maximum 32°C/90°F (HI) by pushing the
up button. Each push of the button will
cause the temperature to increase by 0.5
°C/1°F.
The temperature will decrease to the
minimum 17°C/62°F (Lo) by pushing the
down button. Each push of the button will
cause the temperature to decrease by
0.5°C/1°F. When set to the lowest tem-
perature setting, the air conditioning will
operate continuously.
Dual temperature control selec-
tion button
Adjusting the driver and passenger side
temperature individually
1. Press the DUAL button to operate thedriver and passenger side temperature
individually (the indicator light in the
button illuminates). Pressing the right
temperature control button will auto-
matically switch to the DUAL mode as
well.
2. Press the left temperature control to adjust the driver side temperature.
Press the right temperature control to
adjust the passenger side tempera-
ture.
OGH026060NOGH026059N
Page 178 of 283
447
Driving your vehicle
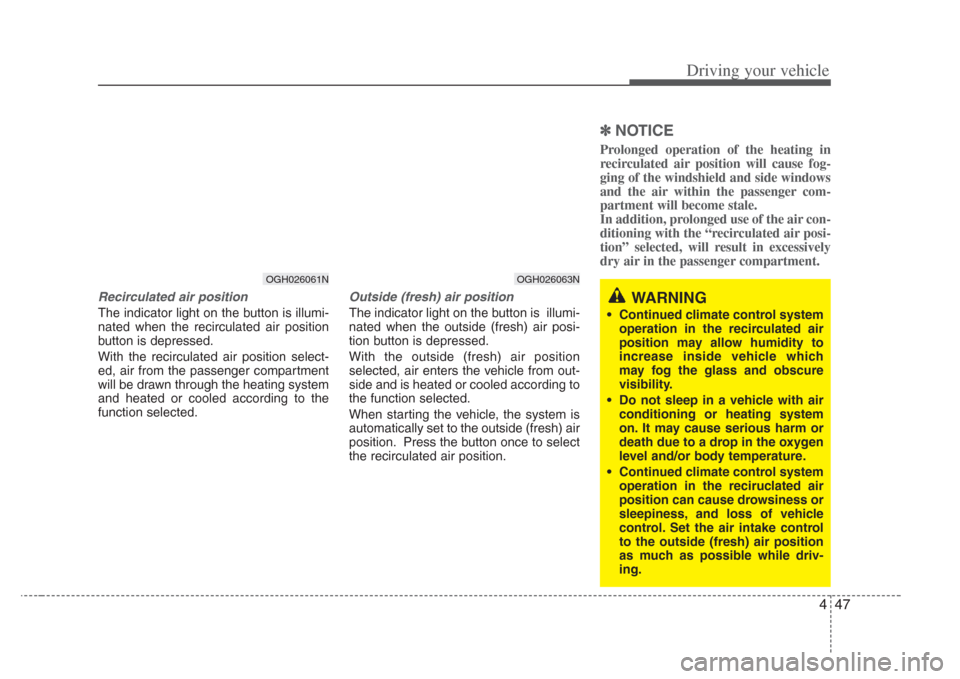
Recirculated air position
The indicator light on the button is illumi-
nated when the recirculated air position
button is depressed.
With the recirculated air position select-
ed, air from the passenger compartment
will be drawn through the heating system
and heated or cooled according to the
function selected.
Outside (fresh) air position
The indicator light on the button is illumi-
nated when the outside (fresh) air posi-
tion button is depressed.
With the outside (fresh) air position
selected, air enters the vehicle from out-
side and is heated or cooled according to
the function selected.
When starting the vehicle, the system is
automatically set to the outside (fresh) air
position. Press the button once to select
the recirculated air position.
✽
NOTICE
Prolonged operation of the heating in
recirculated air position will cause fog-
ging of the windshield and side windows
and the air within the passenger com-
partment will become stale.
In addition, prolonged use of the air con-
ditioning with the “recirculated air posi-
tion” selected, will result in excessively
dry air in the passenger compartment.
OGH026061N
WARNING
• Continued climate control system
operation in the recirculated air
position may allow humidity to
increas e inside vehicle which
may fog the glass and obscure
visibility.
• Do not sleep in a vehicle with air conditioning or heating system
on. It may cause serious harm or
death due to a drop in the oxygen
level and/or body temperature.
• Continued climate control system
operation in the reciruclated air
position can cause drowsiness or
sleepiness, and loss of vehicle
control. Set the air intake control
to the out side (fresh) air position
as much a s possible while driv-
ing.
OGH026063N
Page 180 of 283
449
Driving your vehicle
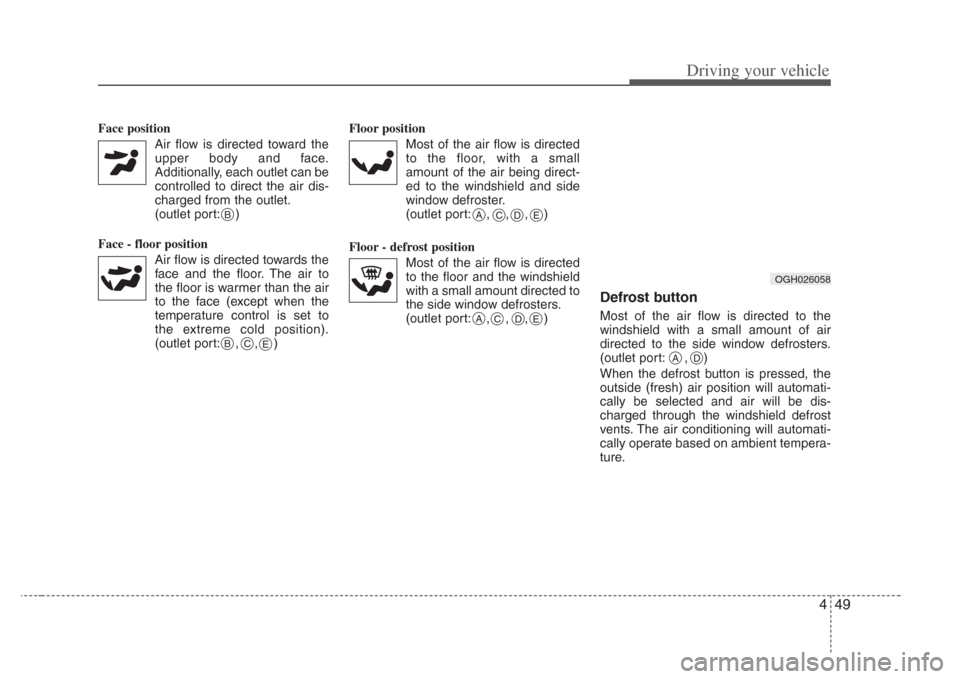
Face position Air flow is directed toward theupper body and face.
Additionally, each outlet can be controlled to direct the air dis-
charged from the outlet.
(outlet port: )
Face - floor position Air flow is directed towards theface and the floor. The air to
the floor is warmer than the air
to the face (except when the
temperature control is set to
the extreme cold position).
(outlet port: , , ) Floor position
Most of the air flow is directedto the floor, with a small
amount of the air being direct-
ed to the windshield and side
window defroster.
(outlet port: , , , )
Floor - defrost position Most of the air flow is directedto the floor and the windshield
with a small amount directed to
the side window defrosters.
(outlet port: , , , )
Defrost button
Most of the air flow is directed to the
windshield with a small amount of air
directed to the side window defrosters.
(outlet port: , )
When the defrost button is pressed, the
outside (fresh) air position will automati-
cally be selected and air will be dis-
charged through the windshield defrost
vents. The air conditioning will automati-
cally operate based on ambient tempera-
ture.
B
BC
A
E
E
CDE
ACD
OGH026058
AD
Page 181 of 283
Driving your vehicle
504
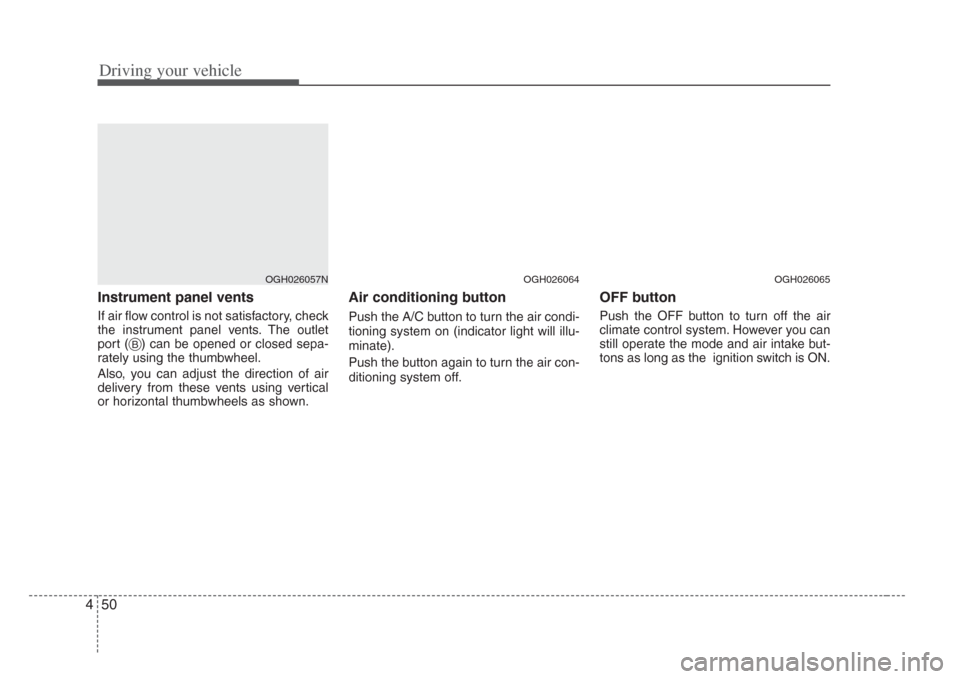
Instrument panel vents
If air flow control is not satisfactory, check
the instrument panel vents. The outlet
port ( ) can be opened or closed sepa-
rately using the thumbwheel.
Also, you can adjust the direction of air
delivery from these vents using vertical
or horizontal thumbwheels as shown.
Air conditioning button
Push the A/C button to turn the air condi-
tioning system on (indicator light will illu-
minate).
Push the button again to turn the air con-
ditioning system off.
OFF button
Push the OFF button to turn off the air
climate control system. However you can
still operate the mode and air intake but-
tons as long as the ignition switch is ON.
OGH026057N
B
OGH026064OGH026065
Page 182 of 283
451
Driving your vehicle
Air conditioning system opera-
tion tips
• If the vehicle has been parked in directsunlight during hot weather, open the
windows for a short time to let the hot
air inside the vehicle escape.
• To help reduce moisture inside of the windows on rainy humid days,
decrease the humidity inside the vehi-
cle by operating the air conditioning
system.
• During air conditioning system opera- tion, you may occasionally notice a
slight change in the engine speed as
the air conditioning compressor cycles
on. This is a normal system operation
characteristics.
• Use the air conditioning system every month only for a few minutes to ensure
maximum system performance.
• When using the air conditioning sys- tem, you may notice clear water drip-
ping (or even pudding) on the ground
under the passenger side of the vehi-
cle. This is a normal system operation
characteristics. • Operating the air conditioning system
in the recirculated air position does
provide maximum cooling, however,
continual operation in this mode may
cause the air inside the vehicle to
become stale.
Checking the amount of air con-
ditioner refrigerant and compres-
sor lubricant
When the amount of refrigerant is low,
the performance of the air conditioning is
reduced. Overfilling also has a bad influ-
ence on the air conditioning system.
Therefore, if abnormal operation is
found, have the system inspected by an
authorized Kia dealer.
CAUTION
When the performance of the air
conditioning system is reduced it is
important that the correct type and amount of oil and refrigerant isu sed. Otherwis e, damage to the
compressor and abnormal system operation may occur.
CAUTION
When us ing the air conditioning
s ystem, monitor the temperature
gauge closely while driving up hill s
or in heavy traffic when out side
temperatures are high. Air condi- tioning system operation may
caus e engine overheating.
Continue to use the blower fan but turn the air conditioning system off
if the temperature gauge indicate s
engine overheating.
WARNING
The air conditioning system should
be serviced by an authorized Kia
dealer. Improper service may cause
serious injury to the per son per-
forming the service.
Page 184 of 283
453
Driving your vehicle
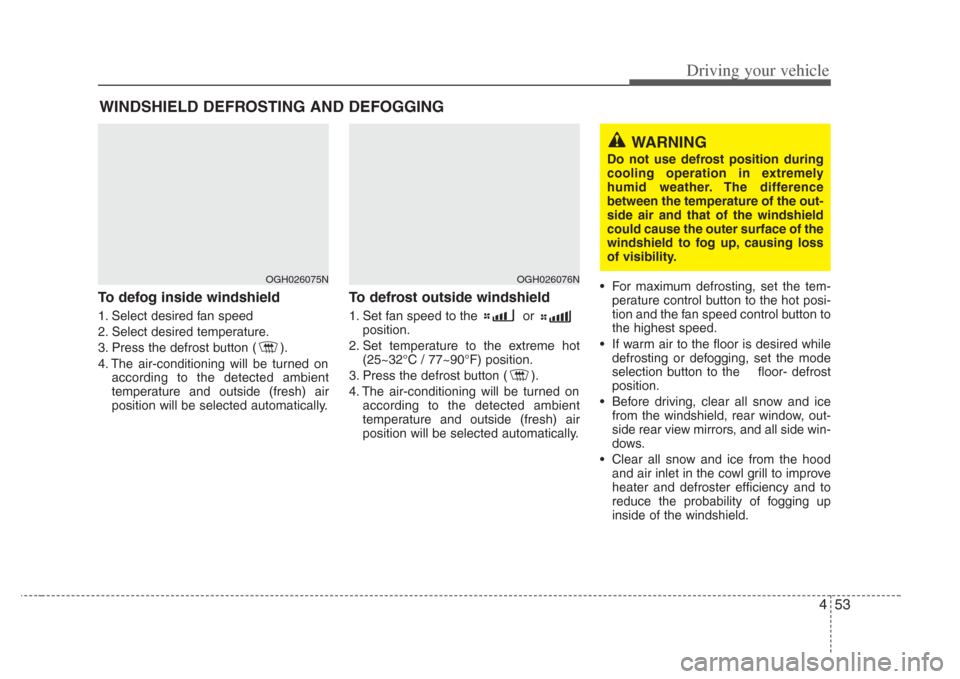
To defog inside windshield
1. Select desired fan speed
2. Select desired temperature.
3. Press the defrost button ( ).
4. The air-conditioning will be turned onaccording to the detected ambient
temperature and outside (fresh) air
position will be selected automatically.
To defrost outside windshield
1. Set fan speed to the or position.
2. Set temperature to the extreme hot (25~32°C / 77~90°F) position.
3. Press the defrost button ( ).
4. The air-conditioning will be turned on according to the detected ambient
temperature and outside (fresh) air
position will be selected automatically. • For maximum defrosting, set the tem-
perature control button to the hot posi-
tion and the fan speed control button to
the highest speed.
• If warm air to the floor is desired while defrosting or defogging, set the mode
selection button to the floor- defrost
position.
• Before driving, clear all snow and ice from the windshield, rear window, out-
side rear view mirrors, and all side win-
dows.
• Clear all snow and ice from the hood and air inlet in the cowl grill to improve
heater and defroster efficiency and to
reduce the probability of fogging up
inside of the windshield.
WINDSHIELD DEFROSTING AND DEFOGGING
WARNING
Do not use defrost position during
cooling operation in extremely
humid weather. The difference
between the temperature of the out-
side air and that of the wind shield
could cause the outer surface of the
windshield to fog up, cau sing loss
of visibility.
OGH026075NOGH026076N
Page 224 of 283
611
In case of an emergency
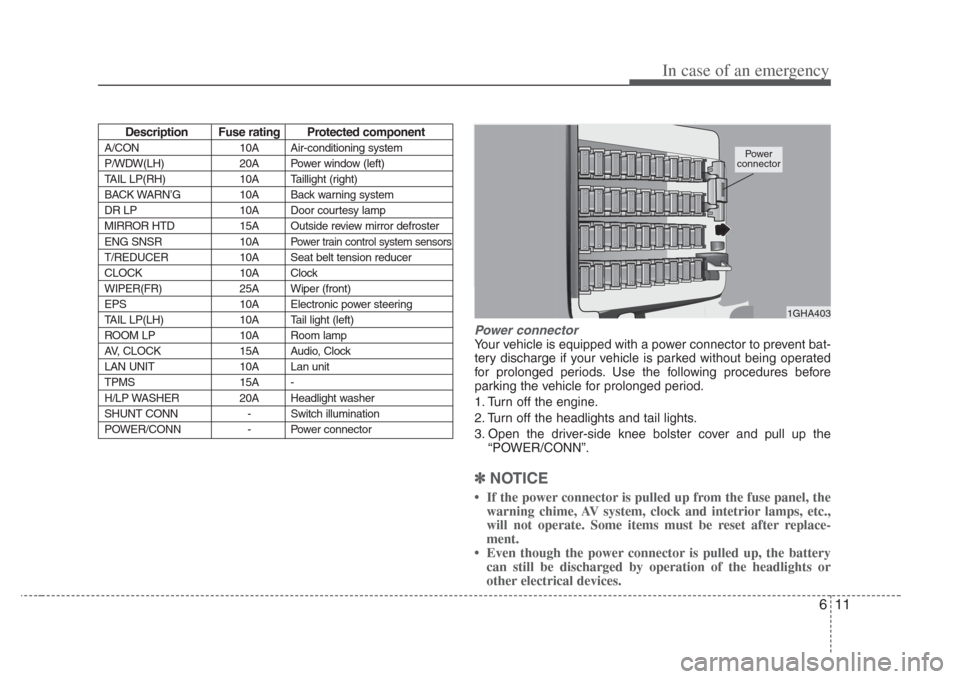
Power connector
Your vehicle is equipped with a power connector to prevent bat-
tery discharge if your vehicle is parked without being operated
for prolonged periods. Use the following procedures before
parking the vehicle for prolonged period.
1. Turn off the engine.
2. Turn off the headlights and tail lights.
3. Open the driver-side knee bolster cover and pull up the“POWER/CONN”.
✽NOTICE
If the power connector is pulled up from the fuse panel, the
warning chime, AV system, clock and intetrior lamps, etc.,
will not operate. Some items must be reset after replace-
ment.
Even though the power connector is pulled up, the battery can still be discharged by operation of the headlights or
other electrical devices.
Des cription Fus e rating Protected component
A/CON 10A Air-conditioning system
P/WDW(LH) 20A Power window (left)
TAIL LP(RH) 10A Taillight (right)
BACK WARN’G 10A Back warning system
DR LP 10A Door courtesy lamp
MIRROR HTD 15A Outside review mirror defroster
ENG SNSR 10A
Power train control system sensors
T/REDUCER10A Seat belt tension reducer
CLOCK 10A Clock
WIPER(FR) 25A Wiper (front)
EPS 10A Electronic power steering
TAIL LP(LH) 10A Tail light (left)
ROOM LP 10A Room lamp
AV, CLOCK 15A Audio, Clock
LAN UNIT 10A Lan unit
TPMS 15A -
H/LP WASHER 20A Headlight washer
SHUNT CONN - Switch illumination
POWER/CONN - Power connector
1GHA403
Power
connector
Page 243 of 283
Maintenance
87
At least monthly:
• Check coolant level in the coolantrecovery reservoir.
• Check the operation of all exterior lights, including the stoplights, turn sig-
nals and hazard warning flashers.
• Check the inflation pressures of all tires including the spare.
At least twice a year (i.e., every Spring and Fall) :
• Check radiator, heater and air condi- tioning hoses for leaks or damage.
• Check windshield washer spray and wiper operation. Clean wiper blades
with clean cloth dampened with wash-
er fluid.
• Check headlight alignment.
• Check muffler, exhaust pipes, shields and clamps.
• Check the lap/shoulder belts for wear and function.
• Check for worn tires and loose wheel lug nuts.
At least once a year :
• Clean body and door drain holes.
• Lubricate door hinges and checks, andhood hinges.
• Lubricate door and hood locks and latches.
• Lubricate door rubber weatherstrips.
• Check the air conditioning system before the warm weather season.
• Check the power steering fluid level.
• Inspect and lubricate automatic transaxle linkage and controls.
• Clean battery and terminals.
• Check the brake fluid level.