engine KIA Optima 2007 2.G Owners Manual
[x] Cancel search | Manufacturer: KIA, Model Year: 2007, Model line: Optima, Model: KIA Optima 2007 2.GPages: 294, PDF Size: 3.37 MB
Page 262 of 294
715
Maintenance
DRIVE BELTSDrive belts should be checked periodical-
ly for proper tension and replaced if nec-
essary. At the same time, belts should be
examined for cracks, wear, fraying or
other evidence of deterioration and
replaced if necessary.
Belt routing should also be checked to be
sure there is no interference between the
belts and other parts of the engine.
If the belt is too loose, have it replaced by
an authorized Kia dealer.Checking the compressor drive
beltHave the drive belts checked in accor-
dance with the maintenance schedule.
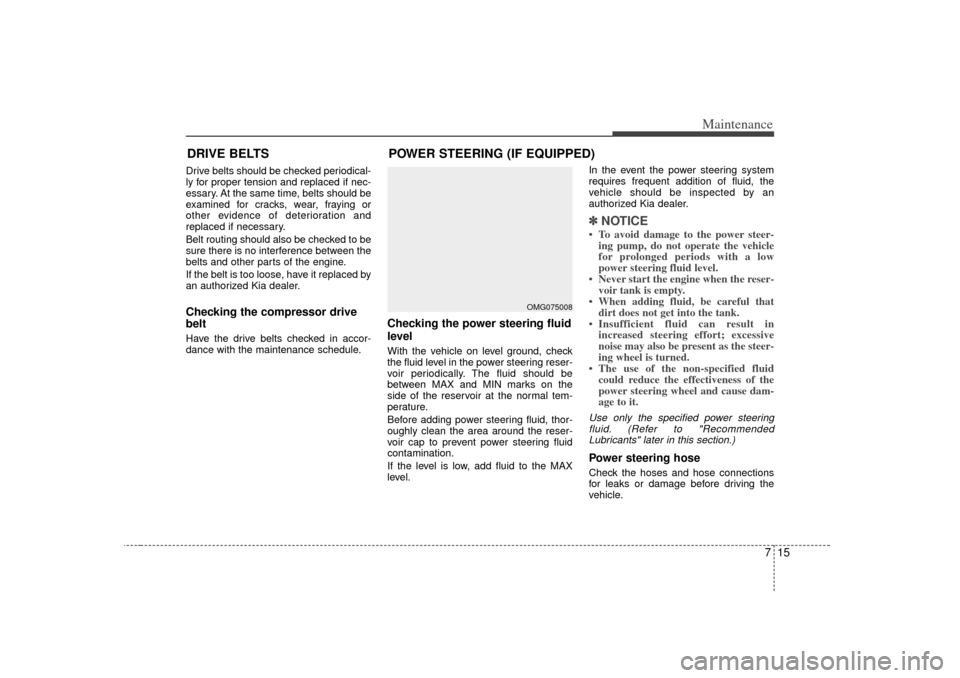
Checking the power steering fluid
level With the vehicle on level ground, check
the fluid level in the power steering reser-
voir periodically. The fluid should be
between MAX and MIN marks on the
side of the reservoir at the normal tem-
perature.
Before adding power steering fluid, thor-
oughly clean the area around the reser-
voir cap to prevent power steering fluid
contamination.
If the level is low, add fluid to the MAX
level.In the event the power steering system
requires frequent addition of fluid, the
vehicle should be inspected by an
authorized Kia dealer.
✽ ✽
NOTICE• To avoid damage to the power steer-
ing pump, do not operate the vehicle
for prolonged periods with a low
power steering fluid level.
• Never start the engine when the reser- voir tank is empty.
• When adding fluid, be careful that dirt does not get into the tank.
• Insufficient fluid can result in increased steering effort; excessive
noise may also be present as the steer-
ing wheel is turned.
• The use of the non-specified fluid could reduce the effectiveness of the
power steering wheel and cause dam-
age to it.Use only the specified power steering
fluid. (Refer to "Recommended Lubricants" later in this section.)Power steering hoseCheck the hoses and hose connections
for leaks or damage before driving the
vehicle.
POWER STEERING (IF EQUIPPED)
OMG075008
Page 263 of 294
Maintenance16
7AUTOMATIC TRANSAXLE (IF EQUIPPED)Checking the automatic transaxle
fluid level The automatic transaxle fluid level
should be checked regularly.
The volume of the transaxle fluid
changes with temperature. Although it is
best to check the level after having driv-
en the vehicle for at least 30 minutes, the
level can be checked after warming the
fluid using the following procedure.
1. Park the vehicle on level ground and
firmly apply the parking brake.
2. Allow the engine to idle for about 2 minutes.
3. Depress the brake pedal and move the shift lever slowly through all ranges
then set it in P (Park). 4. With the engine still idling, pull out the
dipstick, wipe it clean and reinsert it
fully.
5. Pull out the dipstick again and check the fluid level.
✽ ✽NOTICE• Low fluid level causes transaxle slip-
page. Overfilling can cause foaming,
loss of fluid and transaxle malfunc-
tion.
• The use of a non-specified fluid could result in transaxle malfunction and
failure.
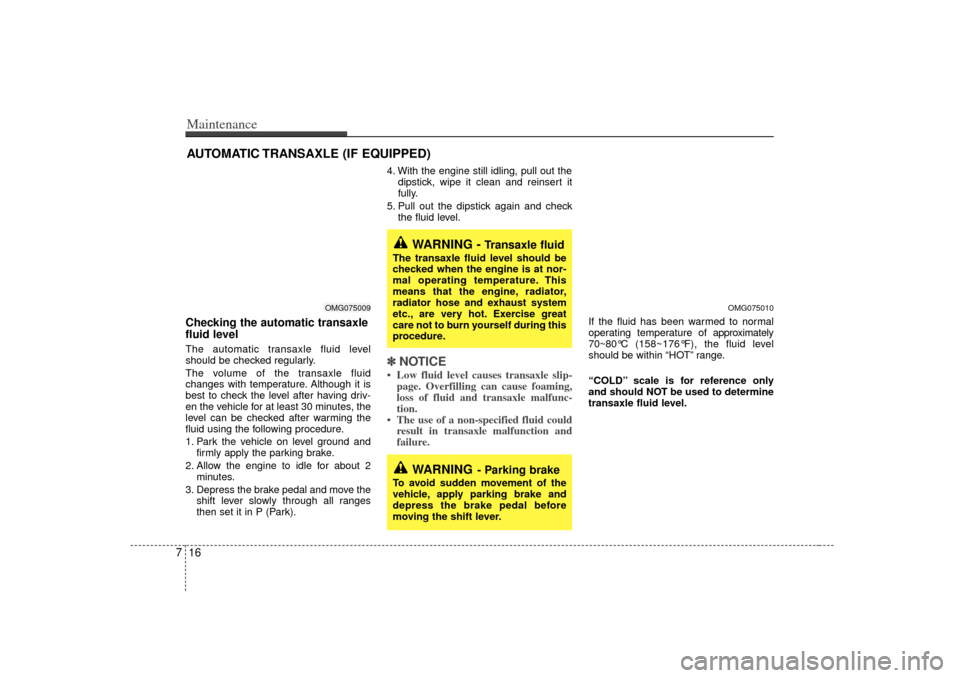
If the fluid has been warmed to normal
operating temperature of approximately
70~80°C (158~176°F), the fluid level
should be within “HOT” range.
“COLD” scale is for reference only
and should NOT be used to determine
transaxle fluid level.
WARNING -
Transaxle fluid
The transaxle fluid level should be
checked when the engine is at nor-
mal operating temperature. This
means that the engine, radiator,
radiator hose and exhaust system
etc., are very hot. Exercise great
care not to burn yourself during this
procedure.
WARNING
- Parking brake
To avoid sudden movement of the
vehicle, apply parking brake and
depress the brake pedal before
moving the shift lever.
OMG075009
OMG075010
Page 264 of 294
717
Maintenance
New automatic transaxle fluid should
be red. The red dye is added so the
assembly plant can identify it as auto-
matic transaxle fluid and distinguish it
from engine oil or antifreeze. The red
dye, which is not an indicator of fluid
quality, is not permanent. As the vehi-
cle is driven, the automatic transaxle
fluid will begin to look darker. The
color may eventually appear light
brown.✽ ✽NOTICEHave an Authorized Kia dealer inspect
or change the automatic transaxle fluid
according to the Scheduled
Maintenance at the beginning of this
section.Changing automatic transaxle
fluidHave automatic transaxle fluid changed
by an authorized Kia dealer according to
the Maintenance Schedule at the begin-
ning of this section.
Use only the specified automatic
transaxle fluid. (Refer to "Recommended
Lubricants" later in this section.)
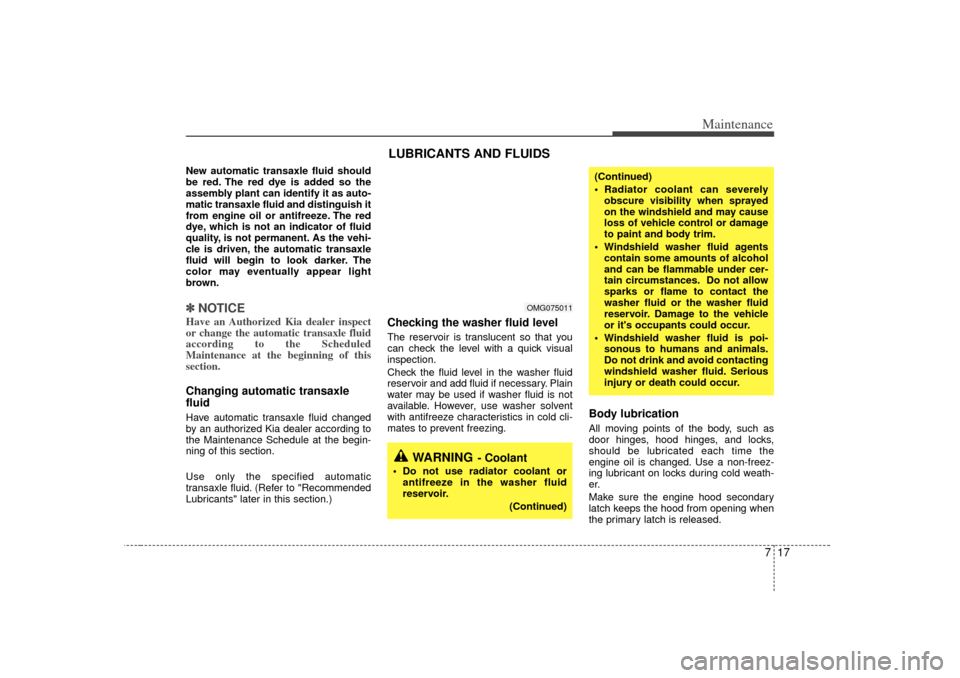
Checking the washer fluid level The reservoir is translucent so that you
can check the level with a quick visual
inspection.
Check the fluid level in the washer fluid
reservoir and add fluid if necessary. Plain
water may be used if washer fluid is not
available. However, use washer solvent
with antifreeze characteristics in cold cli-
mates to prevent freezing.
Body lubrication All moving points of the body, such as
door hinges, hood hinges, and locks,
should be lubricated each time the
engine oil is changed. Use a non-freez-
ing lubricant on locks during cold weath-
er.
Make sure the engine hood secondary
latch keeps the hood from opening when
the primary latch is released.
LUBRICANTS AND FLUIDS
WARNING
- Coolant
Do not use radiator coolant or
antifreeze in the washer fluid
reservoir.
(Continued)
(Continued)
Radiator coolant can severelyobscure visibility when sprayed
on the windshield and may cause
loss of vehicle control or damage
to paint and body trim.
Windshield washer fluid agents contain some amounts of alcohol
and can be flammable under cer-
tain circumstances. Do not allow
sparks or flame to contact the
washer fluid or the washer fluid
reservoir. Damage to the vehicle
or it's occupants could occur.
Windshield washer fluid is poi- sonous to humans and animals.
Do not drink and avoid contacting
windshield washer fluid. Serious
injury or death could occur.
OMG075011
Page 265 of 294
Maintenance18
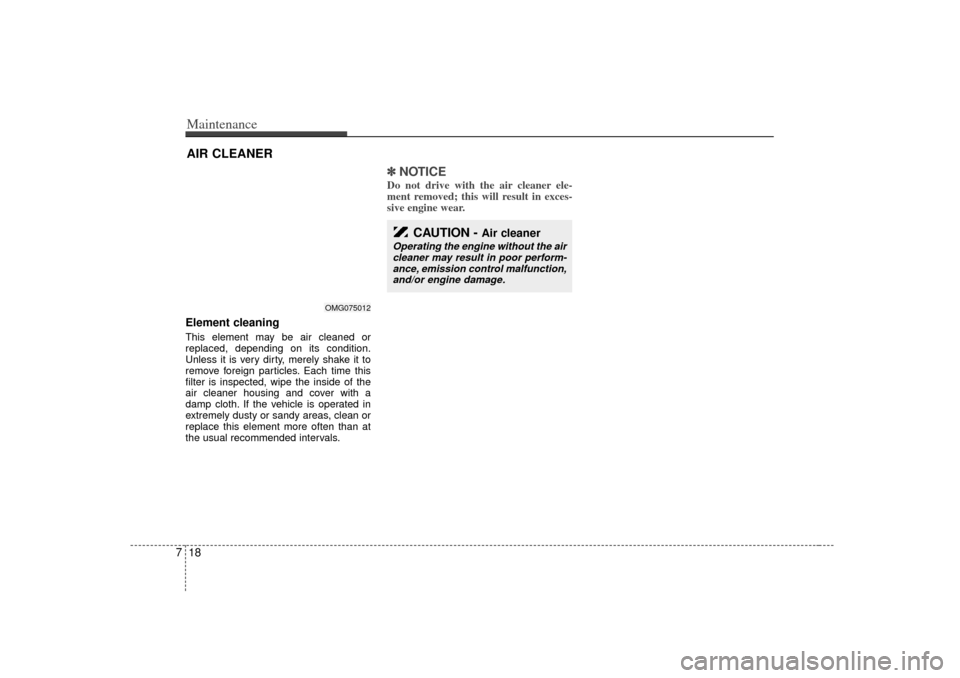
7Element cleaningThis element may be air cleaned or
replaced, depending on its condition.
Unless it is very dirty, merely shake it to
remove foreign particles. Each time this
filter is inspected, wipe the inside of the
air cleaner housing and cover with a
damp cloth. If the vehicle is operated in
extremely dusty or sandy areas, clean or
replace this element more often than at
the usual recommended intervals.
✽ ✽
NOTICEDo not drive with the air cleaner ele-
ment removed; this will result in exces-
sive engine wear.
AIR CLEANER
OMG075012
CAUTION -
Air cleaner
Operating the engine without the air
cleaner may result in poor perform-ance, emission control malfunction,and/or engine damage.
Page 269 of 294
Maintenance22
7
For best battery service : Keep the battery securely mounted.
Keep the top of the battery clean and
dry.
Keep the terminals and connections clean, tight, and coated with petroleum
jelly or terminal grease.
Rinse any spilled electrolyte from the battery immediately with a solution of
water and baking soda.
If the vehicle is not going to be used for an extended time, disconnect the bat-
tery cables.
Battery recharging Your vehicle has a maintenance-free,
calcium-based battery.
If the battery becomes discharged in ashort time (because, for example, the
headlights or interior lights were left on
while the vehicle was not in use),
recharge it by slow charging (trickle)
for 10 hours.
If the battery gradually discharges because of high electric load while the
vehicle is being used, recharge it at 20-
30A for two hours.Items to be reset after the battery hasbeen discharged or the battery hasbeen disconnected. Clock (See Chapter 3)
Climate control system (See Chapter 4)
Audio (See Chapter 3)
Sunroof (See Chapter 3)
(Continued)
When lifting a plastic-cased bat- tery, excessive pressure on the
case may cause battery acid to
leak, resulting in personal injury.
Lift with a battery carrier or with
your hands on opposite corners.
Never attempt to charge the bat- tery when the battery cables are
connected.
The electrical ignition system works with high voltage. Never
touch these components with the
engine running or the ignition
switched on.
Failure to follow the above warn-
ings can result in serious bodily
injury or death.
OMG075021
Page 270 of 294
723
Maintenance
✽
✽NOTICE• Before performing maintenance or
recharging the battery, turn off all
accessories and stop the engine.
• The negative battery cable must be removed first and installed last when
the battery is disconnected.
WARNING
- Recharging
battery
When recharging the battery,
observe the following precautions:
The battery must be removed
from the vehicle and placed in an
area with good ventilation.
Do not allow cigarettes, sparks, or flame near the battery.
Watch the battery during charg- ing, and stop or reduce the charg-
ing rate if the battery cells begin
gassing (boiling) violently or if
the temperature of the electrolyte
of any cell exceeds 49°C (120°F).
Wear eye protection when check- ing the battery during charging.
Disconnect the battery charger in the following order.
1. Turn off the battery charger main switch.
2. Unhook the negative clamp from the negative battery terminal.
3. Unhook the positive clamp from the positive battery terminal.
Page 282 of 294
735
Maintenance
LUBRICANT SPECIFICATIONSRecommended lubricants To help achieve proper engine and powertrain performance and
durability, use only lubricants of the proper quality. The correct
lubricants also help promote engine efficiency that results in
improved fuel economy.
Engine oils labeled Energy Conserving Oil are now available.
Along with other additional benefits, they contribute to fuel
economy by reducing the amount of fuel necessary to over-
come engine friction. Often, these improvements are difficult to
measure in everyday driving, but in a year’s time, they can offer
significant cost and energy savings.
Recommended SAE viscosity number ✽ ✽NOTICEAlways be sure to clean the area around any filler plug, drain
plug, or dipstick before checking or draining any lubricant.
This is especially important in dusty or sandy areas and when
the vehicle is used on unpaved roads. Cleaning the plug and
dipstick areas will prevent dirt and grit from entering the
engine and other mechanisms that could be damaged. Engine oil viscosity (thickness) has an effect on fuel economy
and cold weather operating (starting and oil flow). Lower vis-
cosity engine oils can provide better fuel economy and cold
weather performance, however, higher viscosity engine oils are
required for satisfactory lubrication in hot weather. Using oils of
any viscosity other than those recommended could result in
engine damage.
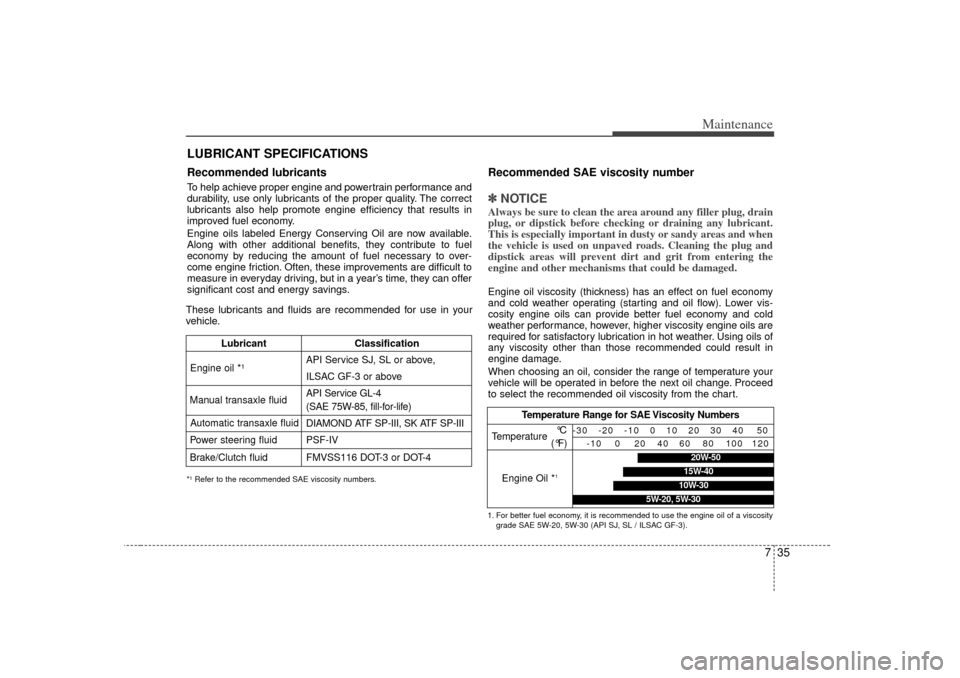
When choosing an oil, consider the range of temperature your
vehicle will be operated in before the next oil change. Proceed
to select the recommended oil viscosity from the chart.
*¹ Refer to the recommended SAE viscosity numbers.These lubricants and fluids are recommended for use in your
vehicle.
Lubricant Classification
API Service SJ, SL or above,
ILSAC GF-3 or above
Manual transaxle fluid API Service GL-4
(SAE 75W-85, fill-for-life)
DIAMOND ATF SP-III, SK ATF SP-III
Power steering fluid PSF-IV
Brake/Clutch fluid FMVSS116 DOT-3 or DOT-4
Engine oil
*¹
Automatic transaxle fluid
Temperature Range for SAE Viscosity Numbers
Temperature
Engine Oil *
1°C
(°F)
-30 -20 -10 0 10 20 30 40 50
-10 0 20 40 60 80 100 120
1. For better fuel economy, it is recommended to use the engine oil of a viscositygrade SAE 5W-20, 5W-30 (API SJ, SL / ILSAC GF-3).
20W-5015W-4010W-30
5W-20, 5W-30
Page 283 of 294
Maintenance36
7EXTERIOR CARE Exterior general caution It is very important to follow the label
directions when using any chemical
cleaner or polish. Read all warning and
caution statements that appear on the
label.Finish maintenanceWashing To help protect your vehicle’s finish from
rust and deterioration, wash it thoroughly
and frequently at least once a month with
lukewarm or cold water.
If you use your vehicle for off-road driv-
ing, you should wash it after each off-
road trip. Pay special attention to the
removal of any accumulation of salt, dirt,
mud, and other foreign materials. Make
sure the drain holes in the lower edges of
the doors and rocker panels are kept
clear and clean.
Insects, tar, tree sap, bird droppings,
industrial pollution and similar deposits
can damage your vehicle’s finish if not
removed immediately.
Even prompt washing with plain water
may not completely remove all these
deposits. A mild soap, safe for use on
painted surfaces, may be used. After washing, rinse the vehicle thor-
oughly with lukewarm or cold water. Do
not allow soap to dry on the finish.
✽ ✽
NOTICEDo not use strong soap, chemical deter-
gents or hot water, and do not wash the
vehicle in direct sunlight or when the
body of the vehicle is warm. ✽ ✽NOTICE• Water washing in the engine compart-
ment may cause the failure of electri-
cal circuits located in the engine com-
partment.
• Never allow water or other liquids to come in contact with electrical/elec-
tronic components inside the vehicle
as this may damage them.
WaxingWax the vehicle when water will no
longer bead on the paint.
Always wash and dry the vehicle before
waxing. Use a good quality liquid or
paste wax, and follow the manufacturer’s
instructions. Wax all metal trim to protect
it and to maintain its luster.
Removing oil, tar, and similar materials
with a spot remover will usually strip the
wax from the finish. Be sure to re-wax
these areas even if the rest of the vehicle
does not yet need waxing.✽ ✽ NOTICE• Wiping dust or dirt off the body with
a dry cloth will scratch the finish.
• Do not use steel wool, abrasive clean- ers, or strong detergents containing
highly alkaline or caustic agents on
chrome-plated or anodized aluminum
parts. This may result in damage to
the protective coating and cause dis-
coloration or paint deterioration.
WARNING
- Wet brakes
After washing the vehicle, test the
brakes while driving slowly to see if
they have been affected by water. If
braking performance is impaired,
dry the brakes by applying them
lightly while maintaining a slow for-
ward speed.
Page 288 of 294
83
Specifications
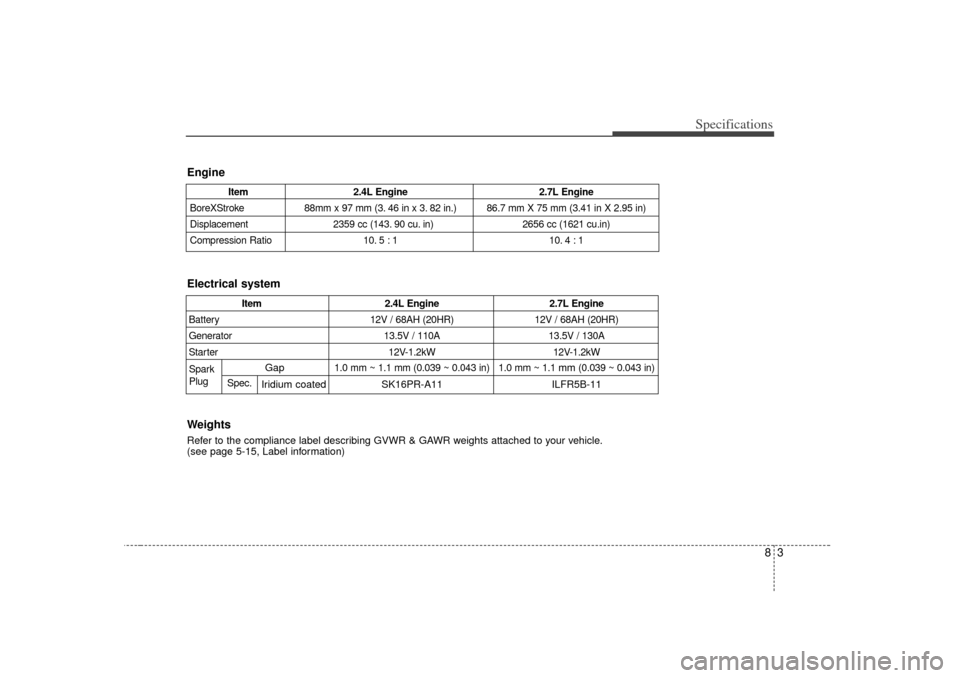
Engine
Item2.4L Engine 2.7L Engine
BoreXStroke 88mm x 97 mm (3. 46 in x 3. 82 in.) 86.7 mm X 75 mm (3.41 in X 2.95 in)
Displacement 2359 cc (143. 90 cu. in) 2656 cc (1621 cu.in)
Compression Ratio 10. 5 : 1 10. 4 : 1
Item2.4L Engine 2.7L Engine
Battery 12V / 68AH (20HR)12V / 68AH (20HR)
Generator 13.5V / 110A13.5V / 130A
Starter 12V-1.2kW12V-1.2kW
Gap
1.0 mm ~ 1.1 mm (0.039 ~ 0.043 in) 1.0 mm ~ 1.1
mm
(0.039 ~ 0.043 in
)
Iridium coated SK16PR-A11 ILFR5B-11
Spark
Plug Spec.Electrical system
WeightsRefer to the compliance label describing GVWR & GAWR weights attached to your vehicle.
(see page 5-15, Label information)
Page 289 of 294
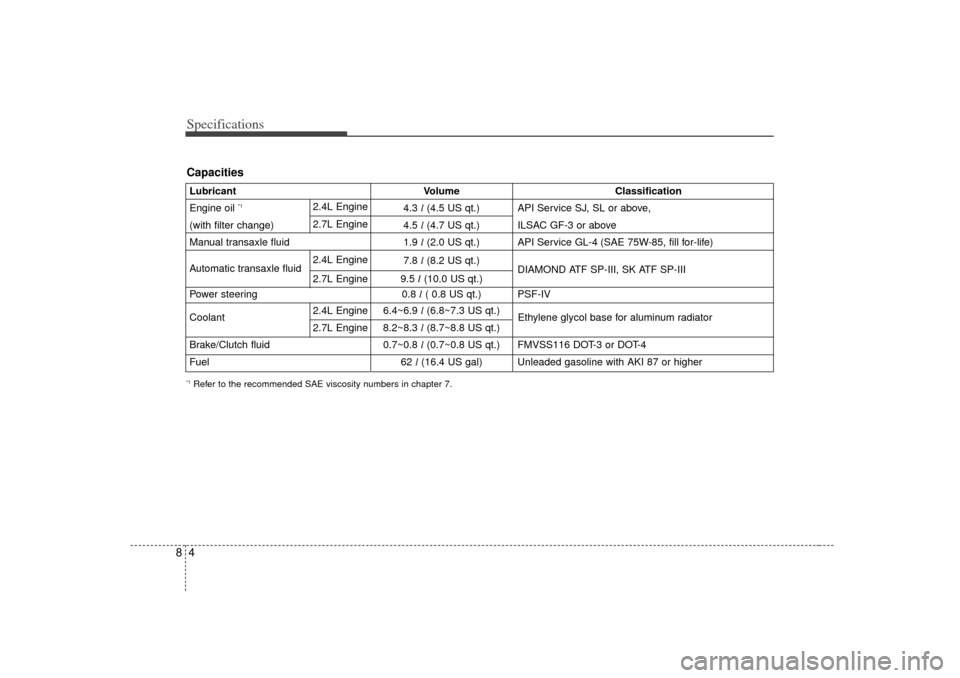
Specifications48*1Refer to the recommended SAE viscosity numbers in chapter 7.LubricantVolume Classification
Engine oil
*1
4.3 l(4.5 US qt.) API Service SJ, SL or above,
(with filter change) 4.5 l (4.7 US qt.) ILSAC GF-3 or above
Manual transaxle fluid 1.9 l(2.0 US qt.) API Service GL-4 (SAE 75W-85, fill for-life)
Automatic transaxle fluid 7.8
l(8.2 US qt.)
9.5 l(10.0 US qt.) DIAMOND ATF SP-III, SK ATF SP-III
Power steering 0.8 l( 0.8 US qt.) PSF-IV
Coolant 6.4~6.9
l(6.8~7.3 US qt.)
Ethylene glycol base for aluminum radiator
8.2~8.3 l(8.7~8.8 US qt.)
Brake/Clutch fluid 0.7~0.8 l (0.7~0.8 US qt.) FMVSS116 DOT-3 or DOT-4
Fuel 62 l(16.4 US gal) Unleaded gasoline with AKI 87 or higher
2.4L Engine
2.7L Engine2.4L Engine
2.7L Engine2.4L Engine
2.7L Engine
Capacities