key KIA Optima 2007 2.G Owner's Guide
[x] Cancel search | Manufacturer: KIA, Model Year: 2007, Model line: Optima, Model: KIA Optima 2007 2.GPages: 294, PDF Size: 3.37 MB
Page 63 of 294
Knowing your vehicle54
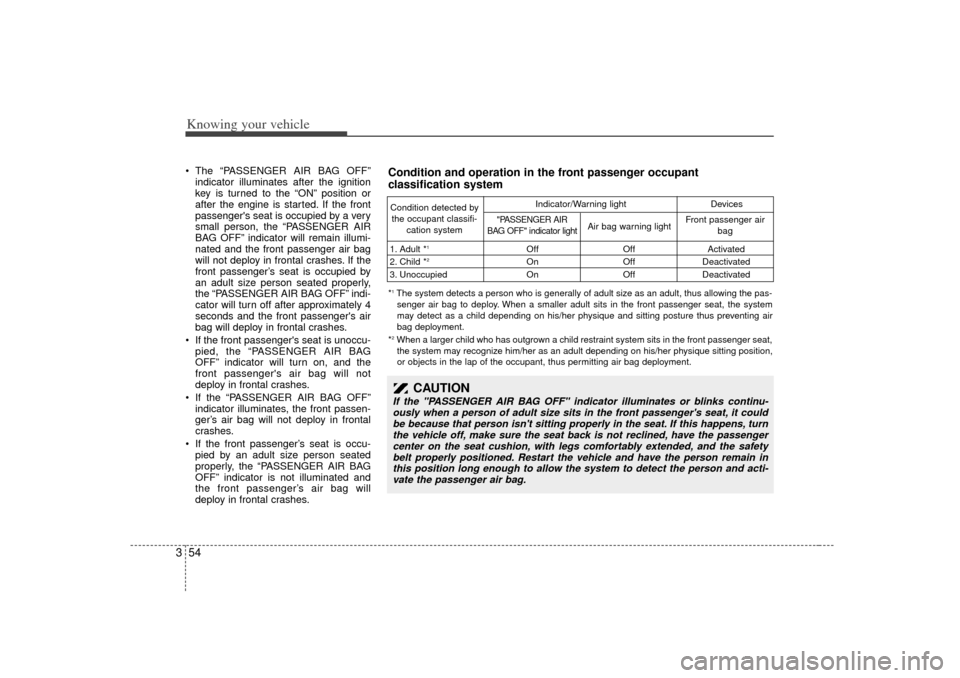
3 The “PASSENGER AIR BAG OFF ”
indicator illuminates after the ignition
key is turned to the “ON”position or
after the engine is started. If the front
passenger's seat is occupied by a very
small person, the “PASSENGER AIR
BAG OFF” indicator will remain illumi-
nated and the front passenger air bag
will not deploy in frontal crashes. If the
front passenger’ s seat is occupied by
an adult size person seated properly,
the “PASSENGER AIR BAG OFF” indi-
cator will turn off after approximately 4
seconds and the front passenger's air
bag will deploy in frontal crashes.
If the front passenger's seat is unoccu-
pied, the “PASSENGER AIR BAG
OFF” indicator will turn on, and the
front passenger's air bag will not
deploy in frontal crashes.
If the “PASSENGER AIR BAG OFF”
indicator illuminates, the front passen-
ger’ s air bag will not deploy in frontal
crashes.
If the front passenger’ s seat is occu-
pied by an adult size person seated
properly, the “PASSENGER AIR BAG
OFF” indicator is not illuminated and
the front passenger’ s air bag will
deploy in frontal crashes.
Condition detected by
the occupant classifi- cation system
1. Adult *
1
2. Child *
2
3. Unoccupied Off
On
On Off
Off
OffActivated
Deactivated
Deactivated
"PASSENGER AIR
BAG OFF" indicator light
Air bag warning light Front passenger air
bag
Indicator/Warning light Devices
*1The system detects a person who is generally of adult size as an adult, thus allowing the pas-
senger air bag to deploy. When a smaller adult sits in the front passenger seat, the system
may detect as a child depending on his/her physique and sitting posture thus preventing air
bag deployment.
*2When a larger child who has outgrown a child restraint system sits in the front passenger seat, the system may recognize him/her as an adult depending on his/her physique sitting position,
or objects in the lap of the occupant, thus permitting air bag deployment.Condition and operation in the front passenger occupant
classification system
CAUTION
If the "PASSENGER AIR BAG OFF" indicator illuminates or blinks continu- ously when a person of adult size sits in the front passenger's seat, it couldbe because that person isn't sitting properly in the seat. If this happens, turn the vehicle off, make sure the seat back is not reclined, have the passengercenter on the seat cushion, with legs comfortably extended, and the safety belt properly positioned. Restart the vehicle and have the person remain inthis position long enough to allow the system to detect the person and acti-vate the passenger air bag.
Page 64 of 294
355
Knowing your vehicle
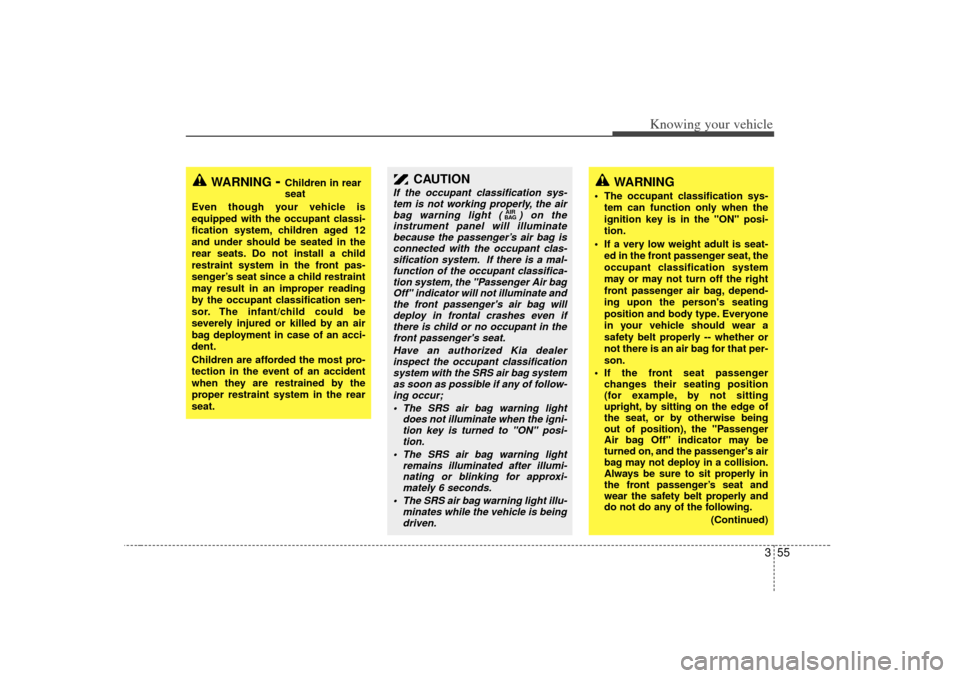
CAUTION
If the occupant classification sys-tem is not working properly, the airbag warning light ( ) on theinstrument panel will illuminate because the passenger’s air bag isconnected with the occupant clas-sification system. If there is a mal- function of the occupant classifica-tion system, the "Passenger Air bagOff" indicator will not illuminate and the front passenger's air bag willdeploy in frontal crashes even ifthere is child or no occupant in the front passenger's seat.
Have an authorized Kia dealerinspect the occupant classification system with the SRS air bag systemas soon as possible if any of follow- ing occur;
The SRS air bag warning light does not illuminate when the igni-tion key is turned to "ON" posi-tion.
The SRS air bag warning light remains illuminated after illumi-nating or blinking for approxi- mately 6 seconds.
The SRS air bag warning light illu- minates while the vehicle is beingdriven.
AIR
BAG
WARNING
The occupant classification sys-
tem can function only when the
ignition key is in the "ON" posi-
tion.
If a very low weight adult is seat- ed in the front passenger seat, the
occupant classification system
may or may not turn off the right
front passenger air bag, depend-
ing upon the person's seating
position and body type. Everyone
in your vehicle should wear a
safety belt properly -- whether or
not there is an air bag for that per-
son.
If the front seat passenger changes their seating position
(for example, by not sitting
upright, by sitting on the edge of
the seat, or by otherwise being
out of position), the "Passenger
Air bag Off" indicator may be
turned on, and the passenger's air
bag may not deploy in a collision.
Always be sure to sit properly in
the front passenger’s seat and
wear the safety belt properly and
do not do any of the following.
(Continued)
WARNING
- Children in rear
seat
Even though your vehicle is
equipped with the occupant classi-
fication system, children aged 12
and under should be seated in the
rear seats. Do not install a child
restraint system in the front pas-
senger’s seat since a child restraint
may result in an improper reading
by the occupant classification sen-
sor. The infant/child could be
severely injured or killed by an air
bag deployment in case of an acci-
dent.
Children are afforded the most pro-
tection in the event of an accident
when they are restrained by the
proper restraint system in the rear
seat.
Page 78 of 294
369
Knowing your vehicle
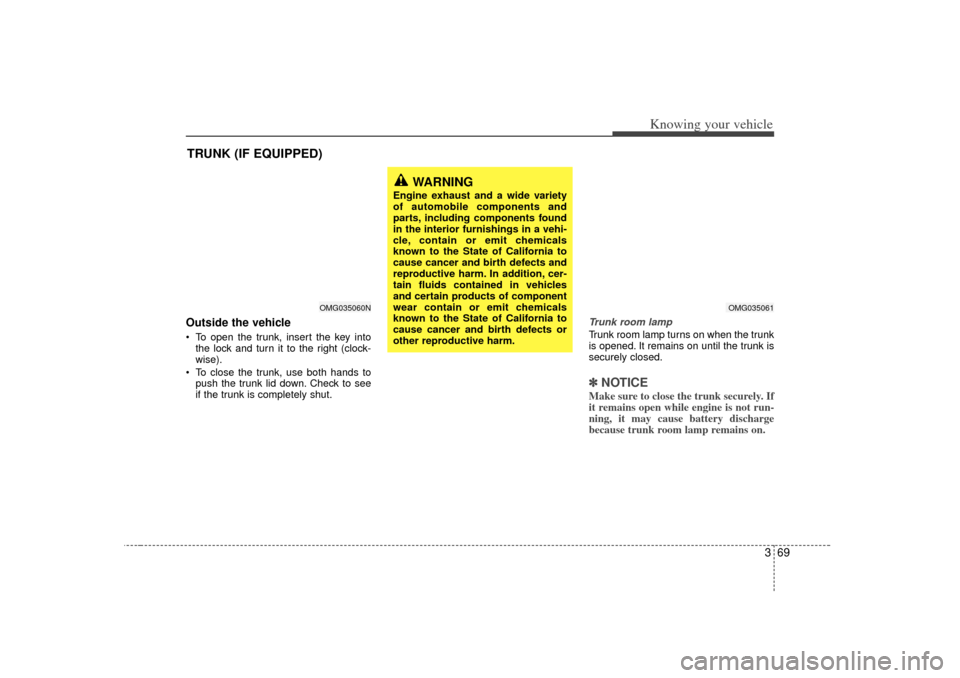
Outside the vehicleTo open the trunk, insert the key into
the lock and turn it to the right (clock-
wise).
To close the trunk, use both hands to
push the trunk lid down. Check to see
if the trunk is completely shut.
Trunk room lampTrunk room lamp turns on when the trunk
is opened. It remains on until the trunk is
securely closed.✽ ✽
NOTICEMake sure to close the trunk securely. If
it remains open while engine is not run-
ning, it may cause battery discharge
because trunk room lamp remains on.
TRUNK (IF EQUIPPED)
WARNING
Engine exhaust and a wide variety
of automobile components and
parts, including components found
in the interior furnishings in a vehi-
cle, contain or emit chemicals
known to the State of California to
cause cancer and birth defects and
reproductive harm. In addition, cer-
tain fluids contained in vehicles
and certain products of component
wear contain or emit chemicals
known to the State of California to
cause cancer and birth defects or
other reproductive harm.
OMG035061
OMG035060N
Page 79 of 294
Knowing your vehicle70
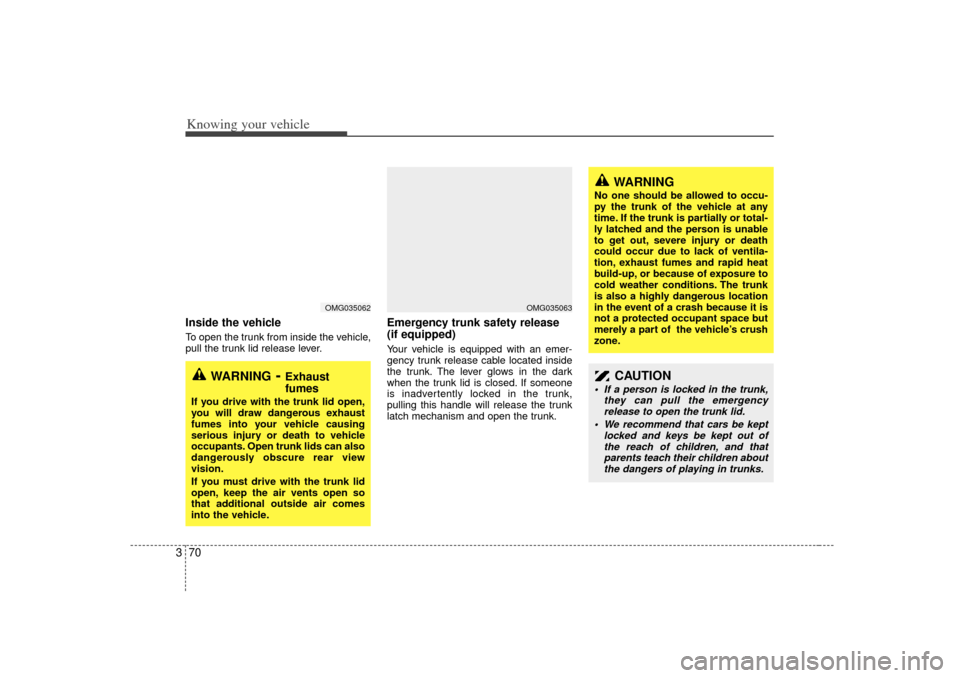
3Inside the vehicleTo open the trunk from inside the vehicle,
pull the trunk lid release lever.
Emergency trunk safety release
(if equipped)Your vehicle is equipped with an emer-
gency trunk release cable located inside
the trunk. The lever glows in the dark
when the trunk lid is closed. If someone
is inadvertently locked in the trunk,
pulling this handle will release the trunk
latch mechanism and open the trunk.
WARNING
- Exhaust
fumes
If you drive with the trunk lid open,
you will draw dangerous exhaust
fumes into your vehicle causing
serious injury or death to vehicle
occupants. Open trunk lids can also
dangerously obscure rear view
vision.
If you must drive with the trunk lid
open, keep the air vents open so
that additional outside air comes
into the vehicle.
WARNING
No one should be allowed to occu-
py the trunk of the vehicle at any
time. If the trunk is partially or total-
ly latched and the person is unable
to get out, severe injury or death
could occur due to lack of ventila-
tion, exhaust fumes and rapid heat
build-up, or because of exposure to
cold weather conditions. The trunk
is also a highly dangerous location
in the event of a crash because it is
not a protected occupant space but
merely a part of the vehicle’s crush
zone.
CAUTION
If a person is locked in the trunk,
they can pull the emergencyrelease to open the trunk lid.
We recommend that cars be kept locked and keys be kept out ofthe reach of children, and that parents teach their children aboutthe dangers of playing in trunks.
OMG035062
OMG035063
Page 80 of 294
371
Knowing your vehicle
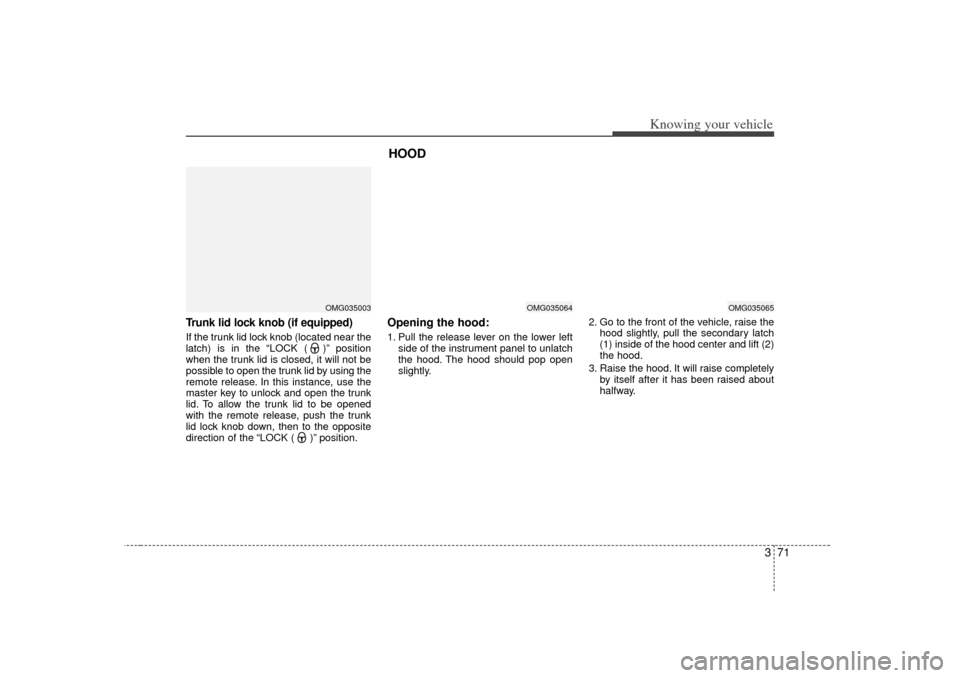
Trunk lid lock knob (if equipped)If the trunk lid lock knob (located near the
latch) is in the “LOCK ( )”position
when the trunk lid is closed, it will not be
possible to open the trunk lid by using the
remote release. In this instance, use the
master key to unlock and open the trunk
lid. To allow the trunk lid to be opened
with the remote release, push the trunk
lid lock knob down, then to the opposite
direction of the “LOCK ( )”position.
Opening the hood:1. Pull the release lever on the lower left
side of the instrument panel to unlatch
the hood. The hood should pop open
slightly. 2. Go to the front of the vehicle, raise the
hood slightly, pull the secondary latch
(1) inside of the hood center and lift (2)
the hood.
3. Raise the hood. It will raise completely by itself after it has been raised about
halfway.
OMG035003
HOOD
OMG035064
OMG035065
Page 94 of 294
385
Knowing your vehicle
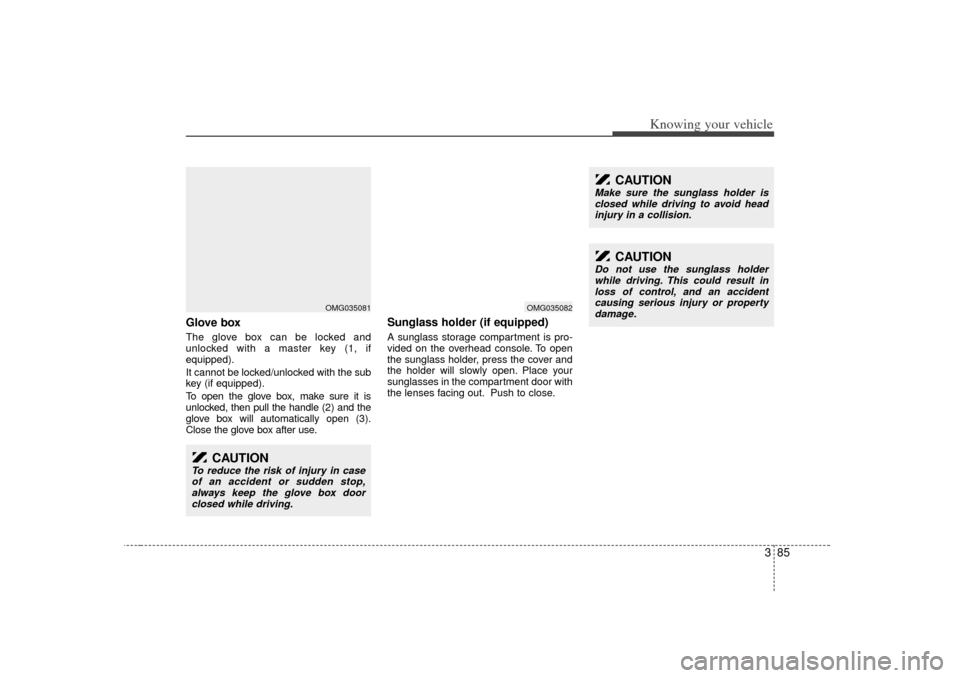
Glove boxThe glove box can be locked and
unlocked with a master key (1, if
equipped).
It cannot be locked/unlocked with the sub
key (if equipped).
To open the glove box, make sure it is
unlocked, then pull the handle (2) and the
glove box will automatically open (3).
Close the glove box after use.
Sunglass holder (if equipped)A sunglass storage compartment is pro-
vided on the overhead console. To open
the sunglass holder, press the cover and
the holder will slowly open. Place your
sunglasses in the compartment door with
the lenses facing out. Push to close.
CAUTION
Do not use the sunglass holderwhile driving. This could result inloss of control, and an accident causing serious injury or propertydamage.
CAUTION
To reduce the risk of injury in caseof an accident or sudden stop, always keep the glove box doorclosed while driving.
OMG035081
OMG035082
CAUTION
Make sure the sunglass holder isclosed while driving to avoid headinjury in a collision.
Page 101 of 294
Knowing your vehicle92
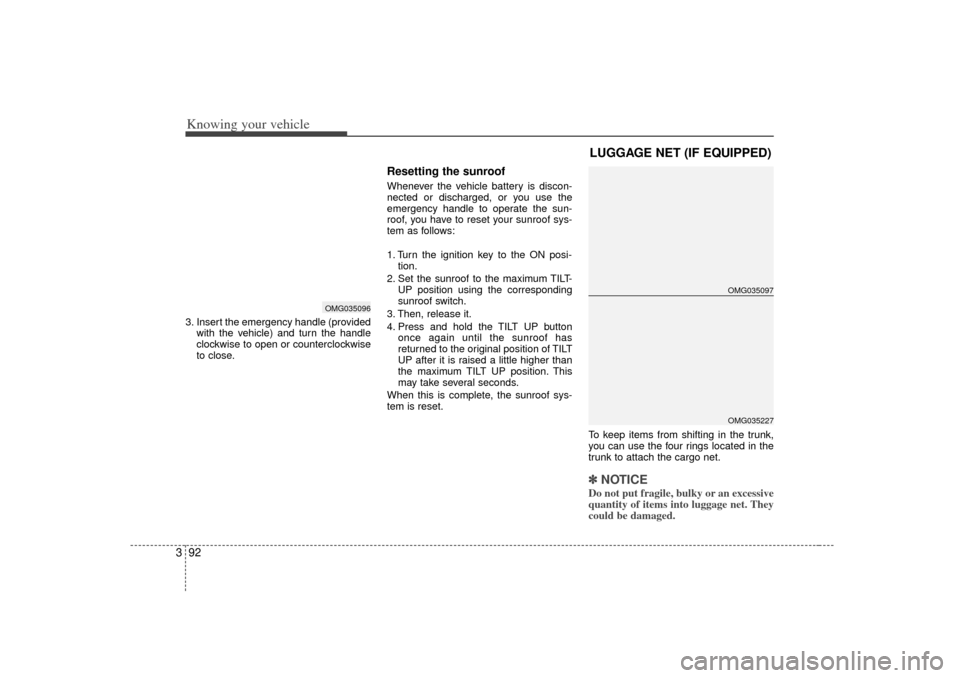
33. Insert the emergency handle (provided
with the vehicle) and turn the handle
clockwise to open or counterclockwise
to close.
Resetting the sunroofWhenever the vehicle battery is discon-
nected or discharged, or you use the
emergency handle to operate the sun-
roof, you have to reset your sunroof sys-
tem as follows:
1. Turn the ignition key to the ON posi-tion.
2. Set the sunroof to the maximum TILT- UP position using the corresponding
sunroof switch.
3. Then, release it.
4. Press and hold the TILT UP button once again until the sunroof has
returned to the original position of TILT
UP after it is raised a little higher than
the maximum TILT UP position. This
may take several seconds.
When this is complete, the sunroof sys-
tem is reset.
To keep items from shifting in the trunk,
you can use the four rings located in the
trunk to attach the cargo net.
✽ ✽NOTICEDo not put fragile, bulky or an excessive
quantity of items into luggage net. They
could be damaged.
OMG035096
LUGGAGE NET (IF EQUIPPED)
OMG035097OMG035227
Page 102 of 294
393
Knowing your vehicle
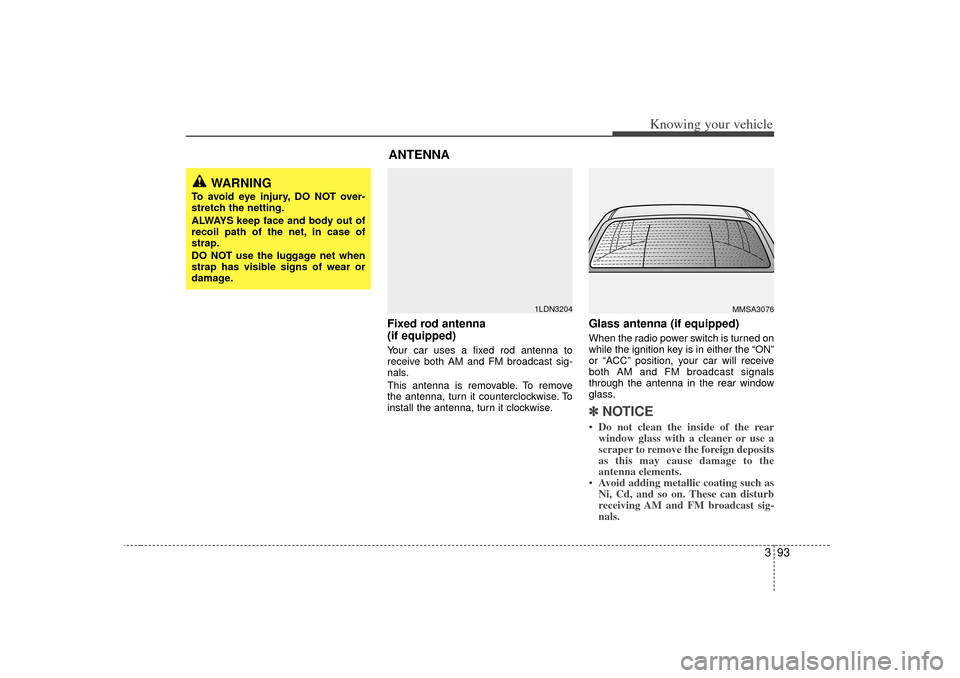
Fixed rod antenna
(if equipped)Your car uses a fixed rod antenna to
receive both AM and FM broadcast sig-
nals.
This antenna is removable. To remove
the antenna, turn it counterclockwise. To
install the antenna, turn it clockwise.
Glass antenna (if equipped)When the radio power switch is turned on
while the ignition key is in either the “ON”
or “ACC ”position, your car will receive
both AM and FM broadcast signals
through the antenna in the rear window
glass.✽ ✽ NOTICE• Do not clean the inside of the rear
window glass with a cleaner or use a
scraper to remove the foreign deposits
as this may cause damage to the
antenna elements.
• Avoid adding metallic coating such as Ni, Cd, and so on. These can disturb
receiving AM and FM broadcast sig-
nals.
MMSA3076
1LDN3204
WARNING
To avoid eye injury, DO NOT over-
stretch the netting.
ALWAYS keep face and body out of
recoil path of the net, in case of
strap.
DO NOT use the luggage net when
strap has visible signs of wear or
damage.
ANTENNA
Page 108 of 294
399
Knowing your vehicle
1. POWER ON-OFF Control KnobThe radio unit may be operated when the
ignition key is in the “ACC” or “ON” posi-
tion. Press the knob to switch the power
on. The LCD shows the radio frequency
in the radio mode, the tape direction indi-
cator in the tape mode. To switch the
power off, press the knob again.VOLUME ControlRotate the knob clockwise to increase
the volume and turn the knob counter-
clockwise to reduce the volume.2. BAND SelectorBAND Selection Button Pressing the FM/AM button changes the
AM, FM1 and FM2 bands.
3. TUNE/MODE Select KnobRotate the knob clockwise to increase
the frequency and turn the knob counter-
clockwise to reduce the frequency.Mode Select KnobPressing the MODE knob changes the
BASS, MID-RANGE, TREBLE, FADER
and BALANCE mode.
The mode selected is shown on the dis-
play.
After selecting each mode, rotate the
mode select knob clockwise or counter-
clockwise.BASS ControlTo increase the BASS, rotate the knob
clockwise, while to decrease the BASS,
rotate the knob counterclockwise.MID-RANGE ControlTo increase the MID-RANGE, rotate the
knob clockwise, while to decrease the
MID, rotate the knob counterclockwise.TREBLE ControlTo increase the TREBLE, rotate the knob
clockwise, while to decrease the TRE-
BLE, rotate the knob counterclockwise.
FADER ControlRotate the control knob clockwise to
emphasize rear speaker sound (front
speaker sound will be attenuated). When
the control knob is turned counterclock-
wise, front speaker sound will be empha-
sized (rear speaker sound will be attenu-
ated).BALANCE ControlRotate the knob clockwise to emphasize
right speaker sound (left speaker sound
will be attenuated). When the control
knob is turned counterclockwise, left
speaker sound will be emphasized (right
speaker sound will be attenuated).
Page 113 of 294

Knowing your vehicle104
31. POWER ON-OFF Control Knob The radio unit may be operated when
the ignition key is in the “ACC”or “ON”
position. Press the knob to switch the
power on. The LCD shows the radio
frequency in radio mode, and displays
the CD track in CD mode. To switch the
power off, press the knob again.
Push the FM/AM or CD to turn on that function without pushing the Power
ON-OFF control knob.VOLUME ControlRotate the knob clockwise to increase
the volume and turn the knob counter-
clockwise to reduce the volume.2. BAND SelectorFM Selection Button Pressing the FMbutton changes the
FM1 and FM2 bands.AM(MW, LW) Selection Button Pressing the AMbutton selects the AM
band. AM mode is displayed on the LCD.
3. TUNE Select/AUDIO Control KnobRotate the knob clockwise to increase
the frequency and turn the knob counter-
clockwise to reduce the frequency.Mode Select KnobPressing the MODE knob changes the
BASS, MID-RANGE, TREBLE, FADER
and BALANCE mode.
The mode selected is shown on the dis-
play.
After selecting the each mode, rotate the
mode select knob clockwise or counter-
clockwise.BASS ControlTo increase the BASS, rotate the knob
clockwise, while to decrease the BASS,
rotate the knob counterclockwise.MID-RANGE ControlTo increase the MID-RANGE, rotate the
knob clockwise, while to decrease the
MID-RANGE, rotate the knob counter-
clockwise.TREBLE ControlTo increase the TREBLE, rotate the knob
clockwise, while to decrease the TRE-
BLE, rotate the knob counterclockwise.
FADER ControlRotate the control knob clockwise to
emphasize rear speaker sound (front
speaker sound will be attenuated). When
the control knob is turned counterclock-
wise, front speaker sound will be empha-
sized (rear speaker sound will be attenu-
ated).BALANCE ControlRotate the knob clockwise to emphasize
right speaker sound (left speaker sound
will be attenuated). When the control
knob is turned counterclockwise, left
speaker sound will be emphasized (right
speaker sound will be attenuated).4. AUTO SEEK Select Button(Automatic Channel Selection)Press the AUTO SEEK select button.
When the side is pressed, the unit
will automatically tune to the next higher
frequency and when the side is
pressed, it will automatically tune to the
next lower frequency.