light KIA Optima 2007 2.G Manual PDF
[x] Cancel search | Manufacturer: KIA, Model Year: 2007, Model line: Optima, Model: KIA Optima 2007 2.GPages: 294, PDF Size: 3.37 MB
Page 199 of 294
461
Driving your vehicle
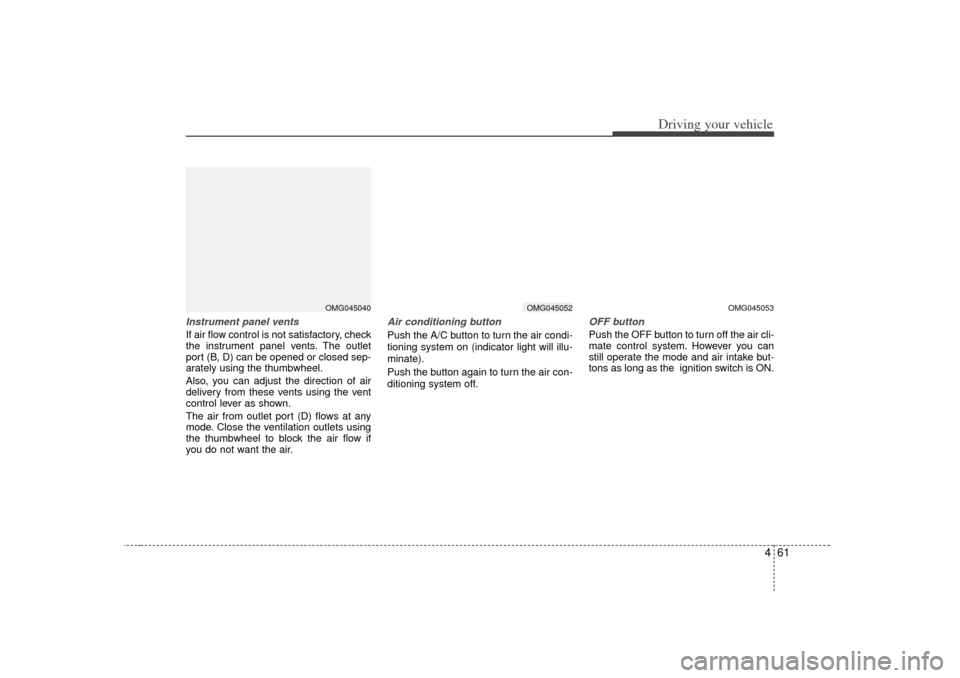
Instrument panel ventsIf air flow control is not satisfactory, check
the instrument panel vents. The outlet
port (B, D) can be opened or closed sep-
arately using the thumbwheel.
Also, you can adjust the direction of air
delivery from these vents using the vent
control lever as shown.
The air from outlet port (D) flows at any
mode. Close the ventilation outlets using
the thumbwheel to block the air flow if
you do not want the air.
Air conditioning button Push the A/C button to turn the air condi-
tioning system on (indicator light will illu-
minate).
Push the button again to turn the air con-
ditioning system off.
OFF buttonPush the OFF button to turn off the air cli-
mate control system. However you can
still operate the mode and air intake but-
tons as long as the ignition switch is ON.
OMG045052
OMG045040
OMG045053
Page 200 of 294
Driving your vehicle62
4Air conditioning system opera-
tion tips If the vehicle has been parked in direct
sunlight during hot weather, open the
windows for a short time to let the hot
air inside the vehicle escape.
To help reduce moisture inside of win-
dows on rainy humid days, decrease
the humidity inside the vehicle by oper-
ating the air conditioning system.
During air conditioning system opera-
tion, you may occasionally notice a
slight change in engine speed as the
air conditioning compressor cycles on.
This is a normal system operation
characteristics.
Use the air conditioning system every
month if only for a few minutes to
ensure maximum system perform-
ance.
When using the air conditioning sys-
tem, you may notice clear water drip-
ping (or even pudding) on the ground
under the passenger side of the vehi-
cle. This is a normal system operation
characteristics.
Operating the air conditioning system
in the recirculated air position does
provide maximum cooling, however,
continual operation in this mode may
cause the air inside the vehicle to
become stale.
✽ ✽
NOTICEWhen using the air conditioning system,
monitor the temperature gauge closely
while driving up hills or in heavy traffic
when outside temperatures are high. Air
conditioning system operation may
cause engine overheating. Continue to
use the blower fan but turn the air con-
ditioning system off if the temperature
gauge indicates engine overheating.
Checking the amount of air con-
ditioner refrigerant and compres-
sor lubricantWhen the amount of refrigerant is low,
the performance of the air conditioning is
reduced. Overfilling also has a bad influ-
ence on the air conditioning system.
Therefore, if abnormal operation is
found, have the system inspected by an
authorized Kia dealer.✽ ✽NOTICEWhen the performance of the air condi-
tioning system is reduced it is important
that the correct type and amount of oil
and refrigerant is used. Otherwise, dam-
age to the compressor and abnormal
system operation may occur.
CAUTION
The air conditioning system should
be serviced by an authorized Kia dealer. Improper service may causeserious injury.
Page 203 of 294
465
Driving your vehicle
Defogging logicManual climate control systemTo reduce the probability of fogging up
the inside of the windshield, the air intake
control is set to the outside (fresh) air
position automatically if any of following
occur.
The mode is set to the , or
while the ignition switch is turned on.
The ignition switch is turned off.
The fan is off.
Press the air intake control button to
select the recirculated air position while
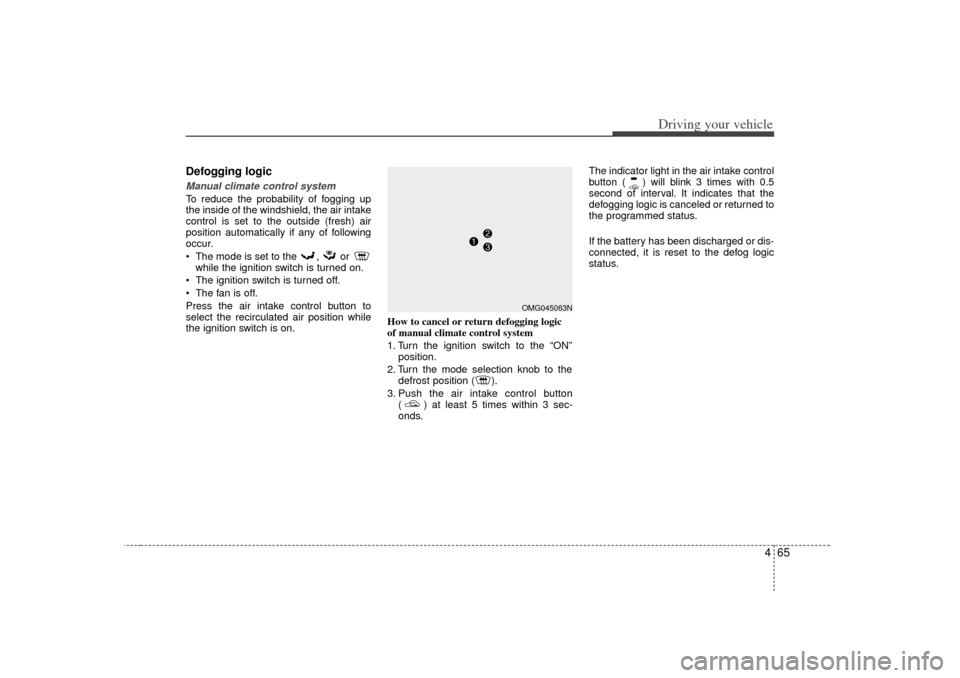
the ignition switch is on. How to cancel or return defogging logic
of manual climate control system
1. Turn the ignition switch to the
“ON”
position.
2. Turn the mode selection knob to the defrost position ( ).
3. Push the air intake control button ( ) at least 5 times within 3 sec-
onds. The indicator light in the air intake control
button ( ) will blink 3 times with 0.5
second of interval. It indicates that the
defogging logic is canceled or returned to
the programmed status.
If the battery has been discharged or dis-
connected, it is reset to the defog logic
status.
OMG045063N
Page 208 of 294
Driving tips45BEFORE DRIVING Before entering vehicle: Be sure that all windows, outside mir-ror(s), and outside lights are clean.
Check the condition of the tires.
Check under the vehicle for any sign of leaks.
Be sure there are no obstacles behind you if you intend to back up.Necessary inspections Fluid levels, such as engine oil, engine
coolant, brake fluid, and washer fluid
should be checked on a regular basis,
with the exact interval depending on the
fluid. Further details are provided in
Section 7, Maintenance.
Before starting Close and lock all doors.
Position the seat so that all controls areeasily reached.
Adjust the inside and outside rearview mirrors.
Be sure that all lights work.
Check all gauges.
Check the operation of warning lights when the ignition switch is turned to
the ON position.
Release the parking brake and make sure the brake warning light goes out.
For safe operation, be sure you are famil-
iar with your vehicle and its equipment.
WARNING
- Driving under
the influence of alcohol or
drugs
Drinking and driving is dangerous.
Drunk driving is the number one
contributor to the highway death
toll each year. Even a small amount
of alcohol will affect your reflexes,
perceptions and judgement. Driving
while under the influence of drugs
is as dangerous or more dangerous
than driving drunk.
You are much more likely to have a
serious accident if you drink or take
drugs and drive.
If you are drinking or taking drugs,
don’t drive. Do not ride with a driv-
er who has been drinking or taking
drugs. Choose a designated driver
or call a cab.
Page 210 of 294
Driving tips65SPECIAL DRIVING CONDITIONSHazardous driving conditions When hazardous driving conditions are
encountered such as water, snow, ice,
mud, sand, or similar hazards, follow
these suggestions:
Drive cautiously and allow extra dis-tance for braking.
Avoid sudden movements in braking or steering.
When braking with non-ABS brakes pump the brake pedal with a light up-
and-down motion until the vehicle is
stopped. If stalled in snow, mud, or sand, use
second gear. Accelerate slowly to
avoid spinning the drive wheels.
Use sand, rock salt, tire chains, or other non-slip material under the drive
wheels to provide traction when stalled
in ice, snow, or mud.
Rocking the vehicle If it is necessary to rock the vehicle to
free it from snow, sand, or mud, first turn
the steering wheel right and left to clear
the area around your front wheels. Then,
shift back and forth between 1 (First) and
R (Reverse) in vehicles equipped with a
manual transaxle or R (Reverse) and any
forward gear in vehicles equipped with
an automatic transaxle. Do not race the
engine, and spin the wheels as little as
possible. If you are still stuck after a few
tries, have the vehicle pulled out by a tow
vehicle to avoid engine overheating and
possible damage to the transaxle.✽ ✽ NOTICEProlonged rocking may cause engine
over-heating, transaxle damage or fail-
ure, and tire damage.
CAUTION
- ABS
Do not pump the brake pedal on a
vehicle equipped with ABS.
WARNING
- Downshifting
Downshifting with an automatic
transaxle, while driving on slippery
surfaces can cause an accident.
The sudden change in tire speed
could cause the tires to skid. Be
careful when downshifting on slip-
pery surfaces.
WARNING
- Spinning tires
Do not spin the wheels, especially
at speeds more than 56 km/h (35
mph). Spinning the wheels at high
speeds when the vehicle is station-
ary could cause a tire to overheat,
explode and injure bystanders.
Page 211 of 294
57
Driving tips
Driving at night Because night driving presents more
hazards than driving in the daylight, here
are some important tips to remember:
Slow down and keep more distancebetween you and other vehicles, as it
may be more difficult to see at night,
especially in areas where there may
not be any street lights.
Adjust your mirrors to reduce the glare from other driver's headlights.
Keep your headlights clean and prop- erly aimed on vehicles not equipped
with the automatic headlight aiming
feature. Dirty or improperly aimed
headlights will make it much more diffi-
cult to see at night.
Avoid staring directly at the headlights of oncoming vehicles. You could be
temporarily blinded, and it will take
several seconds for your eyes to read-
just to the darkness.
Driving in the rain Rain and wet roads can make driving
dangerous, especially if you’re not pre-
pared for the slick pavement. Here are a
few things to consider when driving in the
rain:
A heavy rainfall will make it harder tosee and will increase the distance
needed to stop your vehicle, so slow
down.
Keep your windshield wiping equip- ment in good shape. Replace your
windshield wiper blades when they
show signs of streaking or missing
areas on the windshield.
If your tires are not in good condition, making a quick stop on wet pavement
can cause a skid and possibly lead to
an accident. Be sure your tires are in
good shape.
Turn on your headlights to make it eas- ier for others to see you.
Driving too fast through large puddles can affect your brakes. If you must go
through puddles, try to drive through
them slowly.
If you believe you may have gotten your brakes wet, apply them lightly
while driving until normal braking oper-
ation returns.
Winter driving We recommend that you carry emer-gency equipment, including a window
scraper, windshield de-icer, a bag of
sand or salt, flares, a small shovel and
jumper cables.
Make sure you have sufficient ethyl- ene-glycol coolant in the radiator.
Check the battery condition and cables. Cold temperatures reduce the
output capability of any battery, so it
must be in excellent condition to pro-
vide enough winter starting power.
Make sure the engine oil viscosity is suitable for cold weather.
Check the ignition system for loose connections and damage.
Use antifreeze-formulated windshield washer fluid. (Do not use engine
coolant antifreeze.)
Do not use the parking brake if it might freeze. When parking, shift to 1 (First)
or R (Reverse) with a manual transaxle
or P (Park) with an automatic transaxle
and block the rear wheels.
Page 215 of 294
511
Driving tips
Driving with a trailer Towing a trailer requires experience. You
must gain that experience slowly and
carefully which practicing with an
unloaded or lightly loaded trailer. Before
setting out for the open road, you must
get to know your trailer. Acquaint yourself
with the feel of handling and braking with
the trailer. And always keep in mind that
the vehicle you are driving is now a good
deal longer and not nearly so responsive
as your vehicle is by itself.
Before you start, check the trailer hitch
and platform, safety chains, electrical
connector(s), lights, tires and mirror
adjustment. If the trailer has brakes, fol-
low the trailer manufacturer’s instructions
as to how to check the brakes before you
start driving.
During your trip, stop every hour or so to
be sure that the load is secure, and that
the lights and any trailer brakes are work-
ing.Following distance Stay at least twice as far behind the vehi-
cle ahead as you would when driving
your vehicle without a trailer. This can
help you avoid situations that require
heavy braking and sudden turns.
Passing You’ll need more passing distance up
ahead when you’re towing a trailer. And,
because of the increased vehicle length,
you’ll need to go much farther beyond the
passed vehicle before you can return to
your lane.Backing up The trailer will go in the opposite direc-
tion of the rear of your vehicle when
backing up. This is very difficult for an
inexperienced trailer driver to get used
to. To help you avoid mistakes, hold the
bottom of the steering wheel with one
hand. Then, to move the trailer to the left,
just hold the steering wheel firmly and
move your hand to the left. To move the
trailer to the right, move your hand to the
right. Always back up slowly and, if pos-
sible, have someone guide you.Making turns When you’re turning with a trailer, make
wider turns than normal. Do this so your
trailer won’t strike soft shoulders, curbs,
road signs, trees, or other objects. Avoid
jerky or sudden maneuvers. Signal well
in advance.
Turn signals when towing a trailer When you tow a trailer, your vehicle has
to have a different turn signal flasher and
extra wiring. The green arrows on your
instrument panel will flash whenever you
signal a turn or lane change. Properly
connected, the trailer lights will also flash
to alert other drivers you’re about to turn,
change lanes, or stop.
When towing a trailer, the green arrows
on your instrument panel will flash for
turns even if the bulbs on the trailer are
burned out. Thus, you may think drivers
behind you are seeing your signals
when, in fact, they are not. It’s important
to check occasionally to be sure the trail-
er bulbs are still working. You must also
check the lights every time you discon-
nect and then reconnect the wires.
Do not connect a trailer lighting system
directly to your vehicle’s lighting system.
Use only an approved trailer wiring har-
ness.
Your Authorized Kia Dealer can assist
you in installing the wiring harness.
WARNING -
Trailer wiring
harness
Failure to use an approved trailer
wiring harness could result in an
accident due to the failure of the
trailer lights to operate.
Page 217 of 294
513
Driving tips
When you are ready to leave afterparking on a hill 1. With the automatic transaxle in P (Park), apply your brakes and hold the
brake pedal down while you:
Start your engine;
Shift into gear; and
Release the parking brake.
2. Slowly remove your foot from the brake pedal.
3. Drive slowly forward until the trailer is clear of the chocks.
4. Stop and have someone pick up and store the chocks.Maintenance when trailer towing Your vehicle will need service more often
when you regularly pull a trailer.
Important items to pay particular atten-
tion to include engine oil, automatic
transaxle fluid, axle lubricant and cooling
system fluid. Brake condition is another
important item to frequently check. Each
item is covered in this manual, and the
Index will help you find them quickly. If
you’re trailering, it’s a good idea to review
these sections before you start your trip. Don’t forget to also maintain your trailer
and hitch. Follow the maintenance
schedule that accompanied your trailer
and check it periodically. Preferably, con-
duct the check at the start of each day’s
driving. Most importantly, all hitch nuts
and bolts should be tight.
✽ ✽
NOTICE• Due to higher load during trailer
usage, overheating might occur in hot
days or during uphill driving. If the
coolant gauge indicates over-heating,
switch off the A/C and stop the vehicle
in a safe area to cool down the engine.
• When towing check transaxle fluid more frequently.
• If your vehicle is not equipped with the air conditioner, you should install
a condenser fan to improve engine
performance when towing a trailer.
If you do decide to pull a trailerHere are some important points if you
decide to pull a trailer:
Consider using a sway control. You can
ask a hitch dealer about sway control.
After your odometer indicates 800 km (500 miles) or more, you can tow a
trailer. For the first 800 km (500 miles)
that you tow a trailer, don’t drive over
80 km/h (50 mph) and don’t make
starts at full throttle. This helps your
engine and other parts of your vehicle
“wear” in at the heavier loads.
Always drive your vehicle at a moder- ate speed (less than 100 km/h (60
mph)).
On a long uphill grade, do not exceed 70 km/h (45 mph) or the posted towing
speed limit, whichever is lower.
The important considerations have to do with weight:
Weight of the trailer
How heavy can a trailer safely be? It
should never weigh more than the maxi-
mum trailer weight with trailer brakes. But
even that can be too heavy. If you feel that
the trailer is adversely affecting the move-
ment of your vehicle, reduce your speed,
avoid uneven or winding roads, avoid
roads with steep grades, and/or lighten
your trailer load.
Page 222 of 294
In case of an emergency26ROAD WARNING Hazard warning flasher The hazard warning flasher serves as a
warning to other drivers to exercise
extreme caution when approaching,
overtaking, or passing your vehicle. It
should be used whenever emergency
repairs are being made or when the vehi-
cle is stopped near the edge of a road-
way.
Depress the flasher switch with the igni-
tion switch in any position. The flasher
switch is located in the center console
switch panel. All turn signal lights will
flash simultaneously.• The hazard warning flasher operates
whether your vehicle is running or not.
The turn signals do not work when the hazard flasher is on.
Care must be taken when using the hazard warning flasher while the vehi-
cle is being towed. If your temperature gauge indicates over-
heating, if you experience a loss of
power, or if you hear a loud knocking or
pinging noise, the engine has probably
overheated. Should any of these symp-
toms occur, use the following procedure:
1. Turn on the hazard warning flasher,
then drive to the nearest safe location
and stop your vehicle; set the automat-
ic transaxle in P (Park), or shift the
manual transaxle to N (Neutral) and
apply the parking brake.
2. Make sure the air conditioner is off.
3. If coolant or steam is boiling out of the radiator, stop the engine and call an
authorized Kia dealer for assistance.
If coolant is not boiling out, allow the
engine to idle and open the hood to
permit the engine to cool gradually.
If the temperature does not go down
with the engine idling, stop the engine
and allow sufficient time for it to cool.
OVERHEATING
OMG065001
Page 226 of 294
In case of an emergency66ELECTRICAL CIRCUIT PROTECTIONFuses A vehicle’s electrical system is protected
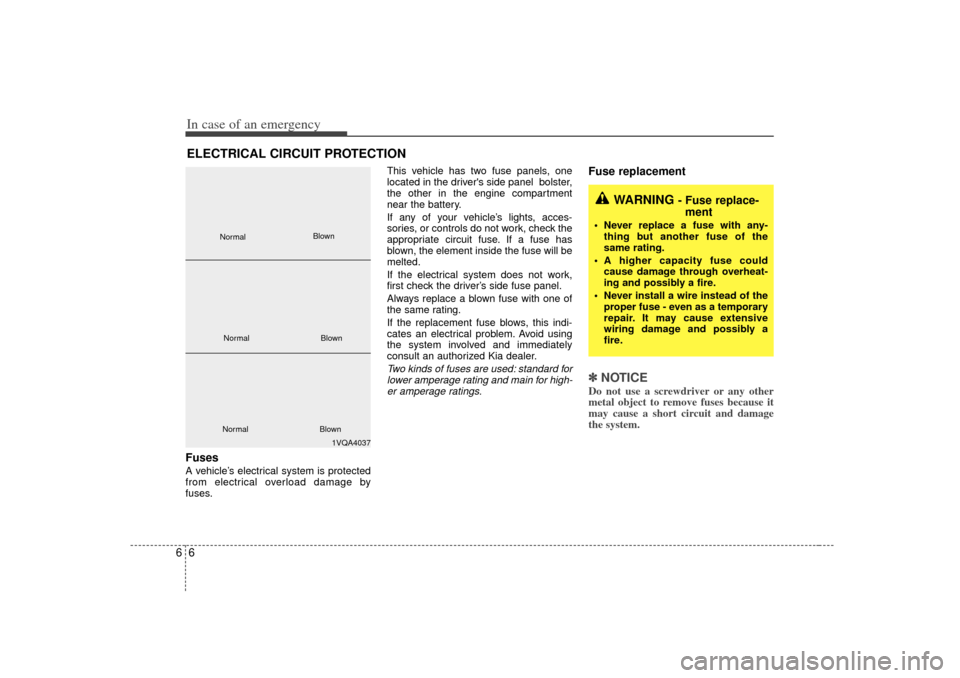
from electrical overload damage by
fuses.This vehicle has two fuse panels, one
located in the driver's side panel bolster,
the other in the engine compartment
near the battery.
If any of your vehicle’s lights, acces-
sories, or controls do not work, check the
appropriate circuit fuse. If a fuse has
blown, the element inside the fuse will be
melted.
If the electrical system does not work,
first check the driver’s side fuse panel.
Always replace a blown fuse with one of
the same rating.
If the replacement fuse blows, this indi-
cates an electrical problem. Avoid using
the system involved and immediately
consult an authorized Kia dealer.
Two kinds of fuses are used: standard for
lower amperage rating and main for high-er amperage ratings.
Fuse replacement ✽ ✽ NOTICEDo not use a screwdriver or any other
metal object to remove fuses because it
may cause a short circuit and damage
the system.
WARNING
- Fuse replace-
ment
Never replace a fuse with any-
thing but another fuse of the
same rating.
A higher capacity fuse could cause damage through overheat-
ing and possibly a fire.
Never install a wire instead of the proper fuse - even as a temporary
repair. It may cause extensive
wiring damage and possibly a
fire.
1VQA4037
Normal
Normal
Blown
Blown
Normal Blown