release KIA Optima 2007 2.G Owner's Manual
[x] Cancel search | Manufacturer: KIA, Model Year: 2007, Model line: Optima, Model: KIA Optima 2007 2.GPages: 294, PDF Size: 3.37 MB
Page 7 of 294
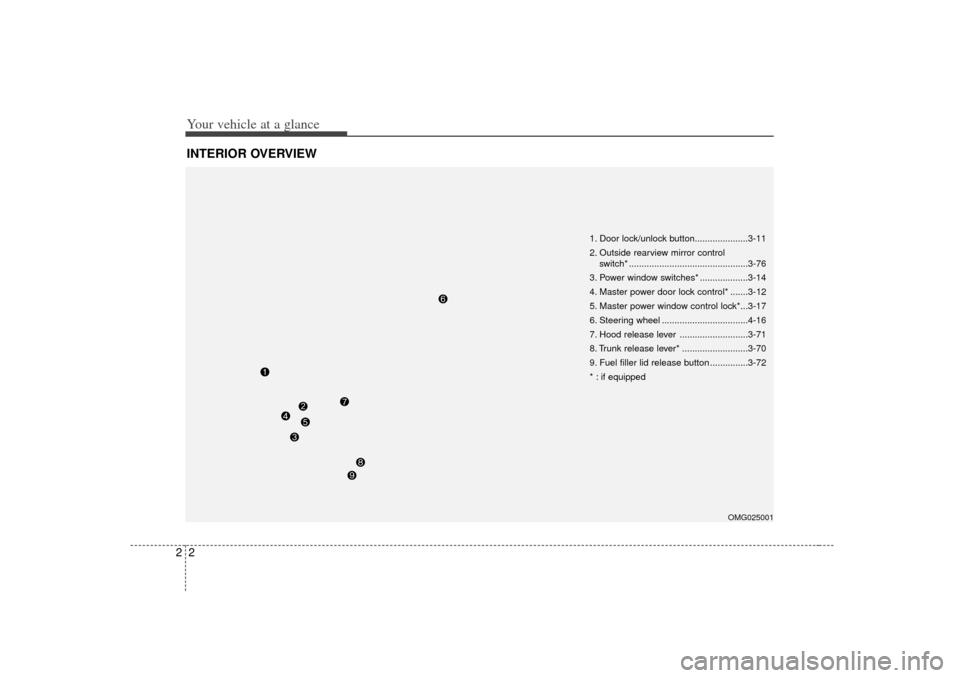
Your vehicle at a glance22INTERIOR OVERVIEW
1. Door lock/unlock button.....................3-11
2. Outside rearview mirror control switch* ...............................................3-76
3. Power window switches* ...................3-14
4. Master power door lock control* .......3-12
5. Master power window control lock*...3-17
6. Steering wheel ..................................4-16
7. Hood release lever ...........................3-71
8. Trunk release lever* ..........................3-70
9. Fuel filler lid release button ...............3-72
* : if equipped
OMG025001
Page 12 of 294
33
Knowing your vehicle
Restrictions in handling keysWhen leaving keys with parking lot and
valet attendants, the following proce-
dures will ensure that your vehicle’s trunk
and glove box compartment can not be
opened in your absence.
With master and sub key(if equipped) 1. Open the trunk with the master key.
2. Set the trunk lid lock knob in the trunk to LOCK ( ) position. In the LOCK
( ) position, the trunk can not be
unlocked with either the trunk release
lever inside the car or trunk open but-
ton of the transmitter.
3. Close the glove box, and lock the glove box using the master key.
4. Leave the attendant with the sub key. The trunk and glove box are secured
because the sub key only allows
engine start and door lock and unlock.
OMG035003
Page 20 of 294
311
Knowing your vehicle
✽
✽NOTICEAlways remove the ignition key, engage
the parking brake, close all windows
and lock all doors when leaving your
vehicle unattended. ✽ ✽NOTICEIf the door is locked/unlocked multiple
times in rapid succession with either the
vehicle key or door lock switch, the sys-
tem may stop operating temporarily in
order to protect the circuit and prevent
damage to system components.
Operating door locks from inside
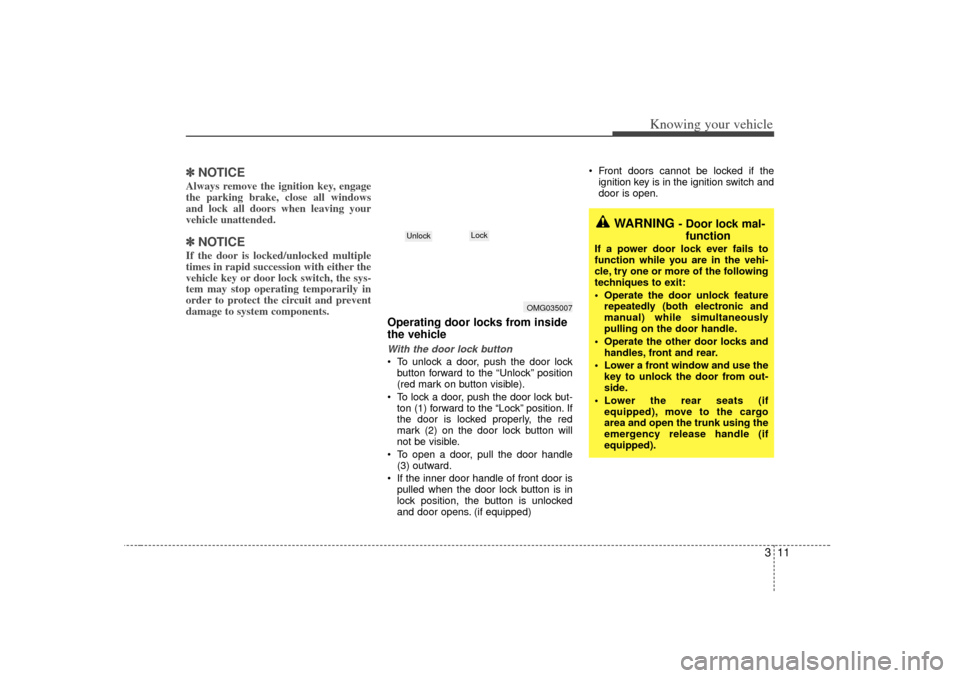
the vehicleWith the door lock button To unlock a door, push the door lock
button forward to the “Unlock” position
(red mark on button visible).
To lock a door, push the door lock but- ton (1) forward to the “Lock” position. If
the door is locked properly, the red
mark (2) on the door lock button will
not be visible.
To open a door, pull the door handle (3) outward.
If the inner door handle of front door is pulled when the door lock button is in
lock position, the button is unlocked
and door opens. (if equipped) Front doors cannot be locked if the
ignition key is in the ignition switch and
door is open.
WARNING
- Door lock mal-function
If a power door lock ever fails to
function while you are in the vehi-
cle, try one or more of the following
techniques to exit:
• Operate the door unlock feature
repeatedly (both electronic and
manual) while simultaneously
pulling on the door handle.
Operate the other door locks and handles, front and rear.
Lower a front window and use the key to unlock the door from out-
side.
Lower the rear seats (if equipped), move to the cargo
area and open the trunk using the
emergency release handle (if
equipped).
OMG035007
Lock
Unlock
Page 24 of 294
315
Knowing your vehicle
Power windows (if equipped)The ignition switch must be in the ON
position for power windows to operate.
Each door has a power window switch
that controls that door’s window.
However, the driver has a power window
lock switch which can block the operation
of passenger windows.
If you notice buffeting and pulsation
(wind shock) with either side window
open, you should open the opposite win-
dow slightly to reduce the condition.✽ ✽ NOTICE• To protect the power window system
from the possibility of damage, do not
open or close two windows at the same
time. This will also ensure the longevi-
ty of the fuse.
• Never try to operate the main switch on the driver's door and the individ-
ual door window switch in opposing
directions at the same time. If this is
done, the window will stop and cannot
be opened or closed.
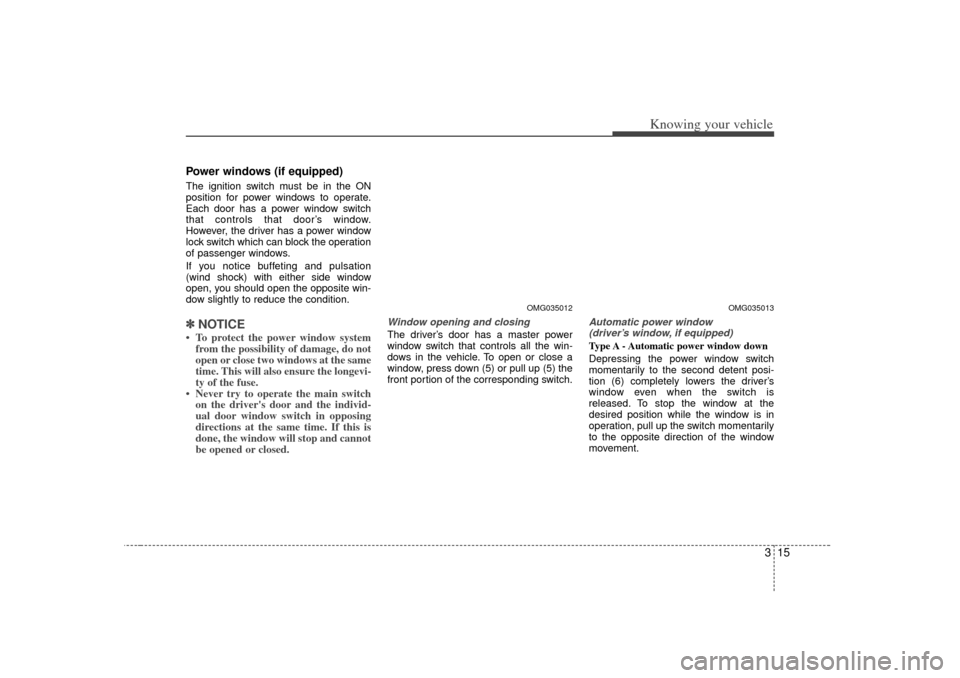
Window opening and closingThe driver’ s door has a master power
window switch that controls all the win-
dows in the vehicle. To open or close a
window, press down (5) or pull up (5) the
front portion of the corresponding switch.
Automatic power window (driver’s window, if equipped)Type A - Automatic power window down
Depressing the power window switch
momentarily to the second detent posi-
tion (6) completely lowers the driver ’s
window even when the switch is
released. To stop the window at the
desired position while the window is in
operation, pull up the switch momentarily
to the opposite direction of the window
movement.
OMG035012
OMG035013
Page 25 of 294
Knowing your vehicle16
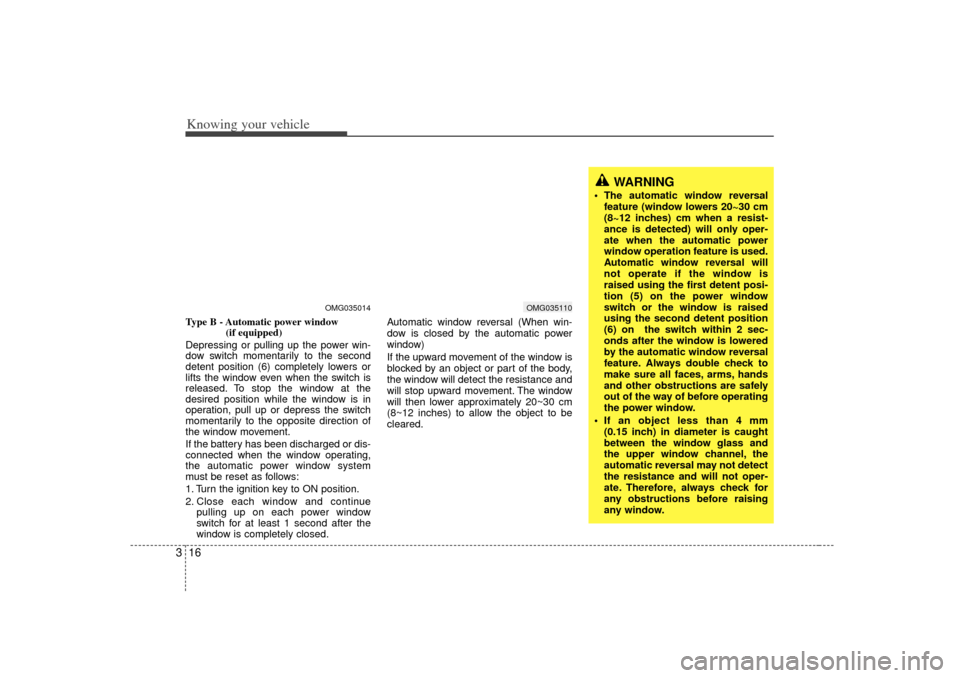
3Type B - Automatic power window
(if equipped)
Depressing or pulling up the power win-
dow switch momentarily to the second
detent position (6) completely lowers or
lifts the window even when the switch is
released. To stop the window at the
desired position while the window is in
operation, pull up or depress the switch
momentarily to the opposite direction of
the window movement.
If the battery has been discharged or dis-
connected when the window operating,
the automatic power window system
must be reset as follows:
1. Turn the ignition key to ON position.
2. Close each window and continue pulling up on each power window
switch for at least 1 second after the
window is completely closed. Automatic window reversal (When win-
dow is closed by the automatic power
window)
If the upward movement of the window is
blocked by an object or part of the body,
the window will detect the resistance and
will stop upward movement. The window
will then lower approximately 20~30 cm
(8~12 inches) to allow the object to be
cleared.
OMG035014
OMG035110
WARNING
The automatic window reversal
feature (window lowers 20~30 cm
(8~12 inches) cm when a resist-
ance is detected) will only oper-
ate when the automatic power
window operation feature is used.
Automatic window reversal will
not operate if the window is
raised using the first detent posi-
tion (5) on the power window
switch or the window is raised
using the second detent position
(6) on the switch within 2 sec-
onds after the window is lowered
by the automatic window reversal
feature. Always double check to
make sure all faces, arms, hands
and other obstructions are safely
out of the way of before operating
the power window.
If an object less than 4 mm (0.15 inch) in diameter is caught
between the window glass and
the upper window channel, the
automatic reversal may not detect
the resistance and will not oper-
ate. Therefore, always check for
any obstructions before raising
any window.
Page 28 of 294
319
Knowing your vehicle
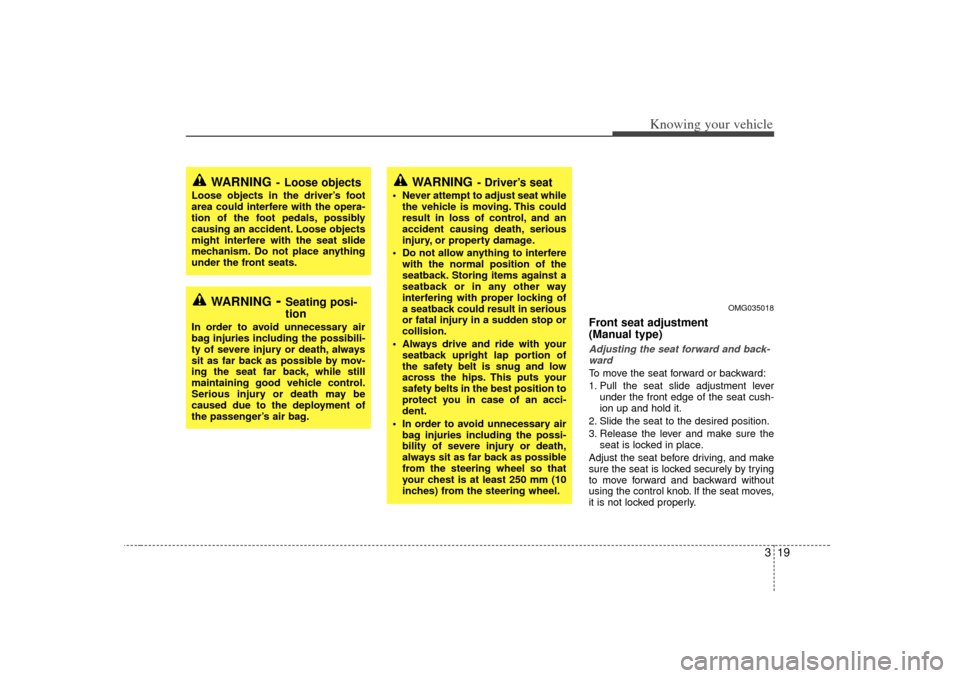
Front seat adjustment
(Manual type)Adjusting the seat forward and back-wardTo move the seat forward or backward:
1. Pull the seat slide adjustment lever under the front edge of the seat cush-
ion up and hold it.
2. Slide the seat to the desired position.
3. Release the lever and make sure the seat is locked in place.
Adjust the seat before driving, and make
sure the seat is locked securely by trying
to move forward and backward without
using the control knob. If the seat moves,
it is not locked properly.
WARNING
- Loose objects
Loose objects in the driver’s foot
area could interfere with the opera-
tion of the foot pedals, possibly
causing an accident. Loose objects
might interfere with the seat slide
mechanism. Do not place anything
under the front seats.
WARNING
- Seating posi-
tion
In order to avoid unnecessary air
bag injuries including the possibili-
ty of severe injury or death, always
sit as far back as possible by mov-
ing the seat far back, while still
maintaining good vehicle control.
Serious injury or death may be
caused due to the deployment of
the passenger’s air bag.
WARNING
- Driver’s seat
Never attempt to adjust seat while the vehicle is moving. This could
result in loss of control, and an
accident causing death, serious
injury, or property damage.
Do not allow anything to interfere with the normal position of the
seatback. Storing items against a
seatback or in any other way
interfering with proper locking of
a seatback could result in serious
or fatal injury in a sudden stop or
collision.
Always drive and ride with your seatback upright lap portion of
the safety belt is snug and low
across the hips. This puts your
safety belts in the best position to
protect you in case of an acci-
dent.
In order to avoid unnecessary air bag injuries including the possi-
bility of severe injury or death,
always sit as far back as possible
from the steering wheel so that
your chest is at least 250 mm (10
inches) from the steering wheel.
OMG035018
Page 29 of 294
Knowing your vehicle20
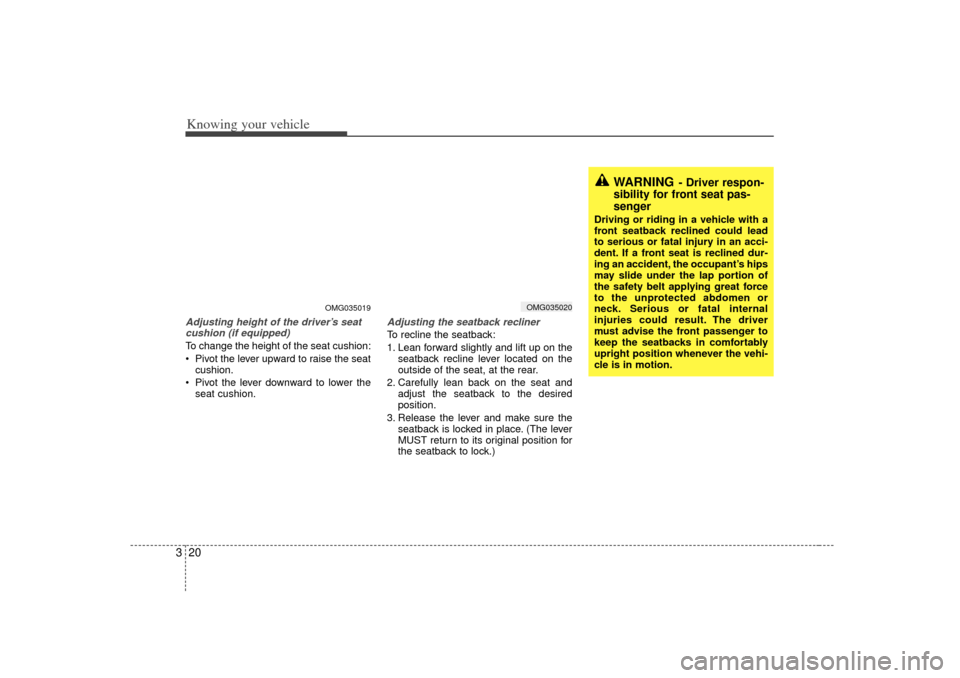
3Adjusting height of the driver’s seat
cushion (if equipped)To change the height of the seat cushion:
Pivot the lever upward to raise the seat
cushion.
Pivot the lever downward to lower the
seat cushion.
Adjusting the seatback reclinerTo recline the seatback:
1. Lean forward slightly and lift up on the
seatback recline lever located on the
outside of the seat, at the rear.
2. Carefully lean back on the seat and adjust the seatback to the desired
position.
3. Release the lever and make sure the seatback is locked in place. (The lever
MUST return to its original position for
the seatback to lock.)
WARNING
- Driver respon-
sibility for front seat pas-
senger
Driving or riding in a vehicle with a
front seatback reclined could lead
to serious or fatal injury in an acci-
dent. If a front seat is reclined dur-
ing an accident, the occupant’s hips
may slide under the lap portion of
the safety belt applying great force
to the unprotected abdomen or
neck. Serious or fatal internal
injuries could result. The driver
must advise the front passenger to
keep the seatbacks in comfortably
upright position whenever the vehi-
cle is in motion.
OMG035019
OMG035020
Page 30 of 294
321
Knowing your vehicle
Front seat adjustment
(Electric type, if equipped)✽ ✽NOTICE• Power seats are driven by the electric
motor. Stop operating if the adjust-
ment is completed. Excessive opera-
tion may damage the electrical equip-
ment.
• When in operation, the power seats consume large amount of electrical
power. To prevent unnecessary charg-
ing system drain, don’t adjust the
power seats longer than necessary
while the engine is not running.
• Do not operate two or more power seat control buttons at the same time.
Doing so may result in power seat
motor or electrical component mal-
function.
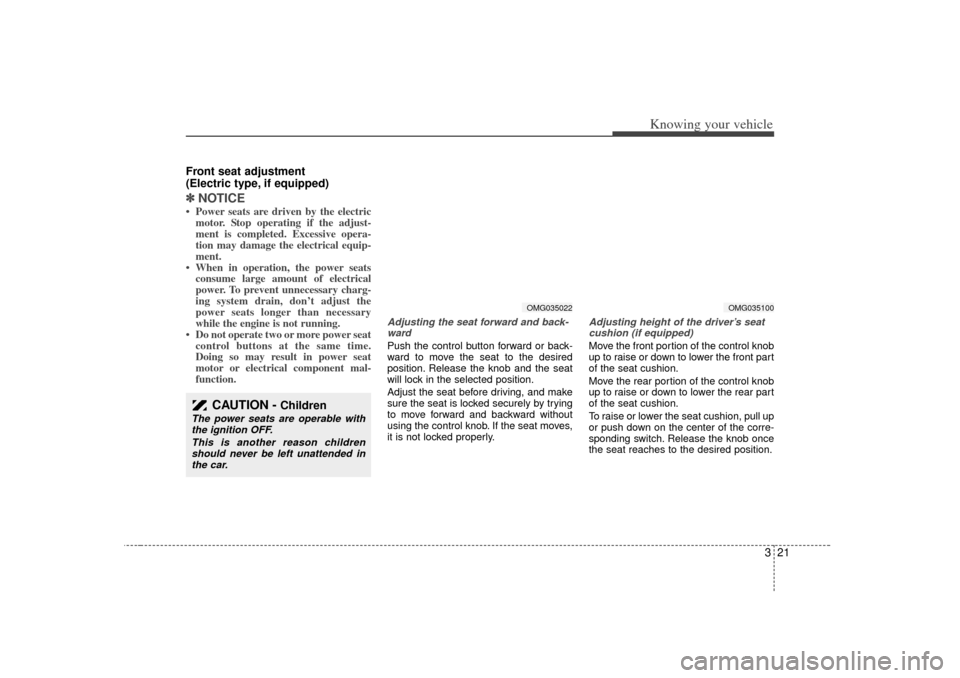
Adjusting the seat forward and back-
wardPush the control button forward or back-
ward to move the seat to the desired
position. Release the knob and the seat
will lock in the selected position.
Adjust the seat before driving, and make
sure the seat is locked securely by trying
to move forward and backward without
using the control knob. If the seat moves,
it is not locked properly.
Adjusting height of the driver’s seatcushion (if equipped)Move the front portion of the control knob
up to raise or down to lower the front part
of the seat cushion.
Move the rear portion of the control knob
up to raise or down to lower the rear part
of the seat cushion.
To raise or lower the seat cushion, pull up
or push down on the center of the corre-
sponding switch. Release the knob once
the seat reaches to the desired position.
CAUTION -
Children
The power seats are operable with the ignition OFF.
This is another reason childrenshould never be left unattended inthe car.
OMG035022
OMG035100
Page 31 of 294
Knowing your vehicle22
3Adjusting the seatback reclinerMove the lever forward or backward to
the desired angle and release the lever. If
the lever is released, seatback will lock in
place. After adjustment, make sure that
the lever has returned to its original
locked position.
Warming the front seat
(if equipped)The front seats can be electrically heated
individually when the ignition switch is
ON. When the switch is ON, a number
ranging from 1 to 5 is displayed on the
switch (5 = warmest setting).
To turn off the seat warmer, set the
switch to 0.
The seat warmer turns off automatically
when the seat temperature reaches the
selected range and will turn on again if
the temperature drops below the select-
ed range.
OMG035023
WARNING
- Driver respon-
sibility for front seat pas-
senger
Driving or riding in a vehicle with a
front seatback reclined could lead
to serious or fatal injury in an acci-
dent. If a front seat is reclined dur-
ing an accident, the occupant’s hips
may slide under the lap portion of
the safety belt applying great force
to the unprotected abdomen or
neck. Serious or fatal internal
injuries could result. The driver
must advise the front passenger to
keep the seatbacks in comfortably
upright position whenever the vehi-
cle is in motion.
OMG035024
Page 32 of 294
323
Knowing your vehicle
✽
✽NOTICE• When cleaning the seats, do not use an
organic solvent such as thinner, ben-
zene, alcohol or gasoline. Doing so
may damage the surface of the heater
or seats.
• To prevent overheating the seat warmer, do not place blankets, cush-
ions or seat covers on the seats while
the seat warmer is in operation.
• Do not place heavy or sharp objects on seats equipped with seat warmers.
Damage to the seat warming compo-
nents could occur.
Headrest adjustmentAdjusting the height up and down
The headrest not only provides comfort
for the driver and passengers, but also
helps to protect the head and neck in the
event of a collision.
To raise the headrest, pull it up to the
desired position (1). To lower the head-
rest, push and hold the release button (2)
on the headrest support and lower the
headrest to the desired position (3). For
best protection, adjust the headrest so its
center is as high as your ears. Also
adjust the headrest so its distance from
the head is as wide as your fist.
WARNING -
Seat warmer
burns
Passengers should use caution
when using seat warmers due to
the possibility of excess heating or
burns. In particular, the driver must
exercise extreme care for the fol-
lowing types of passengers:
1. Infants, children, elderly or hand-
icapped persons, or hospital out-
patients
2. Persons with sensitive skin or those that burn easily
3. Fatigued individuals
4. Intoxicated individuals
5. Individuals taking medication that can cause drowsiness or
sleepiness (sleeping pills, cold
tablets, etc.)
OMG035025