display KIA Optima 2011 3.G Owner's Guide
[x] Cancel search | Manufacturer: KIA, Model Year: 2011, Model line: Optima, Model: KIA Optima 2011 3.GPages: 385, PDF Size: 8.85 MB
Page 183 of 385
4105
Features of your vehicle
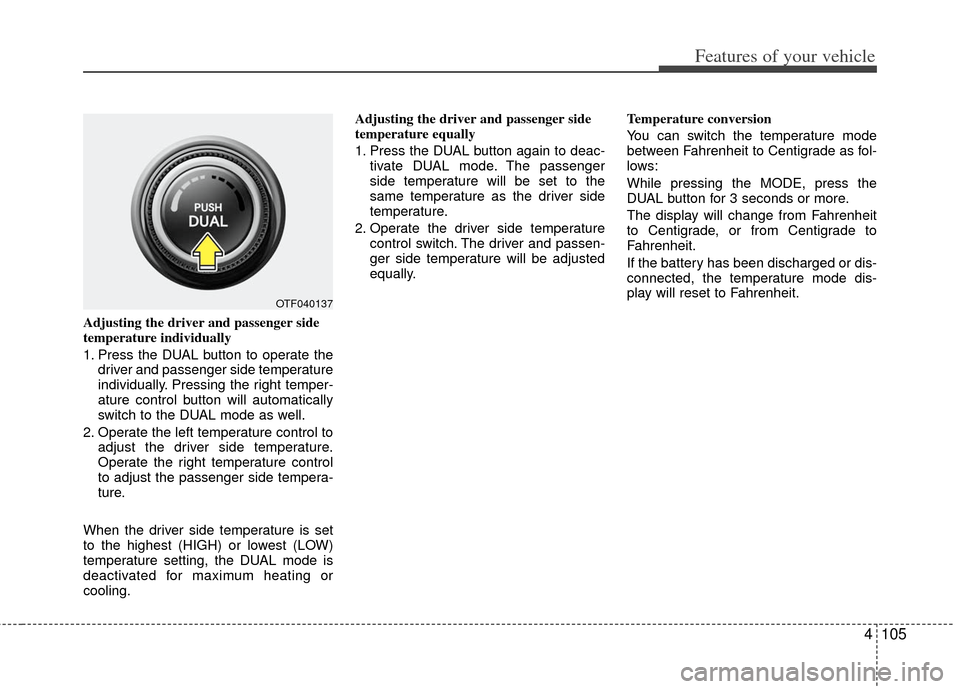
Adjusting the driver and passenger side
temperature individually
1. Press the DUAL button to operate thedriver and passenger side temperature
individually. Pressing the right temper-
ature control button will automatically
switch to the DUAL mode as well.
2. Operate the left temperature control to adjust the driver side temperature.
Operate the right temperature control
to adjust the passenger side tempera-
ture.
When the driver side temperature is set
to the highest (HIGH) or lowest (LOW)
temperature setting, the DUAL mode is
deactivated for maximum heating or
cooling. Adjusting the driver and passenger side
temperature equally
1. Press the DUAL button again to deac-
tivate DUAL mode. The passenger
side temperature will be set to the
same temperature as the driver side
temperature.
2. Operate the driver side temperature control switch. The driver and passen-
ger side temperature will be adjusted
equally. Temperature conversion
You can switch the temperature mode
between Fahrenheit to Centigrade as fol-
lows:
While pressing the MODE, press the
DUAL button for 3 seconds or more.
The display will change from Fahrenheit
to Centigrade, or from Centigrade to
Fahrenheit.
If the battery has been discharged or dis-
connected, the temperature mode dis-
play will reset to Fahrenheit.
OTF040137
Page 184 of 385
Features of your vehicle
106
4
Outside thermometer
The current outside temperature is dis-
played in 1°C (1°F) increments. The tem-
perature range is between -40°C ~ 60°C
(-40°F~140°F).
The outside temperature on the display
may not change immediately like a
general thermometer to prevent the
driver from being inattentive.
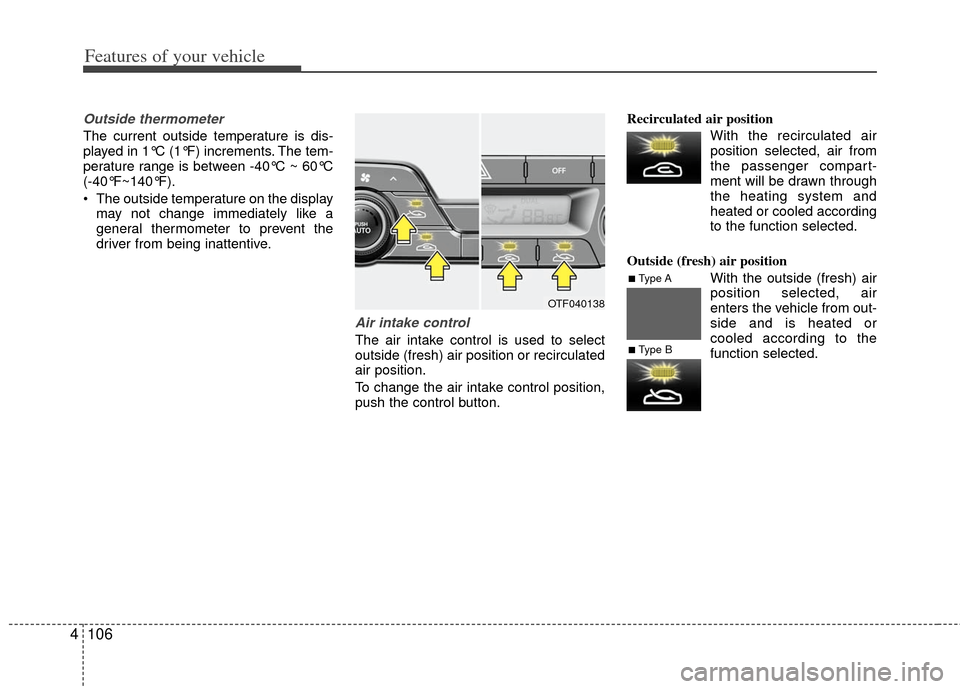
Air intake control
The air intake control is used to select
outside (fresh) air position or recirculated
air position.
To change the air intake control position,
push the control button. Recirculated air position
With the recirculated airposition selected, air from
the passenger compart-
ment will be drawn through
the heating system and
heated or cooled according
to the function selected.
Outside (fresh) air position With the outside (fresh) air
position selected, air
enters the vehicle from out-
side and is heated or
cooled according to the
function selected.
OTF040138
■Type A
■Type B
Page 186 of 385
Features of your vehicle
108
4
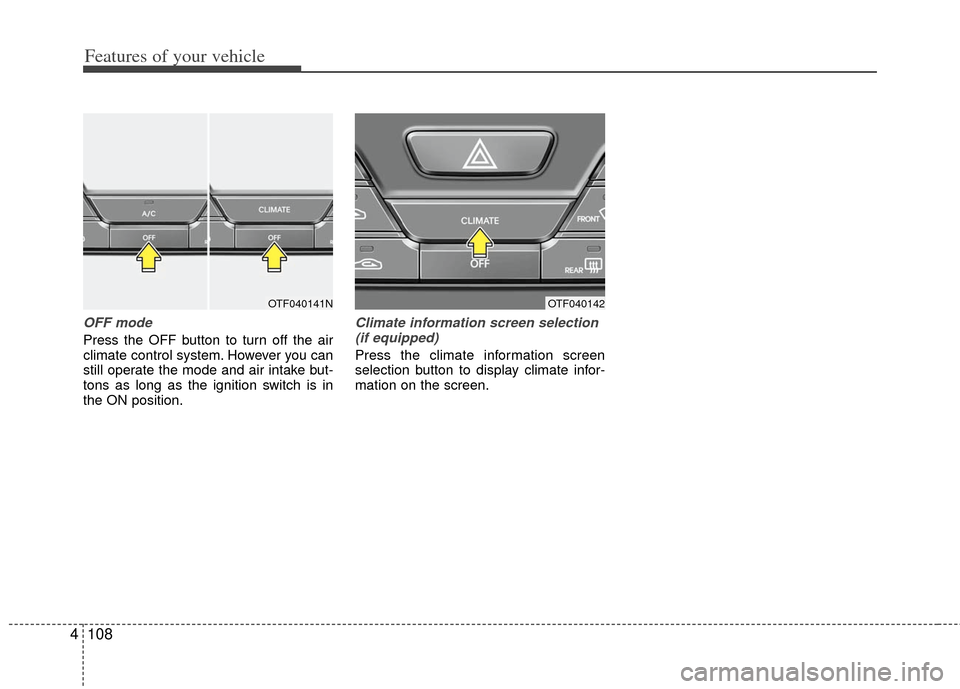
OFF mode
Press the OFF button to turn off the air
climate control system. However you can
still operate the mode and air intake but-
tons as long as the ignition switch is in
the ON position.
Climate information screen selection
(if equipped)
Press the climate information screen
selection button to display climate infor-
mation on the screen.
OTF040141NOTF040142
Page 189 of 385
4111
Features of your vehicle
Defogging logic
To reduce the probability of fogging up
inside of the windshield, the air intake or
air conditioning are controlled automati-
cally according to certain conditions such
as or position. To cancel or
return to the defogging logic, do the fol-
lowings.
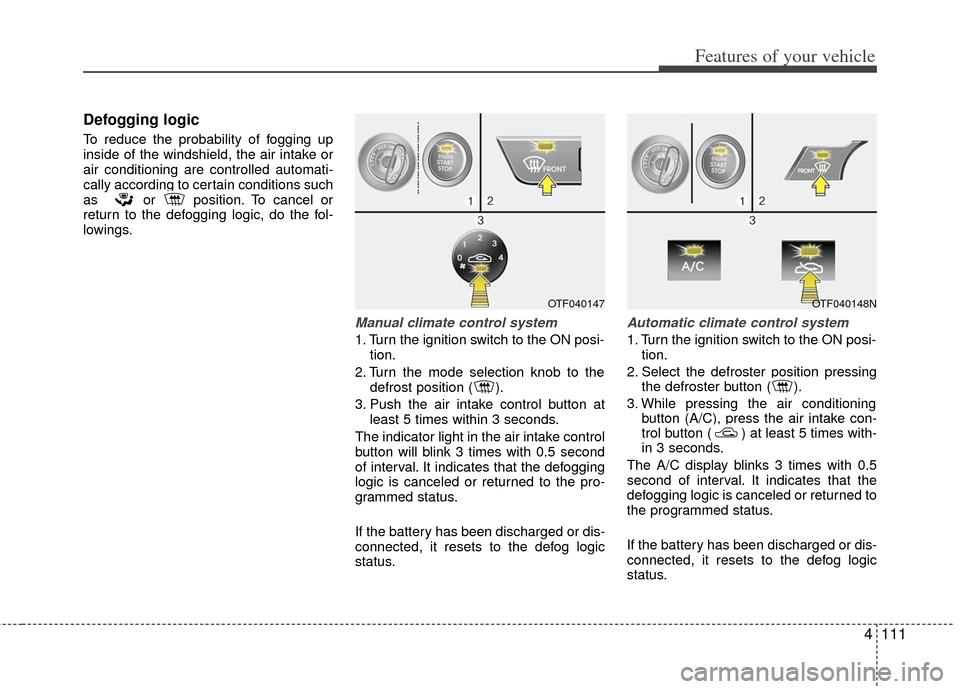
Manual climate control system
1. Turn the ignition switch to the ON posi-tion.
2. Turn the mode selection knob to the defrost position ( ).
3. Push the air intake control button at least 5 times within 3 seconds.
The indicator light in the air intake control
button will blink 3 times with 0.5 second
of interval. It indicates that the defogging
logic is canceled or returned to the pro-
grammed status.
If the battery has been discharged or dis-
connected, it resets to the defog logic
status.
Automatic climate control system
1. Turn the ignition switch to the ON posi- tion.
2. Select the defroster position pressing the defroster button ( ).
3. While pressing the air conditioning button (A/C), press the air intake con-
trol button ( ) at least 5 times with-
in 3 seconds.
The A/C display blinks 3 times with 0.5
second of interval. It indicates that the
defogging logic is canceled or returned to
the programmed status.
If the battery has been discharged or dis-
connected, it resets to the defog logic
status.
OTF040147OTF040148N
Page 196 of 385
Features of your vehicle
118
4
Digital clock
Whenever the battery terminals or relat-
ed fuses are disconnected, you must
reset the time.
When the ignition switch is in the ACC or
ON position, the clock buttons operate as
follows:
Pressing the H button will advance the
time display by one hour.
Pressing the M button will advance the
time display by one minute.
To change the 12 hour format to the 24
hour format, press the H and M button
at the same time for more than 5 sec-
onds.
For example, if the time is 10:15 p.m.,
the display will change to 22:15.
Floor mat anchor(s)
When using a floor mat on the front floor
carpet, make sure it attaches to the floor
mat anchor(s) in your vehicle. This keeps
the floor mat from sliding forward.
WARNING
Do not adjust the clock while driv-
ing. You may lose your steering
control and cause severe personal
injury or accidents.
OTF040162
OTF040163
OYF049234N
■Type A
■Type B
Page 205 of 385
4127
Features of your vehicle
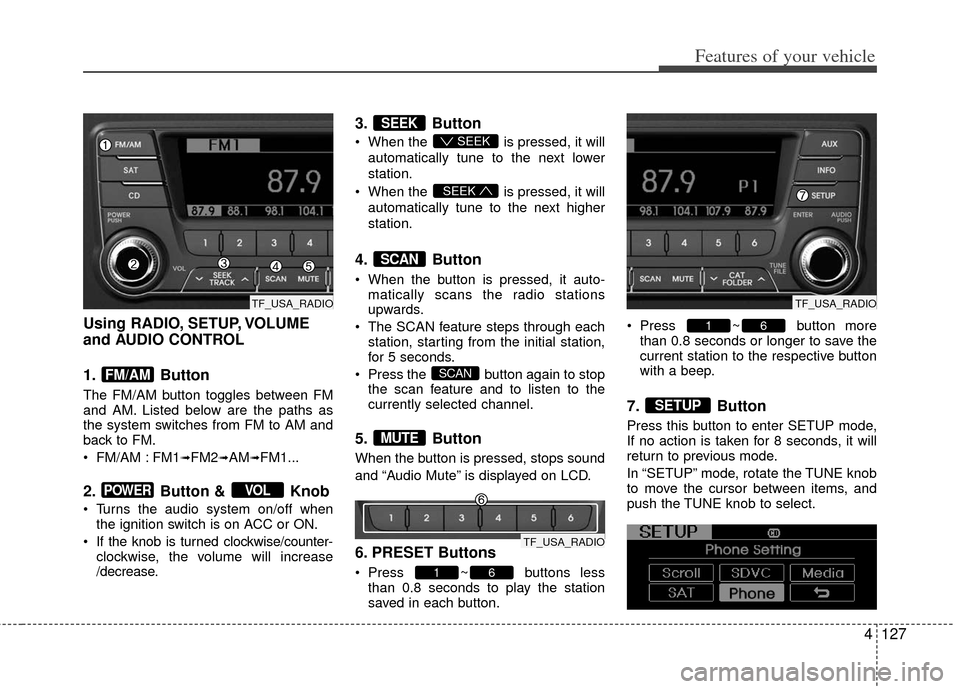
Using RADIO, SETUP, VOLUME
and AUDIO CONTROL
1. Button
The FM/AM button toggles between FM
and AM. Listed below are the paths as
the system switches from FM to AM and
back to FM.
FM/AM : FM1
➟FM2➟AM➟FM1...
2. Button & Knob
Turns the audio system on/off whenthe ignition switch is on ACC or ON.
If the knob is turned clockwise/counter- clockwise, the volume will increase
/decrease.
3. Button
When the is pressed, it will
automatically tune to the next lower
station.
When the is pressed, it will
automatically tune to the next higher
station.
4. Button
When the button is pressed, it auto- matically scans the radio stations
upwards.
The SCAN feature steps through each station, starting from the initial station,
for 5 seconds.
Press the button again to stop the scan feature and to listen to the
currently selected channel.
5. Button
When the button is pressed, stops sound
and “Audio Mute” is displayed on LCD.
6. PRESET Buttons
Press ~ buttons lessthan 0.8 seconds to play the station
saved in each button. Press ~ button more
than 0.8 seconds or longer to save the
current station to the respective button
with a beep.
7. Button
Press this button to enter SETUP mode,
If no action is taken for 8 seconds, it will
return to previous mode.
In “SETUP” mode, rotate the TUNE knob
to move the cursor between items, and
push the TUNE knob to select.
SETUP
61
61
MUTE
SCAN
SCAN
SEEK
SEEK
SEEK
VOLPOWER
FM/AM
TF_USA_RADIO
TF_USA_RADIO
TF_USA_RADIO
Page 206 of 385
Features of your vehicle
128
4
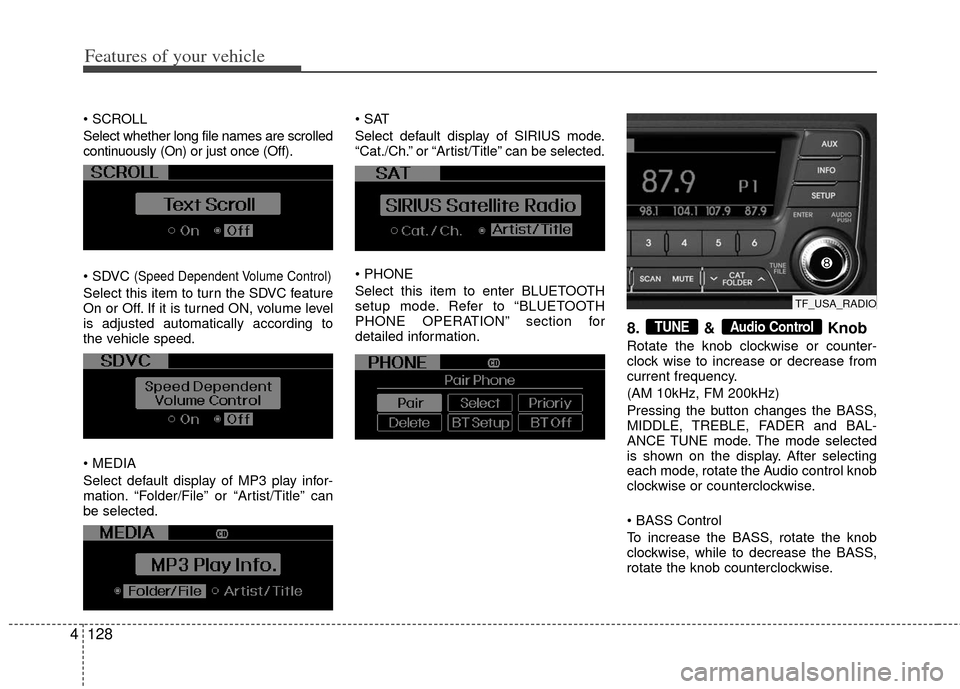
Select whether long file names are scrolled
continuously (On) or just once (Off).
(Speed Dependent Volume Control)
Select this item to turn the SDVC feature
On or Off. If it is turned ON, volume level
is adjusted automatically according to
the vehicle speed.
Select default display of MP3 play infor-
mation. “Folder/File” or “Artist/Title” can
be selected.
Select default display of SIRIUS mode.
“Cat./Ch.” or “Artist/Title” can be selected.
Select this item to enter BLUETOOTH
setup mode. Refer to “BLUETOOTH
PHONE OPERATION” section for
detailed information.
8. & Knob
Rotate the knob clockwise or counter-
clock wise to increase or decrease from
current frequency.
(AM 10kHz, FM 200kHz)
Pressing the button changes the BASS,
MIDDLE, TREBLE, FADER and BAL-
ANCE TUNE mode. The mode selected
is shown on the display. After selecting
each mode, rotate the Audio control knob
clockwise or counterclockwise.
To increase the BASS, rotate the knob
clockwise, while to decrease the BASS,
rotate the knob counterclockwise.
Audio ControlTUNE
TF_USA_RADIO
Page 208 of 385
Features of your vehicle
130
4
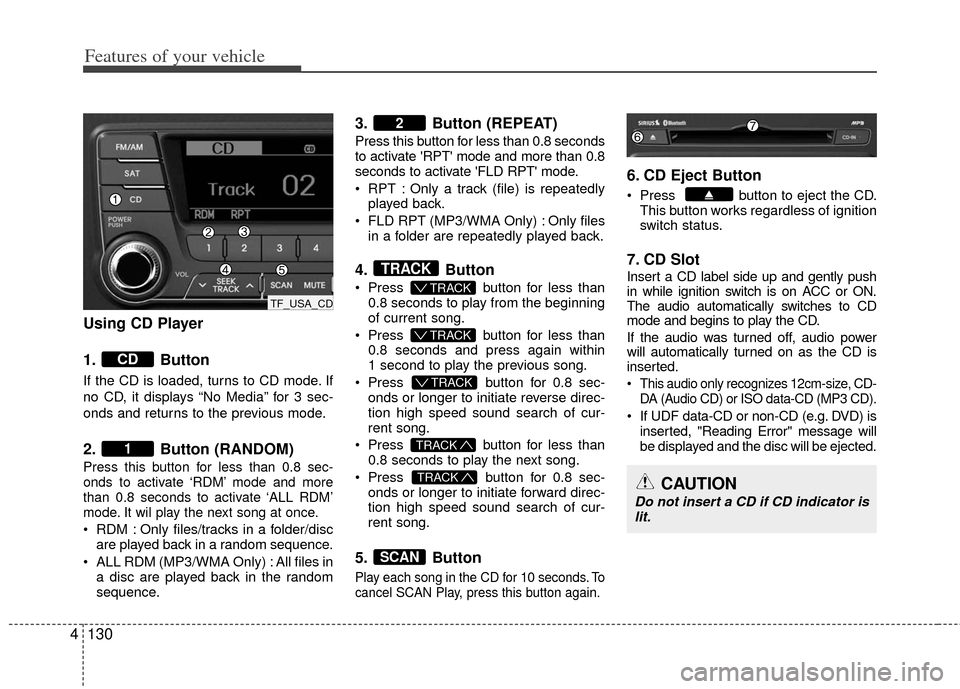
Using CD Player
1. Button
If the CD is loaded, turns to CD mode. If
no CD, it displays “No Media” for 3 sec-
onds and returns to the previous mode.
2. Button (RANDOM)
Press this button for less than 0.8 sec-
onds to activate ‘RDM’ mode and more
than 0.8 seconds to activate ‘ALL RDM’
mode. It wil play the next song at once.
RDM : Only files/tracks in a folder/disc
are played back in a random sequence.
ALL RDM (MP3/WMA Only) : All files in a disc are played back in the random
sequence.
3. Button (REPEAT)
Press this button for less than 0.8 seconds
to activate 'RPT' mode and more than 0.8
seconds to activate 'FLD RPT' mode.
RPT : Only a track (file) is repeatedlyplayed back.
FLD RPT (MP3/WMA Only) : Only files in a folder are repeatedly played back.
4. Button
Press button for less than
0.8 seconds to play from the beginning
of current song.
Press button for less than
0.8 seconds and press again within
1 second to play the previous song.
Press button for 0.8 sec-
onds or longer to initiate reverse direc-
tion high speed sound search of cur-
rent song.
Press button for less than
0.8 seconds to play the next song.
Press button for 0.8 sec-
onds or longer to initiate forward direc-
tion high speed sound search of cur-
rent song.
5. Button
Play each song in the CD for 10 seconds. To
cancel SCAN Play, press this button again.
6. CD Eject Button
Press button to eject the CD. This button works regardless of ignition
switch status.
7. CD Slot
Insert a CD label side up and gently push
in while ignition switch is on ACC or ON.
The audio automatically switches to CD
mode and begins to play the CD.
If the audio was turned off, audio power
will automatically turned on as the CD is
inserted.
This audio only recognizes 12cm-size, CD- DA (Audio CD) or ISO data-CD (MP3 CD).
If UDF data-CD or non-CD (e.g. DVD) isinserted, "Reading Error" message will
be displayed and the disc will be ejected.
SCAN
TRACK
TRACK
T TRACK
T TRACK
T TRACK
TRACK
2
1
CD
CAUTION
Do not insert a CD if CD indicator is
lit.
TF_USA_CD
Page 209 of 385
4131
Features of your vehicle
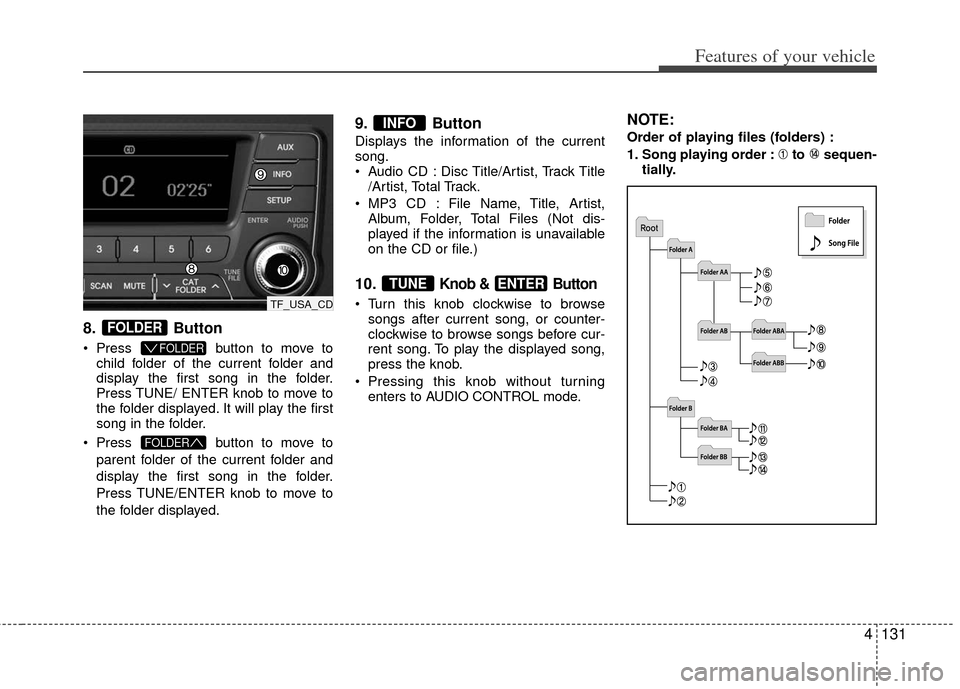
8.Button
Press button to move to
child folder of the current folder and
display the first song in the folder.
Press TUNE/ ENTER knob to move to
the folder displayed. It will play the first
song in the folder.
Press button to move to
parent folder of the current folder and
display the first song in the folder.
Press TUNE/ENTER knob to move to
the folder displayed.
9. Button
Displays the information of the current
song.
Audio CD : Disc Title/Artist, Track Title /Artist, Total Track.
MP3 CD : File Name, Title, Artist, Album, Folder, Total Files (Not dis-
played if the information is unavailable
on the CD or file.)
10.Knob & Button
Turn this knob clockwise to browsesongs after current song, or counter-
clockwise to browse songs before cur-
rent song. To play the displayed song,
press the knob.
Pressing this knob without turning enters to AUDIO CONTROL mode.
NOTE:
Order of playing files (folders) :
1. Song playing order : to sequen- tially.
ENTERTUNE
INFO
FOLDER
FOLDER
FOLDER
TF_USA_CD
Page 210 of 385
Features of your vehicle
132
4
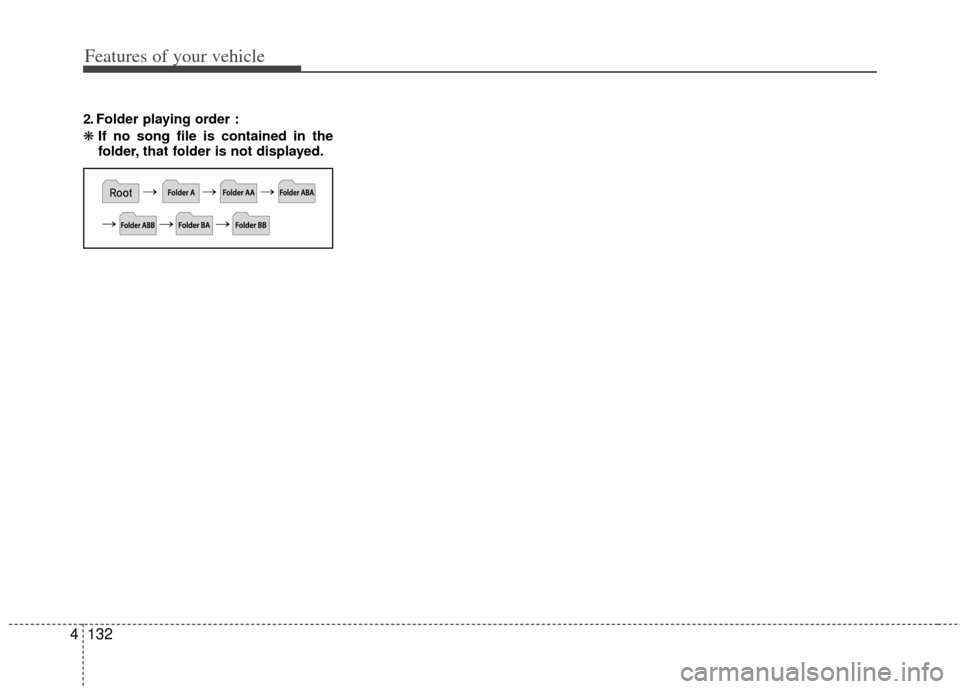
2. Folder playing order :
❋ If no song file is contained in the
folder, that folder is not displayed.