level KIA Optima 2012 3.G User Guide
[x] Cancel search | Manufacturer: KIA, Model Year: 2012, Model line: Optima, Model: KIA Optima 2012 3.GPages: 382, PDF Size: 8.75 MB
Page 149 of 382
Features of your vehicle
62
4
Low brake fluid level warning
If the warning light remains on, it may
indicate that the brake fluid level in the
reservoir is low.
If the warning light remains on:
1. Drive carefully to the nearest safe
location and stop your vehicle.
2. With the engine stopped, check the brake fluid level immediately and add
fluid as required. Then check all brake
components for fluid leaks.
3. Do not drive the vehicle if leaks are found, the warning light remains on or
the brakes do not operate properly.
Have the vehicle towed to any author-
ized Kia dealer for a brake system
inspection and necessary repairs.
Your vehicle is equipped with dual-diago-
nal braking systems. This means you still
have braking on two wheels even if one
of the dual systems should fail. With only
one of the dual systems working, more
than normal pedal travel and greater
pedal pressure are required to stop the
vehicle. Also, the vehicle will not stop in
as short a distance with only a portion of
the brake system working. If the brakes
fail while you are driving, shift to a lower
gear for additional engine braking and
stop the vehicle as soon as it is safe to do
so. To check bulb operation, check whether
the parking brake and brake fluid warning
light illuminates when the ignition switch
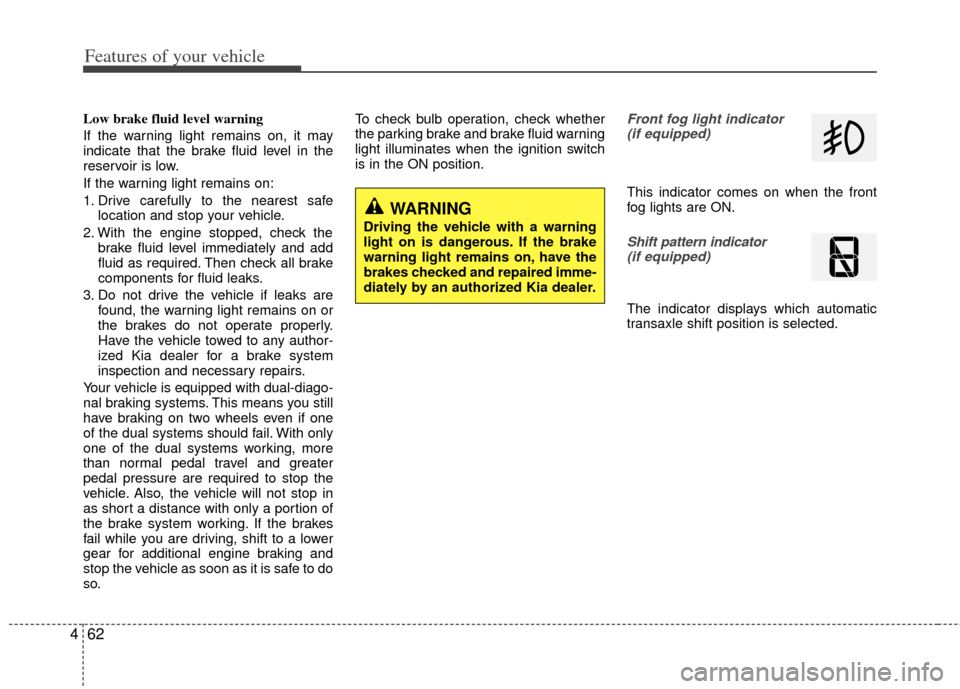
is in the ON position.Front fog light indicator
(if equipped)
This indicator comes on when the front
fog lights are ON.
Shift pattern indicator (if equipped)
The indicator displays which automatic
transaxle shift position is selected.
WARNING
Driving the vehicle with a warning
light on is dangerous. If the brake
warning light remains on, have the
brakes checked and repaired imme-
diately by an authorized Kia dealer.
Page 151 of 382
Features of your vehicle
64
4
When the ignition switch is turned to
the ON position and the indicator turns
off after 2 seconds, the system may
need repair. Have the vehicle checked
by an authorized Kia dealer.
When the battery is weak, if the engine start/stop button is depressed, the indi-
cator will blink and you will not be able
to start the engine. However, you may
still be able to start the engine by
inserting the smart key in the smart
key holder. If smart key system related
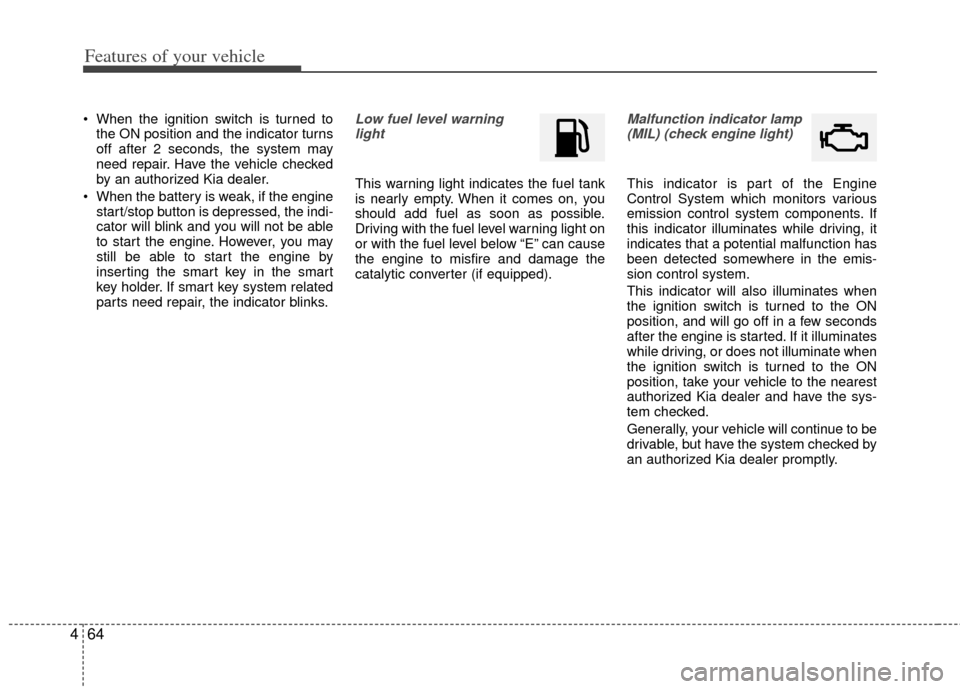
parts need repair, the indicator blinks.Low fuel level warning light
This warning light indicates the fuel tank
is nearly empty. When it comes on, you
should add fuel as soon as possible.
Driving with the fuel level warning light on
or with the fuel level below “E” can cause
the engine to misfire and damage the
catalytic converter (if equipped).
Malfunction indicator lamp(MIL) (check engine light)
This indicator is part of the Engine
Control System which monitors various
emission control system components. If
this indicator illuminates while driving, it
indicates that a potential malfunction has
been detected somewhere in the emis-
sion control system.
This indicator will also illuminates when
the ignition switch is turned to the ON
position, and will go off in a few seconds
after the engine is started. If it illuminates
while driving, or does not illuminate when
the ignition switch is turned to the ON
position, take your vehicle to the nearest
authorized Kia dealer and have the sys-
tem checked.
Generally, your vehicle will continue to be
drivable, but have the system checked by
an authorized Kia dealer promptly.
Page 167 of 382
Features of your vehicle
80
4
Battery saver function
The purpose of this feature is to pre-
vent the battery from being dis-
charged. The system automatically
turns off the parking lights when the
driver removes the ignition key (smart
key: turns off the engine) and opens
the driver-side door.
With this feature, the parking lights will be turned off automatically if the driver
parks on the side of road at night.
If necessary, to keep the lights on
when the ignition key is removed,
(smart key: turns off the engine) per-
form the following:
1) Open the driver-side door.
2) Turn the parking lights OFF and ON again using the light switch on the
steering column.
Headlight escort function
(if equipped)
The headlights (and/or taillights) will
remain on for approximately 20 minutes
after the ignition key is removed or turned
to the ACC or LOCK position. However, if
the driver’s door is opened and closed,
the headlights are turned off after 30 sec-
onds.
The headlights can be turned off by
pressing the lock button on the transmit-
ter (or smart key) twice or turning off the
light switch from the headlight or Auto
light position.
Headlight leveling device
(if equipped)
Automatic type
It is automatically adjusted the headlight
beam level according to the number of
the passengers and the loading weight in
the luggage area.
And it offers the proper headlight beam
under the various conditions.
LIGHTING
WARNING
If it is not working properly even
though your car is inclined back-
ward according to passenger's
posture, or the headlight beam is
irradiated to the high or low posi-
tion, have your vehicle inspected
by an authorized Kia dealer.
Don't attempt to inspect or replace
the wiring yourself to prevent mal-
function.
CAUTION
If the driver gets out of the vehicle
through other doors (except dri-ver's door), the battery saver func- tion does not operate and the head-light escort function does not turnoff automatically. Therefore, It caus- es the battery to be discharged. Inthis case, make sure to turn off thelamp before getting out of the vehi- cle.
Page 174 of 382
487
Features of your vehicle
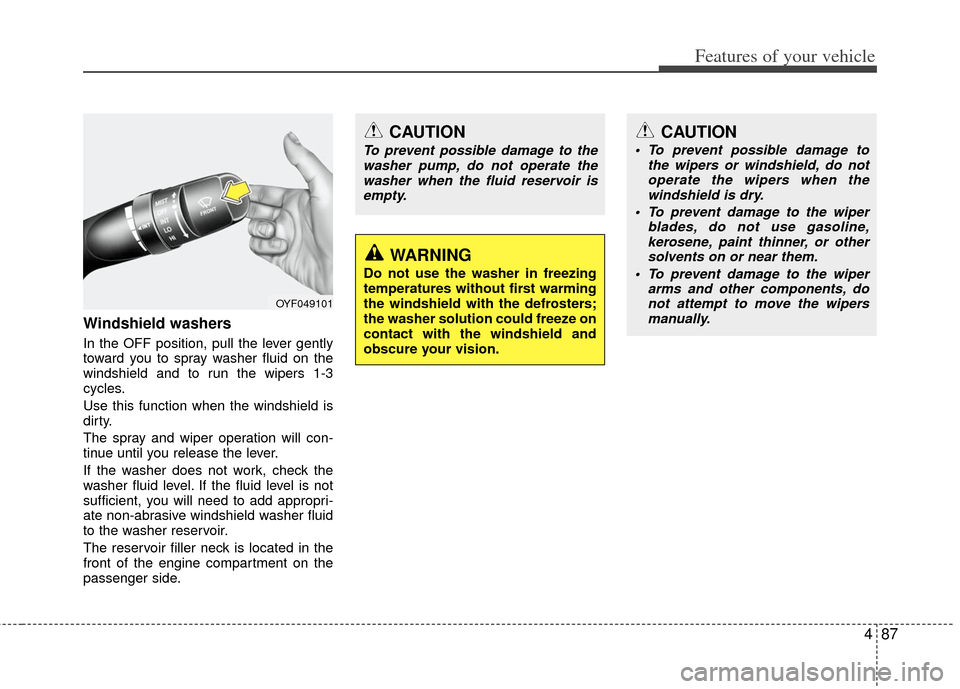
Windshield washers
In the OFF position, pull the lever gently
toward you to spray washer fluid on the
windshield and to run the wipers 1-3
cycles.
Use this function when the windshield is
dirty.
The spray and wiper operation will con-
tinue until you release the lever.
If the washer does not work, check the
washer fluid level. If the fluid level is not
sufficient, you will need to add appropri-
ate non-abrasive windshield washer fluid
to the washer reservoir.
The reservoir filler neck is located in the
front of the engine compartment on the
passenger side.
OYF049101
CAUTION
To prevent possible damage to thewasher pump, do not operate thewasher when the fluid reservoir isempty.
WARNING
Do not use the washer in freezing
temperatures without first warming
the windshield with the defrosters;
the washer solution could freeze on
contact with the windshield and
obscure your vision.
CAUTION
To prevent possible damage to the wipers or windshield, do notoperate the wipers when thewindshield is dry.
To prevent damage to the wiper blades, do not use gasoline,kerosene, paint thinner, or othersolvents on or near them.
To prevent damage to the wiper arms and other components, donot attempt to move the wipersmanually.
Page 181 of 382
Features of your vehicle
94
4
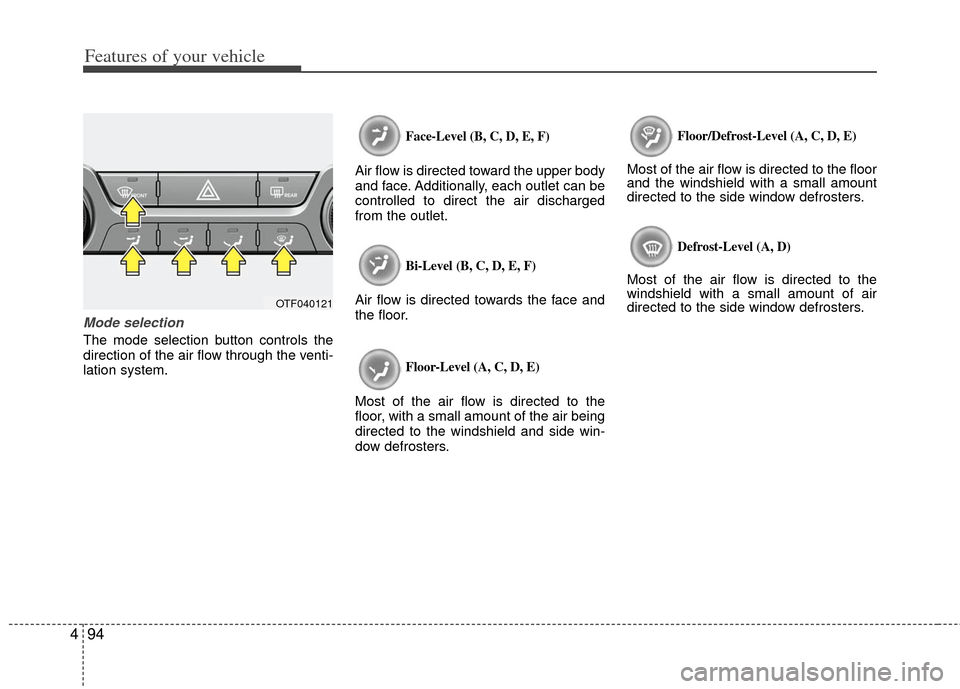
Mode selection
The mode selection button controls the
direction of the air flow through the venti-
lation system.
Face-Level (B, C, D, E, F)
Air flow is directed toward the upper body
and face. Additionally, each outlet can be
controlled to direct the air discharged
from the outlet.
Bi-Level (B, C, D, E, F)
Air flow is directed towards the face and
the floor.
Floor-Level (A, C, D, E)
Most of the air flow is directed to the
floor, with a small amount of the air being
directed to the windshield and side win-
dow defrosters.
Floor/Defrost-Level (A, C, D, E)
Most of the air flow is directed to the floor
and the windshield with a small amount
directed to the side window defrosters.
Defrost-Level (A, D)
Most of the air flow is directed to the
windshield with a small amount of air
directed to the side window defrosters.
OTF040121
Page 182 of 382
495
Features of your vehicle
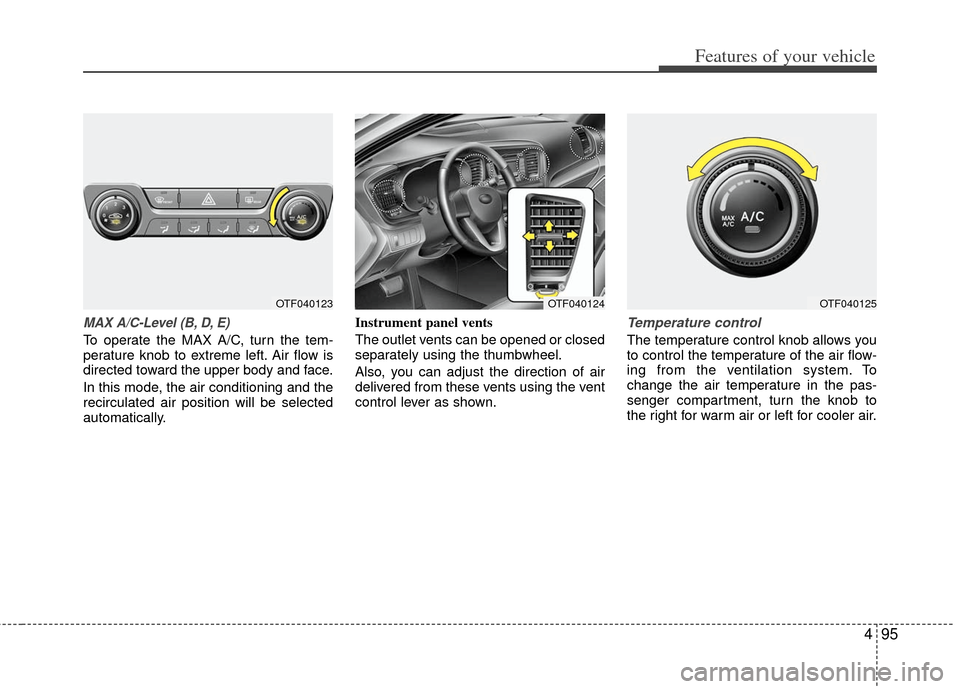
MAX A/C-Level (B, D, E)
To operate the MAX A/C, turn the tem-
perature knob to extreme left. Air flow is
directed toward the upper body and face.
In this mode, the air conditioning and the
recirculated air position will be selected
automatically.Instrument panel vents
The outlet vents can be opened or closed
separately using the thumbwheel.
Also, you can adjust the direction of air
delivered from these vents using the vent
control lever as shown.
Temperature control
The temperature control knob allows you
to control the temperature of the air flow-
ing from the ventilation system. To
change the air temperature in the pas-
senger compartment, turn the knob to
the right for warm air or left for cooler air.
OTF040124OTF040123OTF040125
Page 184 of 382
497
Features of your vehicle
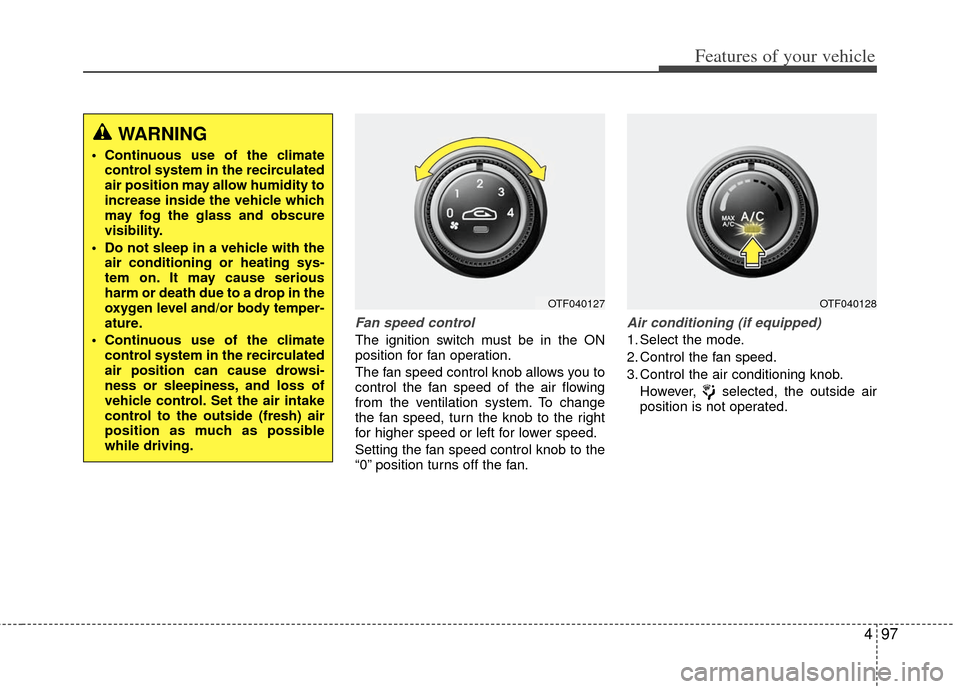
Fan speed control
The ignition switch must be in the ON
position for fan operation.
The fan speed control knob allows you to
control the fan speed of the air flowing
from the ventilation system. To change
the fan speed, turn the knob to the right
for higher speed or left for lower speed.
Setting the fan speed control knob to the
“0” position turns off the fan.
Air conditioning (if equipped)
1. Select the mode.
2. Control the fan speed.
3. Control the air conditioning knob.However, selected, the outside air
position is not operated.
OTF040127OTF040128
WARNING
Continuous use of the climatecontrol system in the recirculated
air position may allow humidity to
increase inside the vehicle which
may fog the glass and obscure
visibility.
Do not sleep in a vehicle with the air conditioning or heating sys-
tem on. It may cause serious
harm or death due to a drop in the
oxygen level and/or body temper-
ature.
Continuous use of the climate control system in the recirculated
air position can cause drowsi-
ness or sleepiness, and loss of
vehicle control. Set the air intake
control to the outside (fresh) air
position as much as possible
while driving.
Page 190 of 382
4103
Features of your vehicle
Manual heating and air condition-
ing
The heating and cooling system can be
controlled manually by pushing buttons
other than the AUTO button. In this case,
the system works sequentially according
to the order of buttons selected.
1. Start the engine.
2. Set the mode to the desired position.To improve the effectiveness of heat-ing and cooling :
- Heating:
- Cooling:
3. Set the temperature control to the desired position.
4. Set the air intake control to the outside (fresh) air or recirculated air position.
5. Set the fan speed control to the desired speed.
6. If air conditioning is desired, turn the air conditioning system on.
Press the AUTO button in order to con-
vert to full automatic control of the sys-
tem.
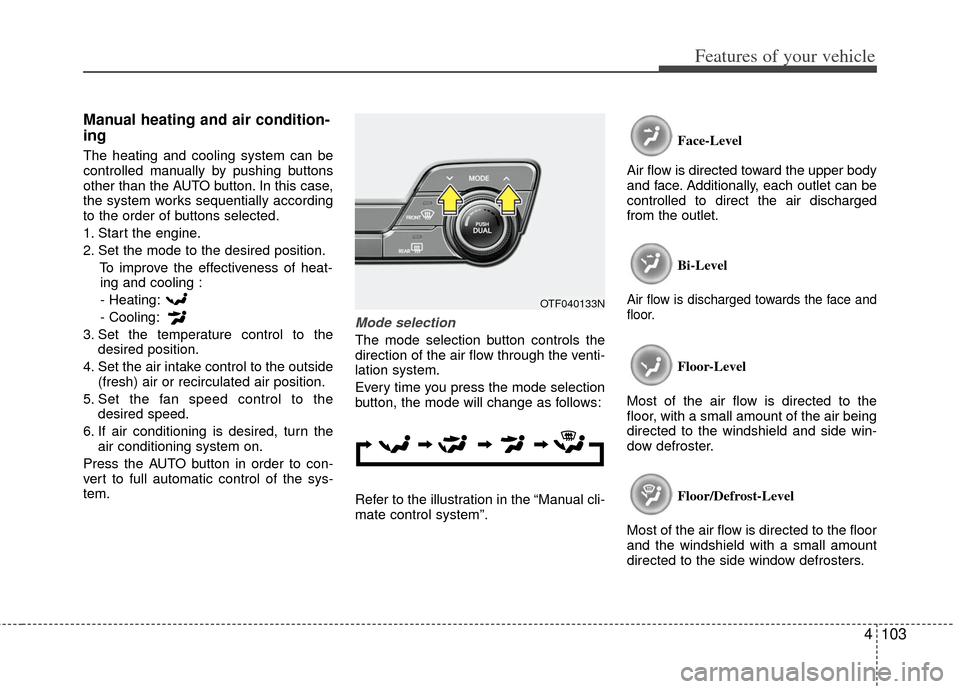
Mode selection
The mode selection button controls the
direction of the air flow through the venti-
lation system.
Every time you press the mode selection
button, the mode will change as follows:
Refer to the illustration in the “Manual cli-
mate control system”. Face-Level
Air flow is directed toward the upper body
and face. Additionally, each outlet can be
controlled to direct the air discharged
from the outlet.
Bi-Level
Air flow is discharged towards the face and
floor.
Floor-Level
Most of the air flow is directed to the
floor, with a small amount of the air being
directed to the windshield and side win-
dow defroster.
Floor/Defrost-Level
Most of the air flow is directed to the floor
and the windshield with a small amount
directed to the side window defrosters.
OTF040133N
Page 191 of 382
Features of your vehicle
104
4
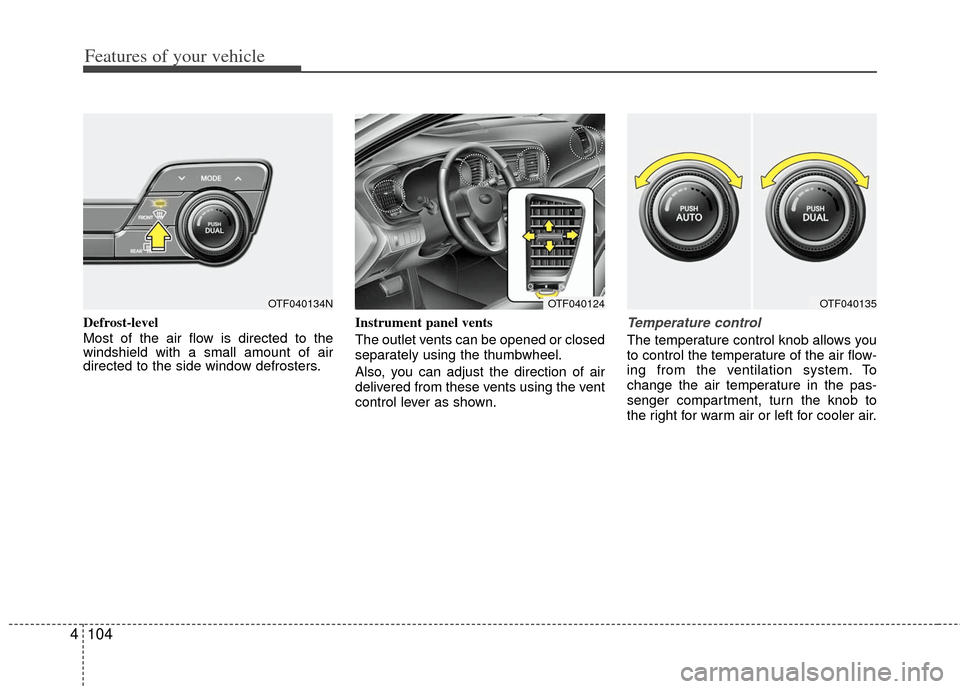
Defrost-level
Most of the air flow is directed to the
windshield with a small amount of air
directed to the side window defrosters. Instrument panel vents
The outlet vents can be opened or closed
separately using the thumbwheel.
Also, you can adjust the direction of air
delivered from these vents using the vent
control lever as shown.Temperature control
The temperature control knob allows you
to control the temperature of the air flow-
ing from the ventilation system. To
change the air temperature in the pas-
senger compartment, turn the knob to
the right for warm air or left for cooler air.
OTF040124OTF040135OTF040134N
Page 194 of 382
4107
Features of your vehicle
вњЅ
вњЅNOTICE
Prolonged operation of the heating in
recirculated air position will cause fog-
ging of the windshield and side windows
and the air within the passenger com-
partment will become stale.
In addition, prolonged operation of the
air conditioning with the recirculated
air position selected, will result in exces-
sively dry air in the passenger compart-
ment.
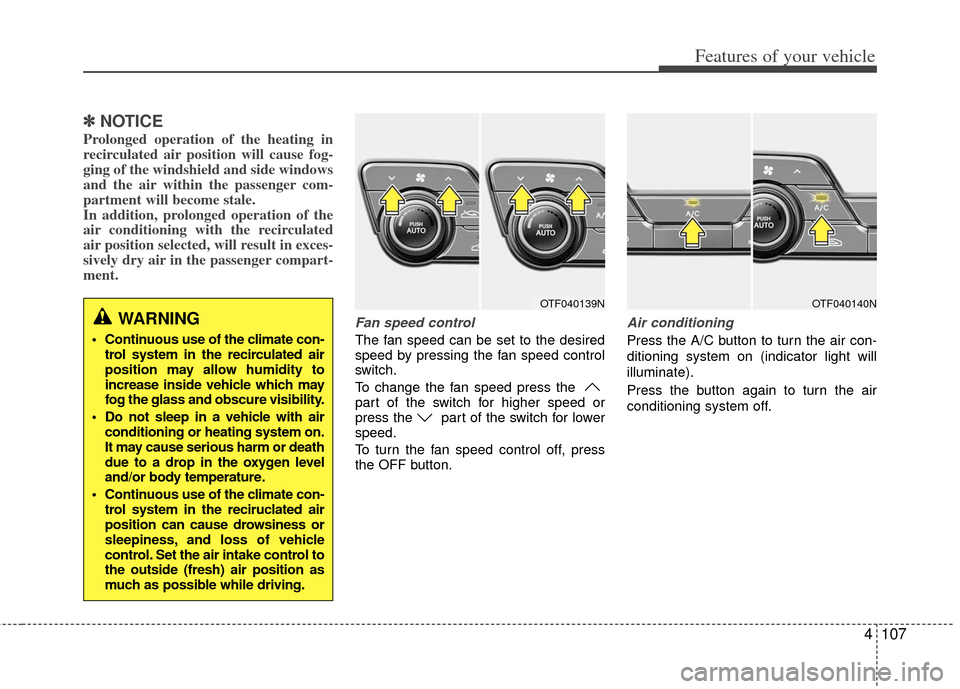
Fan speed control
The fan speed can be set to the desired
speed by pressing the fan speed control
switch.
To change the fan speed press the
part of the switch for higher speed or
press the part of the switch for lower
speed.
To turn the fan speed control off, press
the OFF button.
Air conditioning
Press the A/C button to turn the air con-
ditioning system on (indicator light will
illuminate).
Press the button again to turn the air
conditioning system off.
WARNING
Continuous use of the climate con-
trol system in the recirculated air
position may allow humidity to
increase inside vehicle which may
fog the glass and obscure visibility.
Do not sleep in a vehicle with air conditioning or heating system on.
It may cause serious harm or death
due to a drop in the oxygen level
and/or body temperature.
Continuous use of the climate con- trol system in the reciruclated air
position can cause drowsiness or
sleepiness, and loss of vehicle
control. Set the air intake control to
the outside (fresh) air position as
much as possible while driving.
OTF040140NOTF040139N