clock KIA OPTIMA HYBRID 2015 Owners Manual
[x] Cancel search | Manufacturer: KIA, Model Year: 2015, Model line: OPTIMA HYBRID, Model: KIA OPTIMA HYBRID 2015Pages: 495, PDF Size: 13.38 MB
Page 119 of 495
Features of your vehicle
28
4
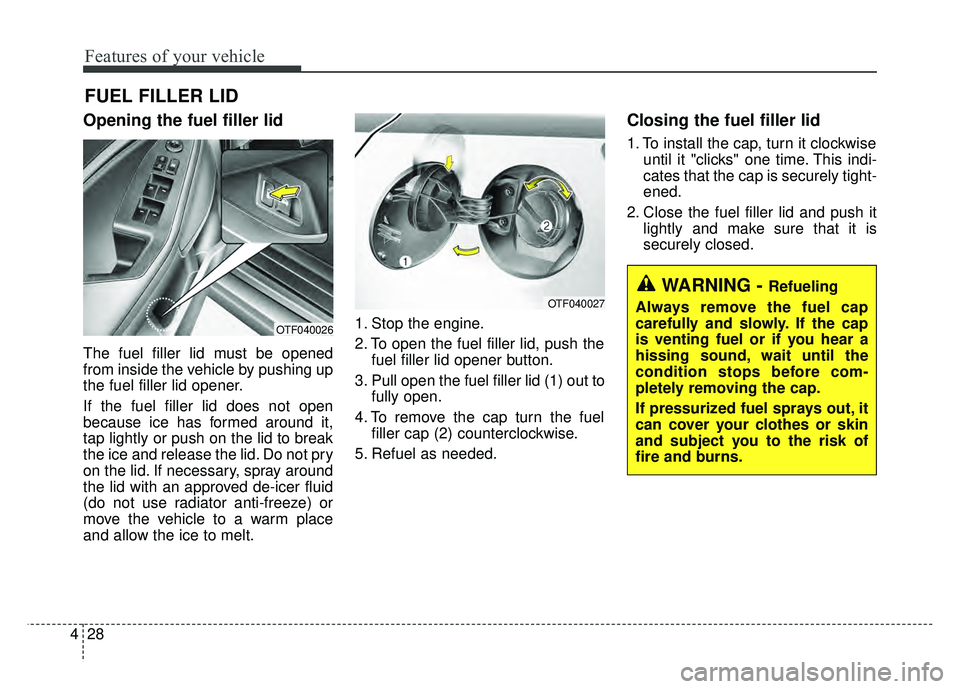
Opening the fuel filler lid
The fuel filler lid must be opened
from inside the vehicle by pushing up
the fuel filler lid opener.
If the fuel filler lid does not open
because ice has formed around it,
tap lightly or push on the lid to break
the ice and release the lid. Do not pry
on the lid. If necessary, spray around
the lid with an approved de-icer fluid
(do not use radiator anti-freeze) or
move the vehicle to a warm place
and allow the ice to melt. 1. Stop the engine.
2. To open the fuel filler lid, push the
fuel filler lid opener button.
3. Pull open the fuel filler lid (1) out to fully open.
4. To remove the cap turn the fuel filler cap (2) counterclockwise.
5. Refuel as needed.
Closing the fuel filler lid
1. To install the cap, turn it clockwise until it "clicks" one time. This indi-
cates that the cap is securely tight-
ened.
2. Close the fuel filler lid and push it lightly and make sure that it is
securely closed.
FUEL FILLER LID
OTF040026
OTF040027
WARNING - Refueling
Always remove the fuel cap
carefully and slowly. If the cap
is venting fuel or if you hear a
hissing sound, wait until the
condition stops before com-
pletely removing the cap.
If pressurized fuel sprays out, it
can cover your clothes or skin
and subject you to the risk of
fire and burns.
Page 215 of 495
Features of your vehicle
124
4
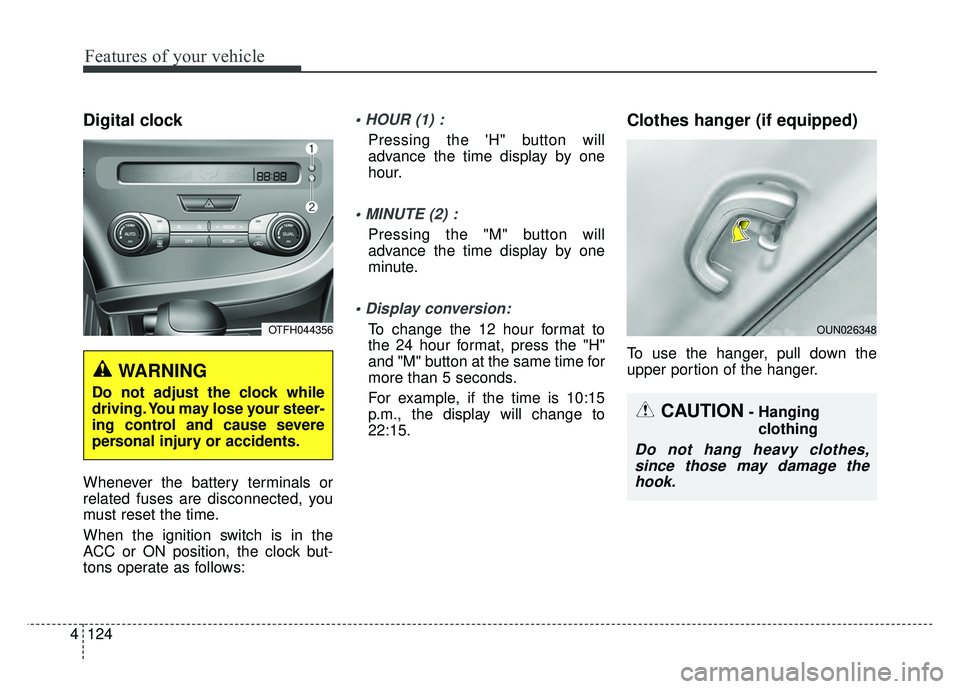
Digital clock
Whenever the battery terminals or
related fuses are disconnected, you
must reset the time.
When the ignition switch is in the
ACC or ON position, the clock but-
tons operate as follows:
Pressing the 'H" button will
advance the time display by one
hour.
Pressing the "M" button will
advance the time display by one
minute.
To change the 12 hour format to
the 24 hour format, press the "H"
and "M" button at the same time for
more than 5 seconds.
For example, if the time is 10:15
p.m., the display will change to
22:15.
Clothes hanger (if equipped)
To use the hanger, pull down the
upper portion of the hanger.
WARNING
Do not adjust the clock while
driving. You may lose your steer-
ing control and cause severe
personal injury or accidents.
OTFH044356
CAUTION- Hanging
clothing
Do not hang heavy clothes,since those may damage thehook.
OUN026348
Page 355 of 495
615
What to do in an emergency
Do not allow anyone to remain in the
vehicle while it is on the jack.
Make sure any children present are
in a secure place away from the road
and from the vehicle to be raised with
the jack.Removing and storing the
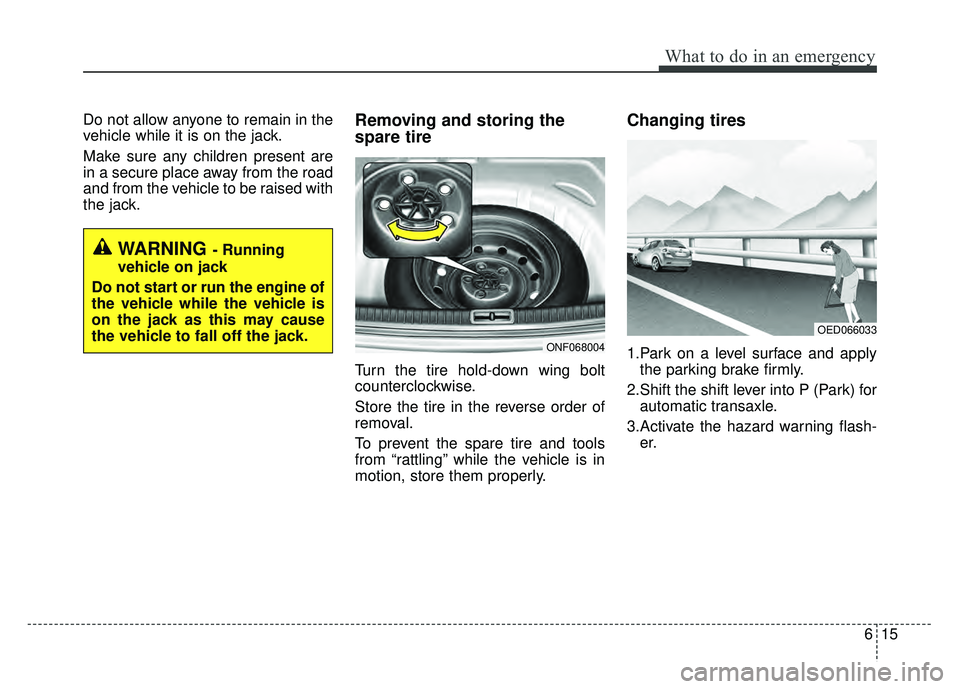
spare tire
Turn the tire hold-down wing bolt
counterclockwise.
Store the tire in the reverse order of
removal.
To prevent the spare tire and tools
from “rattling” while the vehicle is in
motion, store them properly.
Changing tires
1.Park on a level surface and applythe parking brake firmly.
2.Shift the shift lever into P (Park) for automatic transaxle.
3.Activate the hazard warning flash- er.
OED066033
WARNING - Running
vehicle on jack
Do not start or run the engine of
the vehicle while the vehicle is
on the jack as this may cause
the vehicle to fall off the jack.
ONF068004
Page 356 of 495
What to do in an emergency
16
6
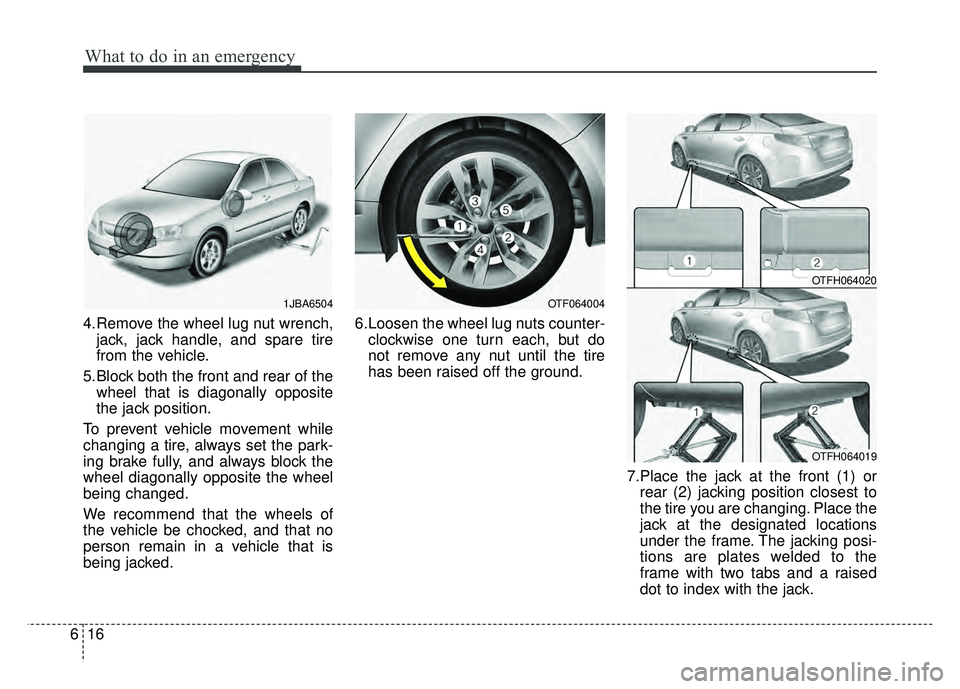
4.Remove the wheel lug nut wrench,
jack, jack handle, and spare tire
from the vehicle.
5.Block both the front and rear of the wheel that is diagonally opposite
the jack position.
To prevent vehicle movement while
changing a tire, always set the park-
ing brake fully, and always block the
wheel diagonally opposite the wheel
being changed.
We recommend that the wheels of
the vehicle be chocked, and that no
person remain in a vehicle that is
being jacked. 6.Loosen the wheel lug nuts counter-
clockwise one turn each, but do
not remove any nut until the tire
has been raised off the ground.
7.Place the jack at the front (1) orrear (2) jacking position closest to
the tire you are changing. Place the
jack at the designated locations
under the frame. The jacking posi-
tions are plates welded to the
frame with two tabs and a raised
dot to index with the jack.
1JBA6504OTF064004
OTFH064020
OTFH064019
Page 357 of 495
617
What to do in an emergency
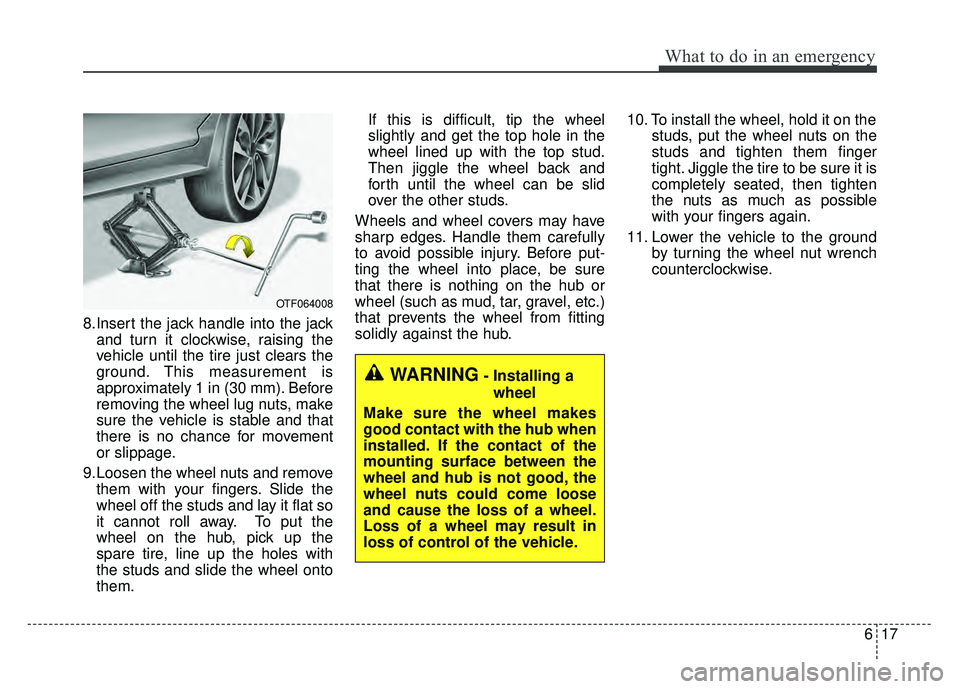
8.Insert the jack handle into the jackand turn it clockwise, raising the
vehicle until the tire just clears the
ground. This measurement is
approximately 1 in (30 mm). Before
removing the wheel lug nuts, make
sure the vehicle is stable and that
there is no chance for movement
or slippage.
9.Loosen the wheel nuts and remove them with your fingers. Slide the
wheel off the studs and lay it flat so
it cannot roll away. To put the
wheel on the hub, pick up the
spare tire, line up the holes with
the studs and slide the wheel onto
them. If this is difficult, tip the wheel
slightly and get the top hole in the
wheel lined up with the top stud.
Then jiggle the wheel back and
forth until the wheel can be slid
over the other studs.
Wheels and wheel covers may have
sharp edges. Handle them carefully
to avoid possible injury. Before put-
ting the wheel into place, be sure
that there is nothing on the hub or
wheel (such as mud, tar, gravel, etc.)
that prevents the wheel from fitting
solidly against the hub. 10. To install the wheel, hold it on the
studs, put the wheel nuts on the
studs and tighten them finger
tight. Jiggle the tire to be sure it is
completely seated, then tighten
the nuts as much as possible
with your fingers again.
11. Lower the vehicle to the ground by turning the wheel nut wrench
counterclockwise.
OTF064008
WARNING- Installing a
wheel
Make sure the wheel makes
good contact with the hub when
installed. If the contact of the
mounting surface between the
wheel and hub is not good, the
wheel nuts could come loose
and cause the loss of a wheel.
Loss of a wheel may result in
loss of control of the vehicle.
Page 369 of 495
629
What to do in an emergency
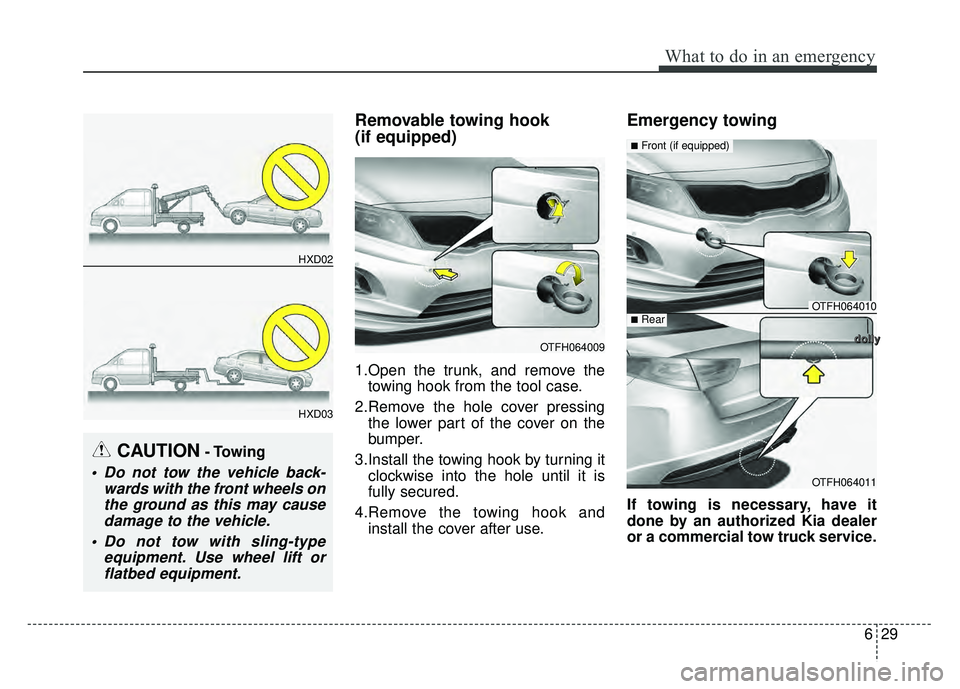
Removable towing hook
(if equipped)
1.Open the trunk, and remove thetowing hook from the tool case.
2.Remove the hole cover pressing the lower part of the cover on the
bumper.
3.Install the towing hook by turning it clockwise into the hole until it is
fully secured.
4.Remove the towing hook and install the cover after use.
Emergency towing
If towing is necessary, have it
done by an authorized Kia dealer
or a commercial tow truck service.
OTFH064009
OTFH064010
OTFH064011
■Front (if equipped)
■Rear
CAUTION- Towing
Do not tow the vehicle back- wards with the front wheels onthe ground as this may causedamage to the vehicle.
Do not tow with sling-type equipment. Use wheel lift orflatbed equipment.
HXD02
HXD03
d
d
d
d
o
o
o
o
l
l
l
l
l
l
l
l
y
y
y
y
Page 405 of 495
733
Maintenance
Checking the coolant level✽
✽NOTICE
The engine coolant and/or inverter
coolant level is influenced by hybrid
system temperature. Before filling
the engine coolant and/or inverter
coolant, turn the hybrid vehicle off,
fill the engine coolant and/or invert-
er coolant carefully.
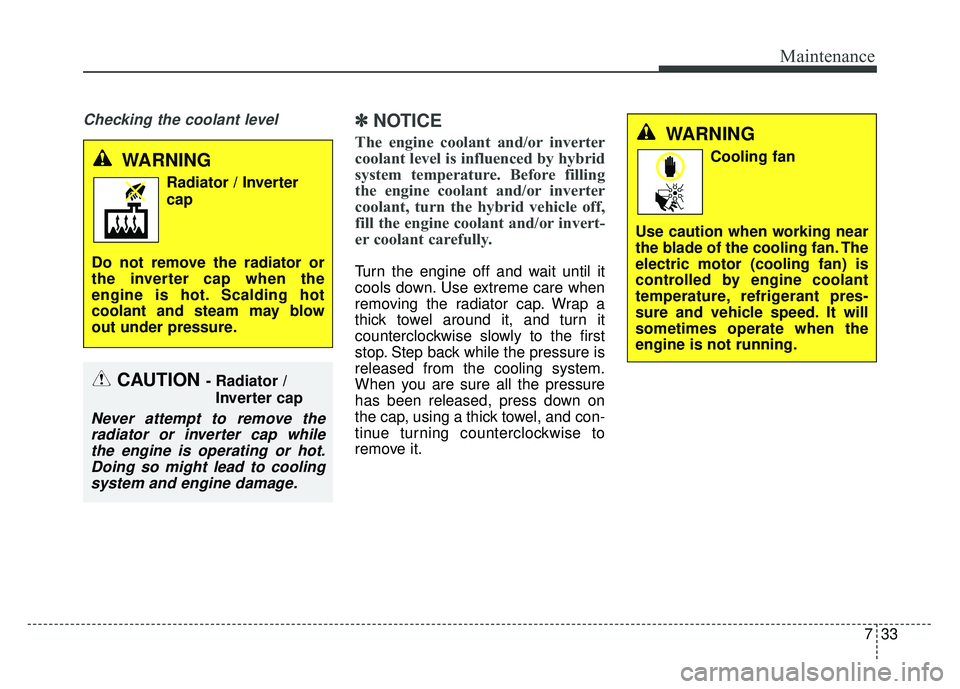
Turn the engine off and wait until it
cools down. Use extreme care when
removing the radiator cap. Wrap a
thick towel around it, and turn it
counterclockwise slowly to the first
stop. Step back while the pressure is
released from the cooling system.
When you are sure all the pressure
has been released, press down on
the cap, using a thick towel, and con-
tinue turning counterclockwise to
remove it.
WARNING
Radiator / Inverter
cap
Do not remove the radiator or
the inverter cap when the
engine is hot. Scalding hot
coolant and steam may blow
out under pressure.
WARNING
Cooling fan
Use caution when working near
the blade of the cooling fan. The
electric motor (cooling fan) is
controlled by engine coolant
temperature, refrigerant pres-
sure and vehicle speed. It will
sometimes operate when the
engine is not running.
CAUTION - Radiator / Inverter cap
Never attempt to remove theradiator or inverter cap whilethe engine is operating or hot.Doing so might lead to coolingsystem and engine damage.
Page 419 of 495
747
Maintenance
Battery recharging
Your vehicle has a maintenance-free,
calcium-based battery.
If the battery becomes dischargedin a short time (because, for exam-
ple, the headlights or interior lights
were left on while the vehicle was
not in use), recharge it by slow
charging (trickle) for 10 hours.
If the battery gradually discharges because of high electric load while
the vehicle is being used, recharge
it at 20-30A for two hours. When recharging the battery,
observe the following precautions:
The battery must be removed from
the vehicle and placed in an area
with good ventilation.
Watch the battery during charging, and stop or reduce the charging
rate if the battery cells begin
gassing (boiling) violently or if the
temperature of the electrolyte of
any cell exceeds 120°F (49°C).
Wear eye protection when check- ing the battery during charging.
Disconnect the battery charger in the following order.
1. Turn off the battery charger main switch.
2. Unhook the negative clamp from the negative battery terminal.
3. Unhook the positive clamp from the positive battery terminal.
Before performing maintenance or recharging the battery, turn off all
accessories and stop the engine.
The negative battery cable must be removed first and installed last
when the battery is disconnected.
Reset items
Items should be reset after the bat-
tery has been discharged or the bat-
tery has been disconnected.
Auto down window (See chapter 4)
Sunroof (See chapter 4)
Trip computer (See chapter 4)
Climate control system (See chapter 4)
Clock (See chapter 4)
Audio (See chapter 4)
Page 436 of 495
Maintenance
64
7
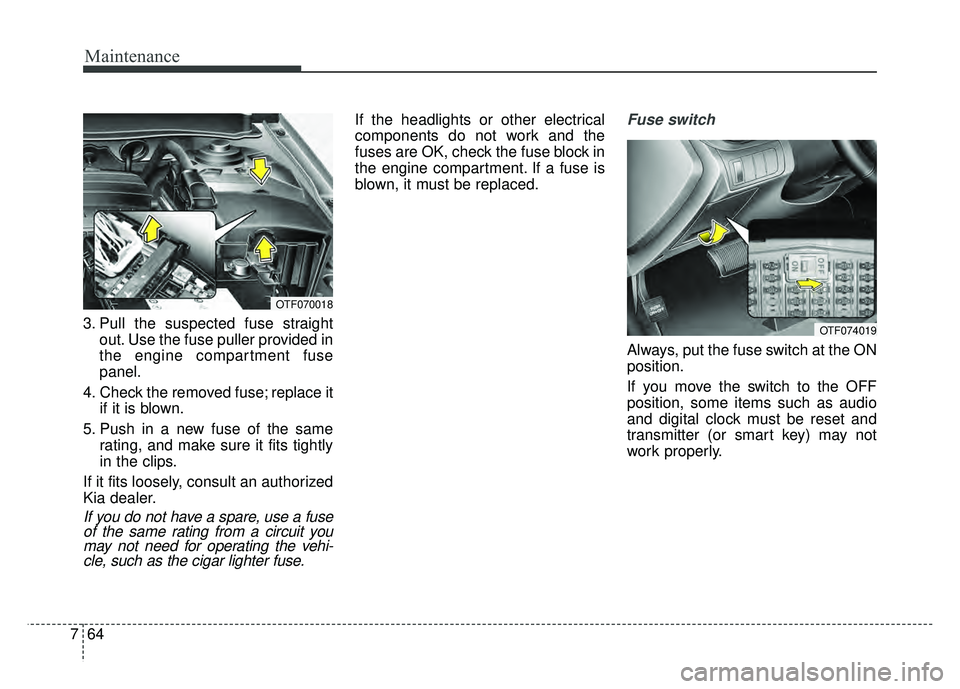
3. Pull the suspected fuse straight
out. Use the fuse puller provided in
the engine compartment fuse
panel.
4. Check the removed fuse; replace it if it is blown.
5. Push in a new fuse of the same rating, and make sure it fits tightly
in the clips.
If it fits loosely, consult an authorized
Kia dealer.
If you do not have a spare, use a fuse of the same rating from a circuit youmay not need for operating the vehi-cle, such as the cigar lighter fuse.
If the headlights or other electrical
components do not work and the
fuses are OK, check the fuse block in
the engine compartment. If a fuse is
blown, it must be replaced.Fuse switch
Always, put the fuse switch at the ON
position.
If you move the switch to the OFF
position, some items such as audio
and digital clock must be reset and
transmitter (or smart key) may not
work properly.
OTF070018
OTF074019
Page 449 of 495
777
Maintenance
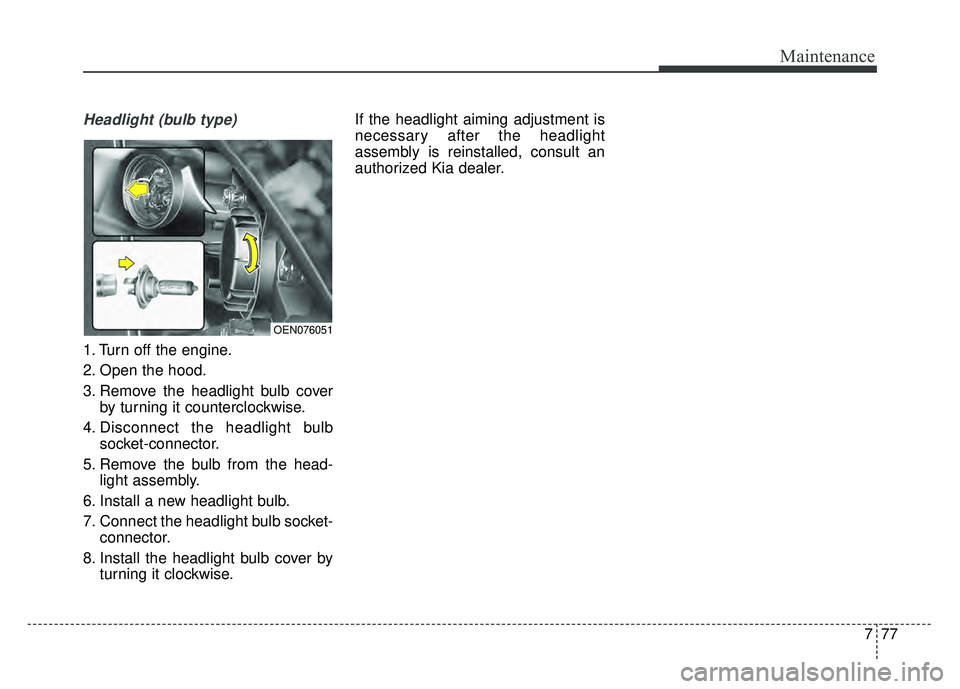
Headlight (bulb type)
1. Turn off the engine.
2. Open the hood.
3. Remove the headlight bulb coverby turning it counterclockwise.
4. Disconnect the headlight bulb socket-connector.
5. Remove the bulb from the head- light assembly.
6. Install a new headlight bulb.
7. Connect the headlight bulb socket- connector.
8. Install the headlight bulb cover by turning it clockwise. If the headlight aiming adjustment is
necessary after the headlight
assembly is reinstalled, consult an
authorized Kia dealer.
OEN076051