check KIA OPTIMA HYBRID 2017 Owner's Manual
[x] Cancel search | Manufacturer: KIA, Model Year: 2017, Model line: OPTIMA HYBRID, Model: KIA OPTIMA HYBRID 2017Pages: 604, PDF Size: 13.16 MB
Page 102 of 604
Safety features of your vehicle
42
3
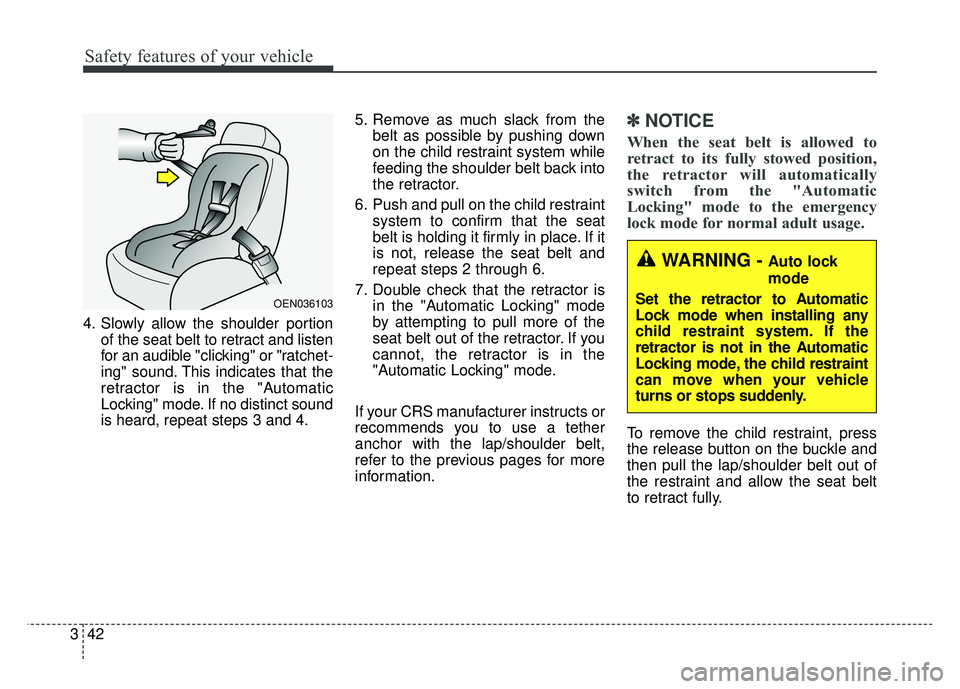
4. Slowly allow the shoulder portion
of the seat belt to retract and listen
for an audible "clicking" or "ratchet-
ing" sound. This indicates that the
retractor is in the "Automatic
Locking" mode. If no distinct sound
is heard, repeat steps 3 and 4. 5. Remove as much slack from the
belt as possible by pushing down
on the child restraint system while
feeding the shoulder belt back into
the retractor.
6. Push and pull on the child restraint system to confirm that the seat
belt is holding it firmly in place. If it
is not, release the seat belt and
repeat steps 2 through 6.
7. Double check that the retractor is in the "Automatic Locking" mode
by attempting to pull more of the
seat belt out of the retractor. If you
cannot, the retractor is in the
"Automatic Locking" mode.
If your CRS manufacturer instructs or
recommends you to use a tether
anchor with the lap/shoulder belt,
refer to the previous pages for more
information.
✽ ✽ NOTICE
When the seat belt is allowed to
retract to its fully stowed position,
the retractor will automatically
switch from the "Automatic
Locking" mode to the emergency
lock mode for normal adult usage.
To remove the child restraint, press
the release button on the buckle and
then pull the lap/shoulder belt out of
the restraint and allow the seat belt
to retract fully.
OEN036103
WARNING - Auto lock
mode
Set the retractor to Automatic
Lock mode when installing any
child restraint system. If the
retractor is not in the Automatic
Locking mode, the child restraint
can move when your vehicle
turns or stops suddenly.
Page 107 of 604

347
Safety features of your vehicle
SRS components and functions
The SRS consists of the following
components:
1. Driver's front air bag module
2. Passenger's front air bag module
3. Side air bag modules
4. Curtain air bag modules
5. Retractor pre-tensioner assemblies*
6. Air bag warning light
7. SRS control module (SRSCM)
8. Front impact sensors
9. Side impact sensors10. PASSENGER AIR BAG “OFF”
indicator (Front passenger’s seat
only)
11. Occupant detection system (Front passenger’s seat only)
12. Front passenger’s seat belt buckle sensor
13. Emergency fastening device (EFD)
*: if equipped If the air bag warning light is illumi-
nated for more than 6 seconds after
engine start/stop button has been
changed to ON, or of it illuminates
during vehicle operation, an SRS
component may not be functioning
properly and you should have your
vehicle checked by an authorized Kia
dealer.
W7-147
OJFH036097N
Page 113 of 604
353
Safety features of your vehicle
✽
✽NOTICE
• Do not use car seat cushions that
cover up the surface of the seat
and aftermarket manufactured
passenger seat heaters.
• After conducting car interior cleaning using steam or detergent,
the seat should be dried properly.
Afterward, check for normal
operation of the "PASS AIR BAG
"OFF"" and air bag warning
lights.
• Any service related to the passen- ger seat and the ODS must be
done at Kia service center.
• After the passenger seat has been removed or installed for repair
purposes, check for normal opera-
tion of the "PASS AIR BAG
"OFF"" and air bag warning
lights with a person seated or not
seated in the passenger seat.
✽ ✽ NOTICE
When the “PASS AIR BAG “OFF””
symbol is illuminated, the passenger
air bag system will not operate. The
passenger air bag system will oper-
ate when necessary if the symbol is
not illuminated.
✽ ✽NOTICE
Do not modify or replace the front
passenger seat. Don't place anything
on or attach anything such as a blan-
ket, front seat cover or after market
seat heater to the front passenger
seat. This can adversely affect the
occupant detection system.
WARNING - ODS system
Riding in an improper position or
placing items on or under the
passenger seat may interfere
with the normal operation of the
ODS (Occupant Detection
System). It is important for the
driver to instruct the passenger
as to the proper seating instruc-
tions as contained in this manual.
Page 122 of 604
Safety features of your vehicle
62
3
The side air bag is supplemental to
the driver's and the passenger's
seat belt systems and is not a sub-
stitute for them. Therefore your
seat belts must be worn at all times
while the vehicle is in operation.
For best protection from the side air bag system and to avoid being
injured by the deploying side air
bag, both front seat occupants
should sit in an upright position
with the seat belt properly fas-
tened. The driver's hands should
be placed on the steering wheel at
the 9:00 and 3:00 positions. The
passenger's arms and hands
should be placed on their laps. If seat or seat cover is damaged,
have the vehicle checked and
repaired by an authorized Kia deal-
er. Inform the dealer that your vehi-
cle is equipped with side air bags
and an occupant detection system.
WARNING- Flying objects
Do not place any objects (an
umbrella, bag, etc.) between the
front door and the front seat.
Such objects may become dan-
gerous projectiles if the side
airbag inflates.
WARNING- Deployment
Do not install any accessories
including seat covers, on the
side or near the side air bag as
this may affect the deployment
of the side air bags.
WARNING - No attaching
objects
Do not place any objects over the air bag or between the air
bag and yourself. Also, do not
attach any objects around the
area the air bag inflates such
as the door, side door glass,
front and rear pillar.
Do not put any objects between the side airbag label
and seat cushion. It could
cause harm if the vehicle is in
a crash severe enough to
cause the air bags to deploy.
Page 125 of 604
365
Safety features of your vehicle
Problems may arise if the sensor
installation angles are changed due
to the deformation of the front
bumper, front end module, body or
front doors where side collision sen-
sors are installed. Have the vehicle
checked and repaired by an author-
ized Kia dealer.
Installing bumper guards (or side
step or running board) or replacing a
bumper (or front door module) with
non-genuine parts may adversely
affect your vehicle’s collision and air
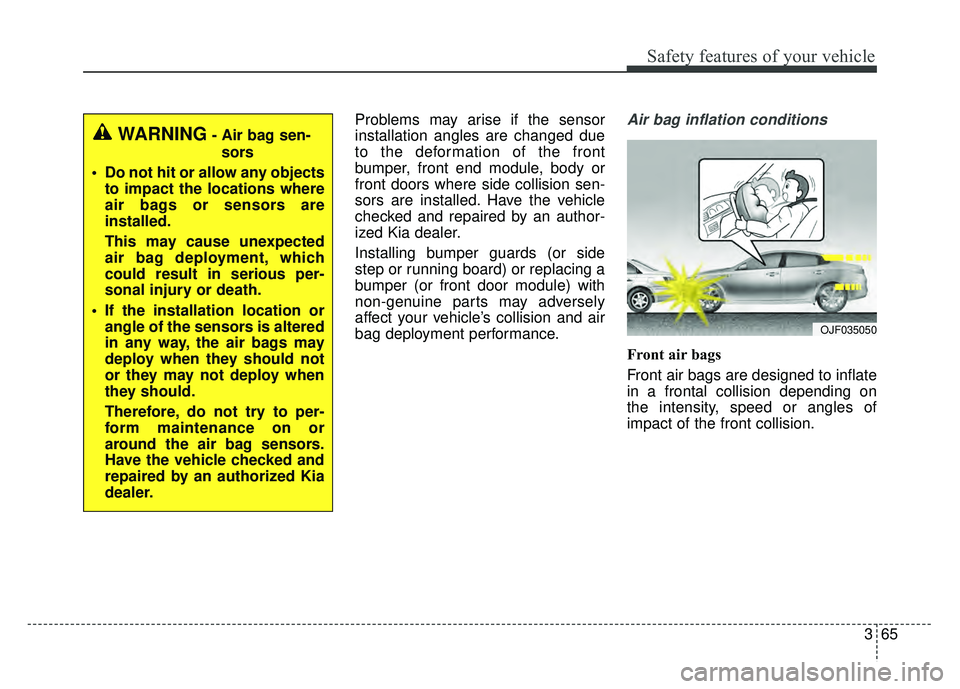
bag deployment performance.Air bag inflation conditions
Front air bags
Front air bags are designed to inflate
in a frontal collision depending on
the intensity, speed or angles of
impact of the front collision.
OJF035050
WARNING- Air bag sen-sors
Do not hit or allow any objects to impact the locations where
air bags or sensors are
installed.
This may cause unexpected
air bag deployment, which
could result in serious per-
sonal injury or death.
If the installation location or angle of the sensors is altered
in any way, the air bags may
deploy when they should not
or they may not deploy when
they should.
Therefore, do not try to per-
form maintenance on or
around the air bag sensors.
Have the vehicle checked and
repaired by an authorized Kia
dealer.
Page 135 of 604

45
Features of your vehicle
Locking
Pressing the button of the front out-
side door handles with all doors (and
trunk) closed and any door unlocked,
locks all the doors (and trunk).The hazard warning lights will blink
once to indicate that all doors (and
trunk) are locked. The button will only
operate when the smart key is within
28 ~ 40 in (0.7 ~ 1 m) from the out-
side door handle. If you want to make
sure that a door has locked or not,
you should check the door lock but-
ton inside the vehicle or pull the out-
side door handle.
Even though you press the button,
the doors will not lock and the chime
sounds if any of the following occurs:
• The smart key is in the vehicle.
The ENGINE START/STOP button
is in the ACC or ON position.
Any door except the trunk is opened.
Unlocking
Pressing the button of the front out-
side door handles with all doors (and
trunk) closed and locked, unlocks all
the doors (and trunk). The hazard
warning lights will blink twice to indi-
cate that all doors (and trunk) are
unlocked. The button will only oper-
ate when the smart key is within 28 ~
40 in (0.7 ~ 1 m) from the outside
door handle.
When Two press unlock function is
activated,
- If you press the Door Unlock but-ton(2) on the smart key, driver`s
door will unlock.
- If you press Door Unlock button(2) on the smart key within four sec-
onds again, then all the doors will
unlock.
- If you press the driver's outside door handle button, driver`s door
will unlock.
- If you press the driver's outside door handle button within four sec-
onds again, then all the doors will
unlock.
OYDDCO2004
OJF045003
Page 148 of 604
Features of your vehicle
18
4
Closing the trunk
To close, lower the trunk lid, then
press down on it until it locks. To be
sure the trunk lid is securely fas-
tened, always check by trying to pull
it up again.
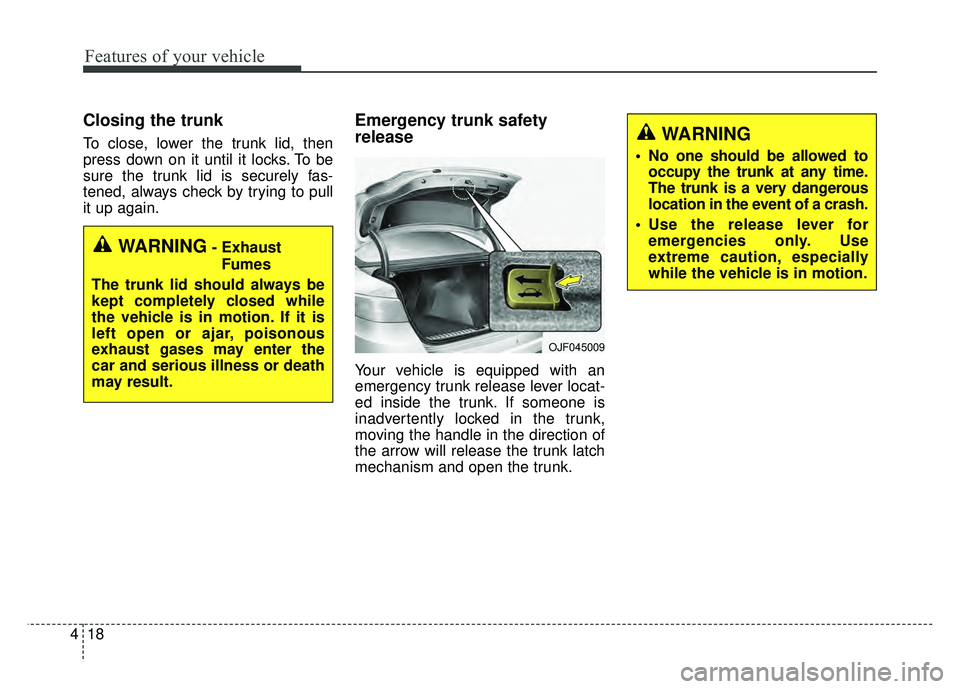
Emergency trunk safety
release
Your vehicle is equipped with an
emergency trunk release lever locat-
ed inside the trunk. If someone is
inadvertently locked in the trunk,
moving the handle in the direction of
the arrow will release the trunk latch
mechanism and open the trunk.
WARNING- Exhaust
Fumes
The trunk lid should always be
kept completely closed while
the vehicle is in motion. If it is
left open or ajar, poisonous
exhaust gases may enter the
car and serious illness or death
may result.
OJF045009
WARNING
• No one should be allowed to occupy the trunk at any time.
The trunk is a very dangerous
location in the event of a crash.
Use the release lever for emergencies only. Use
extreme caution, especially
while the vehicle is in motion.
Page 156 of 604
Features of your vehicle
26
4
If the power window switch is pulled
up continuously again within 5 sec-
onds after the window is lowered by
the automatic window reversal fea-
ture, the automatic window reversal
will not operate.
The automatic reverse feature for the
driver’s window is only active when
the “auto up” feature is used by fully
pulling up the switch. The automatic
reverse feature will not operate if the
window is raised using the halfway
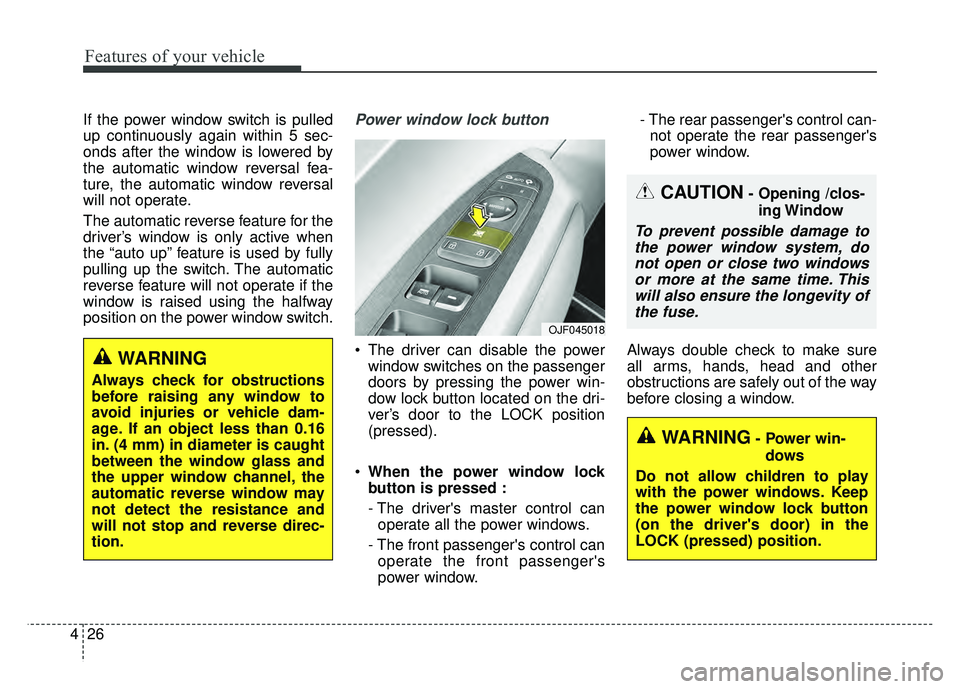
position on the power window switch.Power window lock button
The driver can disable the power
window switches on the passenger
doors by pressing the power win-
dow lock button located on the dri-
ver’s door to the LOCK position
(pressed).
When the power window lock
button is pressed :
- The driver's master control can
operate all the power windows.
- The front passenger's control can operate the front passenger's
power window. - The rear passenger's control can-
not operate the rear passenger's
power window.
Always double check to make sure
all arms, hands, head and other
obstructions are safely out of the way
before closing a window.
CAUTION- Opening /clos- ing Window
To prevent possible damage tothe power window system, donot open or close two windowsor more at the same time. Thiswill also ensure the longevity ofthe fuse.
WARNING- Power win-
dows
Do not allow children to play
with the power windows. Keep
the power window lock button
(on the driver's door) in the
LOCK (pressed) position.
OJF045018
WARNING
Always check for obstructions
before raising any window to
avoid injuries or vehicle dam-
age. If an object less than 0.16
in. (4 mm) in diameter is caught
between the window glass and
the upper window channel, the
automatic reverse window may
not detect the resistance and
will not stop and reverse direc-
tion.
Page 158 of 604

Features of your vehicle
28
4
Closing the hood
1. Before closing the hood, check the
following:
partment must be correctly
installed.
bustible material must be
removed from the engine com-
partment.
2. Lower the hood halfway and push down to securely lock in place.
3. Check that the hood has engaged properly. If the hood can be raised
slightly, it is not properly engaged.
Open it again and close it with a lit-
tle more force.WARNING - Fire risk
Do not leave gloves, rags or any
other combustible material in the
engine compartment. Doing so
may cause a heat-induced fire.
WARNING - Unsecured
engine hood
Always double check to be sure
that the hood is firmly latched
before driving away. If it is not
latched, the hood could fly open
while the vehicle is being driv-
en, causing a total loss of visi-
bility, which might result in an
accident.
CAUTION - Hood obstruc-
tion
Before closing the hood, ensure that all obstructions areremoved from the hood open-ing. Closing the hood with anobstruction present in the hoodopening may result in propertydamage.
Page 160 of 604
Features of your vehicle
30
4
Always check that the fuel cap is
installed securely to prevent fuel
spillage in the event of an accident.
✽ ✽
NOTICE
Tighten the cap until it clicks once,
otherwise the fuel cap open warning
indicator light will illuminate.
WARNING- Fire/explo-
sion risk
Read and follow all warnings
posted at the gas station facili-
ty. Failure to follow all warnings
may result in severe personal
injury, severe burns or death
due to fire or explosion.WARNING- Static electricity
Before touching the fuel noz- zle, you should eliminate
potentially dangerous static
electricity discharge by touch-
ing another metal part of the
vehicle, a safe distance away
from the fuel filler neck, noz-
zle, or other gas source.
Do not get back into a vehicle once you have begun refueling
since you can generate static
electricity by touching, rubbing
or sliding against any item or
fabric (polyester, satin, nylon,
etc.) capable of producing stat-
ic electricity. Static electricity
discharge can ignite fuel
vapors resulting in rapid burn-
ing. If you must reenter the
vehicle, you should once again
eliminate potentially danger-
ous static electricity discharge
by touching a metal part of the
vehicle, away from the fuel filler
neck, nozzle or other gasoline
source.WARNING- Refueling
Always remove the fuel cap
carefully and slowly. If the cap
is venting fuel or if you hear a
hissing sound, wait until the
condition stops before com-
pletely removing the cap. If
pressurized fuel sprays out, it
can cover your clothes or skin
and subject you to the risk of
fire and burns.