light KIA OPTIMA HYBRID 2018 Features and Functions Guide
[x] Cancel search | Manufacturer: KIA, Model Year: 2018, Model line: OPTIMA HYBRID, Model: KIA OPTIMA HYBRID 2018Pages: 56, PDF Size: 5.74 MB
Page 20 of 56
18*IF EQUIPPED OPTIMA HYBRID / PLUG-IN HYBRID FEATURES & FUNCTIONS GUIDE
Electronic Stability Control (ESC)
The ESC system is designed to help stabilize the vehicle during cornering
maneuvers . It is a good idea to keep the ESC turned ON for daily driving
whenever possible .
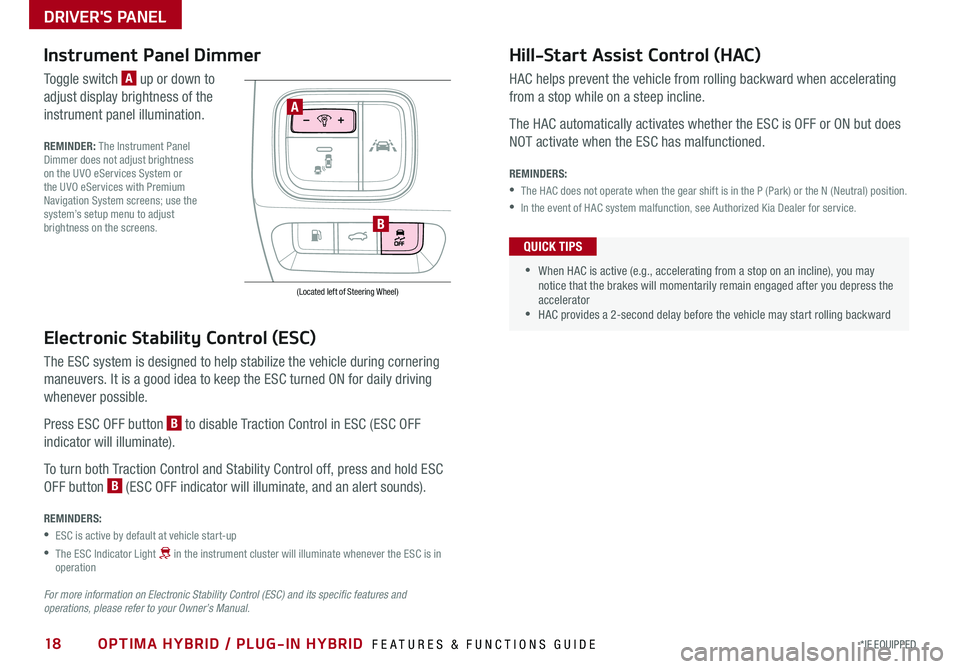
Press ESC OFF button B to disable Traction Control in ESC (ESC OFF
indicator will illuminate) .
To turn both Traction Control and Stability Control off, press and hold ESC
OFF button B (ESC OFF indicator will illuminate, and an alert sounds) .
REMINDERS:
•ESC is active by default at vehicle start-up
•
The ESC Indicator Light in the instrument cluster will illuminate whenever the ESC is in operation
For more information on Electronic Stability Control (ESC) and its specific features and operations, please refer to your Owner’s Manual.
(Located left of Steering Wheel)
Instrument Panel Dimmer
Toggle switch A up or down to
adjust display brightness of the
instrument panel illumination .
REMINDER: The Instrument Panel Dimmer does not adjust brightness on the UVO eServices System or the UVO eServices with Premium Navigation System screens; use the system’s setup menu to adjust brightness on the screens .
Hill-Start Assist Control (HAC)
HAC helps prevent the vehicle from rolling backward when accelerating
from a stop while on a steep incline .
The HAC automatically activates whether the ESC is OFF or ON but does
NOT activate when the ESC has malfunctioned .
REMINDERS:
•The HAC does not operate when the gear shift is in the P (Park) or the N (Neutral) position .
•In the event of HAC system malfunction, see Authorized Kia Dealer for service .
•
•When HAC is active (e .g ., accelerating from a stop on an incline), you may notice that the brakes will momentarily remain engaged after you depress the accelerator •HAC provides a 2-second delay before the vehicle may start rolling backward
QUICK TIPS
A
B
DRIVER'S PANEL
Page 21 of 56
19*IF EQUIPPED ALWAYS CHECK THE OWNER’S MANUAL FOR COMPLETE OPER ATING INFORMATION AND SAFET Y WARNINGS .
To use electrical accessories:
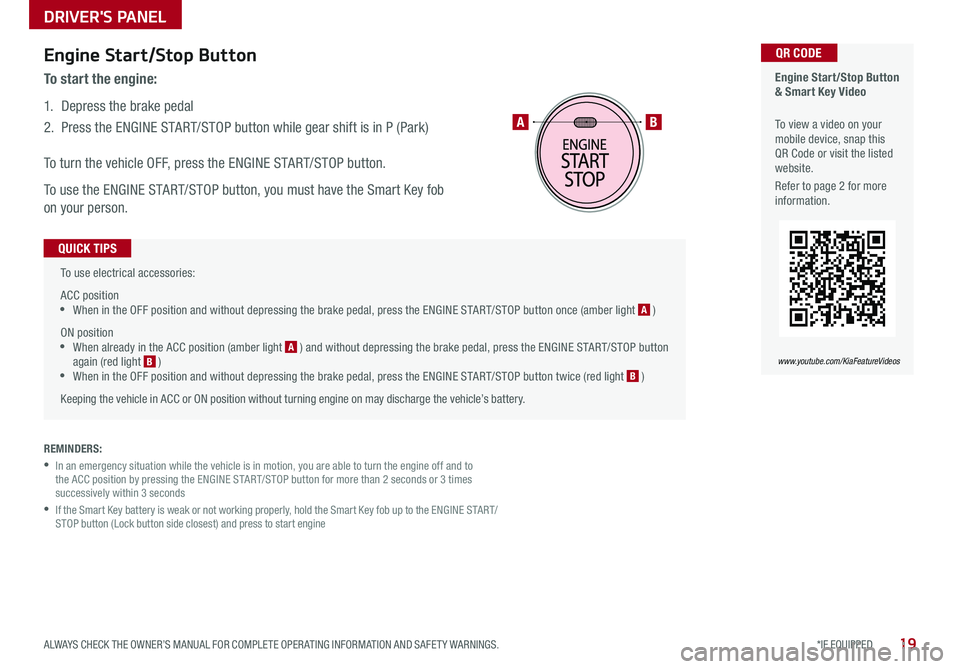
ACC position •When in the OFF position and without depressing the brake pedal, press the ENGINE START/STOP button once (amber light A )
ON position •When already in the ACC position (amber light A ) and without depressing the brake pedal, press the ENGINE START/STOP button again (red light B ) •
When in the OFF position and without depressing the brake pedal, press the ENGINE START/STOP button twice (red light B )
Keeping the vehicle in ACC or ON position without turning engine on may discharge the vehicle’s battery .
QUICK TIPS
Engine Start/Stop Button & Smart Key Video
To view a video on your mobile device, snap this QR Code or visit the listed website .
Refer to page 2 for more information .
QR CODE
www.youtube.com/KiaFeatureVideos
AB
REMINDERS:
•
In an emergency situation while the vehicle is in motion, you are able to turn the engine off and to the ACC position by pressing the ENGINE START/STOP button for more than 2 seconds or 3 times successively within 3 seconds
•
If the Smart Key battery is weak or not working properly, hold the Smart Key fob up to the ENGINE START/STOP button (Lock button side closest) and press to start engine
Engine Start/Stop Button
To start the engine:
1 . Depress the brake pedal
2 .
Press the ENGINE START/STOP button while gear shift is in P (Park)
To turn the vehicle OFF, press the ENGINE START/STOP button .
To use the ENGINE START/STOP button, you must have the Smart Key fob
on your person .
DRIVER'S PANEL
Page 23 of 56
21*IF EQUIPPED ALWAYS CHECK THE OWNER’S MANUAL FOR COMPLETE OPER ATING INFORMATION AND SAFET Y WARNINGS .
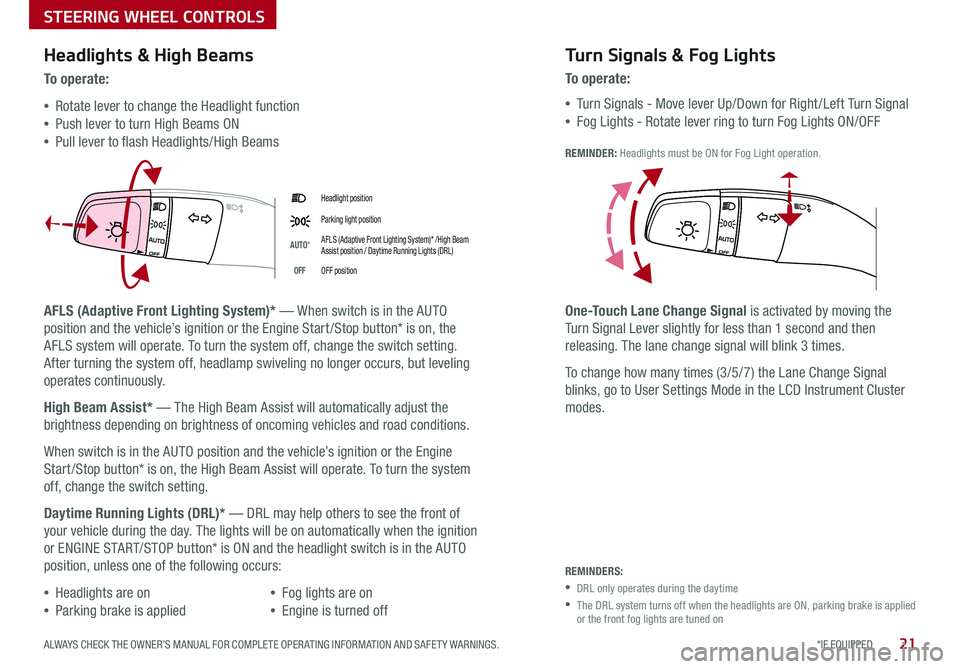
Headlight position
Parking light position
AUTO*AFLS (Adaptive Front Lighting System)* /High Beam Assist position / Daytime Running Lights (DRL)
OFFOFF position
Headlights & High Beams
To o p e rate:
•Rotate lever to change the Headlight function
•Push lever to turn High Beams ON
•Pull lever to flash Headlights/High Beams
AFLS (Adaptive Front Lighting System)* — When switch is in the AUTO
position and the vehicle’s ignition or the Engine Start /Stop button* is on, the
AFLS system will operate . To turn the system off, change the switch setting .
After turning the system off, headlamp swiveling no longer occurs, but leveling
operates continuously .
High Beam Assist* — The High Beam Assist will automatically adjust the
brightness depending on brightness of oncoming vehicles and road conditions .
When switch is in the AUTO position and the vehicle’s ignition or the Engine
Start /Stop button* is on, the High Beam Assist will operate . To turn the system
off, change the switch setting .
Daytime Running Lights (DRL)* — DRL may help others to see the front of
your vehicle during the day . The lights will be on automatically when the ignition
or ENGINE START/STOP button* is ON and the headlight switch is in the AUTO
position, unless one of the following occurs:
•Headlights are on
•Parking brake is applied
•Fog lights are on
•Engine is turned off
Turn Signals & Fog Lights
To o p e r a t e :
•Tu r n Signals - Move lever Up/Down for Right /Left Turn Signal
•Fog Lights - Rotate lever ring to turn Fog Lights ON/OFF
REMINDER: Headlights must be ON for Fog Light operation .
One-Touch Lane Change Signal is activated by moving the
Turn Signal Lever slightly for less than 1 second and then
releasing . The lane change signal will blink 3 times .
To change how many times (3/5/7) the Lane Change Signal
blinks, go to User Settings Mode in the LCD Instrument Cluster
modes .
REMINDERS:
•DRL only operates during the daytime
•
The DRL system turns off when the headlights are ON, parking brake is applied or the front fog lights are tuned on
STEERING WHEEL CONTROLS
Page 30 of 56

28*IF EQUIPPED
AUDIO SYSTEM
OPTIMA HYBRID / PLUG-IN HYBRID FEATURES & FUNCTIONS GUIDE
UVO eServices / Android AutoTM / Apple CarPlay® S e tup*
For further UVO eServices System operations, refer to the Car Multimedia System User's Manual. For other audio system information, refer to page 29-30.
Android Auto™*
Setting up Android Auto™:
1 . From an Android Auto™ compatible device, download the
Android Auto™ app from the Google Play™ Store .
2 . Open the Android Auto™ app and proceed with the on-screen
instructions to complete setup on the mobile device .
How to start Android Auto™:
1 . Press the SETUP key on your audio control unit’s control panel .
2 . Press the PHONE PROJECTION button or CONNECTIVIT Y
button, select Android Auto™ then select ENABLE ANDROID AUTO .
Accept all terms, conditions and requests on the head unit and
phone in order to use Android Auto™ .
3 . Connect the Android™ device with the vehicle’s USB port using the
manufacturer’s cable provided with your phone .
4 . From the vehicle’s home screen, select the Android Auto™ button,
where you’ll see all the Android Auto™ supported apps .
REMINDERS:
• Android Auto compatibility requirements: Micro-USB cable that came with your phone, OS Android™ 5 .0 or higher, compatible Android smartphone and data and wireless plan for applicable feature(s) .
• Apple CarPlay compatibility requirements: Apple Lightning® cable, latest iOS software, iPhone 5 or later and data and wireless plan for applicable feature(s)
• It is recommended to always update your phone to the latest operating system release
UVO eServices Registration/Activation – To use UVO eServices:
1 . On your Smartphone, go to an app store or marketplace to download the free Kia UVO eServices app .
2 . Open the UVO eServices app and create an account by clicking on REGISTER . After entering your information,
accept the terms and conditions to complete registration (you can also register for an account on MyUVO .com) .
3 . Follow the app’s IN-CAR SETUP instructions to connect your smartphone and complete UVO eServices activation .
Apple CarPlay®*
Setting up and starting Apple CarPlay®:
1 . Connect the Apple CarPlay® compatible iPhone with the vehicle’s
USB port using the manufacture’s cable provided with your iPhone .
2 . On the audio control unit's control panel, press the SETUP key .
3 . Press the PHONE PROJECTION button or CONNECTIVIT Y button on
the screen and select Apple CarPlay® .
4 . Select ENABLE APPLE CARPL AY . Accept all terms, conditions and
requests on the head unit and phone in order to use Apple CarPlay®
1 . From the vehicle’s home screen, select the Apple CarPlay® button,
where you’ll see all the Apple CarPlay® supported apps
Page 33 of 56
31*IF EQUIPPED ALWAYS CHECK THE OWNER’S MANUAL FOR COMPLETE OPER ATING INFORMATION AND SAFET Y WARNINGS .
Digital Clock
UVO eServices System* / UVO eServices with
Premium Navigation System* Clock Setup:
Press the SETUP key on the head unit . Then press the on-screen
Clock icon to enter clock settings . Follow the onscreen options to
adjust the clock settings .
Press the on-screen return icon to save changes .
QUICK TIP
Aux/USB/iPod® Port & Power Outlets
The power outlets are inactive when ignition is in the OFF position .
QUICK TIP
REMINDER: Using the power outlet (accessory plug) for prolonged periods of time with the engine off could cause the battery to discharge .
For more information on the Aux/USB/iPod® Port & Power Outlets, refer to the Owner's Manual.
REMINDERS:
• Daylight Savings must be enabled or disabled in the Clock Settings screen .
• To access manual date and time setting, turn GPS time OFF in the Clock Settings (UVO eServices with Navigation System*) .
12V180W
USB Charger*
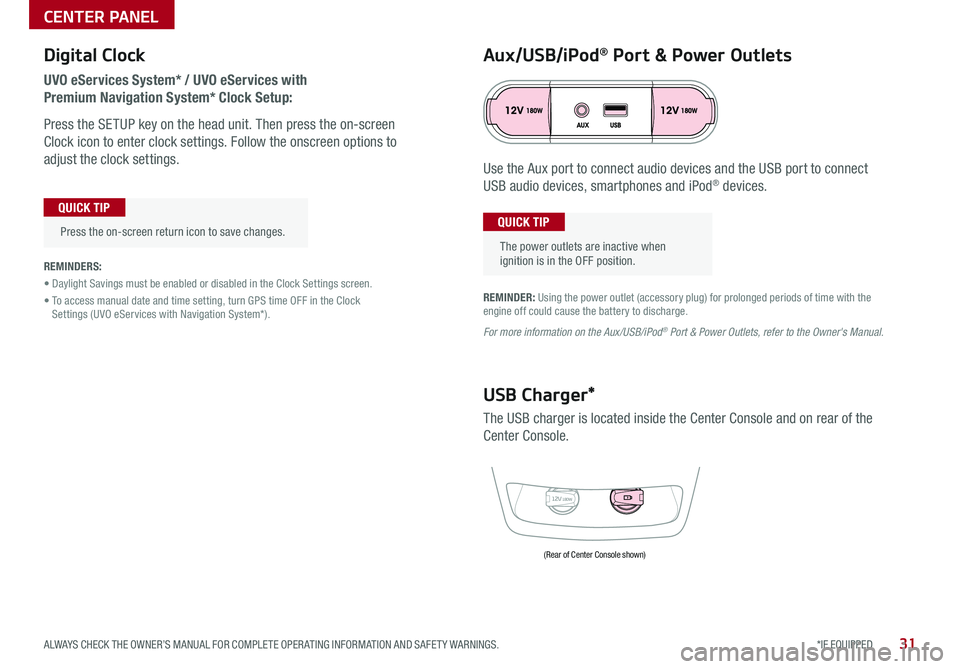
The USB charger is located inside the Center Console and on rear of the
Center Console .
Use the Aux port to connect audio devices and the USB port to connect
USB audio devices, smartphones and iPod® devices .
(Rear of Center Console shown)
CENTER PANEL
Page 38 of 56
36*IF EQUIPPED OPTIMA HYBRID / PLUG-IN HYBRID FEATURES & FUNCTIONS GUIDE
Auto Hold*
Auto Hold temporarily maintains the vehicle
at a standstill even if the brake pedal is
released . Auto Hold can be turned ON/
OFF using the AUTO HOLD switch B on
the driver’s panel . Before Auto Hold will
operate, the driver’s door, engine hood and
trunk must be closed, and the driver’s seat
belt must be fastened .
The Auto Hold indicator has four states:
White: Standby - With vehicle at a
standstill, and AUTO HOLD switch B
turned ON, the indicator will illuminate
white . While driving the vehicle (vehicle is
not at a standstill), the Auto Hold indicator
will remain white .
Green: Engaged - When coming to a
complete stop by depressing the brake
pedal, the Auto Hold indicator changes from white to green .
OFF (not illuminated) - The indicator will turn OFF when the AUTO
HOLD switch B is turned OFF or when the EPB is manually turned ON .
Yellow: Malfunction - When the indicator is illuminated yellow, there
may be a system malfunction . Take your vehicle to a local Kia dealer .
Refer to page 4 for location of Instrument Cluster indicators.
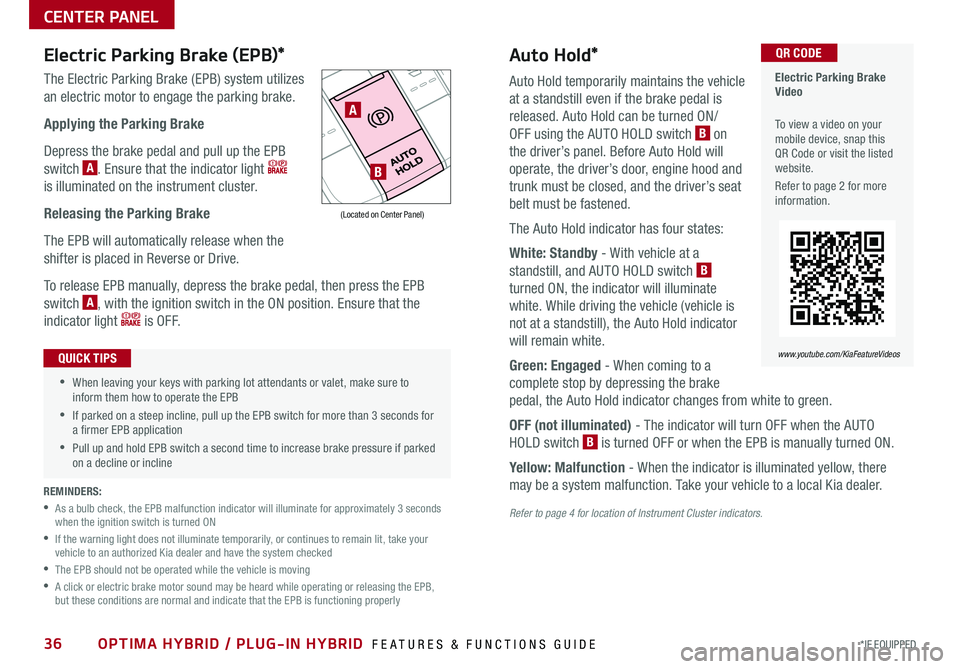
Electric Parking Brake (EPB)*
The Electric Parking Brake (EPB) system utilizes
an electric motor to engage the parking brake .
Applying the Parking Brake
Depress the brake pedal and pull up the EPB
switch A . Ensure that the indicator light
is illuminated on the instrument cluster .
Releasing the Parking Brake
The EPB will automatically release when the
shifter is placed in Reverse or Drive .
To release EPB manually, depress the brake pedal, then press the EPB
switch A, with the ignition switch in the ON position . Ensure that the
indicator light i s O F F .
Electric Parking Brake Video
To view a video on your mobile device, snap this QR Code or visit the listed website .
Refer to page 2 for more information .
QR CODE
www.youtube.com/KiaFeatureVideos
A
B
(Located on Center Panel)
REMINDERS:
•
As a bulb check, the EPB malfunction indicator will illuminate for approximately 3 seconds when the ignition switch is turned ON
•
If the warning light does not illuminate temporarily, or continues to remain lit, take your vehicle to an authorized Kia dealer and have the system checked
•The EPB should not be operated while the vehicle is moving
•
A click or electric brake motor sound may be heard while operating or releasing the EPB, but these conditions are normal and indicate that the EPB is functioning properly
•When leaving your keys with parking lot attendants or valet, make sure to inform them how to operate the EPB
•If parked on a steep incline, pull up the EPB switch for more than 3 seconds for a firmer EPB application
•Pull up and hold EPB switch a second time to increase brake pressure if parked on a decline or incline
QUICK TIPS
CENTER PANEL
Page 42 of 56

40*IF EQUIPPED OPTIMA HYBRID / PLUG-IN HYBRID FEATURES & FUNCTIONS GUIDE
Power Trunk / Smart Trunk*
Smart Key:
To open the Power Trunk, press and hold the Trunk
button A until the Trunk begins opening . Press
again to cancel .
REMINDER: Pulling the Trunk upward by the handle or pressing the button a second time will interrupt the automatic opening of the Power Trunk .
HOLDA
Outside the Vehicle:
To open Power Trunk
automatically, press the Trunk
Release button B located
underneath the Trunk lid .
Mechanical Key can also be
used to open trunk C .
Inside the Vehicle:
Press and hold the Power
Trunk Open button D to
open the Trunk .
Smart Trunk*
When the Smart Key fob is on your person and you are near the back of
the vehicle, within close proximity, the hazard lights will blink and a chime
will sound for about 3 seconds as an alert that the Power Trunk is about
to open . Then the alert system will blink and chime two additional times
before opening the Power Trunk .
The Smart Trunk feature is off by default . To enable the Smart Trunk, go to
User Settings in the LCD Instrument Cluster modes .
REMINDERS:
•All doors are closed and locked after about 15 seconds
•The Smart Trunk feature will not operate when:
- The doors are recently closed and locked, and the Smart Key is still detected after 15 seconds near the vehicle or within 60 inches of the door handles
- A door is not locked or closed
- The Smart Key is in the vehicle
For more information on the Smart Trunk operation, please refer to the Owner's Manual.
During the Smart Trunk alert, the Smart Trunk can be deactivated with the Smart Key by pressing any button on the key fob .
QUICK TIP
BC
(Button located on Driver's Panel left of Steering Wheel)
D
OTHER KEY FEATURES
Page 43 of 56

Map/Room Lamps
Automatic turn off function*
The interior lights automatically turn off approximately 30 seconds after the
ENGINE START/STOP button is OFF .
Map/Personal Lamp
Push the lens A to turn the Map Lamp ON/OFF . This light produces a spot
beam for convenient use as a Map Lamp or Personal Lamp for the driver or
front passenger .
Room Lamp
: When pressed B, the lamp turns ON when any door is opened .
: When pressed C, the lamp stays on continuously .
( Type A )
( Type B)
Panoramic Sunroof Operation*
The Sunroof and Sunshade operation is controlled through a multi-
directional switch/lever, and the ignition needs to be in the ON position to
operate the Sunroof/Sunshade .
Slide the Sunshade and Sunroof:
•Auto Open: Slide lever backward to the farthest position and release
•Auto Close (Sunroof only): Slide the lever D forward to the farthest
position and release
Slide the Sunshade:
•Open: Slide the lever D partially backward to the first detent position
•Auto Close: Slide the lever D forward to the farthest position
Slide the Sunroof (with Sunshade open):
•Open: Slide the lever D backward and release
•Close: Slide the lever D partially forward to the first detent position or
pull the lever downward
Tilt the Sunroof:
•Raise: Push lever D upward
•Lower: Pull lever D upward
•Auto Close: Slide the lever D forward to the farthest position
REMINDER: Sunshade needs to remain OPEN while Sunroof is open and vehicle is moving .
•When doors are unlocked by the Smart Key*, the lamp turns ON for approximately 30 seconds •If your vehicle is equipped with the theft alarm system, the interior lights automatically turn off approximately 3 seconds after the system is in armed stage •Using interior lights for an extended period of time may cause battery discharge
QUICK TIPS To stop the Sunroof/Sunshade at any position, push or pull the Sunroof control lever in any direction .
QUICK TIP
CAA
B
D
B
41*IF EQUIPPED ALWAYS CHECK THE OWNER’S MANUAL FOR COMPLETE OPER ATING INFORMATION AND SAFET Y WARNINGS .
OTHER KEY FEATURES
Page 44 of 56

42OPTIMA HYBRID / PLUG-IN HYBRID FEATURES & FUNCTIONS GUIDE
Fuel Door and Trunk Release
Press the button C to release the fuel door .
Pull the button D to open the trunk .
Hood Release Lever and Latch
Opening the Hood:
1 . Pull the Hood Release Lever A to unlatch the Hood
2 . In the front of the vehicle, lift the Hood slightly, pull the secondary
Latch B inside of the Hood’s center and lift the Hood
Closing the Hood: Lower the Hood about halfway and then press
down to securely lock in place .
(Buttons located on Driver's Door)
C
D
(Located on Driver side kick panel)(Latch located inside hood)
A
B
One-Click Fuel Cap Video
To view a video on your mobile device, snap this QR Code or visit the listed website .
Refer to page 2 for more information .
QR CODE
www.youtube.com/KiaFeatureVideos
CLICK!
Fuel Cap / Malfunction
Indicator (Check Engine Light)
Tighten for ONE CLICK to prevent Malfunction
Indicator from illuminating .
REMINDER: The Fuel Filler Door Release button is located on the lower part of the driver’s door panel .
REMINDERS:
•Sunvisor may not shield all direct light
•
Do not operate the vehicle if Sunvisor is impairing your visibility
•
Be aware of your seating position when adjusting or swinging Sunvisor around from the front or side windows
Sunvisor
Use the Sunvisor to shield
direct light through the front
or side windows . Slide the
Sunvisor out and adjust
as needed .
OTHER KEY FEATURES
Page 45 of 56

43*IF EQUIPPED ALWAYS CHECK THE OWNER’S MANUAL FOR COMPLETE OPER ATING INFORMATION AND SAFET Y WARNINGS .
Rear Parking Assist System*
The Rear Parking Assist System* is not a safety device . The Rear Parking
Assist System* is a supplemental system that assists the driver by chiming
if any object is detected within the sensing area to the rear and side of the
vehicle when backing up . When the ignition is ON, the system is activated .
REMINDERS:
•If the vehicle is moving at speeds over 3 mph, the system may not activate correctly
•
When more than two objects are sensed at the same time, the closest one will be recognized first
REMINDER: The above images are for illustration purposes only and may not reflect actual operation
The Rear Parking Assist System* is not a substitute for proper and safe backing-up procedures. Always drive safely and use caution when backing up. The Back-Up Warning System may not detect every object behind the vehicle
Rear-Camera Display*
The Rear-Camera Display system is not a safety device . It is a
supplemental system that displays the view behind the vehicle through the
rearview display mirror or the UVO eServices System/UVO eServices with
Premium Navigation System* screens while the vehicle is in Reverse .
The Rear-Camera Display activates when the:
•ENGINE START/STOP button is in the ON position (green light)
•Gear Shift Lever is in the R (Reverse) position
REMINDERS:
•The above images are for illustration purposes only and may not reflect actual operation
•
UVO eServices System* — While camera is active, only the volume controls on the Audio System can be operated .
•
UVO eServices with Premium Navigation System* — While camera is active, only the Audio System can be operated on the Steering Wheel and Audio Control Unit . Navigation features are disabled .
The Rear-Camera Display is not a substitute for proper and safe backing-up procedures. The Rear-Camera Display may not display every object behind the vehicle. Always drive safely and use caution when backing up
Warning ! Che ck sur roundings for safety
OTHER KEY FEATURES