change time KIA OPTIMA PHEV 2019 Owners Manual
[x] Cancel search | Manufacturer: KIA, Model Year: 2019, Model line: OPTIMA PHEV, Model: KIA OPTIMA PHEV 2019Pages: 553, PDF Size: 11.97 MB
Page 3 of 553
Kia, THE COMPANY
Thank you for becoming the owner of a new Kia vehicle.
As a global car manufacturer focused on building high-quality vehi-
cles with exceptional value, Kia Motors is dedicated to providing you
with a customer service experience that exceeds your expectations.
All information contained in this Owner’s Manual was accurate at the
time of publication. However, Kia reserves the right to make changes
at any time so that our policy of continual product improvement can
be carried out.
This manual applies to all trims of this vehicle and includes images,
descriptions, and explanations of optional as well as standard equip-
ment. As a result, some material in this manual may not be applicable
to your specific Kia vehicle. Some images are shown for illustration
only and may show features that differ from those on your vehicle.Drive safely and enjoy your Kia!
Page 4 of 553
i
Thank you for choosing a Kia vehicle.
When you require service, remember that your Kia dealer
knows your vehicle best. Your dealer has factory-trained tech-
nicians, recommended special tools and genuine Kia replace-
ment parts. It is dedicated to your complete customer satisfac-
tion.
Because subsequent owners require this important information
as well, this publication should remain with the vehicle if it is
sold.
This manual will familiarize you with operational, mainte-
nance and safety information about your new vehicle. It is sup-
plemented by a Warranty and Consumer Information manual
that provides important information on all warranties regarding
your vehicle.
We urge you to read these publications carefully and follow the
recommendations to help assure enjoyable and safe operation
of your new vehicle.
Kia offers a great variety of options, components and features
for its various models. Therefore, some of the equipment
described in this manual, along with the various illustrations,
may not be applicable to your particular vehicle.
The information and specifications provided in this manual
were accurate at the time of printing. Kia reserves the right to
discontinue or change specifications or design at any time
without notice and without incurring any obligation. If you
have questions, always check with your Kia dealer.
We assure you of our continuing interest in your motoring
pleasure and satisfaction in your Kia vehicle.
© 2018 Kia Motors America, Inc.
All rights reserved. May not be reproduced or translated in
whole or in part without the written consent of Kia Motors
America, Inc.
Printed in Korea
Foreword
Page 68 of 553
Safety features of your vehicle
83
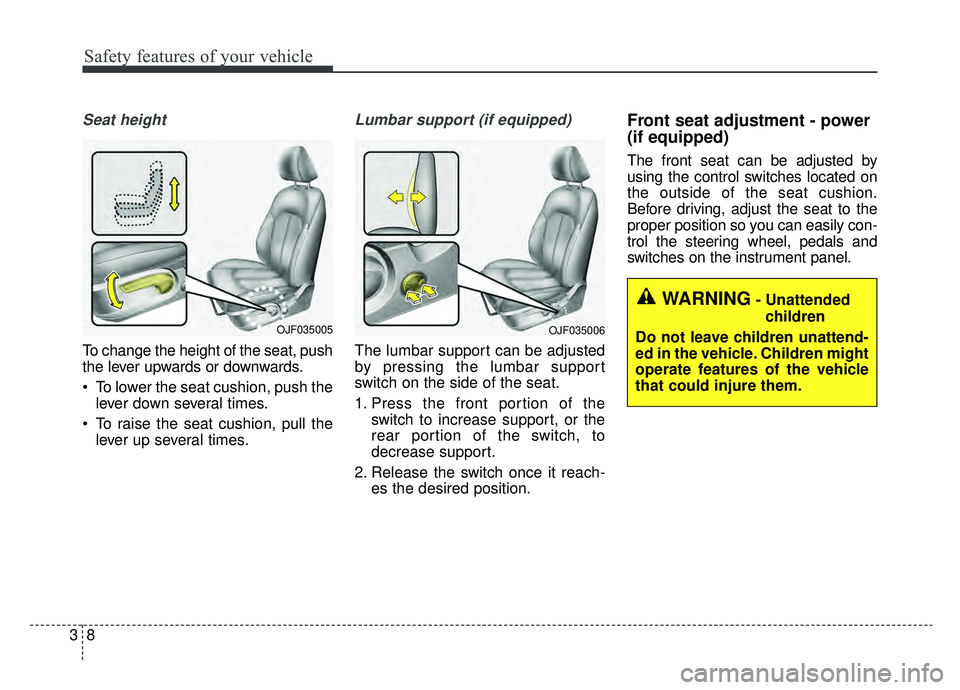
Seat height
To change the height of the seat, push
the lever upwards or downwards.
To lower the seat cushion, push thelever down several times.
To raise the seat cushion, pull the lever up several times.
Lumbar support (if equipped)
The lumbar support can be adjusted
by pressing the lumbar support
switch on the side of the seat.
1. Press the front portion of the switch to increase support, or the
rear portion of the switch, to
decrease support.
2. Release the switch once it reach- es the desired position.
Front seat adjustment - power
(if equipped)
The front seat can be adjusted by
using the control switches located on
the outside of the seat cushion.
Before driving, adjust the seat to the
proper position so you can easily con-
trol the steering wheel, pedals and
switches on the instrument panel.
WARNING- Unattended
children
Do not leave children unattend-
ed in the vehicle. Children might
operate features of the vehicle
that could injure them.
OJF035006OJF035005
Page 104 of 553
Safety features of your vehicle
44
3
How does the air bag system
operate?
Air bags are activated (able to
inflate if necessary) only when the
engine start/stop button has been
changed to ON position.
The appropriate air bags inflate instantly in the event of a serious
frontal collision or side collision in
order to help protect the occupants
from serious physical injury.
There is no single speed at which the air bags will inflate.
Generally, air bags are designed to
inflate based upon the severity of a
collision and its direction. These
two factors determine whether the
sensors produce an electronic
deployment/ inflation signal.
Air bag deployment depends on a number of factors including vehicle
speed, angles of impact, and, the
density and stiffness of the vehi-
cles or objects which your vehicle
hits in the collision. The determin-
ing factors are not limited to those
mentioned above. The front air bags will completely
inflate and deflate in an instant.
It is virtually impossible for you to
see the air bags inflate during an
accident.
It is much more likely that you will
simply see the deflated air bags
hanging out of their storage com-
partments after the collision.
In addition to inflating in serious side collisions, side and/or curtain
air bags will inflate if the sensing
system detects a rollover.
When a rollover is detected, side and/or curtain air bags will remain
inflated longer to help provide pro-
tection from ejection, especially
when used in conjunction with the
seat belts. In order to help provide protection,
the air bags must inflate rapidly.
The speed of the air bag inflation is
a consequence of extremely short
time in which to inflate the air bag
between the occupant and the
vehicle structures before the occu-
pant impacts those structures. This
speed of inflation reduces the risk
of serious or life-threatening
injuries and is thus a necessary
part of the air bag design.
However, air bag inflation can also
cause injuries which can include
facial abrasions, bruises and bro-
ken bones because the inflation
speed also causes the air bags to
expand with a great deal of force.
There are even circumstances under which contact with the
steering wheel or passenger air
bag can cause fatal injuries,
especially if the occupant is
positioned excessively close to
the steering wheel or passenger
air bag.
Page 173 of 553
443
Features of your vehicle
Electric power steering (EPS)
The power steering uses a motor to
assist you in steering the vehicle. If
the engine is off or if the power steer-
ing system becomes inoperative, the
vehicle may still be steered, but it will
require increased steering effort.
The motor driven power steering is
controlled by a power steering con-
trol unit which senses the steering
wheel torque and vehicle speed to
command the motor.
The steering becomes heavier as the
vehicle's speed increases and
becomes lighter as the vehicle's
speed decreases for improved steer-
ing control.
Should you notice any change in the
effort required to steer during normal
vehicle operation, have the power
steering checked by an authorized
Kia dealer. If the Electric Power Steering
System does not operate normally,
the warning light will illuminate on
the instrument cluster. The steering
wheel may require increased
steering effort. Take your vehicle to
an authorized Kia dealer and have
the vehicle checked as soon as
possible.
When you operate the steering wheel in low temperature, noise
may occur. If temperature rises, the
noise will likely disappear. This is a
normal condition.
When the vehicle is stationary, and the steering wheel is turned all the
way to the left or right continuous-
ly, the steering wheel becomes
harder to turn. The power assist is
limited to protect the motor from
overheating.
As time passes, the steering wheel
will return to its normal condition.
✽ ✽ NOTICE
The following symptoms may occur
during normal vehicle operation:
• The EPS warning light does not
illuminate.
• The steering gets heavy immedi- ately after turning the Engine
Start/Stop button is ON position.
This happens as the system per-
forms the EPS system diagnostics.
When the diagnostics are complet-
ed, the steering wheel will return
to its normal condition.
• A click noise may be heard from the EPS relay after turning the
Engine Start/Stop button is ON or
OFF position.
• A motor noise may be heard when the vehicle is at a stop or at a low
driving speed.
• If the Electric Power Steering System does not operate normally,
the warning light will illuminate on
the instrument cluster. The steer-
ing wheel may become difficult to
control or operate abnormally.
Take your vehicle to an authorized
Kia dealer and have the vehicle
checked as soon as possible. (Continued)
STEERING WHEEL
Page 191 of 553
461
Features of your vehicle
Service Mode
Tire Pressure
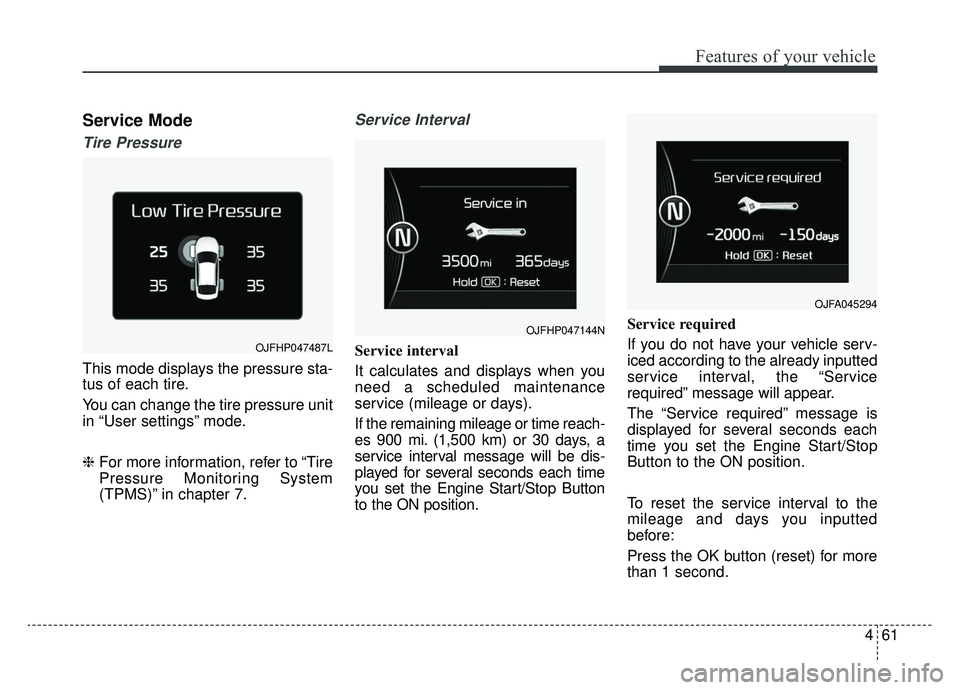
This mode displays the pressure sta-
tus of each tire.
You can change the tire pressure unit
in “User settings” mode.
❈For more information, refer to “Tire
Pressure Monitoring System
(TPMS)” in chapter 7.
Service Interval
Service interval
It calculates and displays when you
need a scheduled maintenance
service (mileage or days).
If the remaining mileage or time reach-
es 900 mi. (1,500 km) or 30 days, a
service interval message will be dis-
played for several seconds each time
you set the Engine Start/Stop Button
to the ON position. Service required
If you do not have your vehicle serv-
iced according to the already inputted
service interval, the “Service
required” message will appear.
The “Service required” message is
displayed for several seconds each
time you set the Engine Start/Stop
Button to the ON position.
To reset the service interval to the
mileage and days you inputted
before:
Press the OK button (reset) for more
than 1 second.
OJFHP047144N
OJFA045294
OJFHP047487L
Page 193 of 553
463
Features of your vehicle
User Settings Mode
Description
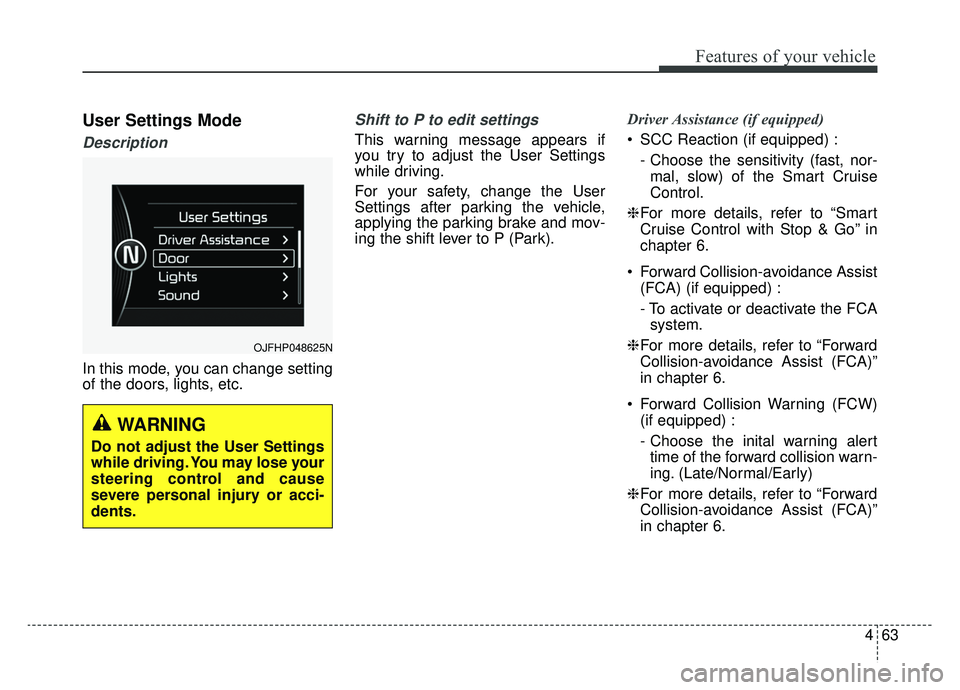
In this mode, you can change setting
of the doors, lights, etc.
Shift to P to edit settings
This warning message appears if
you try to adjust the User Settings
while driving.
For your safety, change the User
Settings after parking the vehicle,
applying the parking brake and mov-
ing the shift lever to P (Park).Driver Assistance (if equipped)
SCC Reaction (if equipped) :
- Choose the sensitivity (fast, nor-mal, slow) of the Smart Cruise
Control.
❈ For more details, refer to “Smart
Cruise Control with Stop & Go” in
chapter 6.
Forward Collision-avoidance Assist (FCA) (if equipped) :
- To activate or deactivate the FCAsystem.
❈ For more details, refer to “Forward
Collision-avoidance Assist (FCA)”
in chapter 6.
Forward Collision Warning (FCW) (if equipped) :
- Choose the inital warning alerttime of the forward collision warn-
ing. (Late/Normal/Early)
❈ For more details, refer to “Forward
Collision-avoidance Assist (FCA)”
in chapter 6.
OJFHP048625N
WARNING
Do not adjust the User Settings
while driving. You may lose your
steering control and cause
severe personal injury or acci-
dents.
Page 195 of 553
465
Features of your vehicle
Lights
One Touch Turn Signal :- Off: The one touch turn signalfunction will be deactivated.
- 3, 5, 7 Flashes : The lane change signals will blink 3, 5 or 7 times
when the turn signal lever is
moved slightly.
❈ For more details, refer to “Lighting”
in this chapter.
Headlight Delay : - If this item is checked, the headlamp delay function will be acti-
vated.
❈ For more details, refer to “Lighting”
in this chapter.
Welcome Light(if equipped) : - If this item is checked, the wel-come light function will be activat-
ed. Sound
Cluster Voice Guidance Volume (if
equipped) :
- Adjust the Cluster voice guidancevolume. (Level 1~3)
Parking Distance Warning Volume (if equipped) :
- Adjust the Park Assist Systemvolume. (Level 1 ~ 3)
Blind-Spot Collision Warning Sound (if equipped) :
- If this item is checked, the blindspot detection sound will be acti-
vated.
❈ For more details, refer to "Blind-
Spot Collision Warning System" in
chapter 6. Convenience
Seat Easy Access (if equipped) :
- Off : The seat easy access func-tion will be deactivated.
- Normal/Extended : When you turn off the engine, the driver’s
seat will automatically move
backwards 3 in. (7.6 cm)
(Enhanced) for you to enter or
exit the vehicle more comfortably.
If you change the ignition switch or
Engine Start/Stop Button from
OFF position to the ACC position,
the driver’s seat will return to the
original position.
❈ For more details, refer to “Driver
Position Memory System” in chap-
ter 3.
Page 203 of 553
473
Features of your vehicle
Assist Mode (if equipped)
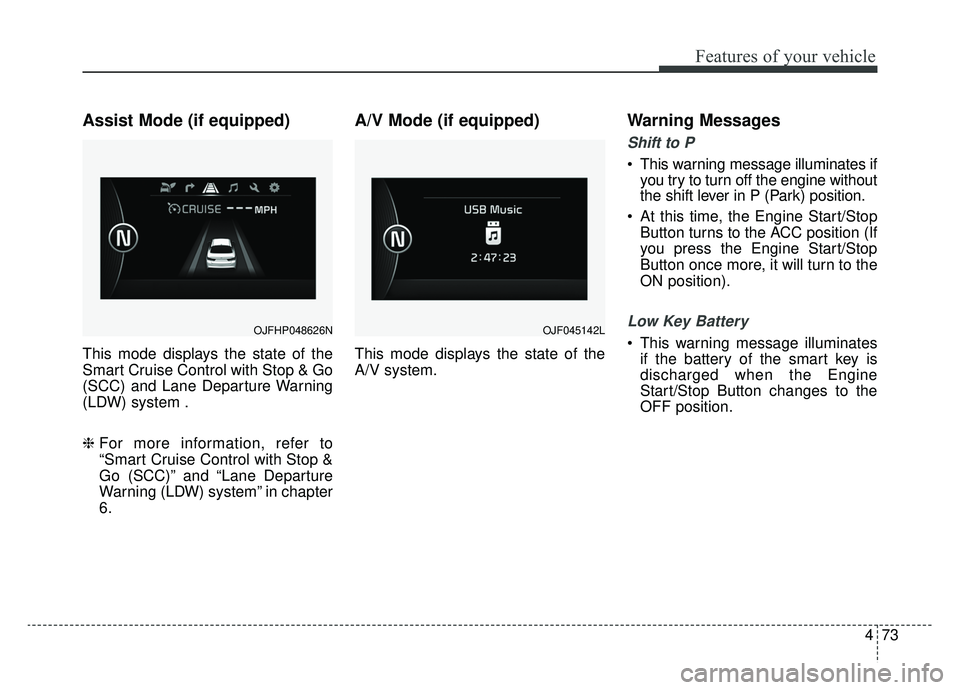
This mode displays the state of the
Smart Cruise Control with Stop & Go
(SCC) and Lane Departure Warning
(LDW) system .
❈ For more information, refer to
“Smart Cruise Control with Stop &
Go (SCC)” and “Lane Departure
Warning (LDW) system” in chapter
6.
A/V Mode (if equipped)
This mode displays the state of the
A/V system.
Warning Messages
Shift to P
This warning message illuminates if
you try to turn off the engine without
the shift lever in P (Park) position.
At this time, the Engine Start/Stop Button turns to the ACC position (If
you press the Engine Start/Stop
Button once more, it will turn to the
ON position).
Low Key Battery
This warning message illuminatesif the battery of the smart key is
discharged when the Engine
Start/Stop Button changes to the
OFF position.OJFHP048626NOJF045142L
Page 238 of 553
Features of your vehicle
108
4
✽ ✽
NOTICE
• Do not disassemble a front view
camera temporarily for tinted
window or attaching any types of
coatings and accessories. If you
disassemble the camera and
assemble it again, take your vehi-
cle to an authorized Kia dealer
and have the system checked to
need a calibration.
• When you replace or reinstall the windshield glass, front view cam-
era, take your vehicle to an
authorized Kia dealer and have
the system checked.
• Be careful that water does not get into the High Beam Assist unit and
do not remove or damage related
parts of the High Beam Assist sys-
tem.
• Do not place objects on the dash- board that reflect light such as
mirrors, white paper, etc. The sys-
tem may not be able to function if
sunlight is reflected. (Continued)(Continued)
• At times, the High Beam Assist
may not operate due to system
limitations. The system is for your
convenience only. It is the respon-
sibility of the driver to use safe
driving practices and always
check the road conditions for your
safety.
• When the system does not operate normally, change the lamp posi-
tion manually between the high
beam and low beam.
Turn signals and lane change
signals
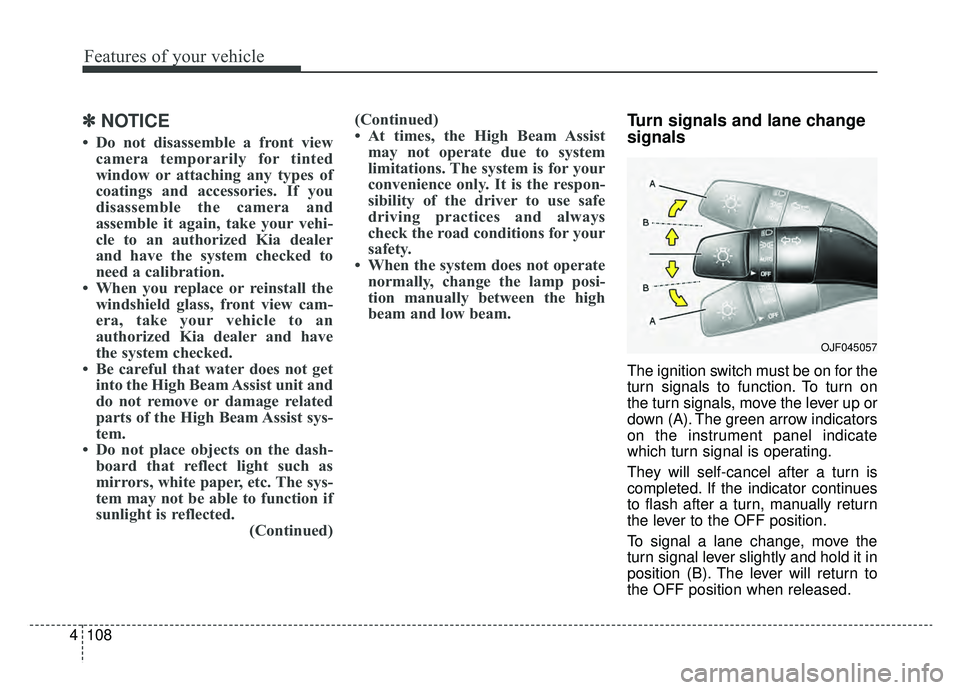
The ignition switch must be on for the
turn signals to function. To turn on
the turn signals, move the lever up or
down (A). The green arrow indicators
on the instrument panel indicate
which turn signal is operating.
They will self-cancel after a turn is
completed. If the indicator continues
to flash after a turn, manually return
the lever to the OFF position.
To signal a lane change, move the
turn signal lever slightly and hold it in
position (B). The lever will return to
the OFF position when released.
OJF045057