child seat KIA PICANTO 2006 User Guide
[x] Cancel search | Manufacturer: KIA, Model Year: 2006, Model line: PICANTO, Model: KIA PICANTO 2006Pages: 281, PDF Size: 9.89 MB
Page 64 of 281

Knowing your vehicle
54
3
1 23456789
To secure the child restraint seat
1. To engage the child restraint seat
to the ISOFIX anchor, insert the
child restraint seat latch into the
ISOFIX anchor. Listen for the audi-
ble “click” sound.
2. Connect the tether strap hook to the child restraint hook holder and
tighten to secure the seat. Refer to
“Securing a child restraint seat
with the “Tether Anchorage” sys-
tem” on page 3-52.
(Continued)
Do not mount more than onechild restraint to a child
restraint lower anchorage
point. The improper increased
load may cause the anchorage
points or tether anchor to
break, causing serious injuryor death.
Attach the ISOFIX or ISOFIX- compatible child restraint seat
only to the appropriate loca-
tions shown in the illustration.
Always follow the installation and use instructions provided
by the manufacturer of the
child restraint.WARNING
Do not install a child restraint seat at the center of the rear
seat using the vehicle's
ISOFIX anchors. The ISOFIX
anchors are only provided for
the left and right outboard rear
seating positions. Do not mis-
use the ISOFIX anchors by
attempting to attach a child
restraint seat in the middle ofthe rear seat to the ISOFIX
anchors. In a crash, the child
restraint seat ISOFIX attach-
ments may not be strong
enough to secure the child
restraint seat properly in thecenter of the rear seat and
may break, causing serious
injury or death.
(Continued)
1SAE2200/SBGQ03102
Page 65 of 281

355
1 23456789
Knowing your vehicle
Child seat restraint suitability forseat position - For Europe
Use child safety seats that have
been officially approved and are
appropriate for your children. When
using the child safety seats, refer to
the following table.
L1 : Suitable for Bebe comfort ELIOS (E2 037014) approved for the use in this
mass group
L2 : Suitable for PegPerego primo Viaggio (E13 030010) approved for
the use in this mass group
L3 : Suitable for Bebe comfort iSEOS (E2 039014) approved for the use in
this mass group L4 : Suitable for GRACO Autobaby (E11
03.44.160 / E11 03.44.161) approved
for the use in this mass group
L5 : Suitable for Romer Lord Plus (E1 03301136) approved for the use in
this mass group
L7 : Suitable for BeSafe iZi COMFORT (E4 03443206) approved for the use
in this mass group
L8 : Suitable for MAXI-COSI Priori XP (E1 03301153) approved for the use
in this mass group
L9 : Suitable for Bebe comfort HiPSOS(E2 031011/E2 031017)
approved for the use in this mass
group
L10 : Suitable for "Römer ISOFIX GR1" approved for use in this age group
(Approval No:E1 R44-03301133)
U : Suitable for "universal" category restraints approved for use in this
mass group
UF : Suitable for forward-facing "univer- sal" category restraints approved for
the use in this mass group
Seating position
Age group
0 : Up to 10 kg L1, L2, UU
(0 - 9 months) L3, L4
0+ : Up to 13 kg L1, L2
UU
(0 - 2 years) L3, L4
I : 9 kg to 18 kg L3, L5
U, L10 U(9 months - 4 years) L7, L8
II & III : 15 kg to
L9 UF UF
36 kg (4 - 12 years)
Front
passengerRear
outboard Rear
center
WARNING
We recommend that a child restraint seat be installed in the
rear seat, even if the front pas-
senger's air bag ON/OFF switch
is set to “OFF”. To ensure the
safety of your child, the front
passenger’s air bag must be
deactivated when it should be
necessary to install a child
restraint seat on the front pas-
senger seat in exceptional cir-cumstances.
Page 69 of 281
359
1 23456789
Knowing your vehicle
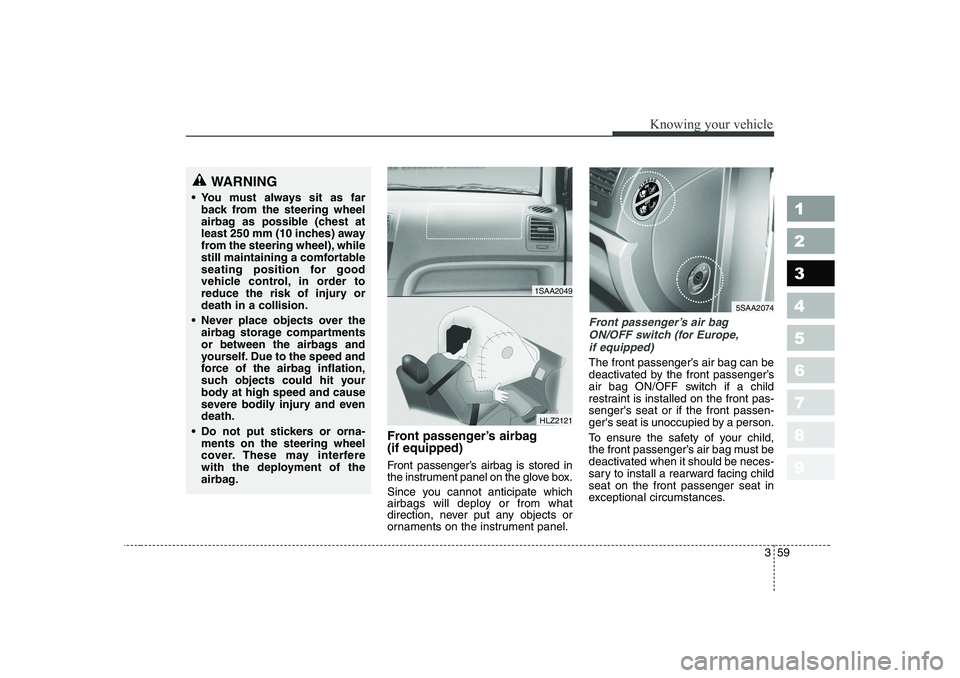
Front passenger’s airbag (if equipped)
Front passenger’s airbag is stored in
the instrument panel on the glove box.
Since you cannot anticipate which
airbags will deploy or from what
direction, never put any objects or
ornaments on the instrument panel.
Front passenger’s air bagON/OFF switch (for Europe, if equipped)
The front passenger’s air bag can be
deactivated by the front passenger’s
air bag ON/OFF switch if a child
restraint is installed on the front pas-senger's seat or if the front passen-
ger's seat is unoccupied by a person.
To ensure the safety of your child,
the front passenger’s air bag must be
deactivated when it should be neces-
sary to install a rearward facing childseat on the front passenger seat in
exceptional circumstances.
WARNING
You must always sit as far back from the steering wheel
airbag as possible (chest at
least 250 mm (10 inches) away
from the steering wheel), while
still maintaining a comfortable
seating position for good
vehicle control, in order to
reduce the risk of injury ordeath in a collision.
Never place objects over the airbag storage compartments
or between the airbags and
yourself. Due to the speed and
force of the airbag inflation,
such objects could hit your
body at high speed and cause
severe bodily injury and evendeath.
Do not put stickers or orna- ments on the steering wheel
cover. These may interfere
with the deployment of the
airbag.
1SAA2049
HLZ2121
5SAA2074
Page 71 of 281
361
1 23456789
Knowing your vehicle
WARNING
The front seat passenger’s airbag is much larger than the
steering wheel airbag and
inflates with considerably
more force. It can seriously
hurt or kill a passenger who is
not in the proper position and
wearing the safety belt proper-
ly. The front passengers
should always move their seat
as far back as practical and sit
back in their seat.
It is essential that the front passengers always wear their
safety belts, even when the
vehicle is moving in a parking
lot or up a driveway into
garage. (Continued)(Continued)
Even though your vehicle isequipped with the front pas-
senger's air bag ON/OFF
switch, do not install a child
restraint system in the front
passenger's seat. A child
restraint system must never
be placed in the front seat.
Children who are too large for
child restraint systems should
always occupy the rear seat
and use the available
lap/shoulder belts. Children
are afforded the most safety in
the event of an accident when
they are restrained by a prop-er restraint system in the rearseat.
As soon as the child seat is no longer needed on the front
passenger's seat, reactivate
the front passenger's air bag.WARNING
The driver is responsible for the proper position of the
front passenger’s air bag
ON/OFF switch.
Deactivate the front passen- ger's air bag only when the
ignition switch is switched off,
or the malfunction may occur
in the SRS Control Module.
And there may be a danger
that the driver's and/or front
passenger’s and/or side and
curtain air bag may fail to trig-
ger, or not trigger correctlyduring a collision.
Never install a rearward facing child seat on the front passen-
ger's seat unless the front
passenger's air bag has been
deactivated. The infant or child
could be severely injured or
killed by an air bag deploy-ment in case of an accident. (Continued)
Page 72 of 281
Knowing your vehicle
62
3
1 23456789
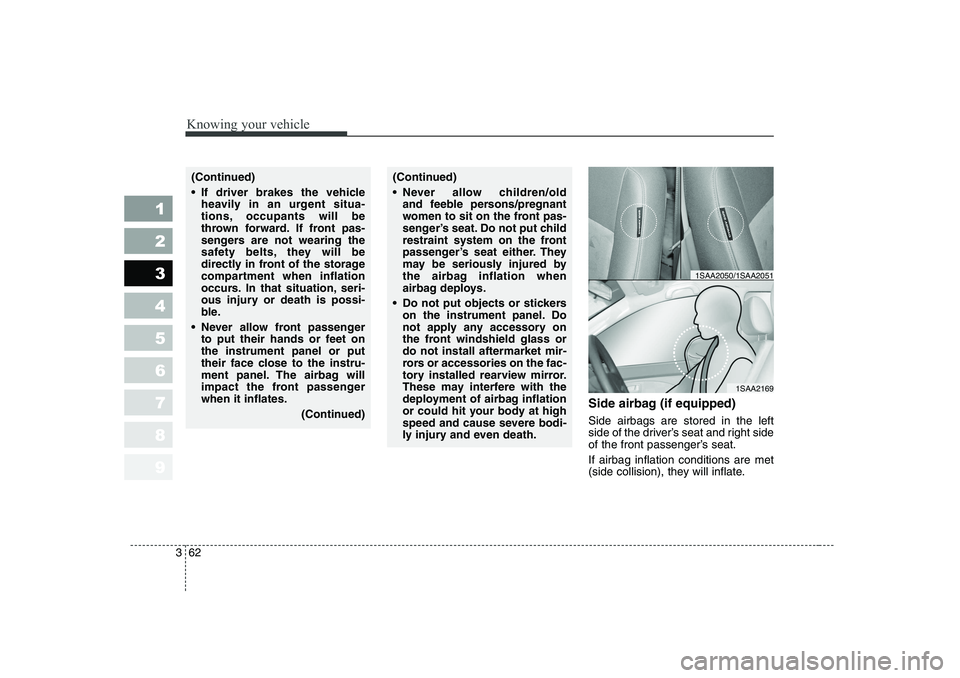
Side airbag (if equipped) Side airbags are stored in the left
side of the driver’s seat and right side
of the front passenger’s seat. If airbag inflation conditions are met
(side collision), they will inflate.
1SAA2169
1SAA2050/1SAA2051
(Continued)
If driver brakes the vehicle
heavily in an urgent situa-
tions, occupants will be
thrown forward. If front pas-
sengers are not wearing the
safety belts, they will be
directly in front of the storage
compartment when inflation
occurs. In that situation, seri-
ous injury or death is possi-
ble.
Never allow front passenger to put their hands or feet onthe instrument panel or put
their face close to the instru-
ment panel. The airbag will
impact the front passengerwhen it inflates.
(Continued)(Continued)
Never allow children/old and feeble persons/pregnant
women to sit on the front pas-
senger’s seat. Do not put child
restraint system on the front
passenger’s seat either. They
may be seriously injured by
the airbag inflation when
airbag deploys.
Do not put objects or stickers on the instrument panel. Do
not apply any accessory on
the front windshield glass ordo not install aftermarket mir-
rors or accessories on the fac-
tory installed rearview mirror.
These may interfere with the
deployment of airbag inflation
or could hit your body at high
speed and cause severe bodi-
ly injury and even death.
Page 81 of 281
371
1 23456789
Knowing your vehicle
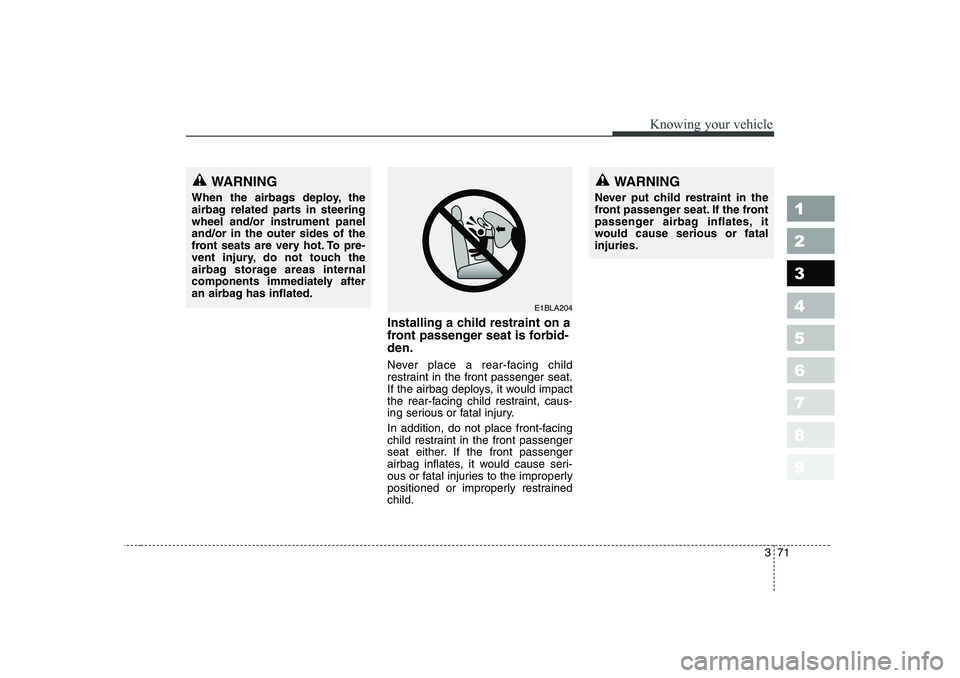
Installing a child restraint on a
front passenger seat is forbid-den.
Never place a rear-facing child
restraint in the front passenger seat.
If the airbag deploys, it would impact
the rear-facing child restraint, caus-
ing serious or fatal injury.
In addition, do not place front-facing
child restraint in the front passenger
seat either. If the front passenger
airbag inflates, it would cause seri-
ous or fatal injuries to the improperly
positioned or improperly restrainedchild.
WARNING
Never put child restraint in the
front passenger seat. If the front
passenger airbag inflates, it
would cause serious or fatalinjuries.WARNING
When the airbags deploy, the
airbag related parts in steeringwheel and/or instrument paneland/or in the outer sides of the
front seats are very hot. To pre-
vent injury, do not touch the
airbag storage areas internal
components immediately after
an airbag has inflated.
E1BLA204
Page 110 of 281
49
1 23456789
Driving your vehicle
✽✽
NOTICE
The transaxle may be damaged if
you shift into P (Park) while thevehicle is in motion.
R (reverse)
Use this position to drive the vehicle
backward.
✽✽
NOTICE
Always come to a complete stop
before shifting into or out of R(Reverse); you may damage thetransaxle if you shift into R whilethe vehicle is in motion, except as
explained in “Rocking the Vehicle”,in this manual.
N (neutral)
With the gearshift in the N position,
the wheels and transaxle are not
locked. The vehicle will roll freely
even on the slightest incline unless
the parking brake or service brakesare applied.(Continued) Before leaving the driver ’s
seat, always make sure the
shift lever is in the P (PARK)
position. Set the parking
brake fully, shut the engine off
and take the key with you.
Unexpected and sudden vehi-
cle movement can occur if you
do not follow these precau-
tions in the order specified.
Never leave a child unattend-
ed in a vehicle.
Page 228 of 281
715
Maintenance
1 23456789
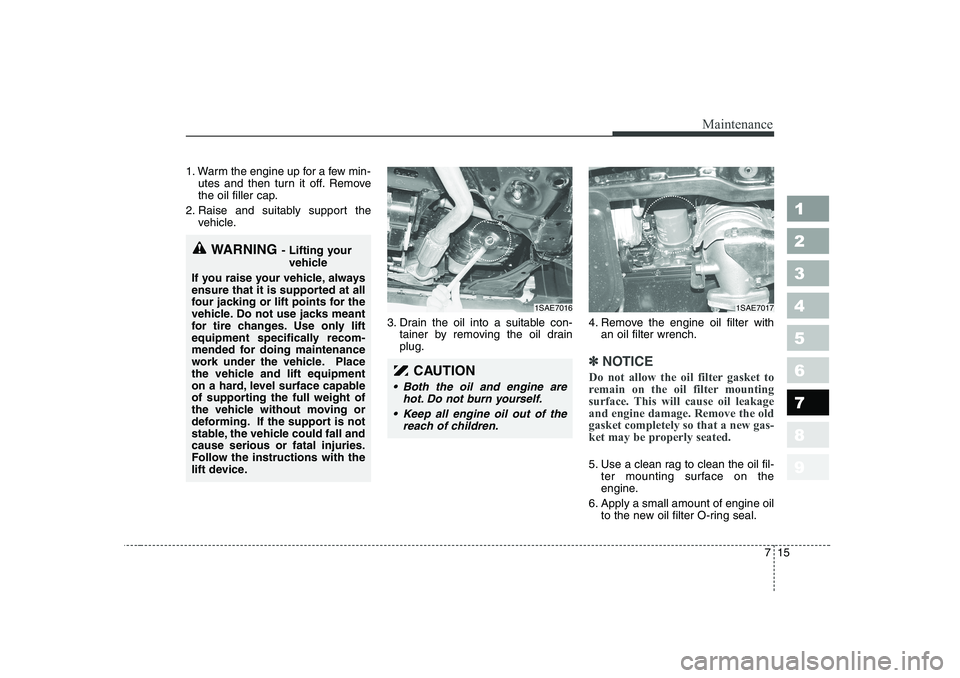
1. Warm the engine up for a few min-utes and then turn it off. Remove
the oil filler cap.
2. Raise and suitably support the vehicle.
3. Drain the oil into a suitable con-tainer by removing the oil drainplug. 4. Remove the engine oil filter with
an oil filter wrench.
✽✽ NOTICE
Do not allow the oil filter gasket to
remain on the oil filter mounting
surface. This will cause oil leakageand engine damage. Remove the oldgasket completely so that a new gas-
ket may be properly seated.
5. Use a clean rag to clean the oil fil- ter mounting surface on the
engine.
6. Apply a small amount of engine oil to the new oil filter O-ring seal.
CAUTION
Both the oil and engine are
hot. Do not burn yourself.
Keep all engine oil out of the reach of children.
1SAE70161SAE7017
WARNING - Lifting your
vehicle
If you raise your vehicle, always
ensure that it is supported at all
four jacking or lift points for the
vehicle. Do not use jacks meant
for tire changes. Use only lift
equipment specifically recom-
mended for doing maintenance
work under the vehicle. Place
the vehicle and lift equipment
on a hard, level surface capable
of supporting the full weight of
the vehicle without moving or
deforming. If the support is not
stable, the vehicle could fall andcause serious or fatal injuries.
Follow the instructions with the
lift device.