ESP KIA PICANTO 2008 User Guide
[x] Cancel search | Manufacturer: KIA, Model Year: 2008, Model line: PICANTO, Model: KIA PICANTO 2008Pages: 335, PDF Size: 12.98 MB
Page 106 of 335
435
Features of your vehicle
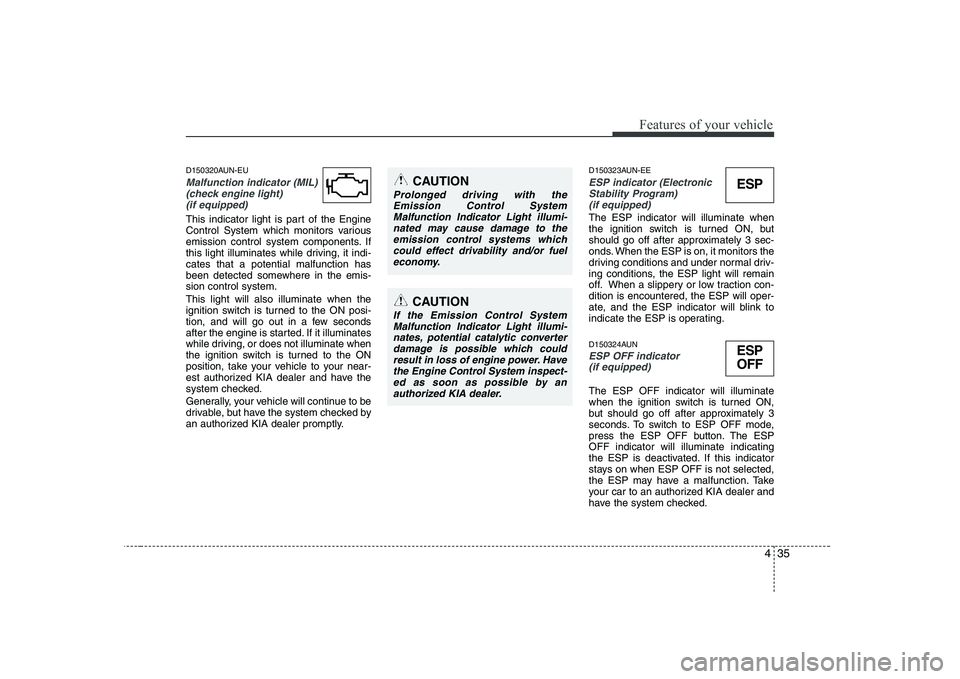
D150320AUN-EU
Malfunction indicator (MIL)(check engine light) (if equipped)
This indicator light is part of the Engine
Control System which monitors various
emission control system components. If
this light illuminates while driving, it indi-cates that a potential malfunction has
been detected somewhere in the emis-sion control system. This light will also illuminate when the
ignition switch is turned to the ON posi-
tion, and will go out in a few seconds
after the engine is started. If it illuminates
while driving, or does not illuminate when
the ignition switch is turned to the ON
position, take your vehicle to your near-
est authorized KIA dealer and have the
system checked.
Generally, your vehicle will continue to be
drivable, but have the system checked by
an authorized KIA dealer promptly. D150323AUN-EE
ESP indicator (Electronic
Stability Program) (if equipped)
The ESP indicator will illuminate when
the ignition switch is turned ON, but
should go off after approximately 3 sec-
onds. When the ESP is on, it monitors the
driving conditions and under normal driv-
ing conditions, the ESP light will remain
off. When a slippery or low traction con-dition is encountered, the ESP will oper-
ate, and the ESP indicator will blink to
indicate the ESP is operating.
D150324AUN
ESP OFF indicator (if equipped)
The ESP OFF indicator will illuminate
when the ignition switch is turned ON,
but should go off after approximately 3
seconds. To switch to ESP OFF mode,
press the ESP OFF button. The ESPOFF indicator will illuminate indicating
the ESP is deactivated. If this indicator
stays on when ESP OFF is not selected,
the ESP may have a malfunction. Take
your car to an authorized KIA dealer and
have the system checked.
CAUTION
Prolonged driving with the
Emission Control System Malfunction Indicator Light illumi-nated may cause damage to the
emission control systems whichcould effect drivability and/or fueleconomy.
CAUTION
If the Emission Control System Malfunction Indicator Light illumi-
nates, potential catalytic converter damage is possible which couldresult in loss of engine power. Havethe Engine Control System inspect-
ed as soon as possible by an authorized KIA dealer.
ESP
ESP
OFF
Page 108 of 335
437
Features of your vehicle
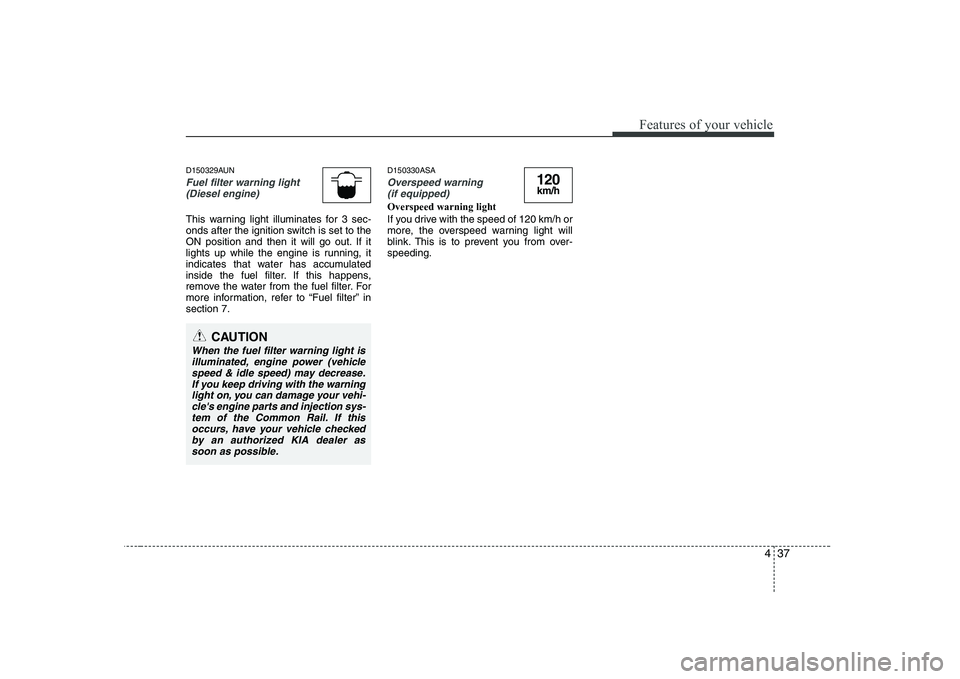
D150329AUN
Fuel filter warning light(Diesel engine)
This warning light illuminates for 3 sec-
onds after the ignition switch is set to the
ON position and then it will go out. If it
lights up while the engine is running, it
indicates that water has accumulated
inside the fuel filter. If this happens,
remove the water from the fuel filter. For
more information, refer to “Fuel filter” insection 7. D150330ASA
Overspeed warning
(if equipped)
Overspeed warning light
If you drive with the speed of 120 km/h or
more, the overspeed warning light will
blink. This is to prevent you from over-speeding.
120km/h
CAUTION
When the fuel filter warning light is
illuminated, engine power (vehiclespeed & idle speed) may decrease.
If you keep driving with the warning light on, you can damage your vehi-cle's engine parts and injection sys-tem of the Common Rail. If this
occurs, have your vehicle checkedby an authorized KIA dealer assoon as possible.
Page 109 of 335
Features of your vehicle
38
4
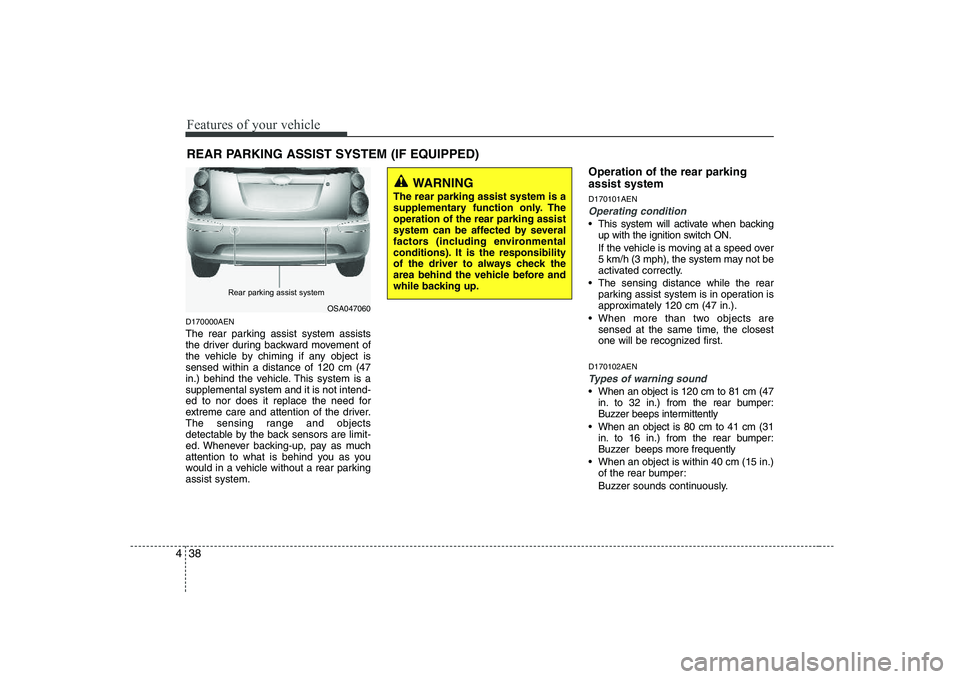
D170000AEN
The rear parking assist system assists
the driver during backward movement of
the vehicle by chiming if any object issensed within a distance of 120 cm (47
in.) behind the vehicle. This system is asupplemental system and it is not intend-
ed to nor does it replace the need for
extreme care and attention of the driver.
The sensing range and objects
detectable by the back sensors are limit-
ed. Whenever backing-up, pay as much
attention to what is behind you as you
would in a vehicle without a rear parkingassist system. Operation of the rear parking assist system D170101AEN
Operating condition
This system will activate when backing
up with the ignition switch ON.
If the vehicle is moving at a speed over
5 km/h (3 mph), the system may not be
activated correctly.
The sensing distance while the rear parking assist system is in operation is
approximately 120 cm (47 in.).
When more than two objects are sensed at the same time, the closest
one will be recognized first.
D170102AEN
Types of warning sound
When an object is 120 cm to 81 cm (47 in. to 32 in.) from the rear bumper:
Buzzer beeps intermittently
When an object is 80 cm to 41 cm (31 in. to 16 in.) from the rear bumper:
Buzzer beeps more frequently
When an object is within 40 cm (15 in.) of the rear bumper:
Buzzer sounds continuously.
REAR PARKING ASSIST SYSTEM (IF EQUIPPED)
OSA047060
WARNING
The rear parking assist system is a
supplementary function only. Theoperation of the rear parking assist
system can be affected by several
factors (including environmental
conditions). It is the responsibility
of the driver to always check the
area behind the vehicle before and
while backing up.
Rear parking assist system
Page 111 of 335
Features of your vehicle
40
4
✽✽
NOTICE
This system can only sense objects with- in the range and location of the sensors;
It can not detect objects in other areas
where sensors are not installed. Also,
small or slim objects, such as poles orobjects located between sensors may notbe detected by the sensors.Always visually check behind the vehi-cle when backing up.
Be sure to inform any drivers of the
vehicle that may be unfamiliar with the
system regarding the systems capabili-ties and limitations.D170400BUN
Self-diagnosis
If you don’t hear an audible warning
sound or if the buzzer sounds intermit-tently when shifting the gear to the R
(Reverse) position, this may indicate a
malfunction in the rear parking assist
system. If this occurs, have your vehicle
checked by an authorized KIA dealer as
soon as possible.
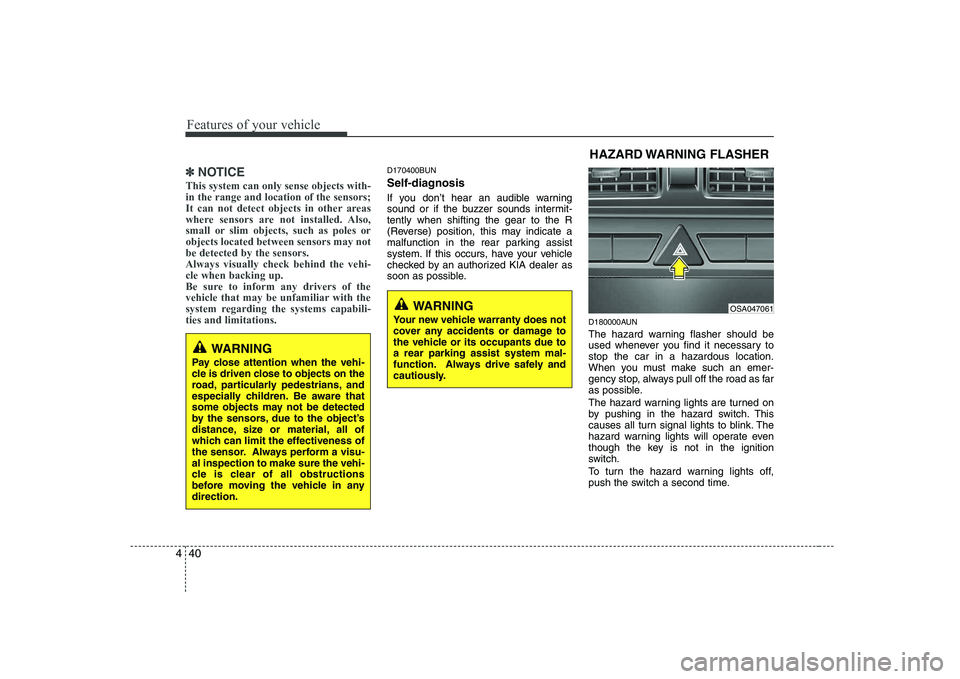
D180000AUN
The hazard warning flasher should be
used whenever you find it necessary tostop the car in a hazardous location.
When you must make such an emer-
gency stop, always pull off the road as far
as possible.
The hazard warning lights are turned on
by pushing in the hazard switch. This
causes all turn signal lights to blink. The
hazard warning lights will operate even
though the key is not in the ignition
switch.
To turn the hazard warning lights off,
push the switch a second time.HAZARD WARNING FLASHER
OSA047061
WARNING
Pay close attention when the vehi-
cle is driven close to objects on the
road, particularly pedestrians, and
especially children. Be aware that
some objects may not be detected
by the sensors, due to the object’s
distance, size or material, all of
which can limit the effectiveness of
the sensor. Always perform a visu-al inspection to make sure the vehi-
cle is clear of all obstructions
before moving the vehicle in anydirection.
WARNING
Your new vehicle warranty does not
cover any accidents or damage to
the vehicle or its occupants due toa rear parking assist system mal-
function. Always drive safely and
cautiously.
Page 115 of 335
Features of your vehicle
44
4
D190800ASA
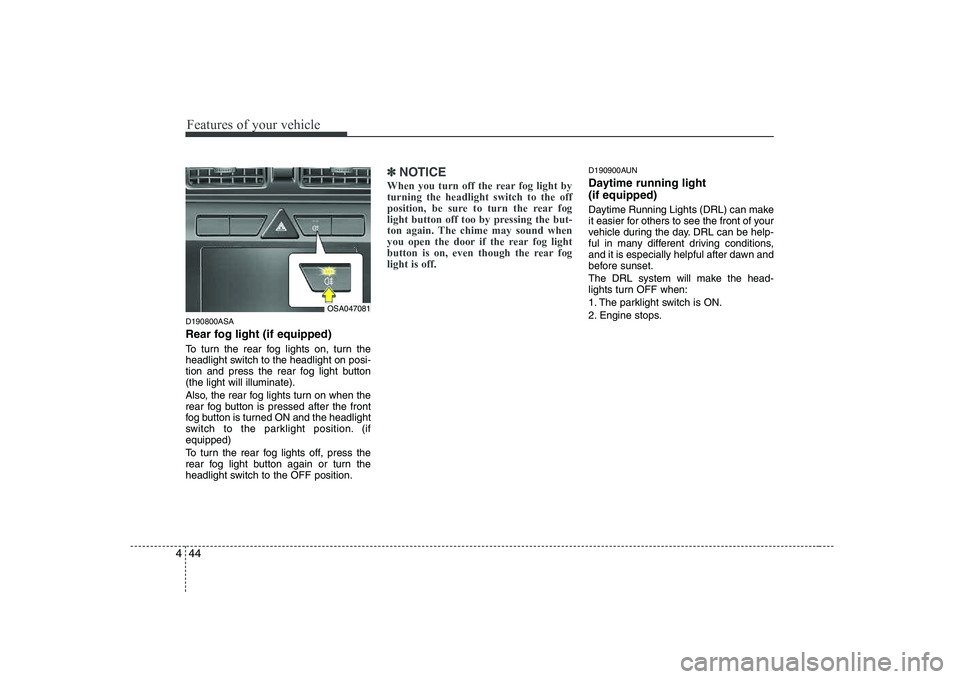
Rear fog light (if equipped)
To turn the rear fog lights on, turn the
headlight switch to the headlight on posi-
tion and press the rear fog light button(the light will illuminate).
Also, the rear fog lights turn on when the
rear fog button is pressed after the front
fog button is turned ON and the headlight
switch to the parklight position. (ifequipped)
To turn the rear fog lights off, press the
rear fog light button again or turn the
headlight switch to the OFF position.
✽✽
NOTICE
When you turn off the rear fog light by turning the headlight switch to the off
position, be sure to turn the rear fog
light button off too by pressing the but-
ton again. The chime may sound when
you open the door if the rear fog light
button is on, even though the rear foglight is off.D190900AUN
Daytime running light (if equipped)
Daytime Running Lights (DRL) can make
it easier for others to see the front of your
vehicle during the day. DRL can be help-
ful in many different driving conditions,
and it is especially helpful after dawn and
before sunset.
The DRL system will make the head-
lights turn OFF when:
1. The parklight switch is ON.
2. Engine stops.
OSA047081
Page 139 of 335
Features of your vehicle
68
4
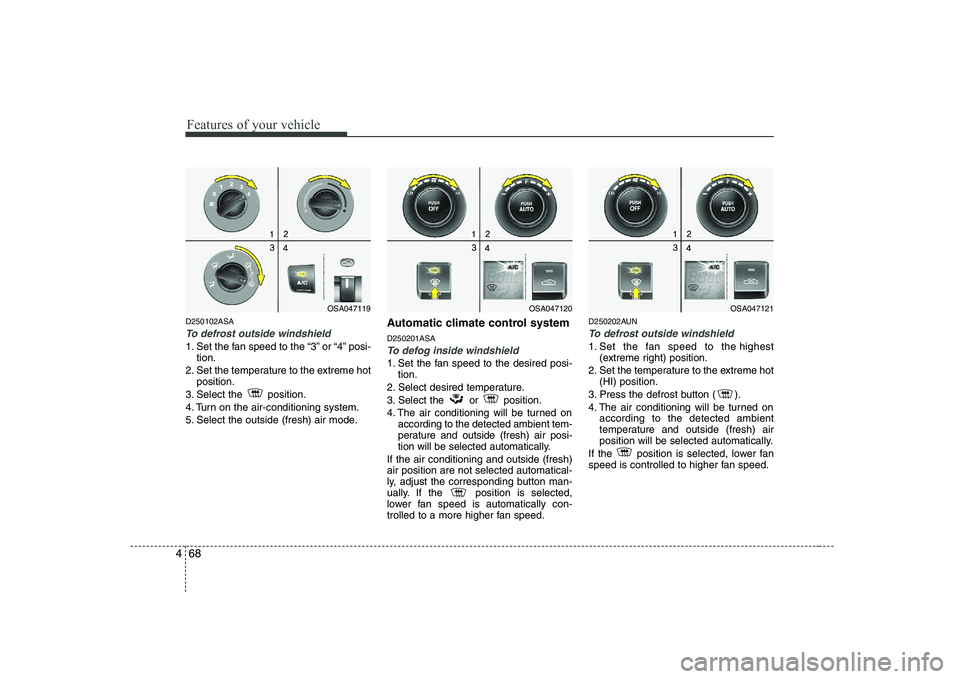
D250102ASA
To defrost outside windshield
1. Set the fan speed to the “3” or “4” posi-
tion.
2. Set the temperature to the extreme hot position.
3. Select the position.
4. Turn on the air-conditioning system.
5. Select the outside (fresh) air mode. Automatic climate control system D250201ASATo defog inside windshield
1. Set the fan speed to the desired posi-
tion.
2. Select desired temperature.
3. Select the or position.
4. The air conditioning will be turned on according to the detected ambient tem-
perature and outside (fresh) air posi-
tion will be selected automatically.
If the air conditioning and outside (fresh)air position are not selected automatical-
ly, adjust the corresponding button man-
ually. If the position is selected,
lower fan speed is automatically con-
trolled to a more higher fan speed. D250202AUN
To defrost outside windshield
1. Set the fan speed to the highest
(extreme right) position.
2. Set the temperature to the extreme hot (HI) position.
3. Press the defrost button ( ).
4. The air conditioning will be turned on according to the detected ambient
temperature and outside (fresh) air
position will be selected automatically.
If the position is selected, lower fan
speed is controlled to higher fan speed.
OSA047119OSA047120OSA047121
Page 152 of 335
481
Features of your vehicle
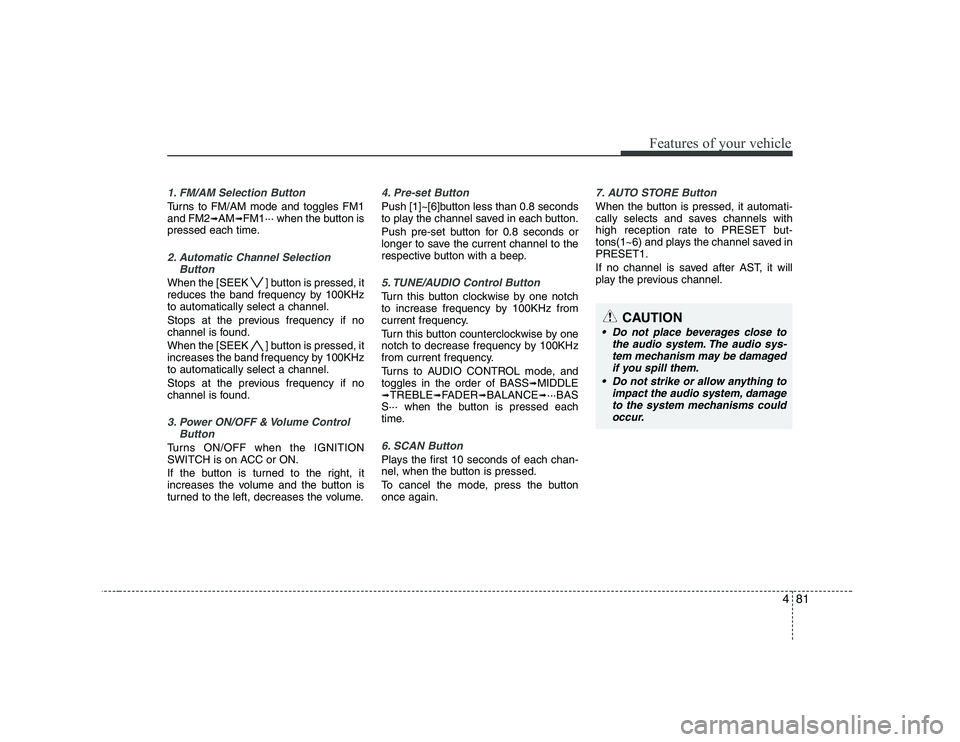
1. FM/AM Selection Button
Turns to FM/AM mode and toggles FM1 and FM2➟AM ➟FM1··· when the button is
pressed each time.
2. Automatic Channel Selection
Button
When the [SEEK ] button is pressed, it
reduces the band frequency by 100KHzto automatically select a channel.
Stops at the previous frequency if no
channel is found.
When the [SEEK ] button is pressed, it
increases the band frequency by 100KHzto automatically select a channel.
Stops at the previous frequency if no
channel is found.
3. Power ON/OFF & Volume ControlButton
Turns ON/OFF when the IGNITION
SWITCH is on ACC or ON.
If the button is turned to the right, it
increases the volume and the button is
turned to the left, decreases the volume.
4. Pre-set Button
Push [1]~[6]button less than 0.8 seconds
to play the channel saved in each button.
Push pre-set button for 0.8 seconds or
longer to save the current channel to the
respective button with a beep.
5. TUNE/AUDIO Control Button
Turn this button clockwise by one notch
to increase frequency by 100KHz from
current frequency.
Turn this button counterclockwise by one
notch to decrease frequency by 100KHz
from current frequency.
Turns to AUDIO CONTROL mode, and toggles in the order of BASS ➟
MIDDLE
➟ TREBLE ➟FADER ➟BALANCE ➟···BAS
S··· when the button is pressed each
time.
6. SCAN Button
Plays the first 10 seconds of each chan-
nel, when the button is pressed.
To cancel the mode, press the button once again.
7. AUTO STORE Button
When the button is pressed, it automati-
cally selects and saves channels with
high reception rate to PRESET but-
tons(1~6) and plays the channel saved inPRESET1.
If no channel is saved after AST, it will
play the previous channel.
CAUTION
Do not place beverages close to
the audio system. The audio sys-
tem mechanism may be damagedif you spill them.
Do not strike or allow anything to impact the audio system, damage
to the system mechanisms couldoccur.
Page 158 of 335
487
Features of your vehicle
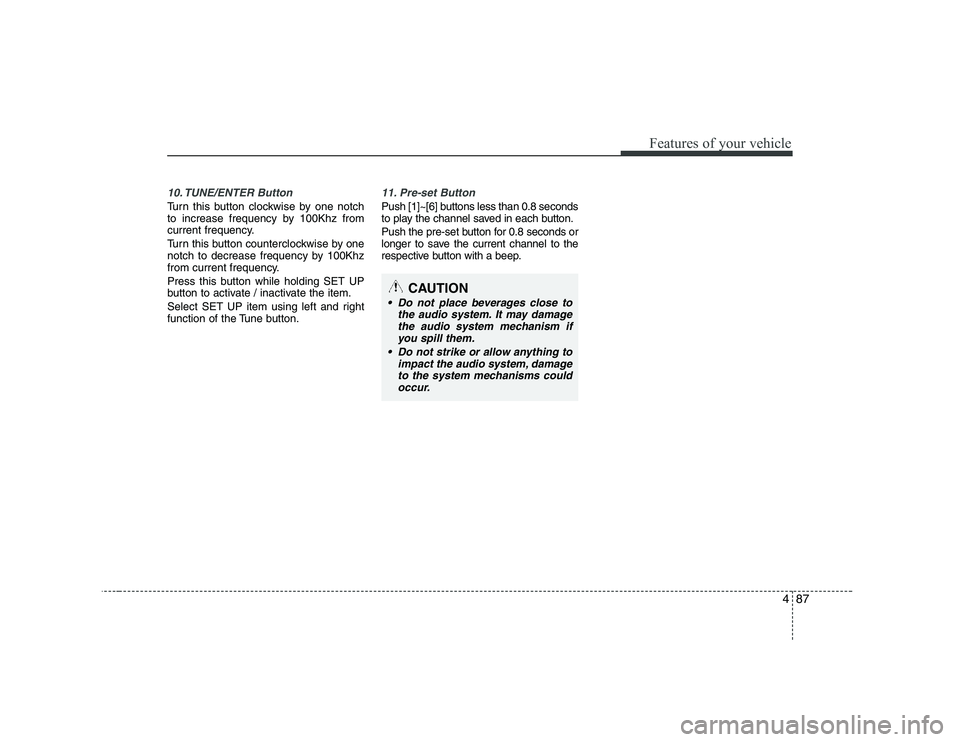
10. TUNE/ENTER Button
Turn this button clockwise by one notch
to increase frequency by 100Khz from
current frequency.
Turn this button counterclockwise by one
notch to decrease frequency by 100Khz
from current frequency.
Press this button while holding SET UP
button to activate / inactivate the item.
Select SET UP item using left and right
function of the Tune button.
11. Pre-set Button
Push [1]~[6] buttons less than 0.8 seconds
to play the channel saved in each button.
Push the pre-set button for 0.8 seconds or
longer to save the current channel to the
respective button with a beep.
CAUTION
Do not place beverages close tothe audio system. It may damage
the audio system mechanism ifyou spill them.
Do not strike or allow anything to impact the audio system, damageto the system mechanisms could
occur.
Page 170 of 335
499
Features of your vehicle
10. ENTER/TUNE Button
Turn this button clockwise by one notch
to increase frequency by 0.05Mhz from
current frequency.
Turn this button counterclockwise by one
notch to decrease frequency by 0.05Mhz
from current frequency.
Press this button while holding the SET
UP button to activate/inactivate the item. Select a SET UP item using the left and
right function of the Tune button.
11. Pre-set Button
Push [1]~[6] buttons less than 0.8 seconds
to play the channel saved in each button.
Push the Pre-set button for 0.8 seconds or
longer to save the current channel to the
respective button with a beep.
CAUTION
Do not place beverages close tothe audio system. It may damage
the playback mechanism if youspill them.
Do not strike or allow anything to impact the audio system, damageto the system mechanisms could
occur.
Page 182 of 335
53
Driving your vehicle
E020100AUN
Before entering vehicle
• Be sure that all windows, outside mir-ror(s), and outside lights are clean.
Check the condition of the tires.
Check under the vehicle for any sign of leaks.
Be sure there are no obstacles behind you if you intend to back up.
E020200AUN
Necessary inspections
Fluid levels, such as engine oil, engine
coolant, brake fluid, and washer fluid
should be checked on a regular basis,
with the exact interval depending on the
fluid. Further details are provided in sec-
tion 7, “Maintenance”. E020300AUN
Before starting
Close and lock all doors.
Position the seat so that all controls are
easily reached.
Adjust the inside and outside rearview mirrors.
Be sure that all lights work.
Check all gauges.
Check the operation of warning lights when the ignition switch is turned to the ON position.
Release the parking brake and make sure the brake warning light goes out.
For safe operation, be sure you are famil-
iar with your vehicle and its equipment.
BEFORE DRIVING
WARNING
All passengers must be properly
belted whenever the vehicle is mov-
ing. Refer to “Seat belts” in section
3 for more information on their
proper use.
WARNING
Always check the surrounding
areas near your vehicle for people,
especially children, before putting a
car into D (Drive) or R (Reverse).
WARNING - Driving under
the influence of alcohol or drugs
Drinking and driving is dangerous.
Drunk driving is the number one
contributor to the highway death
toll each year. Even a small amount
of alcohol will affect your reflexes,
perceptions and judgment. Drivingwhile under the influence of drugs
is as dangerous or more dangerousthan driving drunk.
You are much more likely to have a
serious accident if you drink or
take drugs and drive.
If you are drinking or taking drugs,
don’t drive. Do not ride with a driv-er who has been drinking or taking
drugs. Choose a designated driveror call a cab.