reset KIA PICANTO 2012 Owners Manual
[x] Cancel search | Manufacturer: KIA, Model Year: 2012, Model line: PICANTO, Model: KIA PICANTO 2012Pages: 840, PDF Size: 41.16 MB
Page 16 of 840

Safety features of your vehicle
4
3
Front seat adjustment - manual
Forward and rearward
To move the seat forward or rearward:
1. Pull the seat slide adjustment lever up
and hold it.
2. Slide the seat to the position you desire.
3. Release the lever and make sure the seat is locked in place.
Adjust the seat before driving, and make
sure the seat is locked securely by trying
to move forward and rearward without
using the lever. If the seat moves, it is not
locked properly.
OTA030002L
(Continued)
To avoid the possibility of burns, do not remove the carpet in the
cargo area. Emission control
devices beneath this floor gener-ate high temperatures.WARNING - Rear seatbacks
The rear seatback must be securely latched. If not, passen-
gers and objects could be thrown
forward resulting in serious
injury or death in the event of a
sudden stop or collision.
Luggage and other cargo should be laid flat in the cargo area. If
objects are large, heavy, or must
be piled, they must be secured.
Under no circumstances should
cargo be piled higher than the
seatbacks. Failure to follow thesewarnings could result in serious
injury or death in the event of a
sudden stop, collision or rollover.
No passenger should ride in the cargo area or sit or lie on folded
seatbacks while the vehicle is
moving. All passengers must be
properly seated in seats and
restrained properly while riding.
When resetting the seatback to the upright position, make sure it
is securely latched by pushing it
forward and backwards.
(Continued)
WARNING
After adjusting the seat, always
check that it is securely locked into
place by attempting to move the
seat forward or backward without
using the lock release lever.
Sudden or unexpected movement
of the driver's seat could cause you
to lose control of the vehicle result-ing in an accident.
WARNING
Use extreme caution so that hands or other objects are not
caught in the seat mechanisms
while the seat is moving.
Do not put a cigarette lighter on the floor or seat. When you oper-
ate the seat, gas may gush out of
the lighter and cause fire.
Page 96 of 840
423
Features of your vehicle
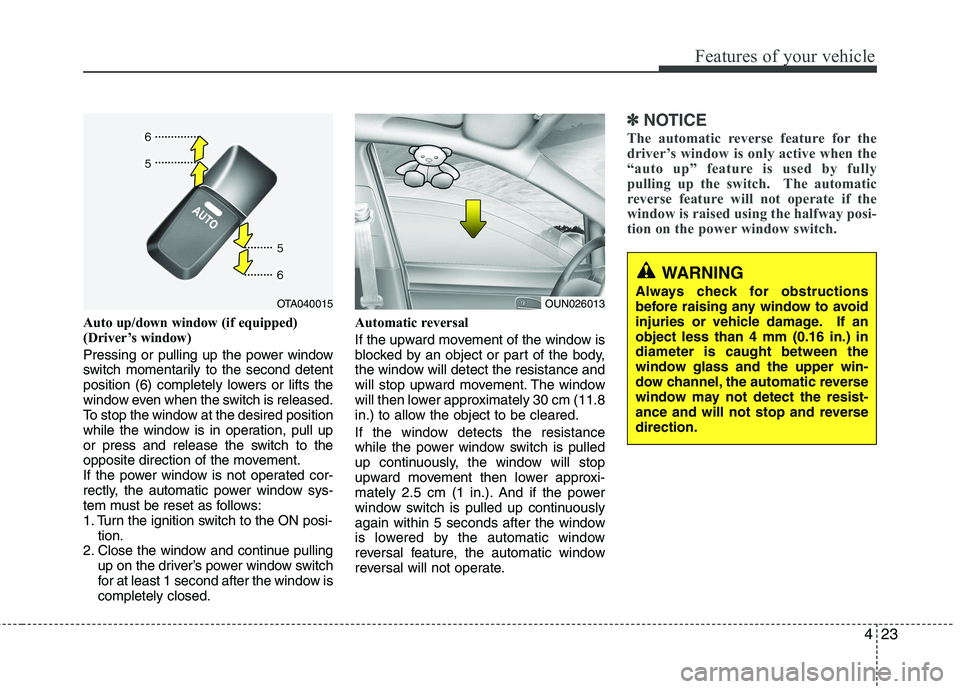
Auto up/down window (if equipped)
(Driver’s window)
Pressing or pulling up the power window
switch momentarily to the second detent
position (6) completely lowers or lifts the
window even when the switch is released.
To stop the window at the desired position
while the window is in operation, pull up
or press and release the switch to the
opposite direction of the movement.
If the power window is not operated cor-
rectly, the automatic power window sys-
tem must be reset as follows:
1. Turn the ignition switch to the ON posi-tion.
2. Close the window and continue pulling up on the driver’s power window switch
for at least 1 second after the window iscompletely closed. Automatic reversal
If the upward movement of the window is
blocked by an object or part of the body,
the window will detect the resistance and
will stop upward movement. The window
will then lower approximately 30 cm (11.8
in.) to allow the object to be cleared.
If the window detects the resistance
while the power window switch is pulled
up continuously, the window will stop
upward movement then lower approxi-
mately 2.5 cm (1 in.). And if the power
window switch is pulled up continuously
again within 5 seconds after the window
is lowered by the automatic window
reversal feature, the automatic window
reversal will not operate.
✽✽
NOTICE
The automatic reverse feature for the
driver’s window is only active when the
“auto up” feature is used by fully
pulling up the switch. The automatic
reverse feature will not operate if the
window is raised using the halfway posi-
tion on the power window switch.
WARNING
Always check for obstructions
before raising any window to avoid
injuries or vehicle damage. If anobject less than 4 mm (0.16 in.) indiameter is caught between the
window glass and the upper win-
dow channel, the automatic reverse
window may not detect the resist-
ance and will not stop and reversedirection.
OUN026013OTA040015
Page 107 of 840
Features of your vehicle
34
4
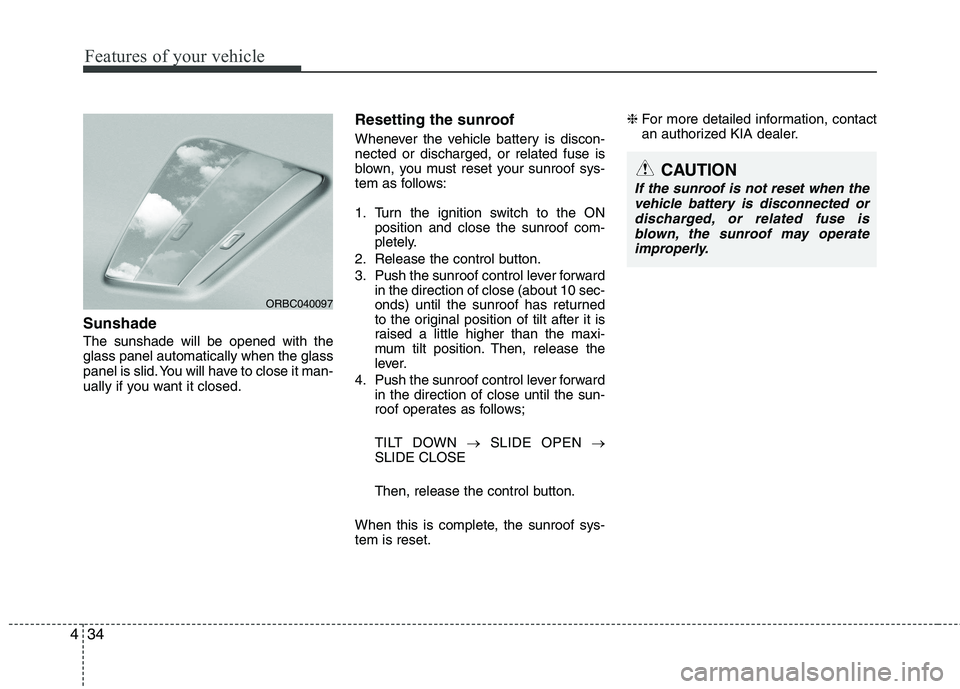
Sunshade The sunshade will be opened with the glass panel automatically when the glass
panel is slid. You will have to close it man-
ually if you want it closed. Resetting the sunroof
Whenever the vehicle battery is discon- nected or discharged, or related fuse is
blown, you must reset your sunroof sys-
tem as follows:
1. Turn the ignition switch to the ON
position and close the sunroof com-
pletely.
2. Release the control button.
3. Push the sunroof control lever forward in the direction of close (about 10 sec-
onds) until the sunroof has returned
to the original position of tilt after it is
raised a little higher than the maxi-
mum tilt position. Then, release the
lever.
4. Push the sunroof control lever forward in the direction of close until the sun-
roof operates as follows;
TILT DOWN �SLIDE OPEN �
SLIDE CLOSE
Then, release the control button.
When this is complete, the sunroof sys- tem is reset. ❈
For more detailed information, contact
an authorized KIA dealer.
ORBC040097
CAUTION
If the sunroof is not reset when the
vehicle battery is disconnected or discharged, or related fuse isblown, the sunroof may operate improperly.
Page 118 of 840
445
Features of your vehicle
Fuel gauge
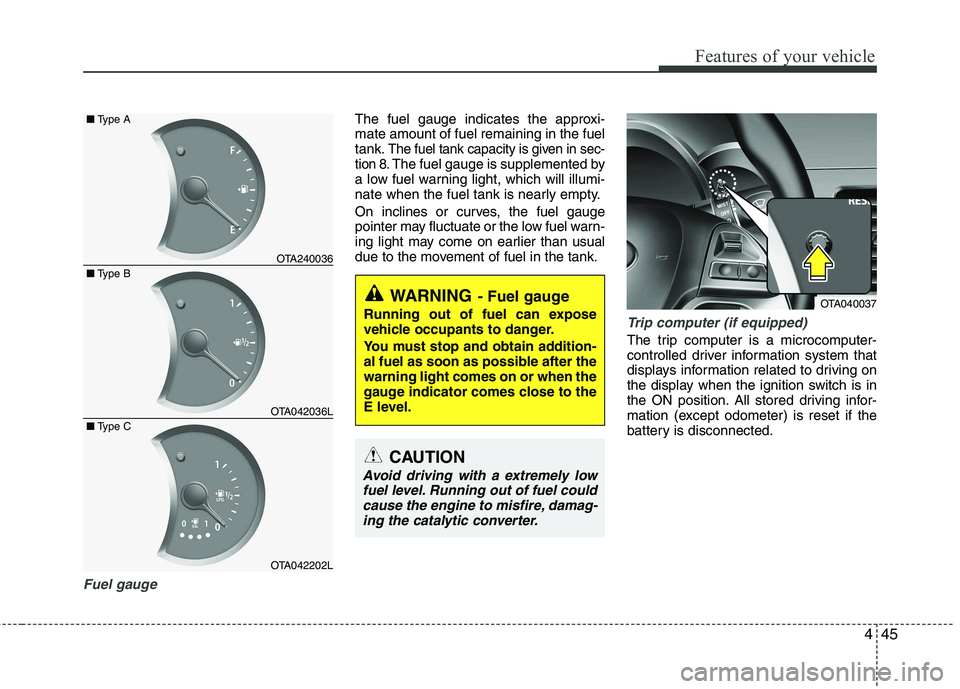
The fuel gauge indicates the approxi- mate amount of fuel remaining in the fueltank.
The fuel tank capacity is given in sec-
tion 8.The fuel gauge is supplemented by
a low fuel warning light, which will illumi-
nate when the fuel tank is nearly empty.
On inclines or curves, the fuel gauge
pointer may fluctuate or the low fuel warn-
ing light may come on earlier than usual
due to the movement of fuel in the tank.
Trip computer (if equipped)
The trip computer is a microcomputer-
controlled driver information system that
displays information related to driving on
the display when the ignition switch is in
the ON position. All stored driving infor-
mation (except odometer) is reset if the
battery is disconnected.
OTA240036
OTA042036L
OTA042202L
■
Type B
■
Type A
■ Type C
WARNING - Fuel gauge
Running out of fuel can expose
vehicle occupants to danger.
You must stop and obtain addition-
al fuel as soon as possible after thewarning light comes on or when the
gauge indicator comes close to the
E level.
CAUTION
Avoid driving with a extremely low fuel level. Running out of fuel couldcause the engine to misfire, damag-
ing the catalytic converter.
OTA040037
Page 119 of 840
Features of your vehicle
46
4
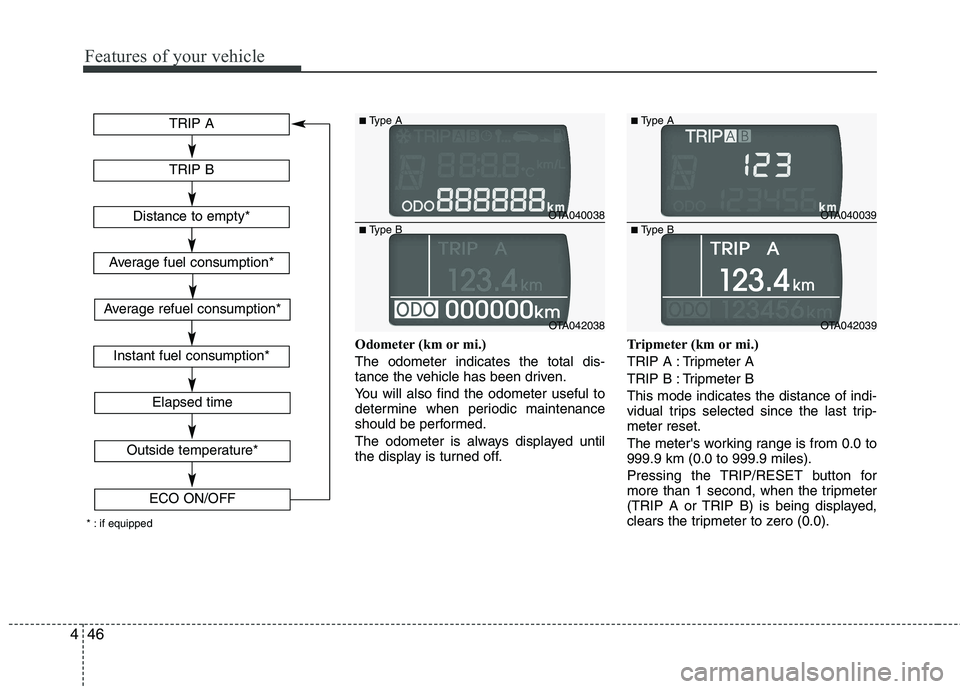
Odometer (km or mi.) The odometer indicates the total dis-
tance the vehicle has been driven.
You will also find the odometer useful to
determine when periodic maintenance
should be performed.
The odometer is always displayed until
the display is turned off. Tripmeter (km or mi.)
TRIP A : Tripmeter A
TRIP B : Tripmeter BThis mode indicates the distance of indi-
vidual trips selected since the last trip-meter reset.
The meter's working range is from 0.0 to 999.9 km (0.0 to 999.9 miles).
Pressing the TRIP/RESET button for
more than 1 second, when the tripmeter
(TRIP A or TRIP B) is being displayed,
clears the tripmeter to zero (0.0).
TRIP A
TRIP B
Elapsed time
Distance to empty*
Average fuel consumption*
Instant fuel consumption*
Outside temperature*
ECO ON/OFF
* : if equipped
Average refuel consumption*
OTA040038
OTA042038
■
Type A
■ Type B
OTA040039
OTA042039
■
Type A
■ Type B
Page 120 of 840
447
Features of your vehicle
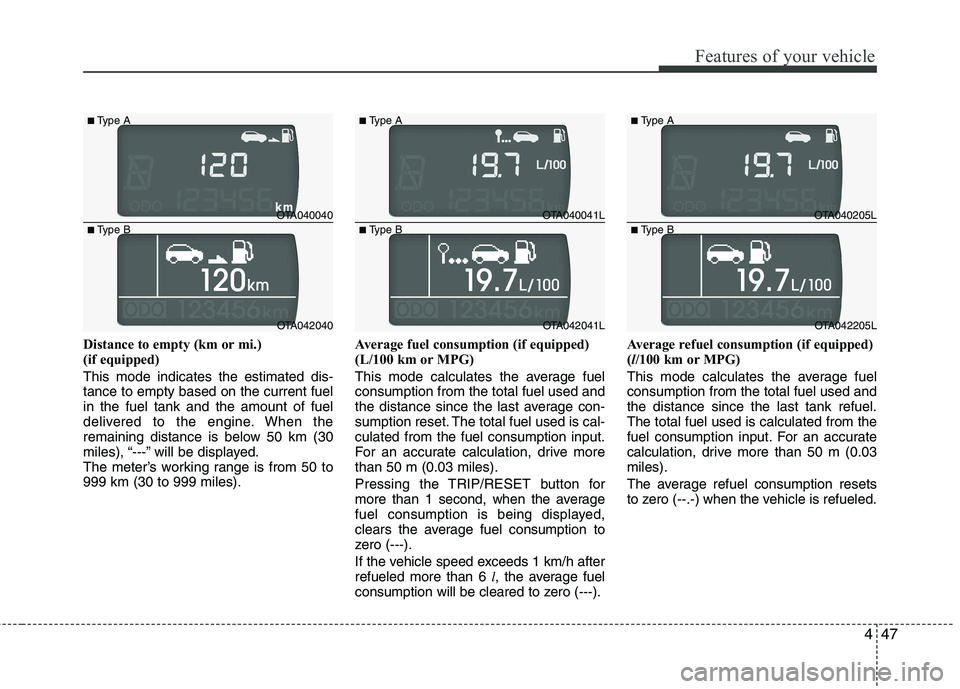
Distance to empty (km or mi.)
(if equipped) This mode indicates the estimated dis- tance to empty based on the current fuelin the fuel tank and the amount of fuel
delivered to the engine. When the
remaining distance is below 50 km (30
miles), “---” will be displayed.
The meter’s working range is from 50 to999 km (30 to 999 miles).Average fuel consumption (if equipped)
(L/100 km or MPG)
This mode calculates the average fuel consumption from the total fuel used and
the distance since the last average con-
sumption reset. The total fuel used is cal-culated from the fuel consumption input.
For an accurate calculation, drive morethan 50 m (0.03 miles).
Pressing the TRIP/RESET button for
more than 1 second, when the average
fuel consumption is being displayed,
clears the average fuel consumption to
zero (---).
If the vehicle speed exceeds 1 km/h after refueled more than 6
l, the average fuel
consumption will be cleared to zero (---). Average refuel consumption (if equipped) (
l/100 km or MPG)
This mode calculates the average fuelconsumption from the total fuel used andthe distance since the last tank refuel.The total fuel used is calculated from the
fuel consumption input. For an accurate
calculation, drive more than 50 m (0.03miles).
The average refuel consumption resets
to zero (--.-) when the vehicle is refueled.
OTA040040
OTA042040
■
Type A
■ Type B
OTA040041L
OTA042041L
■
Type A
■ Type B
OTA040205L
OTA042205L
■
Type A
■ Type B
Page 121 of 840
Features of your vehicle
48
4
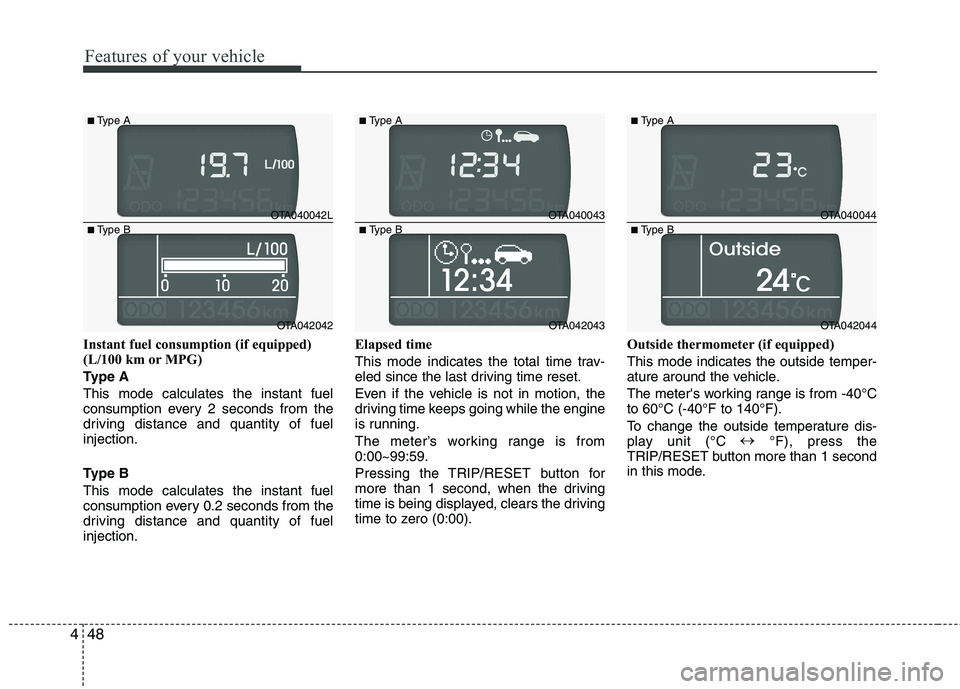
Instant fuel consumption (if equipped)
(L/100 km or MPG)
Type AThis mode calculates the instant fuel
consumption every 2 seconds from the
driving distance and quantity of fuelinjection.
Type B This mode calculates the instant fuel
consumption every 0.2 seconds from the
driving distance and quantity of fuelinjection. Elapsed time
This mode indicates the total time trav-
eled since the last driving time reset.
Even if the vehicle is not in motion, the
driving time keeps going while the engine
is running.
The meter’s working range is from 0:00~99:59.
Pressing the TRIP/RESET button for
more than 1 second, when the driving
time is being displayed, clears the driving
time to zero (0:00).
Outside thermometer (if equipped) This mode indicates the outside temper-
ature around the vehicle.
The meter's working range is from -40°C to 60°C (-40°F to 140°F).
To change the outside temperature dis-
play unit (°C
�
°F), press the
TRIP/RESET button more than 1 second
in this mode.
OTA040042L
OTA042042
■
Type A
■ Type B
OTA040043
OTA042043
■
Type A
■ Type B
OTA040044
OTA042044
■
Type A
■ Type B
Page 122 of 840
449
Features of your vehicle
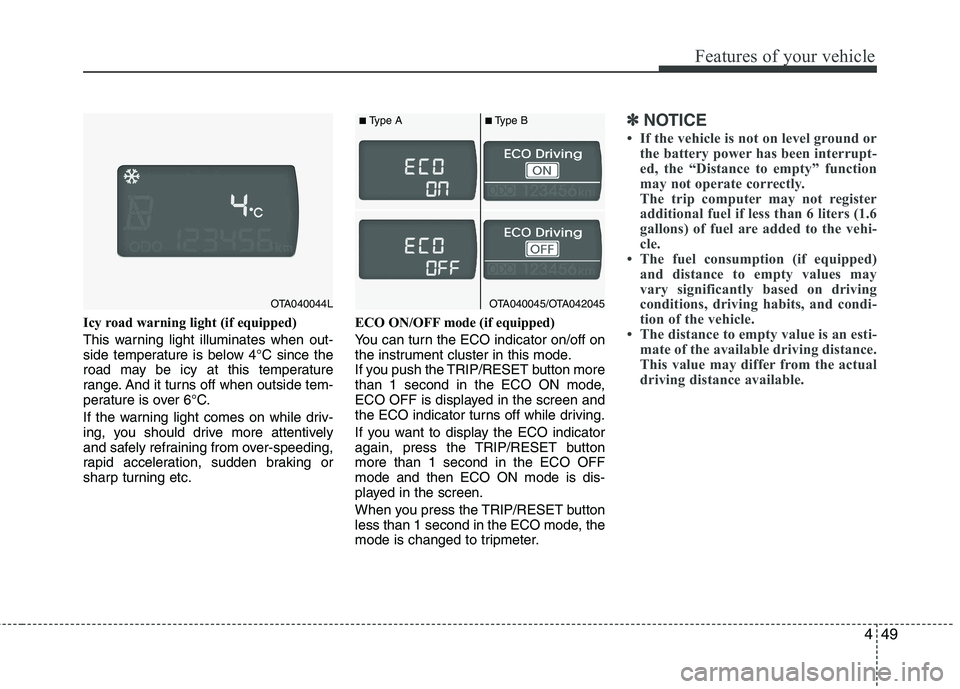
Icy road warning light (if equipped)
This warning light illuminates when out-
side temperature is below 4°C since the
road may be icy at this temperature
range. And it turns off when outside tem-
perature is over 6°C.
If the warning light comes on while driv-
ing, you should drive more attentively
and safely refraining from over-speeding,
rapid acceleration, sudden braking or
sharp turning etc.ECO ON/OFF mode (if equipped)
You can turn the ECO indicator on/off on
the instrument cluster in this mode.
If you push the TRIP/RESET button more
than 1 second in the ECO ON mode,
ECO OFF is displayed in the screen and
the ECO indicator turns off while driving.
If you want to display the ECO indicator
again, press the TRIP/RESET buttonmore than 1 second in the ECO OFFmode and then ECO ON mode is dis-
played in the screen.
When you press the TRIP/RESET button
less than 1 second in the ECO mode, the
mode is changed to tripmeter.
✽✽
NOTICE
If the vehicle is not on level ground or the battery power has been interrupt-
ed, the “Distance to empty” function
may not operate correctly.
The trip computer may not register
additional fuel if less than 6 liters (1.6
gallons) of fuel are added to the vehi-
cle.
The fuel consumption (if equipped)
and distance to empty values may
vary significantly based on driving
conditions, driving habits, and condi-
tion of the vehicle.
The distance to empty value is an esti- mate of the available driving distance.
This value may differ from the actual
driving distance available.
OTA040044LOTA040045/OTA042045
■Type A ■Type B
Page 129 of 840
Features of your vehicle
56
4
ECO
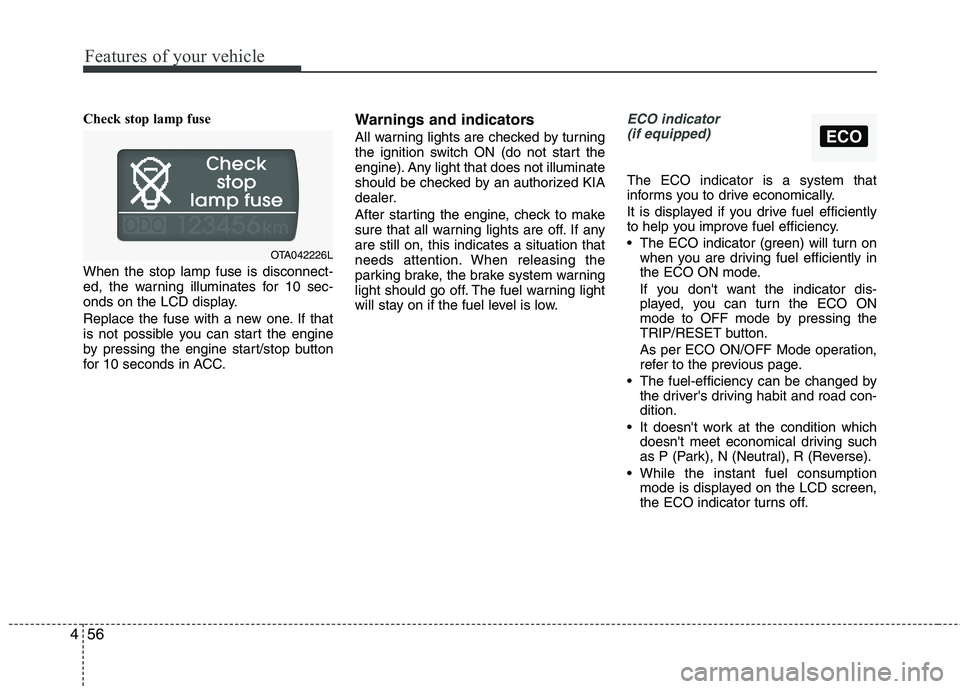
Check stop lamp fuse When the stop lamp fuse is disconnect-
ed, the warning illuminates for 10 sec-
onds on the LCD display.
Replace the fuse with a new one. If that
is not possible you can start the engine
by pressing the engine start/stop button
for 10 seconds in ACC. Warnings and indicators
All warning lights are checked by turning
the ignition switch ON (do not start the
engine). Any light that does not illuminate
should be checked by an authorized KIA
dealer.
After starting the engine, check to make
sure that all warning lights are off. If anyare still on, this indicates a situation that
needs attention. When releasing the
parking brake, the brake system warning
light should go off. The fuel warning light
will stay on if the fuel level is low.ECO indicator
(if equipped)
The ECO indicator is a system that
informs you to drive economically.
It is displayed if you drive fuel efficiently
to help you improve fuel efficiency.
The ECO indicator (green) will turn on when you are driving fuel efficiently in
the ECO ON mode.
If you don't want the indicator dis-
played, you can turn the ECO ON
mode to OFF mode by pressing the
TRIP/RESET button.
As per ECO ON/OFF Mode operation,
refer to the previous page.
The fuel-efficiency can be changed by the driver's driving habit and road con-dition.
It doesn't work at the condition which doesn't meet economical driving such
as P (Park), N (Neutral), R (Reverse).
While the instant fuel consumption mode is displayed on the LCD screen,
the ECO indicator turns off.
OTA042226L
Page 170 of 840
497
Features of your vehicle
Temperature conversion
You can switch the temperature mode
between Centigrade to Fahrenheit as fol-
lows:
While pressing the OFF button, press the
AUTO button for 4 seconds or more.
The display will change from Centigrade
to Fahrenheit, or from Fahrenheit to
Centigrade.
If the battery has been discharged or dis-
connected, the temperature mode dis-
play will reset to Centigrade.
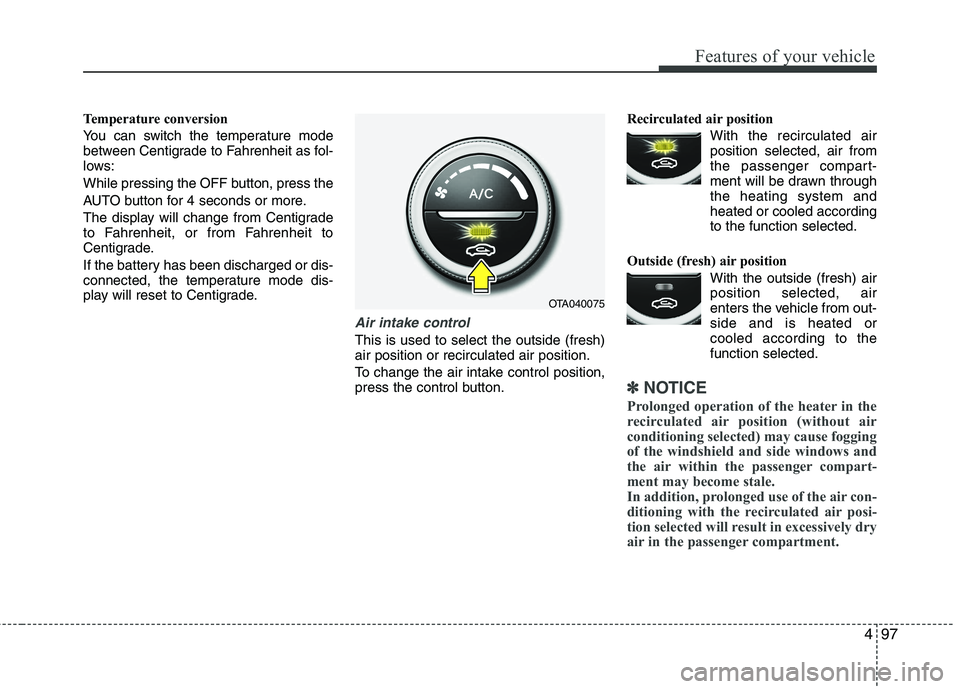
Air intake control
This is used to select the outside (fresh) air position or recirculated air position.
To change the air intake control position,
press the control button.Recirculated air position
With the recirculated airposition selected, air from
the passenger compart-
ment will be drawn throughthe heating system andheated or cooled according
to the function selected.
Outside (fresh) air position With the outside (fresh) airposition selected, air
enters the vehicle from out-side and is heated or
cooled according to thefunction selected.
✽✽ NOTICE
Prolonged operation of the heater in the
recirculated air position (without air
conditioning selected) may cause fogging
of the windshield and side windows and
the air within the passenger compart-
ment may become stale.
In addition, prolonged use of the air con-
ditioning with the recirculated air posi-
tion selected will result in excessively dry
air in the passenger compartment.
OTA040075