reset KIA Rio 2008 2.G Owner's Manual
[x] Cancel search | Manufacturer: KIA, Model Year: 2008, Model line: Rio, Model: KIA Rio 2008 2.GPages: 219, PDF Size: 5.17 MB
Page 84 of 219
375
Knowing your vehicle
✽
NOTICE
• Use the power outlet when the engine
is running, and remove a plug from
the power outlet after using the elec-
tric appliance. Using the power outlet
excessively or while the engine is not
running or leaving appliances plugged
into the power outlet when not in use
will cause battery discharge
• Only use the electric appliances which
are less than 12V and 10A in electric
capacity.
• Adjust the air-conditioner or heater to
the lowest operation level when you
have to use the power socket while
using air-conditioner or heater.
• Close the cover when not in use.
• Some electronic devices can cause
electronic interference when plugged
into a vehicle’s power outlet. These
devices may cause excessive audio
static and malfunctions in other elec-
tronic systems or devices used in your
vehicle.
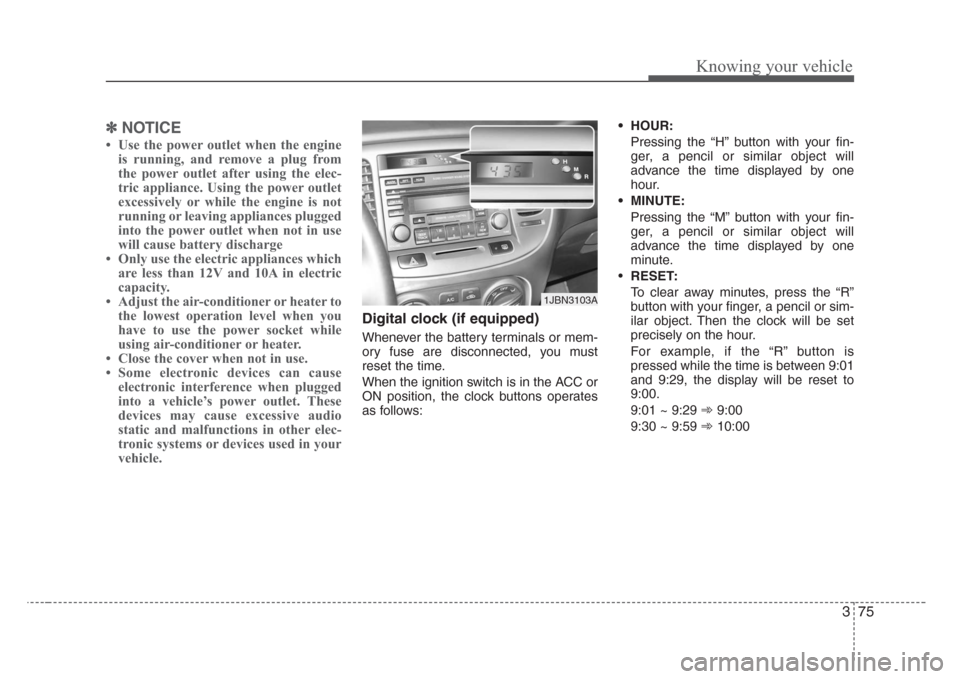
Digital clock (if equipped)
Whenever the battery terminals or mem-
ory fuse are disconnected, you must
reset the time.
When the ignition switch is in the ACC or
ON position, the clock buttons operates
as follows:• HOUR:
Pressing the “H” button with your fin-
ger, a pencil or similar object will
advance the time displayed by one
hour.
• MINUTE:
Pressing the “M” button with your fin-
ger, a pencil or similar object will
advance the time displayed by one
minute.
•RESET:
To clear away minutes, press the “R”
button with your finger, a pencil or sim-
ilar object. Then the clock will be set
precisely on the hour.
For example, if the “R” button is
pressed while the time is between 9:01
and 9:29, the display will be reset to
9:00.
9:01 ~ 9:29 ➾9:00
9:30 ~ 9:59 ➾10:00
1JBN3103A
Page 87 of 219
Knowing your vehicle
78 3
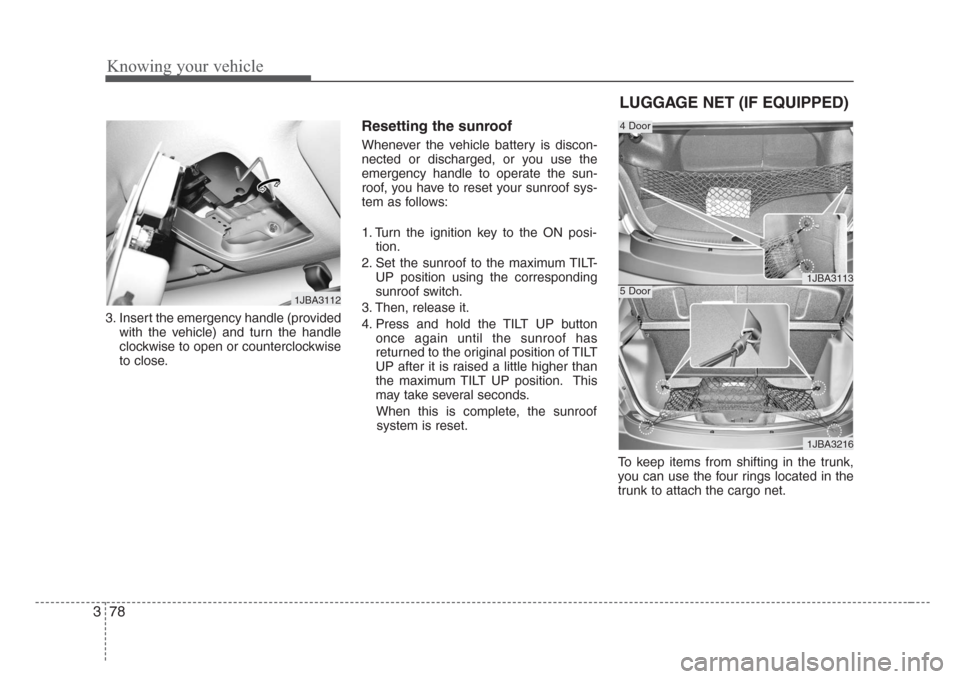
3. Insert the emergency handle (provided
with the vehicle) and turn the handle
clockwise to open or counterclockwise
to close.
Resetting the sunroof
Whenever the vehicle battery is discon-
nected or discharged, or you use the
emergency handle to operate the sun-
roof, you have to reset your sunroof sys-
tem as follows:
1. Turn the ignition key to the ON posi-
tion.
2. Set the sunroof to the maximum TILT-
UP position using the corresponding
sunroof switch.
3. Then, release it.
4. Press and hold the TILT UP button
once again until the sunroof has
returned to the original position of TILT
UP after it is raised a little higher than
the maximum TILT UP position. This
may take several seconds.
When this is complete, the sunroof
system is reset.
To keep items from shifting in the trunk,
you can use the four rings located in the
trunk to attach the cargo net.
1JBA3112
1JBA3113
1JBA3216
4 Door
5 Door
LUGGAGE NET (IF EQUIPPED)
Page 92 of 219
383
Knowing your vehicle
JB-M446USA
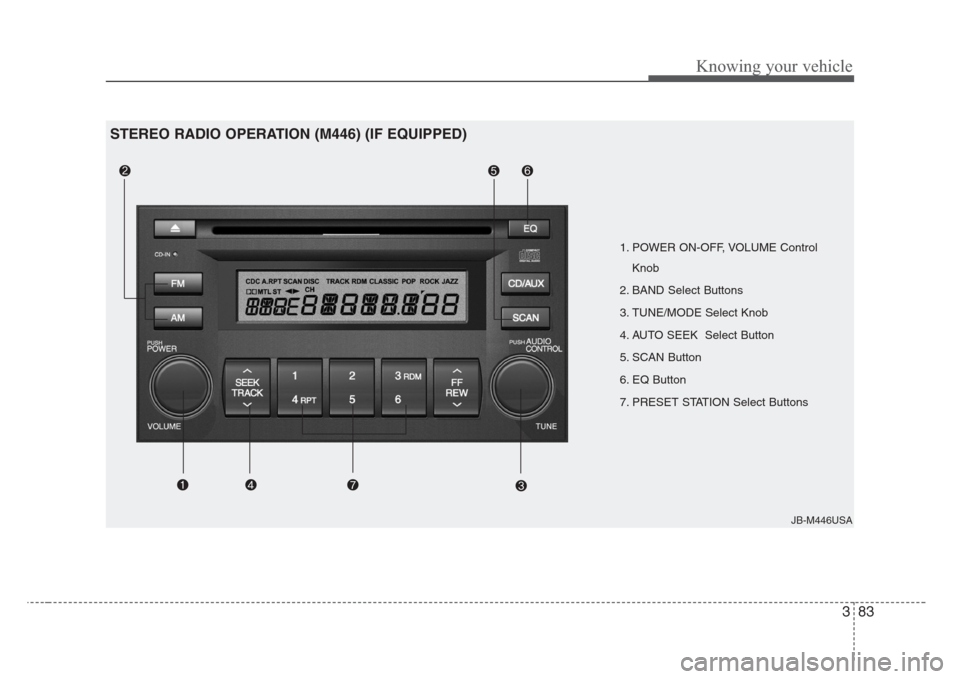
1. POWER ON-OFF, VOLUME Control
Knob
2. BAND Select Buttons
3. TUNE/MODE Select Knob
4. AUTO SEEK Select Button
5. SCAN Button
6. EQ Button
7. PRESET STATION Select Buttons
STEREO RADIO OPERATION (M446) (IF EQUIPPED)
Page 94 of 219
385
Knowing your vehicle
4. AUTO SEEK Select Button
(Automatic Channel Selection)
Press the AUTO SEEK select button.
When the side is pressed, the unit
will automatically tune to the next higher
frequency and when the side is
pressed, it will automatically tune to the
next lower frequency.
5. SCAN Button
When you Press the button, frequency is
changed and the next channel is
received automatically.
To stay on a station, press the SCAN but-
ton again.
6. EQ Button
Press the EQ button to select the CLAS-
SIC, POPS, ROCK, JAZZ and OFF
MODE for the desired tone quality. Each
press of the button changes the display
as follows;
7. PRESET STATION Select
Buttons
Six (6) stations for AM, FM1 and FM2
respectively can be preset in the elec-
tronic memory circuit.
HOW TO PRESET STATIONS
Six AM and twelve FM stations may be
programmed into the memory of the
radio. Then, by simply pressing the AM /
FM select buttons and/or one of the six
station select buttons, you may recall any
of these stations instantly. To program the
stations, follow these steps:
• Press AM/FM selector to set the band
for AM, FM1 and FM2.
• Select the desired station to be stored
by seek or manual tuning.
• Determine the preset station select
button you wish to use to access that
station.• Press the station select button for more
than two seconds. A select button indi-
cator will show in the display indicating
which select button you have
depressed. The frequency display will
flash after it has been stored into the
memory. You should then release the
button, and proceed to program the
next desired station. A total of 18 sta-
tions can be programmed by selecting
one AM and two FM station per button.
• When completed, any preset station
may be recalled by selecting AM, FM1
or FM2 band and the appropriate sta-
tion button.
CAUTION
• Do not place beverages close to
the audio system. The audio sys-
tem mechanism may be damaged
if you spill them.
• Do not strike or allow anything to
impact the audio system, damage
to the system mechanisms could
occur.
CLASSIC➟POPS➟ROCK➟JAZZ➟OFF
Page 97 of 219
Knowing your vehicle
88 3
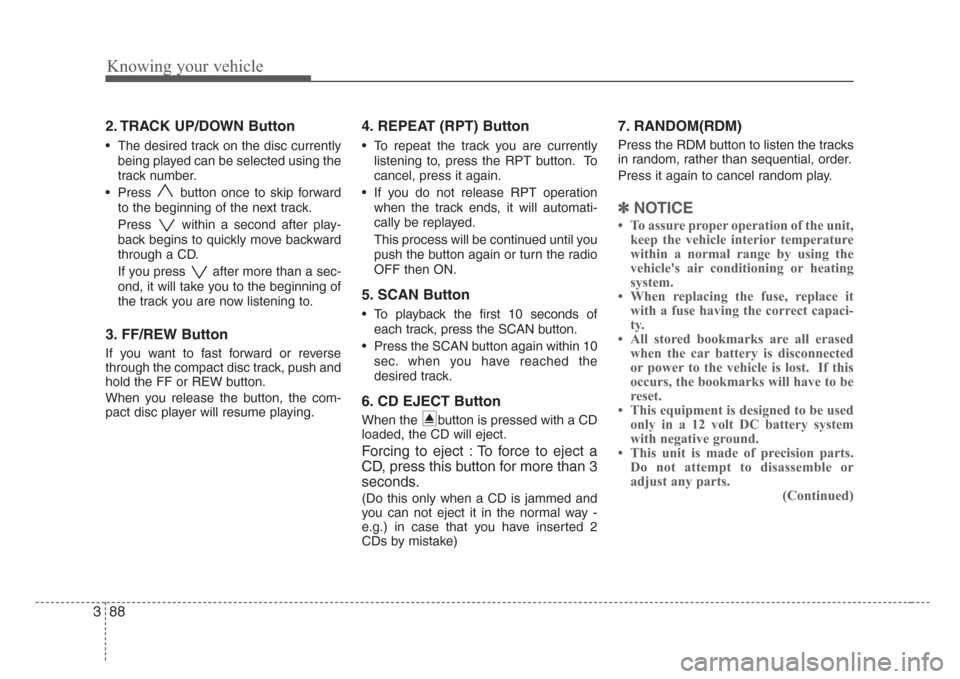
2. TRACK UP/DOWN Button
• The desired track on the disc currently
being played can be selected using the
track number.
• Press button once to skip forward
to the beginning of the next track.
Press within a second after play-
back begins to quickly move backward
through a CD.
If you press after more than a sec-
ond, it will take you to the beginning of
the track you are now listening to.
3. FF/REW Button
If you want to fast forward or reverse
through the compact disc track, push and
hold the FF or REW button.
When you release the button, the com-
pact disc player will resume playing.
4. REPEAT (RPT) Button
• To repeat the track you are currently
listening to, press the RPT button. To
cancel, press it again.
• If you do not release RPT operation
when the track ends, it will automati-
cally be replayed.
This process will be continued until you
push the button again or turn the radio
OFF then ON.
5. SCAN Button
• To playback the first 10 seconds of
each track, press the SCAN button.
• Press the SCAN button again within 10
sec. when you have reached the
desired track.
6. CD EJECT Button
When the button is pressed with a CD
loaded, the CD will eject.
Forcing to eject : To force to eject a
CD, press this button for more than 3
seconds.
(Do this only when a CD is jammed and
you can not eject it in the normal way -
e.g.) in case that you have inserted 2
CDs by mistake)
7. RANDOM(RDM)
Press the RDM button to listen the tracks
in random, rather than sequential, order.
Press it again to cancel random play.
✽
NOTICE
• To assure proper operation of the unit,
keep the vehicle interior temperature
within a normal range by using the
vehicle's air conditioning or heating
system.
• When replacing the fuse, replace it
with a fuse having the correct capaci-
ty.
• All stored bookmarks are all erased
when the car battery is disconnected
or power to the vehicle is lost. If this
occurs, the bookmarks will have to be
reset.
• This equipment is designed to be used
only in a 12 volt DC battery system
with negative ground.
• This unit is made of precision parts.
Do not attempt to disassemble or
adjust any parts.
(Continued)
Page 99 of 219
Knowing your vehicle
90 3
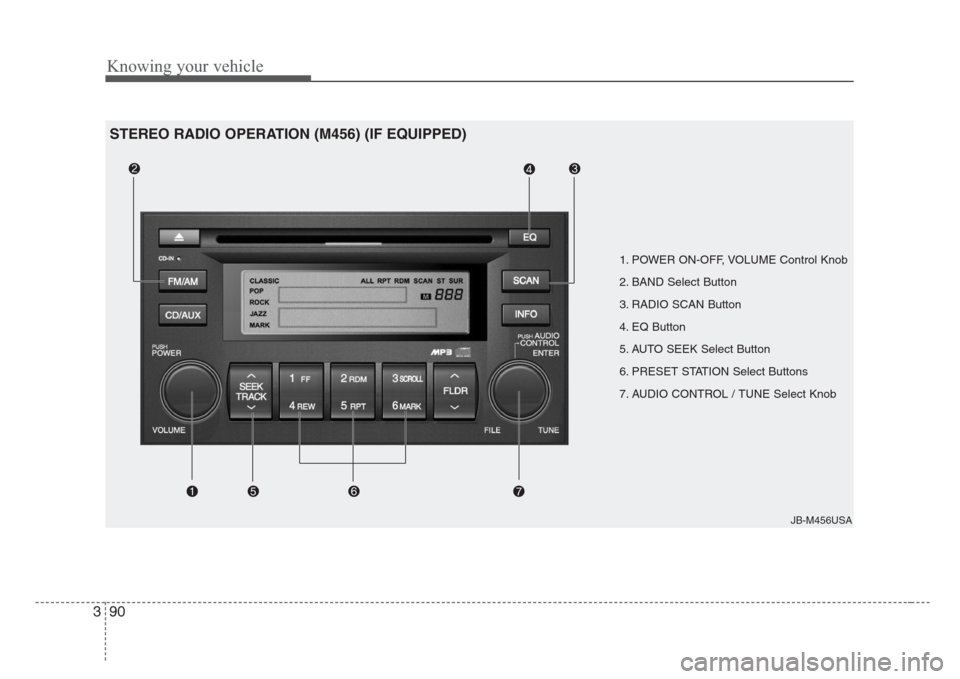
1. POWER ON-OFF, VOLUME Control Knob
2. BAND Select Button
3. RADIO SCAN Button
4. EQ Button
5. AUTO SEEK Select Button
6. PRESET STATION Select Buttons
7. AUDIO CONTROL / TUNE Select Knob
JB-M456USA
STEREO RADIO OPERATION (M456) (IF EQUIPPED)
Page 100 of 219
391
Knowing your vehicle
1. POWER ON-OFF Control Knob
• The radio unit may be operated when
the ignition key is in the "ACC" or "ON"
position. Press the button to switch the
power on. The LCD shows the radio
frequency in the radio mode, CD/ MP3
track in the CD/MP3 mode. To switch
the power off, press the button again.
• Push the FM/AM or CD/MP3 to turn on
that function without pushing Power
ON-OFF control knob.
VOLUME Control
Rotate the knob clockwise to increase
the volume and turn the knob counter-
clockwise to reduce the volume.
2. BAND Select Button
Pressing the FM/AM button changes the
AM, FM1 and FM2 bands. The mode
selected is shown on the display.
3. RADIO SCAN Button
When you press the button, frequency is
changed and the next channel is
received automatically.
To stay on a station, press the CD SCAN
button again.
4. EQ Button
Press the EQ button to select the CLAS-
SIC, POP, ROCK, JAZZ and OFF MODE
for the desired tone quality. Each press of
the button changes the display as fol-
lows;
5. AUTO SEEK Select Button
(Automatic Channel Selection)
Press the AUTO SEEK select button.
When the side is pressed, the unit
will automatically tune to the next higher
frequency and when the side is
pressed, it will automatically tune to the
next lower frequency.
6. PRESET STATION Select
Buttons
Six stations for AM, FM1 and FM2
respectively can be preset in the elec-
tronic memory circuit.
HOW TO PRESET STATIONS
Six AM and twelve FM stations may be
programmed into the memory of the
radio.Then, by simply pressing the AM/FM
band select button and/or one of the six
station select buttons, you may recall any
of these stations instantly. To program the
stations, follow these steps:
• Press AM/FM selector to set the band
for AM, FM1 and FM2.
• Select the desired station to be stored
by seek or manual tuning.
• Determine the preset station select
button you wish to use to access that
station.
• Press and hold the station select button
for more than 0.8 seconds. A select but-
ton indicator will show in the display indi-
cating which select button you have
depressed. The frequency display will
flash after it has been stored in to the
memory. You should then release the but-
ton, and proceed to program the next
desired station. A total of 18 stations can
be programmed by selecting one AM and
two FM station per button.
• When completed, any preset station
may be recalled by selecting AM, FM1
or FM2 band and the appropriate sta-
tion button.
CLASSIC➟POP➟ROCK➟JAZZ➟OFF
Page 106 of 219
397
Knowing your vehicle
✽
NOTICE
• To assure proper operation of the unit,
keep the vehicle interior temperature
within a normal range by using the
vehicle's air conditioning or heating
system.
• When replacing the fuse, replace it
with a fuse having the correct capacity.
• All stored bookmarks are all erased
when the car battery is disconnected
or power to the vehicle is lost. If this
occurs, the bookmarks will have to be
reset.
• This equipment is designed to be used
only in a 12 volt DC battery system
with negative ground.
• This unit is made of precision parts.
Do not attempt to disassemble or
adjust any parts.
• When driving your vehicle, be sure to
keep the volume of the unit set low
enough to allow you to hear sounds
coming from the outside.
• Do not expose this equipment (includ-
ing the speakers and tape) to water or
excessive moisture.
✽
NOTICE
• Do not insert warped or poor quality
discs into the CD player as damage to
the unit may occur.
• Do not insert anything like coins into
the player slot as damage to the unit
may occur.
• Do not place beverages close to the
audio system. The playback mecha-
nism may be damaged if you spill
them.
• Do not strike or allow anything to
impact the audio system, damage to
the system mechanisms could occur.
• Off-road or rough surface driving
may cause the compact disc to skip.
Do not use the compact disc when
driving in such conditions as damage
to the compact disc face could occur.
• Do not attempt to grab or pull the
compact disc out while the disc is
being pulled into the audio unit by the
self-loading mechanism. Damage to
the audio unit and compact disc could
occur.
• Avoid using recorded compact discs in
your audio unit. Original compact
discs are recommended.
Page 123 of 219
417
Driving your vehicle
Speedometer
The speedometer indicates the forward
speed of the vehicle.
Odometer
The odometer indicates the total dis-
tance the vehicle has been driven.
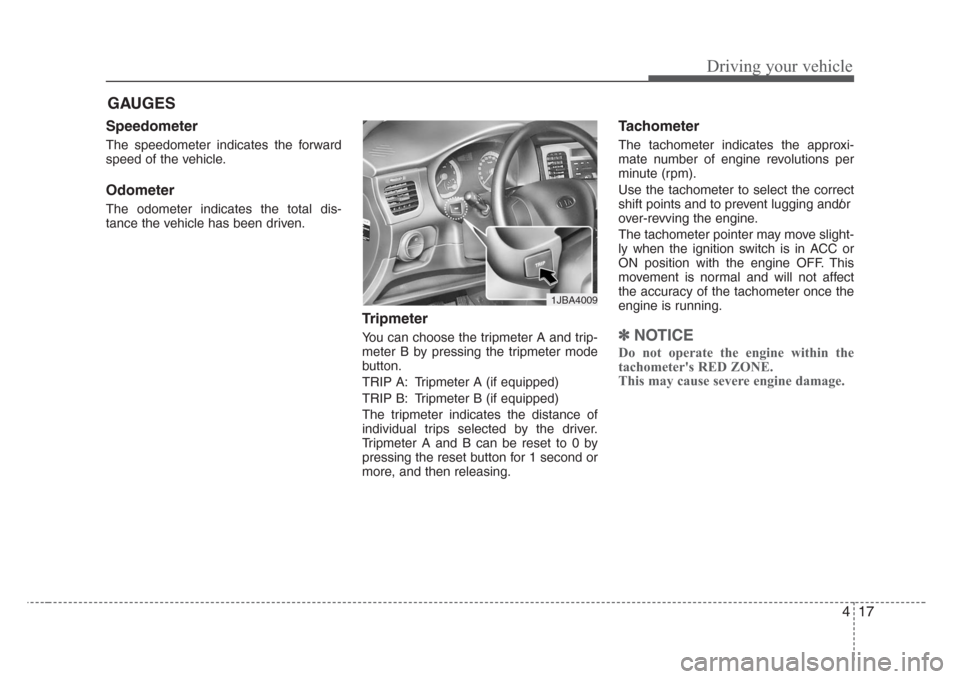
Tripmeter
You can choose the tripmeter A and trip-
meter B by pressing the tripmeter mode
button.
TRIP A: Tripmeter A (if equipped)
TRIP B: Tripmeter B (if equipped)
The tripmeter indicates the distance of
individual trips selected by the driver.
Tripmeter A and B can be reset to 0 by
pressing the reset button for 1 second or
more, and then releasing.
Tachometer
The tachometer indicates the approxi-
mate number of engine revolutions per
minute (rpm).
Use the tachometer to select the correct
shift points and to prevent lugging and/or
over-revving the engine.
The tachometer pointer may move slight-
ly when the ignition switch is in ACC or
ON position with the engine OFF. This
movement is normal and will not affect
the accuracy of the tachometer once the
engine is running.
✽
NOTICE
Do not operate the engine within the
tachometer's RED ZONE.
This may cause severe engine damage.
GAUGES
1JBA4009
Page 166 of 219
In case of an emergency
12 6
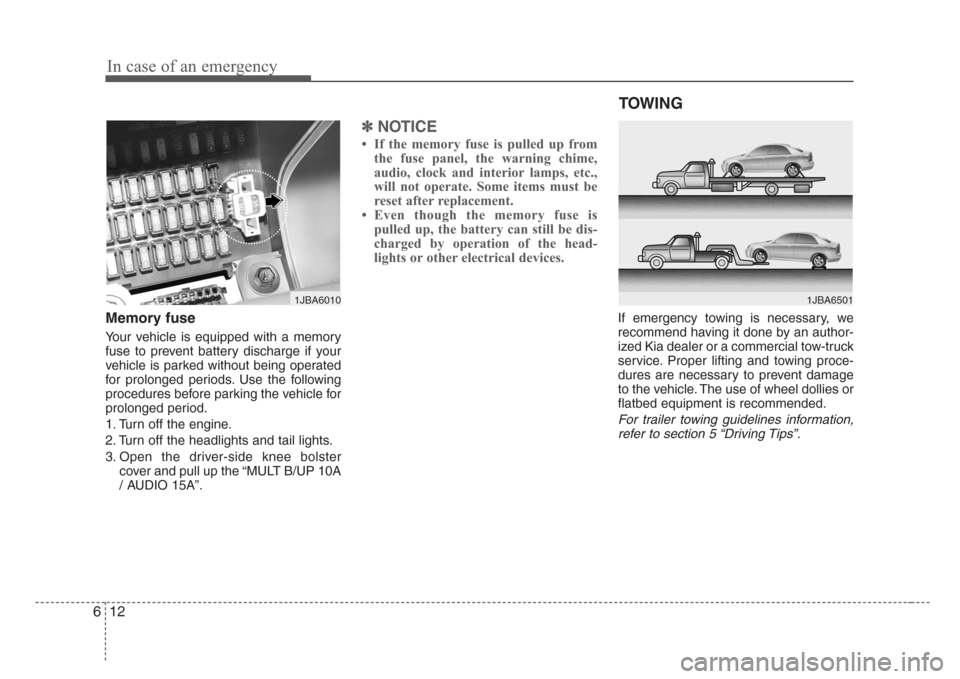
Memory fuse
Your vehicle is equipped with a memory
fuse to prevent battery discharge if your
vehicle is parked without being operated
for prolonged periods. Use the following
procedures before parking the vehicle for
prolonged period.
1. Turn off the engine.
2. Turn off the headlights and tail lights.
3. Open the driver-side knee bolster
cover and pull up the “MULT B/UP 10A
/ AUDIO 15A”.
✽
NOTICE
• If the memory fuse is pulled up from
the fuse panel, the warning chime,
audio, clock and interior lamps, etc.,
will not operate. Some items must be
reset after replacement.
• Even though the memory fuse is
pulled up, the battery can still be dis-
charged by operation of the head-
lights or other electrical devices.
If emergency towing is necessary, we
recommend having it done by an author-
ized Kia dealer or a commercial tow-truck
service. Proper lifting and towing proce-
dures are necessary to prevent damage
to the vehicle. The use of wheel dollies or
flatbed equipment is recommended.
For trailer towing guidelines information,
refer to section 5 “Driving Tips”.
1JBA6010
TOWING
1JBA6501