KIA Rio 2009 2.G Owner's Manual
Manufacturer: KIA, Model Year: 2009, Model line: Rio, Model: KIA Rio 2009 2.GPages: 219, PDF Size: 2.47 MB
Page 101 of 219
Knowing your vehicle92
3(Continued)
If USB device is divided by logical drives, only the music files on thehighest-priority drive are recog-nized by car audio.
Devices such as MP3 Player/ Cellular phone/Digital camerathose are not recognizable bystandard USB I/F can be unrecog-nizable.
USB devices other than standard- ized goods (METAL COVER TYPEUSB) can be unrecognizable.
USB flash memory reader (such as CF, SD, microSD, etc.) or exter-nal-HDD type devices may not berecognized.
Music files protected by DRM (DIGITAL RIGHTS MANAGEMENT)are not recognizable.
The data in the USB memory may lost while using this AUDIO, It isrecommeded to back up impor- tant data on a personal.
(Continued)
(Continued) Please avoid using USB memory products which can be used askey chains or cellular phoneaccessories as they could cause damage to the USB jack. Pleasemake certain only to use plugtype connector products asshown below.
Page 102 of 219
393
Knowing your vehicle
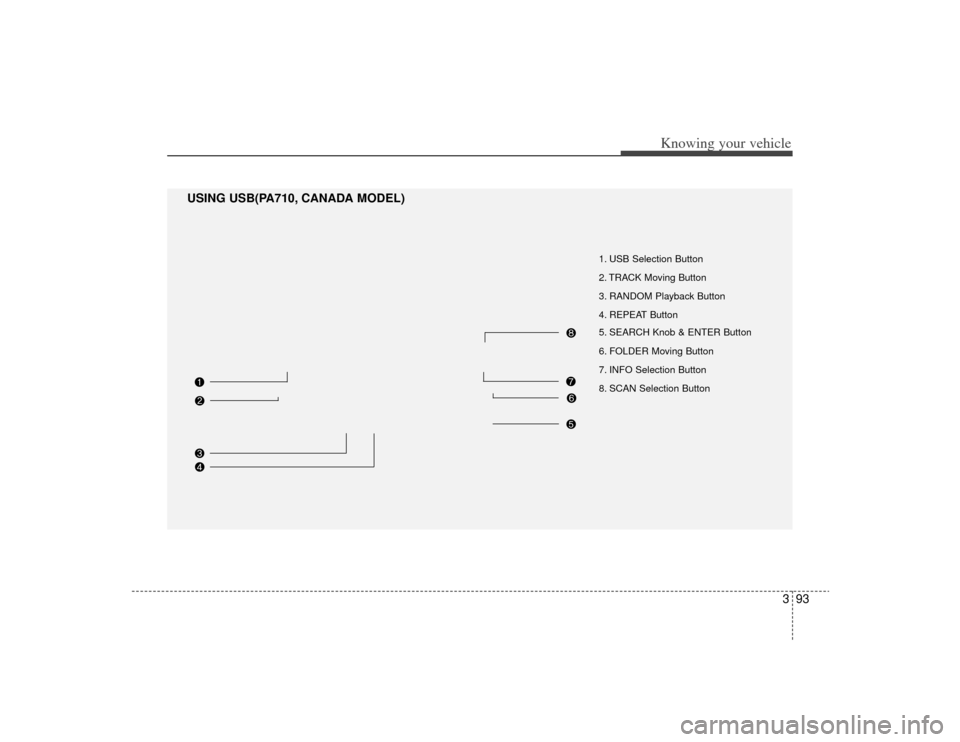
1. USB Selection Button
2. TRACK Moving Button
3. RANDOM Playback Button
4. REPEAT Button
5. SEARCH Knob & ENTER Button
6. FOLDER Moving Button
7. INFO Selection Button
8. SCAN Selection Button
USING USB(PA710, CANADA MODEL)
Page 103 of 219
Knowing your vehicle94
31. USB Selection ButtonIf USB is connected, it switches to the
USB mode from the other mode to play
the song files stored in the USB.
If no CD and auxiliary device is not con-
nected, it displays "NO Media" for 3 sec-
onds and returns to the previous mode.2. TRACK Moving Button ] button for less
than 0.8 second to play from the begin-
ning of the song currently played. Press
the button for less than 0.8 second and
press it again within 1 seconds to move
and play the previous track. Press the
button for 0.8 second or longer to play
the song in reverse direction in fast
speed.
] button for less than 0.8 second to move to the next-
track. Press the button for 0.8 second or
longer to play the song in forward direc-
tion in fast speed.
3. RANDOM Playback ButtonPress this button for less than 0.8 second
to activate 'RDM' mode and more than
0.8 second to activate 'ALL RDM' mode.
Only files in a folder are playedback in a random sequence.
ALL RDM : All files in a USB memory are played back in the random sequence.4. REPEAT ButtonPress this button for less than 0.8 second
to activate 'RPT' mode and more than
0.8 second to activate 'FLD RPT' mode.
Only a file is repeatedly playedback.
Only files in a folder are repeatedly played back.5. SEARCH Knob & ENTER ButtonTurn this button clockwise to display the
songs next to the currently played song.
Turn the button counterclockwise to dis-
play the songs before the currently
played song.
Press the button to skip and play the
selected song.
6. FOLDER Moving Button Press [FOLDER ] to access the first
sub folder of the current folder and play
the first song in the folder.
Press TUNE/ENTER knob to move to
the folder displayed. It will play the first
song in the folder.
Press [FOLDER ] to access the main folder (root directory) and to play
the first song in the root directory.
Press TUNE/ENTER knob to move to
the folder displayed.7. INFO Selection ButtonDisplays the information of the file cur-
rently played in the order of FILE NAME➟ TITLE
➟ ARTIST
➟ ALBUM
➟ FOLD-
ER
➟ TOTAL FILE
➟ NORMAL DISPLAY
➟ FILE NAME
➟... (Displays no informa-
tion if the file has no song information.)
8. SCAN Selection ButtonPlays 10 seconds of each song in the
USB device.
Press the button once again to cancel
scanning.
Page 104 of 219
395
Knowing your vehicle
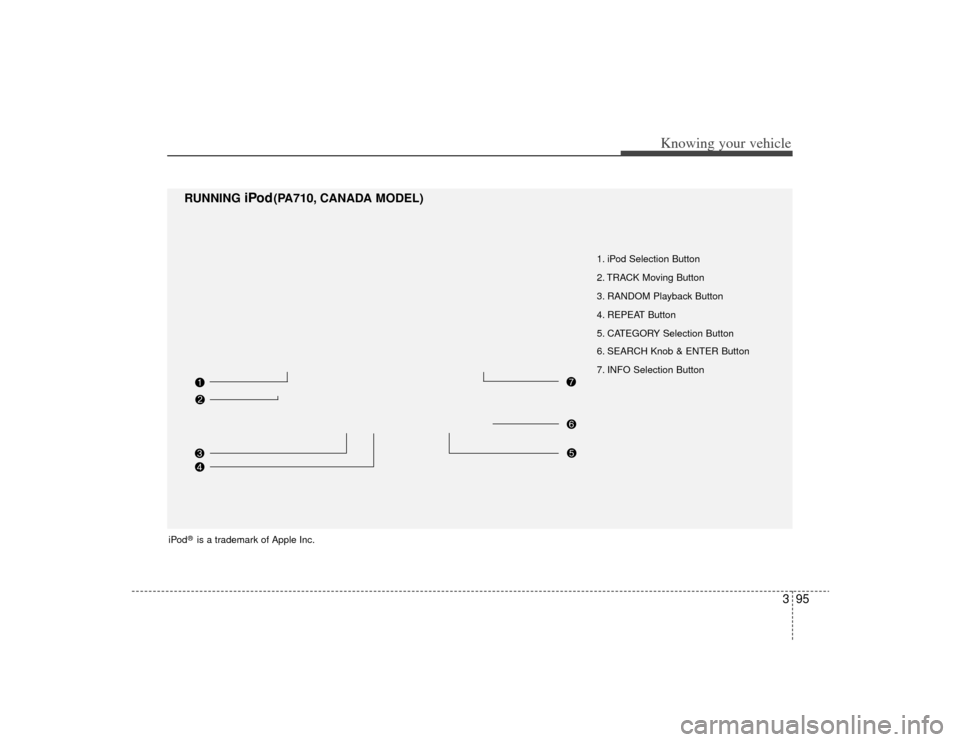
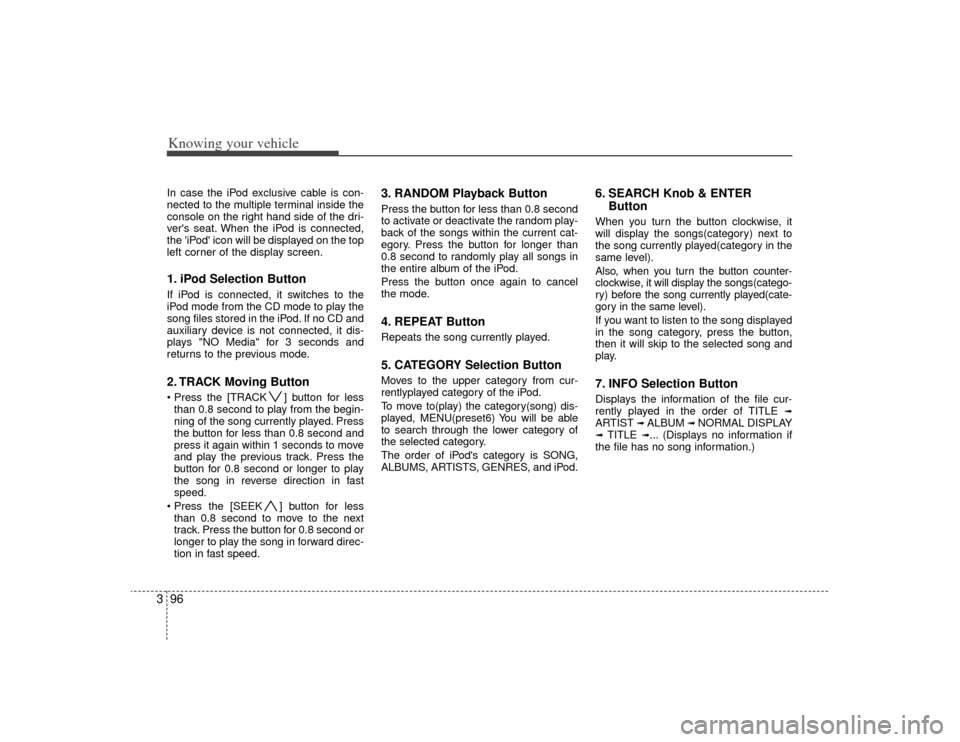
1. iPod Selection Button
2. TRACK Moving Button
3. RANDOM Playback Button
4. REPEAT Button
5. CATEGORY Selection Button
6. SEARCH Knob & ENTER Button
7. INFO Selection Button
RUNNING
iPod
(PA710, CANADA MODEL)
iPod
®is a trademark of Apple Inc.
Page 105 of 219
Knowing your vehicle96
3In case the iPod exclusive cable is con-
nected to the multiple terminal inside the
console on the right hand side of the dri-
ver's seat. When the iPod is connected,
the 'iPod' icon will be displayed on the top
left corner of the display screen.1. iPod Selection ButtonIf iPod is connected, it switches to the
iPod mode from the CD mode to play the
song files stored in the iPod. If no CD and
auxiliary device is not connected, it dis-
plays "NO Media" for 3 seconds and
returns to the previous mode.2. TRACK Moving Button ] button for less
than 0.8 second to play from the begin-
ning of the song currently played. Press
the button for less than 0.8 second and
press it again within 1 seconds to move
and play the previous track. Press the
button for 0.8 second or longer to play
the song in reverse direction in fast
speed.
] button for less than 0.8 second to move to the next
track. Press the button for 0.8 second or
longer to play the song in forward direc-
tion in fast speed.
3. RANDOM Playback ButtonPress the button for less than 0.8 second
to activate or deactivate the random play-
back of the songs within the current cat-
egory. Press the button for longer than
0.8 second to randomly play all songs in
the entire album of the iPod.
Press the button once again to cancel
the mode.4. REPEAT ButtonRepeats the song currently played.5. CATEGORY Selection ButtonMoves to the upper category from cur-
rentlyplayed category of the iPod.
To move to(play) the category(song) dis-
played, MENU(preset6) You will be able
to search through the lower category of
the selected category.
The order of iPod's category is SONG,
ALBUMS, ARTISTS, GENRES, and iPod.
6. SEARCH Knob & ENTER ButtonWhen you turn the button clockwise, it
will display the songs(category) next to
the song currently played(category in the
same level).
Also, when you turn the button counter-
clockwise, it will display the songs(catego-
ry) before the song currently played(cate-
gory in the same level).
If you want to listen to the song displayed
in the song category, press the button,
then it will skip to the selected song and
play.7. INFO Selection ButtonDisplays the information of the file cur-
rently played in the order of TITLE
➟
ARTIST
➟ ALBUM
➟ NORMAL DISPLAY
➟ TITLE
➟... (Displays no information if
the file has no song information.)
Page 106 of 219
397
Knowing your vehicle
✽
✽NOTICE FOR USING iPod
DEVICE• Some iPod models might not sup- port the communication protocol
and the files will not be played.
(iPod models supported: Mini, 4G,
Photo, Nano, 5G)
• The order of search or playback of songs in the iPod can be different
from the order searched in the
audio system.
• If the iPod crashes due to its own trouble, reset the iPod. (Reset:
Refer to iPod manual)
• An iPod may not operate normally on low battery.
CAUTION IN USING
iPod DEVICE
You need the power cable exclu-
sive for an iPod in order to oper-ate an iPod with the buttons on the audio system. The PC cableprovided by Apple may cause amalfunction and do not use it for vehicle use.
When connecting the device with an iPod cable, push in the jackfully to not to interfere with com-munication.
When adjusting the sound effects of an iPod and the audio system,the sound effects of both deviceswill overlap and might reduce ordistort the quality of the sound.
Deactivate (turn off) the equalizer function of an iPod when adjust-ing the audio system’s volume, and turn off the equalizer of theaudio system when using the equalizer of an iPod.
(Continued)
(Continued) When the iPod cable is connected, the system can be switched to theAUX mode even without the iPod device and can cause noise.Disconnect the iPod cable when you are not using the iPod device.
When the iPod is not used for the audio system, the iPod cable hasto be separate from iPod device. Original display of iPod may not bedisplayed.
Page 107 of 219
4
Ignition switch / 4-2
Starting the engine / 4-3
Manual transaxle / 4-4
Automatic transaxle / 4-6
Brake system / 4-9
Steering wheel / 4-14
Instrument cluster / 4-16
Gauges / 4-17
Warnings and indicators / 4-19
Lighting / 4-23
Wipers and washers / 4-26
Defroster / 4-29
Hazard warning flasher / 4-30
Climate control system / 4-30
Windshield defrosting and defogging / 4-37
Driving your vehicle
Page 108 of 219
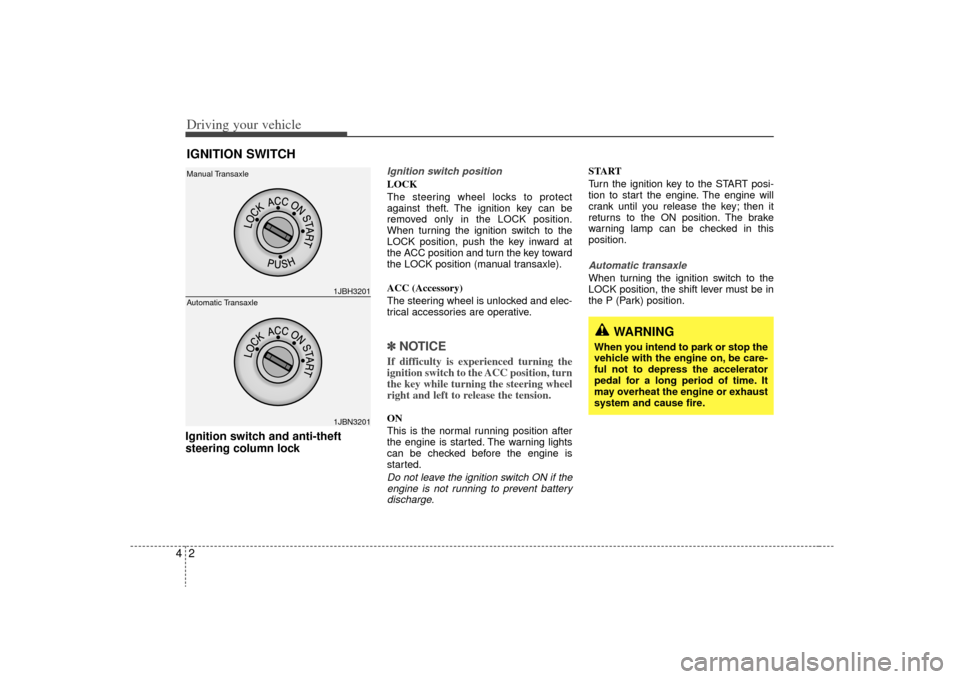
Driving your vehicle24Ignition switch and anti-theft
steering column lock
Ignition switch positionLOCK
The steering wheel locks to protect
against theft. The ignition key can be
removed only in the LOCK position.
When turning the ignition switch to the
LOCK position, push the key inward at
the ACC position and turn the key toward
the LOCK position (manual transaxle).
ACC (Accessory)
The steering wheel is unlocked and elec-
trical accessories are operative.✽ ✽
NOTICEIf difficulty is experienced turning the
ignition switch to the ACC position, turn
the key while turning the steering wheel
right and left to release the tension.ON
This is the normal running position after
the engine is started. The warning lights
can be checked before the engine is
started.Do not leave the ignition switch ON if the
engine is not running to prevent batterydischarge.
START
Turn the ignition key to the START posi-
tion to start the engine. The engine will
crank until you release the key; then it
returns to the ON position. The brake
warning lamp can be checked in this
position.Automatic transaxleWhen turning the ignition switch to the
LOCK position, the shift lever must be in
the P (Park) position.
IGNITION SWITCH
1JBH32011JBN3201
Manual Transaxle
Automatic Transaxle
WARNING
When you intend to park or stop the
vehicle with the engine on, be care-
ful not to depress the accelerator
pedal for a long period of time. It
may overheat the engine or exhaust
system and cause fire.
Page 109 of 219
43
Driving your vehicle
1. Make sure the parking brake isapplied.
2. Manual Transaxle - Depress the
clutch pedal fully and shift the
transaxle into Neutral. Keep the clutch
pedal depressed while turning the
ignition switch to the start position.
The starter will not operate if the
clutch pedal is not fully depressed.
Automatic Transaxle - Place the
transaxle shift lever in P (Park).
Depress the brake pedal fully.
You can also start the engine when the shift lever is in the N (Neutral)position.
3. Turn the ignition switch to START and hold it there until the engine starts (a
maximum of 10 seconds), then
release the key.
4. In extremely cold weather (below -18°C / 0°F) or after the vehicle has
not been operated for several days, let
the engine warm up without depress-
ing the accelerator.
Whether the engine is cold or warm, it
should be started without depressing the accelerator.✽ ✽ NOTICEDo not engage the starter for more than
10 seconds. If the engine stalls or fails to
start, wait 5 to 10 seconds before re-
engaging the starter. Excessive or
improper use of the starter may damage
it. The starter will not operate if:
Manual Transaxle - the clutch pedal is
not fully depressed.
Automatic Transaxle - the shift lever
is NOT in the P (Park) or N (Neutral)
position.
WARNING
- Ignition key
• Never turn the ignition switch to LOCK or ACC while the vehicle is
moving. This would result in loss
of directional control and braking
function, which could cause an
accident or collision.
Before leaving the driver’s seat, always make sure the shift lever
is engaged in 1
stgear for manual
transaxle or P (Park) for automat-
ic transaxle. Then, set the parking
brake fully and shut the engine
off. Unexpected and sudden vehi-
cle movement may occur if these
precautions are not taken.
Never reach for the ignition switch, or any other controls
through the steering wheel while
the vehicle is in motion. The pres-
ence of your hand or arm in this
area could cause a loss of vehicle
control, an accident and serious
bodily injury or death.
Do not place any movable objects around the driver’s seat as they
may move while driving, interfere
with the driver and lead to an
accident.
CAUTION -
Stall
If the engine stalls while you are inmotion, do not attempt to move theshift lever to the P (Park) position. If traffic and road conditions permit,you may put the shift lever in the N (Neutral) position while the vehicleis still moving and turn the ignitionswitch to the START position in an attempt to restart the engine.
STARTING THE ENGINE
CAUTION
Always wear appropriate shoes whenoperating your vehicle. Unsuitableshoes (high heels, ski boots,etc.) may interfere with your ability to use thebrake and accelerator pedal, and theclutch (if equipped).
Page 110 of 219
Driving your vehicle44
Manual transaxle operationThe manual transaxle has five forward
gears.
Press the clutch pedal down fully while
shifting, then release it slowly.
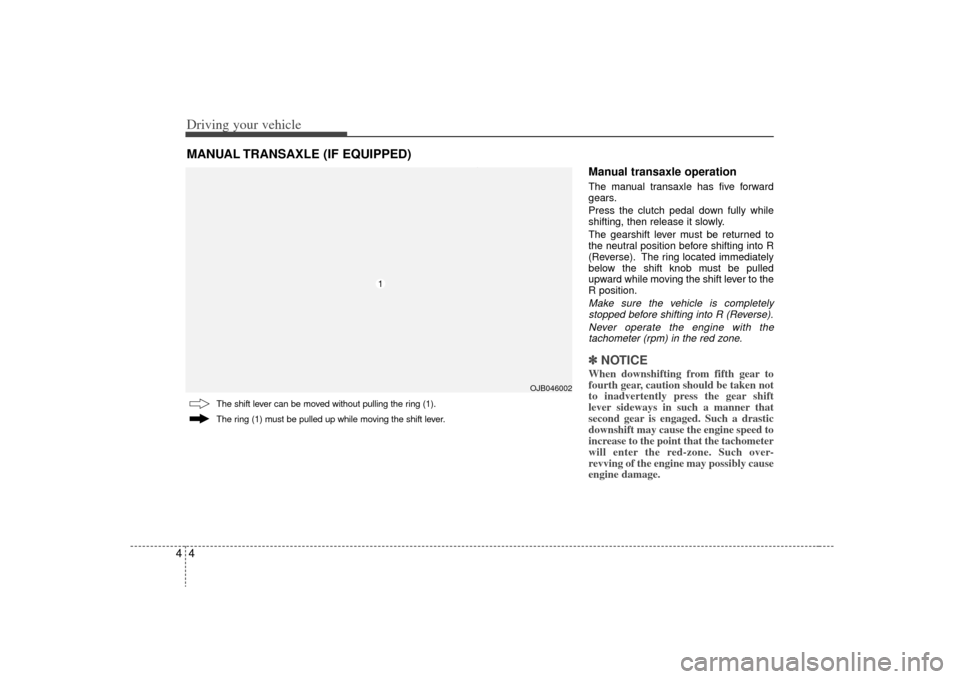
The gearshift lever must be returned to
the neutral position before shifting into R
(Reverse). The ring located immediately
below the shift knob must be pulled
upward while moving the shift lever to the
R position.Make sure the vehicle is completelystopped before shifting into R (Reverse).
Never operate the engine with thetachometer (rpm) in the red zone.✽ ✽ NOTICEWhen downshifting from fifth gear to
fourth gear, caution should be taken not
to inadvertently press the gear shift
lever sideways in such a manner that
second gear is engaged. Such a drastic
downshift may cause the engine speed to
increase to the point that the tachometer
will enter the red-zone. Such over-
revving of the engine may possibly cause
engine damage.
MANUAL TRANSAXLE (IF EQUIPPED)
The ring (1) must be pulled up while moving the shift lever.
OJB046002
The shift lever can be moved without pulling the ring (1).
1