door lock KIA Rio 2009 2.G User Guide
[x] Cancel search | Manufacturer: KIA, Model Year: 2009, Model line: Rio, Model: KIA Rio 2009 2.GPages: 219, PDF Size: 2.47 MB
Page 23 of 219
Knowing your vehicle14
3
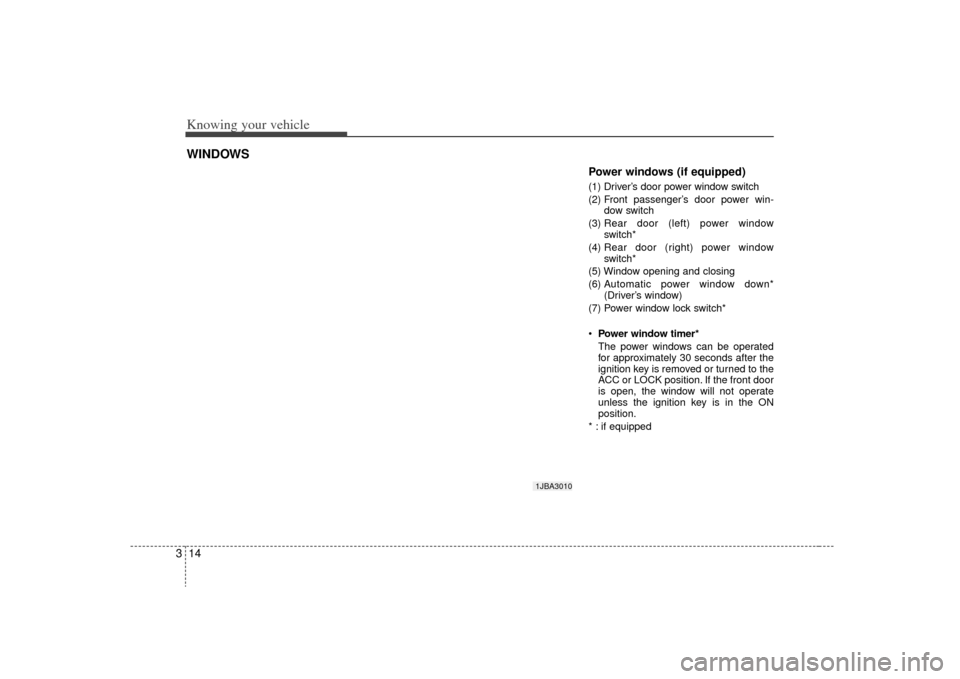
Power windows (if equipped)(1) Driver’s door power window switch
(2) Front passenger’s door power win-
dow switch
(3) Rear door (left) power window
switch*
(4) Rear door (right) power window
switch*
(5) Window opening and closing
(6) A utomatic power window down*
(Driver’s window)
(7) Power window lock switch*
Power window timer*
The power windows can be operated
for approximately 30 seconds after the
ignition key is removed or turned to the
ACC or LOCK position. If the front door
is open, the window will not operate
unless the ignition key is in the ON
position.
* : if equipped
WINDOWS
1JBA3010
Page 24 of 219
315
Knowing your vehicle
Power windows (if equipped)The ignition switch must be in the ON
position for power windows to operate.
Each door has a power window switch
that controls that door’s window.
However, the driver has a power window
lock switch which can block the operation
of passenger windows.✽ ✽NOTICEWhile driving with the rear windows
down or with the sunroof (if equipped)
in an open(or partially open position),
your vehicle may demonstrate a wind
buffeting or pulsation noise. This noise
is a normal occurrence and can be
reduced or eliminated by taking the fol-
lowing actions. If the noise occurs with
one or both of the rear windows down,
partially lower both front windows
approximately one inch. If you experi-
ence the noise with the snroof open,
slightly reduce the size of the sunroof
opening.✽ ✽NOTICE• To prevent the power window system
from the possibility of damage, do not
open or close two windows at the same
time. This will also ensure the longevi-
ty of the fuse. (Continued)(Continued)
• Never try to operate the main switch
on the driver's door and the individ-
ual door window switch in opposing
directions at the same time. If this is
done, the window will stop and cannot
be opened or closed.
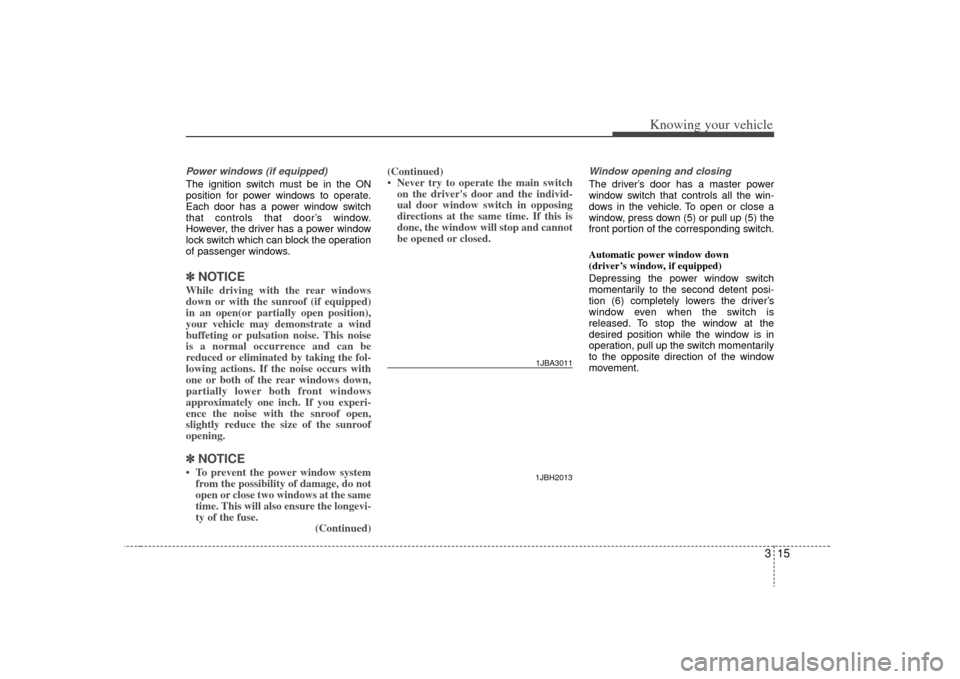
Window opening and closingThe driver’s door has a master power
window switch that controls all the win-
dows in the vehicle. To open or close a
window, press down (5) or pull up (5) the
front portion of the corresponding switch.
Automatic power window down
(driver’s window, if equipped)
Depressing the power window switch
momentarily to the second detent posi-
tion (6) completely lowers the driver’s
window even when the switch is
released. To stop the window at the
desired position while the window is in
operation, pull up the switch momentarily
to the opposite direction of the window
movement.
1JBH20131JBA3011
Page 25 of 219
Knowing your vehicle16
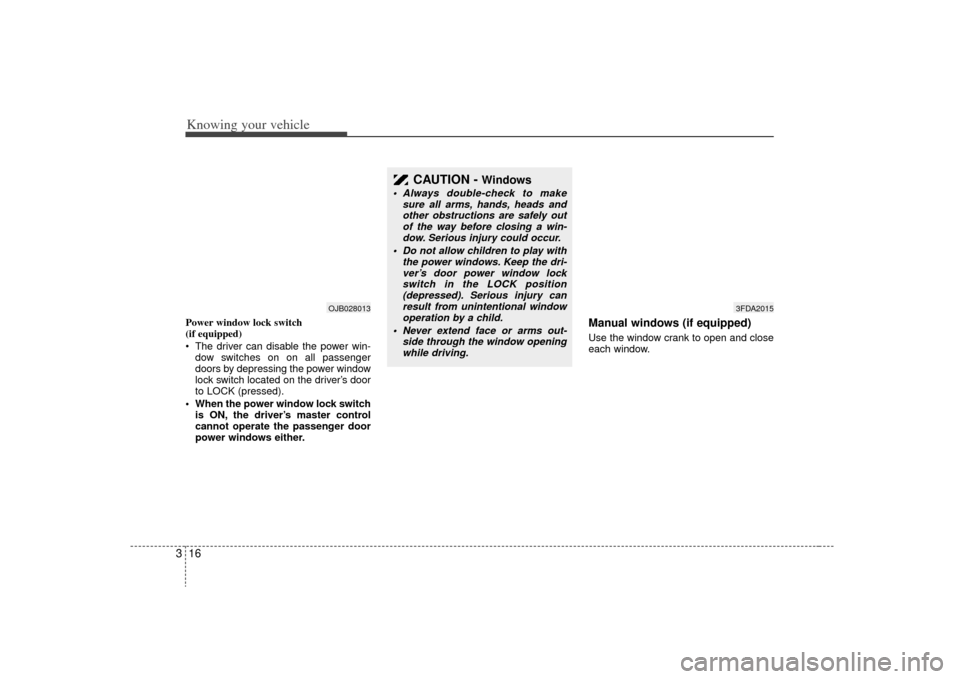
3Power window lock switch
(if equipped)
The driver can disable the power win-
dow switches on on all passenger
doors by depressing the power window
lock switch located on the driver’s door
to LOCK (pressed).
When the power window lock switch is ON, the driver’s master control
cannot operate the passenger door
power windows either.
Manual windows (if equipped)Use the window crank to open and close
each window.
CAUTION -
Windows
Always double-check to make sure all arms, hands, heads andother obstructions are safely out of the way before closing a win-dow. Serious injury could occur.
Do not allow children to play with the power windows. Keep the dri-ver’s door power window lockswitch in the LOCK position (depressed). Serious injury canresult from unintentional window operation by a child.
Never extend face or arms out- side through the window openingwhile driving.
3FDA2015
OJB028013
Page 31 of 219
Knowing your vehicle22
3Rear seat Split folding rear seat (if equipped) The rear seatbacks fold forward to pro-
vide additional cargo space and to pro-
vide access to the cargo area.
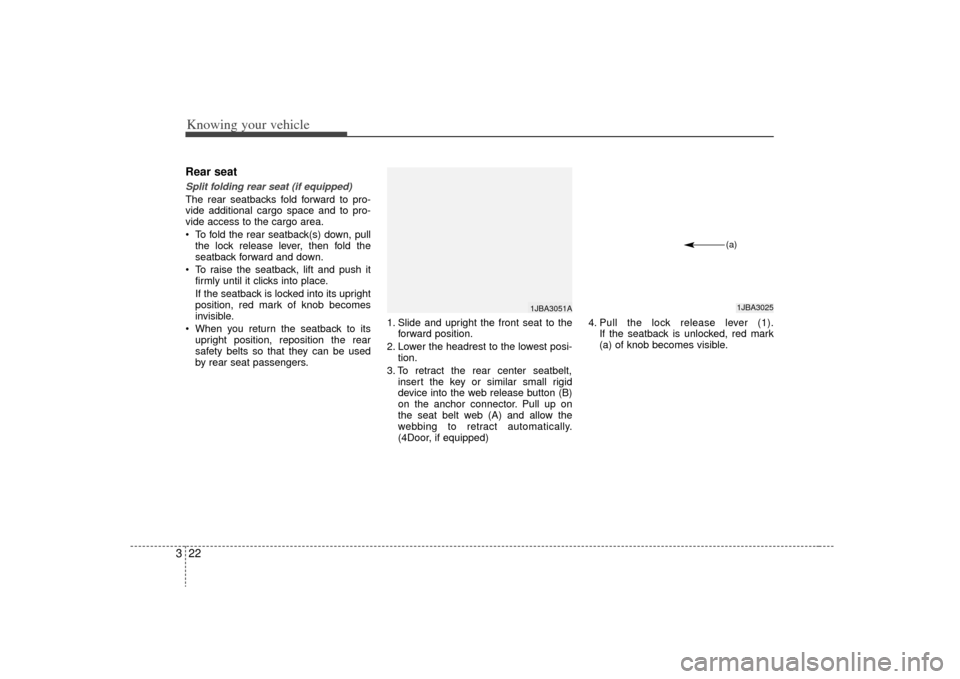
To fold the rear seatback(s) down, pull
the lock release lever, then fold the
seatback forward and down.
To raise the seatback, lift and push it firmly until it clicks into place.
If the seatback is locked into its upright
position, red mark of knob becomes
invisible.
When you return the seatback to its upright position, reposition the rear
safety belts so that they can be used
by rear seat passengers. 1. Slide and upright the front seat to the
forward position.
2. Lower the headrest to the lowest posi- tion.
3. To retract the rear center seatbelt, insert the key or similar small rigid
device into the web release button (B)
on the anchor connector. Pull up on
the seat belt web (A) and allow the
webbing to retract automatically.
(4Door, if equipped) 4. Pull the lock release lever (1).
If the seatback is unlocked, red mark
(a) of knob becomes visible.
1JBA3025(a)
1JBA3051A
Page 41 of 219
Knowing your vehicle32
33. Insert the tongue plate (1) into the
open end of the buckle (2) until an
audible “click” is heard, indicating the
belt is locked in the buckle. 4. Position the lap portion (1) of the belt
across your lap as LOW ON THE HIPS
as possible to reduce the risk of sliding
under it during an accident. Adjust the
belt to a SNUG FIT by pulling up on
the shoulder portion (2) of the safety
belt. The belt retractor is designed to
take up excess webbing automatically
and to maintain tension on the belt. For
your safety, do not put any excess
slack into the safety belt at any loca-
tion.
✽ ✽NOTICEIf you are not able to pull out the safety
belt from the retractor, firmly pull the
belt out and release it. Then you will be
able to pull the belt out smoothly.
5. Adjust the shoulder anchor position to
your size. To raise the anchor position,
push the anchor up (1). To lower the
anchor position, press (2) the button
(A) and slide the anchor down (3).
After adjustment, make sure the
anchor is locked in position.
If the height of the adjusting seat belt is
too near your neck, you will not be getting
the most effective protection. The shoul-
der portion should be adjusted so that it
lies across your chest and midway over
your shoulder nearest the door and not
your neck.
1JBH2263
1JBH2264
1JBA3036
Page 45 of 219
Knowing your vehicle36
3When using the rear center seat belt, the
buckle with the “CENTER” mark must be
used.
Stowing the rear safety belt The rear safety belt buckles can be
stowed in the pocket between the rear
seatback and cushion when not in use.
1JBN3046
1JBE30531JBE3053A
4 Door5 Door
WARNING
When using the rear center belt,
you must lock all tongue plates
and buckles prior to use. If any
tongue plate or buckle is not
locked, it will increase the chance
of injury or death in the event of
collision.
The rear center seatbelt tongue plate (A) and anchor connector
(B) should remain locked at all
times. They should only be
unlocked when folding the rear
seatback down or when carrying
an object in the rear seat that
could cause damage to the seat-
belt webbing or locking devices.
In either case, lock the tongue
plate (A) and anchor connector
(B) immediately after unfolding
the seatbacks or removing the
object being transported.
Page 53 of 219
Knowing your vehicle44
3When the safety belt is allowed to
retract to its fully stowed position, the
retractor will automatically switch
from the “Auto Lock” mode to the
emergency lock mode for normal
adult usage.
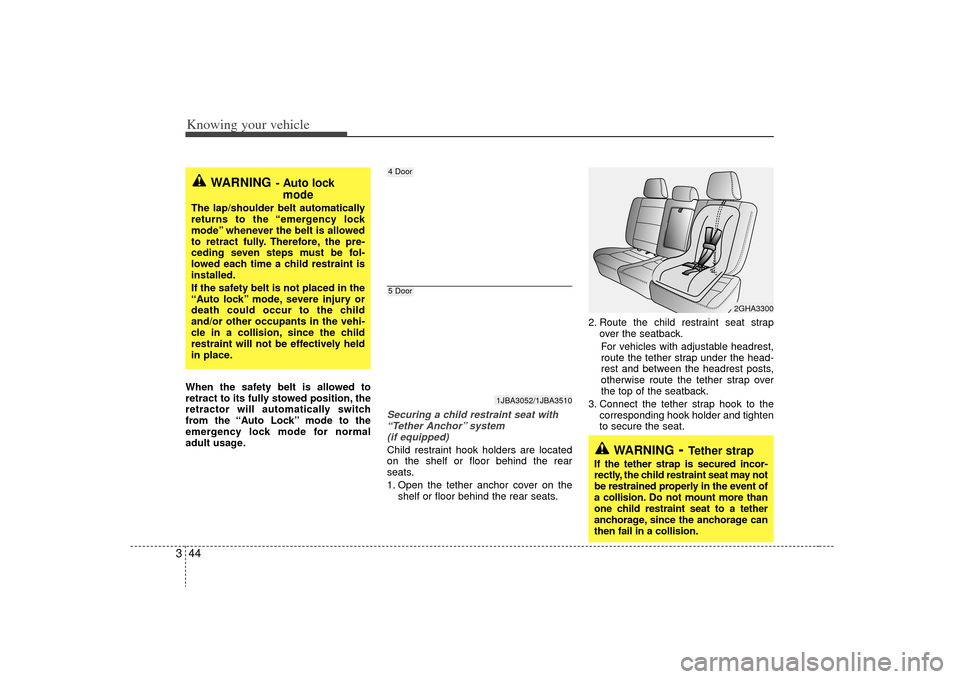
Securing a child restraint seat with
“Tether Anchor” system (if equipped) Child restraint hook holders are located
on the shelf or floor behind the rear
seats.
1. Open the tether anchor cover on the shelf or floor behind the rear seats. 2. Route the child restraint seat strap
over the seatback.
For vehicles with adjustable headrest,
route the tether strap under the head-
rest and between the headrest posts,
otherwise route the tether strap over
the top of the seatback.
3. Connect the tether strap hook to the corresponding hook holder and tighten
to secure the seat.
WARNING
- Auto lockmode
The lap/shoulder belt automatically
returns to the “emergency lock
mode” whenever the belt is allowed
to retract fully. Therefore, the pre-
ceding seven steps must be fol-
lowed each time a child restraint is
installed.
If the safety belt is not placed in the
“Auto lock” mode, severe injury or
death could occur to the child
and/or other occupants in the vehi-
cle in a collision, since the child
restraint will not be effectively held
in place.
1JBA3052/1JBA3510
4 Door5 Door
2GHA3300
WARNING
- Tether strap
If the tether strap is secured incor-
rectly, the child restraint seat may not
be restrained properly in the event of
a collision. Do not mount more than
one child restraint seat to a tether
anchorage, since the anchorage can
then fail in a collision.
Page 61 of 219

Knowing your vehicle52
3Curtain air bag (if equipped)Curtain air bags are located along both
sides of the roof rails above the front and
rear doors.
They are designed to help protect the
heads of the front seat occupants and the
rear outboard seat occupants in certain
side impact collisions. The curtain air bag deployment occurs
only on the side of the vehicle affected
by the impact.
The side air bags (side and/or curtain air bags) are not designed to deploy in
collisions from the front or rear of the
vehicle or in most rollover situations.
The curtain air bags are designed to deploy only in certain side-impact colli-
sions, depending on the crash severity,
angle, speed and impact.
1JBA30591JBA3900
WARNING
In order for side air bags (sideand curtain air bags) to provide
its best protection, both front seat
occupants and both outboard
rear occupants should sit in an
upright position with the seat
belts properly fastened.
Importantly, children should sit in
a proper child restraint system in
the rear seat.
(Continued)
(Continued)
When children are seated in therear outboard seats, they must be
seated in the proper child
restraint system. Make sure to put
the child restraint system as far
away from the door side as possi-
ble, and secure the child restraint
system in a locked position.
Do not allow the passengers to lean their heads or bodies onto
doors, put their arms on the
doors, stretch their arms out of
the window, or place objects
between the doors and passen-
gers when they are seated on
seats equipped with side air
bags.
Never try to open or repair any components of the side curtain
air bag system. This should only
be done by an authorized Kia
dealer.
Failure to follow the above men-
tioned instructions can result in
injury or death to the vehicle occu-
pants in an accident.
Page 69 of 219
Knowing your vehicle60
3
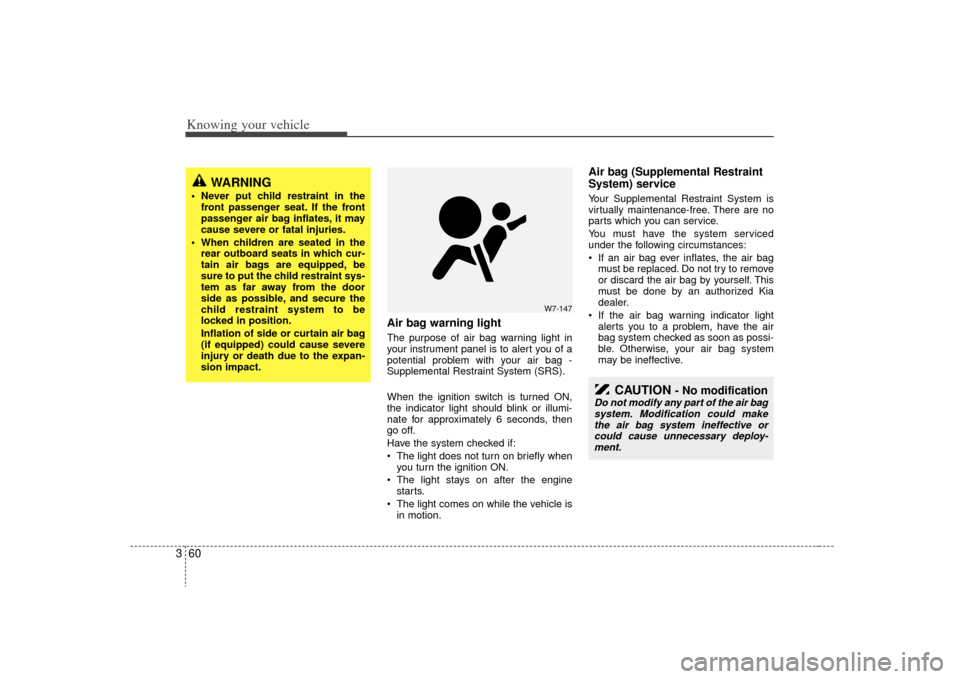
Air bag warning lightThe purpose of air bag warning light in
your instrument panel is to alert you of a
potential problem with your air bag -
Supplemental Restraint System (SRS).
When the ignition switch is turned ON,
the indicator light should blink or illumi-
nate for approximately 6 seconds, then
go off.
Have the system checked if:
The light does not turn on briefly when
you turn the ignition ON.
The light stays on after the engine starts.
The light comes on while the vehicle is in motion.
Air bag (Supplemental Restraint
System) service Your Supplemental Restraint System is
virtually maintenance-free. There are no
parts which you can service.
You must have the system serviced
under the following circumstances:
If an air bag ever inflates, the air bagmust be replaced. Do not try to remove
or discard the air bag by yourself. This
must be done by an authorized Kia
dealer.
If the air bag warning indicator light alerts you to a problem, have the air
bag system checked as soon as possi-
ble. Otherwise, your air bag system
may be ineffective.
WARNING
Never put child restraint in thefront passenger seat. If the front
passenger air bag inflates, it may
cause severe or fatal injuries.
When children are seated in the rear outboard seats in which cur-
tain air bags are equipped, be
sure to put the child restraint sys-
tem as far away from the door
side as possible, and secure the
child restraint system to be
locked in position.
Inflation of side or curtain air bag
(if equipped) could cause severe
injury or death due to the expan-
sion impact.
CAUTION
- No modification
Do not modify any part of the air bagsystem. Modification could makethe air bag system ineffective or could cause unnecessary deploy-ment.
W7-147
Page 74 of 219
365
Knowing your vehicle
Closing the hood1. Before closing the hood, check the fol-lowing:
must be correctly installed.
bustible material must be removed
from the engine compartment.
2. Secure the support rod in its clip.
3. Lower the hood to about 30 cm (12 inches) height and then let it drop to
properly lock in place.
Make sure the hood is properly locked
before driving.
FUEL FILLER LID 1. Stop the engine.
2. To open the fuel filler lid, pull the release lever. (if equipped)
CAUTION
- Hood
Before closing the hood, make sure that all engine parts andtools have been removed fromthe engine area and that no one’s hands are near the hood opening.
Do not leave gloves, rags or any other combustible material in theengine compartment. Doing somay cause a heat-induced fire.
CAUTION
To avoid injury from sharp edges, itis recommended that protective gloves be worn if there is a need toopen the fuel filler door manually.
1JBA3207
5 Door