turn signal KIA Rio 2009 2.G Owner's Manual
[x] Cancel search | Manufacturer: KIA, Model Year: 2009, Model line: Rio, Model: KIA Rio 2009 2.GPages: 219, PDF Size: 2.47 MB
Page 8 of 219
23
Your vehicle at a glance
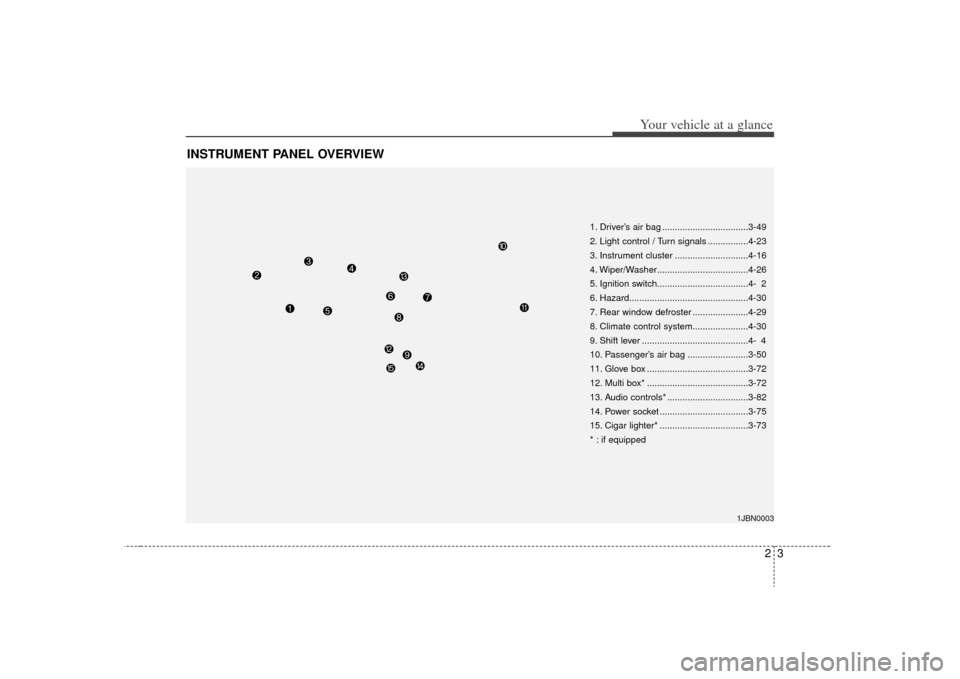
INSTRUMENT PANEL OVERVIEW
1. Driver’s air bag ..................................3-49
2. Light control / Turn signals ................4-23
3. Instrument cluster .............................4-16
4. Wiper/Washer....................................4-26
5. Ignition switch....................................4- 2
6. Hazard...............................................4-30
7. Rear window defroster ......................4-29
8. Climate control system......................4-30
9. Shift lever ..........................................4- 4
10. Passenger’s air bag ........................3-50
11. Glove box ........................................3-72
12. Multi box* ........................................3-72
13. Audio controls* ................................3-82
14. Power socket ...................................3-75
15. Cigar lighter* ...................................3-73
* : if equipped
1JBN0003
Page 16 of 219
37
Knowing your vehicle
Your vehicle is equipped with an elec-
tronic engine immobilizer system to
reduce the risk of unauthorized vehicle
use.
Your immobilizer system is comprised of
a small transponder in the ignition key,
and antenna coil in the key cylinder and
Immobilizer Control Unit (or Smartra
Unit).
With this system, whenever you insert
your ignition key into the ignition switch
and turn it to ON, the antenna coil in the
ignition switch receives a signal from the
transponder in the ignition key and then
sends the signal to the ECU (Engine
Control Unit).
The ECU checks the signal whether the
ignition key is valid.
If the key is determined to be valid, the
engine will start.
If the key is determined to be invalid, the
engine will not start.To deactivate the immobilizer
system:Insert the ignition key into the key cylin-
der and turn it to the ON position.
To activate the immobilizer sys-
tem:Turn the ignition key to the OFF position.
The immobilizer system activates auto-
matically. Without a valid ignition key for
your vehicle, the engine will not start.✽ ✽NOTICEWhen starting the engine, do not use the
key with other immobilizer keys around.
Otherwise the engine may not start or
may stop soon after it starts. Keep each
key separately not to have any malfunc-
tion after you receive your new vehicle.
Limp home (override) procedureWhen you turn the ignition key to the ON
position, if the IMMO indicator goes off
after blinking 5 times, your transponder
equipped in the ignition key is out of order.
You cannot start the engine without the
lime home procedure. To start the engine,
you have to input your password by using
the ignition switch.
The following procedure is how to input
your password of “2345” as an example.
1. Turn the ignition key to the ON position.
The IMMO indicator ( ) will blink 5
times and go off indicating the begin-
ning of the limp home procedure.
2. Turn the ignition key to the ACC posi- tion.
IMMOBILIZER SYSTEM (IF EQUIPPED)
CAUTION
Do not put metal accessories nearthe key or ignition key.
The engine may not start for themetal accessories may interrupt thetransponder signal from normally transmitting.
WARNING
In order to prevent theft of your
vehicle, do not leave spare keys
anywhere in your vehicle. Your
Immobilizer password is a cus-
tomer unique password and should
be kept confidential. Do not leave
this number anywhere in your vehi-
cle.
Page 122 of 219
Driving your vehicle16
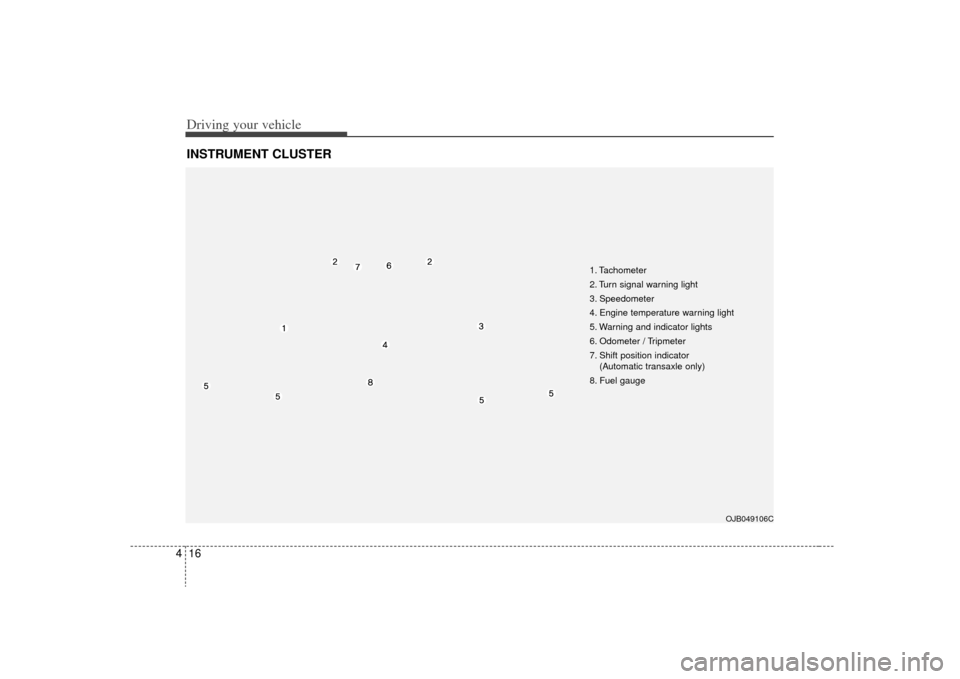
4INSTRUMENT CLUSTER
OJB049106C
1. Tachometer
2. Turn signal warning light
3. Speedometer
4. Engine temperature warning light
5. Warning and indicator lights
6. Odometer / Tripmeter
7. Shift position indicator
(Automatic transaxle only)
8. Fuel gauge
Page 127 of 219
421
Driving your vehicle
Low brake fluid level warningIf the warning light remains on, it may
indicate that the brake fluid level in the
reservoir is low.
If the warning light remains on:
1. Drive carefully to the nearest safelocation and stop your vehicle.
2. With the engine stopped, check the brake fluid level immediately and add
fluid as required. Then check all brake
components for fluid leaks.
3. Do not drive the vehicle if leaks are found, the warning light remains on or
the brakes do not operate properly.
Have it towed to any authorized Kia
dealer for a brake system inspection
and necessary repairs.
To check bulb operation, check whether
the parking brake and brake fluid warning
light illuminates when the ignition switch
is in the ON position.
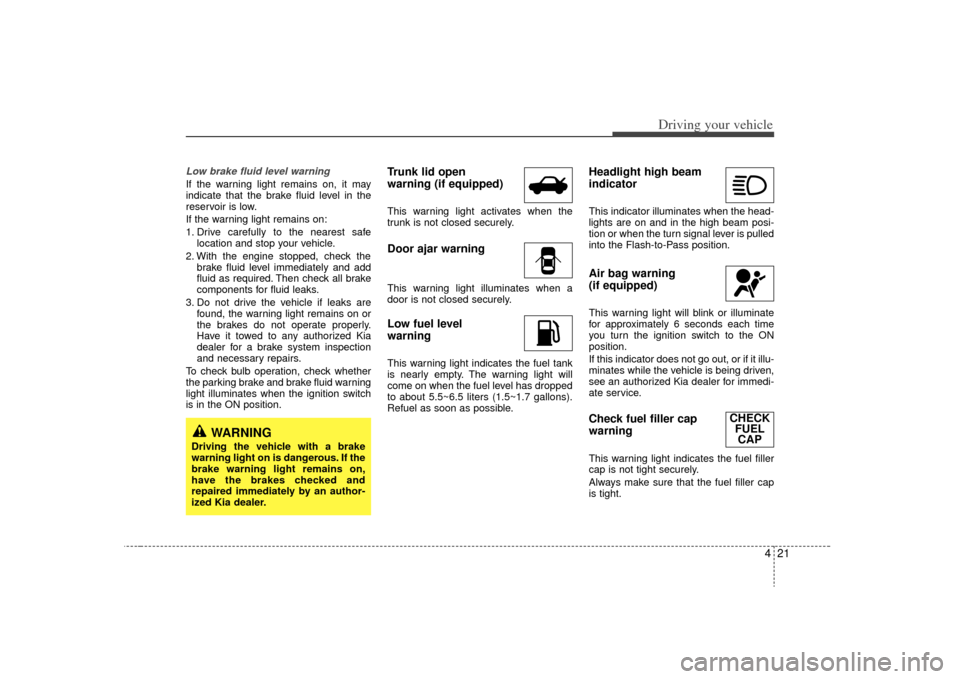
Trunk lid open
warning (if equipped)This warning light activates when the
trunk is not closed securely.Door ajar warningThis warning light illuminates when a
door is not closed securely.Low fuel level
warningThis warning light indicates the fuel tank
is nearly empty. The warning light will
come on when the fuel level has dropped
to about 5.5~6.5 liters (1.5~1.7 gallons).
Refuel as soon as possible.
Headlight high beam
indicator This indicator illuminates when the head-
lights are on and in the high beam posi-
tion or when the turn signal lever is pulled
into the Flash-to-Pass position.Air bag warning
(if equipped) This warning light will blink or illuminate
for approximately 6 seconds each time
you turn the ignition switch to the ON
position.
If this indicator does not go out, or if it illu-
minates while the vehicle is being driven,
see an authorized Kia dealer for immedi-
ate service.Check fuel filler cap
warning This warning light indicates the fuel filler
cap is not tight securely.
Always make sure that the fuel filler cap
is tight.
WARNING
Driving the vehicle with a brake
warning light on is dangerous. If the
brake warning light remains on,
have the brakes checked and
repaired immediately by an author-
ized Kia dealer.
CHECK FUELCAP
Page 131 of 219
425
Driving your vehicle
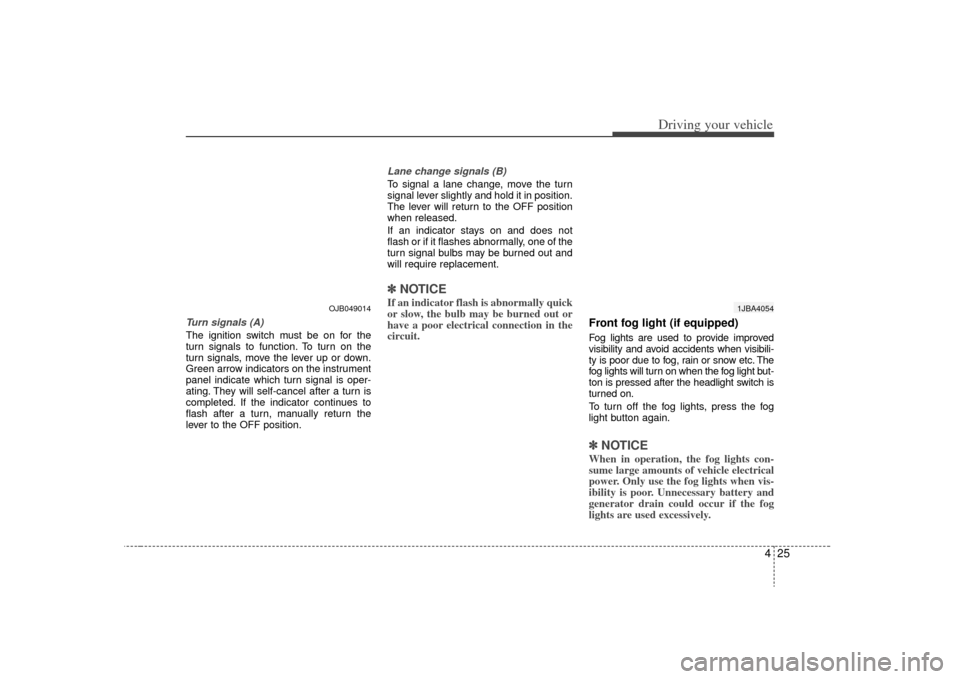
Turn signals (A)The ignition switch must be on for the
turn signals to function. To turn on the
turn signals, move the lever up or down.
Green arrow indicators on the instrument
panel indicate which turn signal is oper-
ating. They will self-cancel after a turn is
completed. If the indicator continues to
flash after a turn, manually return the
lever to the OFF position.
Lane change signals (B)To signal a lane change, move the turn
signal lever slightly and hold it in position.
The lever will return to the OFF position
when released.
If an indicator stays on and does not
flash or if it flashes abnormally, one of the
turn signal bulbs may be burned out and
will require replacement.✽ ✽NOTICEIf an indicator flash is abnormally quick
or slow, the bulb may be burned out or
have a poor electrical connection in the
circuit.
Front fog light (if equipped) Fog lights are used to provide improved
visibility and avoid accidents when visibili-
ty is poor due to fog, rain or snow etc. The
fog lights will turn on when the fog light but-
ton is pressed after the headlight switch is
turned on.
To turn off the fog lights, press the fog
light button again.✽ ✽NOTICEWhen in operation, the fog lights con-
sume large amounts of vehicle electrical
power. Only use the fog lights when vis-
ibility is poor. Unnecessary battery and
generator drain could occur if the fog
lights are used excessively.
1JBA4054
OJB049014
Page 136 of 219
Driving your vehicle30
4The hazard warning flasher causes the
rear tail lights and front turn signal lights
to flash on and off, which serves as a
warning to other drivers to exercise cau-
tion when approaching or passing your
vehicle.
To activate the flasher, depress the haz-
ard warning flasher switch. This switch
operates in any ignition switch position.
To turn the flashers off, depress the
switch again.HAZARD WARNING FLASHER
1JBN6001
CLIMATE CONTROL SYSTEM (IF EQUIPPED)
OJB049200
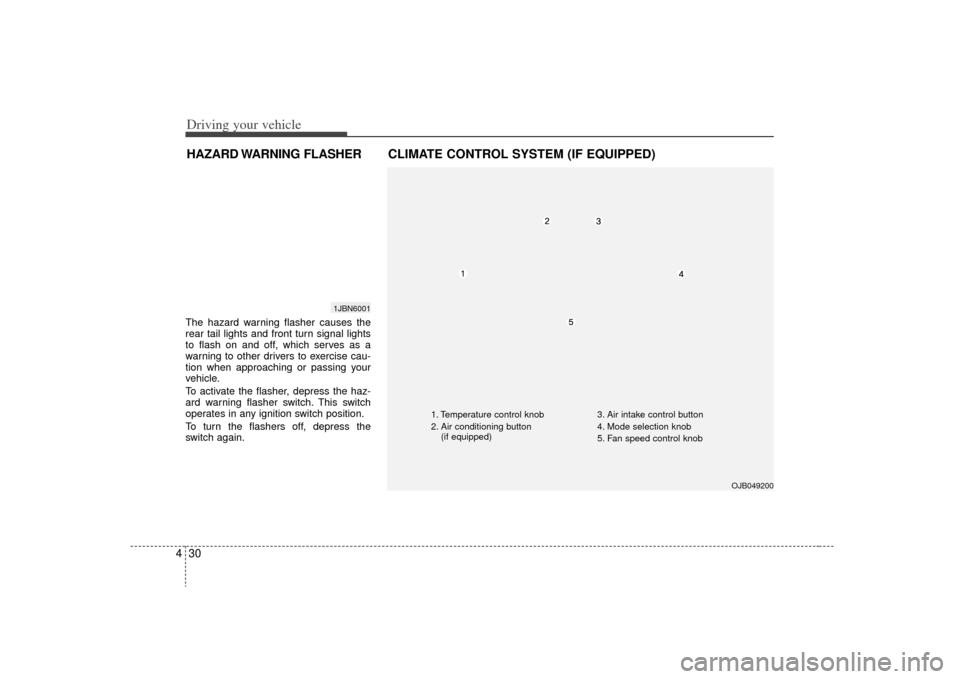
1. Temperature control knob
2. Air conditioning button
(if equipped) 3. Air intake control button
4. Mode selection knob
5. Fan speed control knob
Page 156 of 219
In case of an emergency26ROAD WARNING Hazard warning flasher The hazard warning flasher serves as a
warning to other drivers to exercise
extreme caution when approaching,
overtaking, or passing your vehicle. It
should be used whenever emergency
repairs are being made or when the vehi-
cle is stopped near the edge of a road-
way.
Depress the flasher switch with the igni-
tion switch in any position. The flasher
switch is located in the center console
switch panel. All turn signal lights will
flash simultaneously.• The hazard warning flasher operates
whether your vehicle is running or not.
The turn signals do not work when the hazard flasher is on.
Care must be taken when using the hazard warning flasher while the vehi-
cle is being towed.
If the engine stalls at a crossroad
or crossingIf the engine stalls at a crossroad or
crossing, set the shift lever in the N
(Neutral) position and then push the vehi-
cle to a safe place.If you have a flat tire while drivingIf a tire goes flat while you are driving:
1. Take your foot off the accelerator pedaland let the car slow down while driving
straight ahead. Do not apply the brakes
immediately or attempt to pull off the
road as this may cause a loss of con-
trol. When the car has slowed to such
a speed that it is safe to do so, brake
carefully and pull off the road. Drive off
the road as far as possible and park on
firm, level ground. If you are on a divid-
ed highway, do not park in the median
area between the two traffic lanes.
2. When the car is stopped, turn on your emergency hazard flashers, set the
parking brake and put the transmission
in P.
3. Have all passengers get out of the car. Be sure they all get out on the side of
the car that is away from traffic.
4. When changing a flat tire, follow the instruction provided later in this sec-
tion.
1JBN6001
IN CASE OF AN EMERGENCY
WHILE DRIVING
Page 165 of 219
611
In case of an emergency
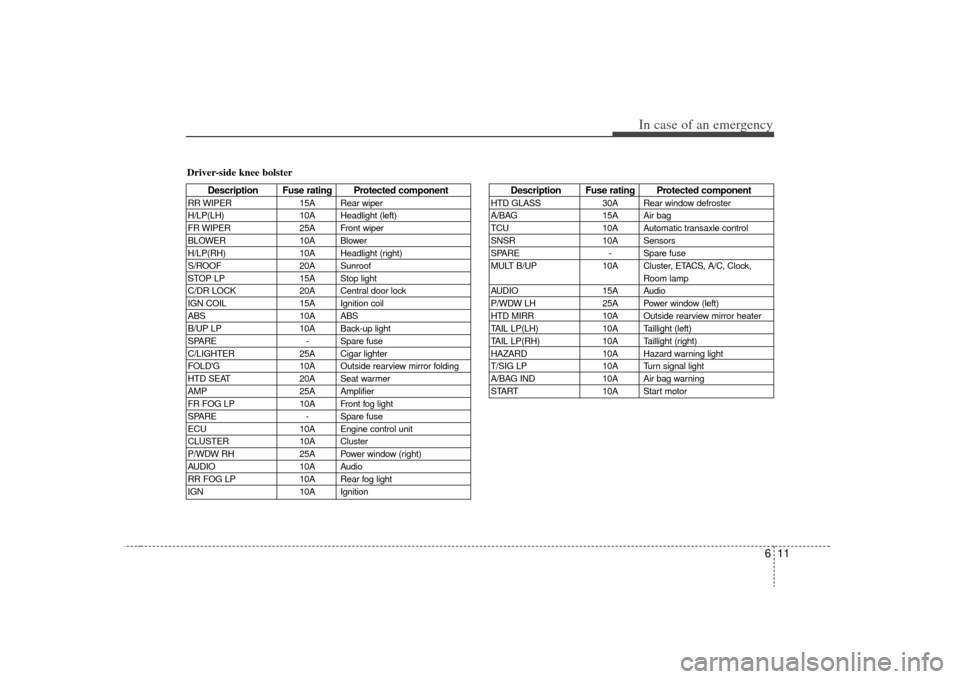
Driver-side knee bolster
Description Fuse rating Protected component
RR WIPER15A Rear wiper
H/LP(LH) 10A Headlight (left)
FR WIPER 25A Front wiper
BLOWER 10A Blower
H/LP(RH) 10A Headlight (right)
S/ROOF 20A Sunroof
STOP LP 15A Stop light
C/DR LOCK 20A Central door lock
IGN COIL 15A Ignition coil
ABS 10A ABS
B/UP LP 10A Back-up light
SPARE - Spare fuse
C/LIGHTER 25A Cigar lighter
FOLD'G 10A Outside rearview mirror folding
HTD SEAT 20A Seat warmer
AMP 25A Amplifier
FR FOG LP 10A Front fog light
SPARE - Spare fuse
ECU 10A Engine control unit
CLUSTER 10A Cluster
P/WDW RH 25A Power window (right)
AUDIO 10A Audio
RR FOG LP 10A Rear fog light
IGN 10A Ignition
Description Fuse rating Protected component
HTD GLASS30A Rear window defroster
A/BAG 15A Air bag
TCU 10A Automatic transaxle control
SNSR 10A Sensors
SPARE - Spare fuse
MULT B/UP 10A Cluster, ETACS, A/C, Clock,
Room lamp
AUDIO 15A Audio
P/WDW LH 25A Power window (left)
HTD MIRR 10A Outside rearview mirror heater
TAIL LP(LH) 10A Taillight (left)
TAIL LP(RH) 10A Taillight (right)
HAZARD 10A Hazard warning light
T/SIG LP 10A Turn signal light
A/BAG IND 10A Air bag warning
START 10A Start motor
Page 216 of 219
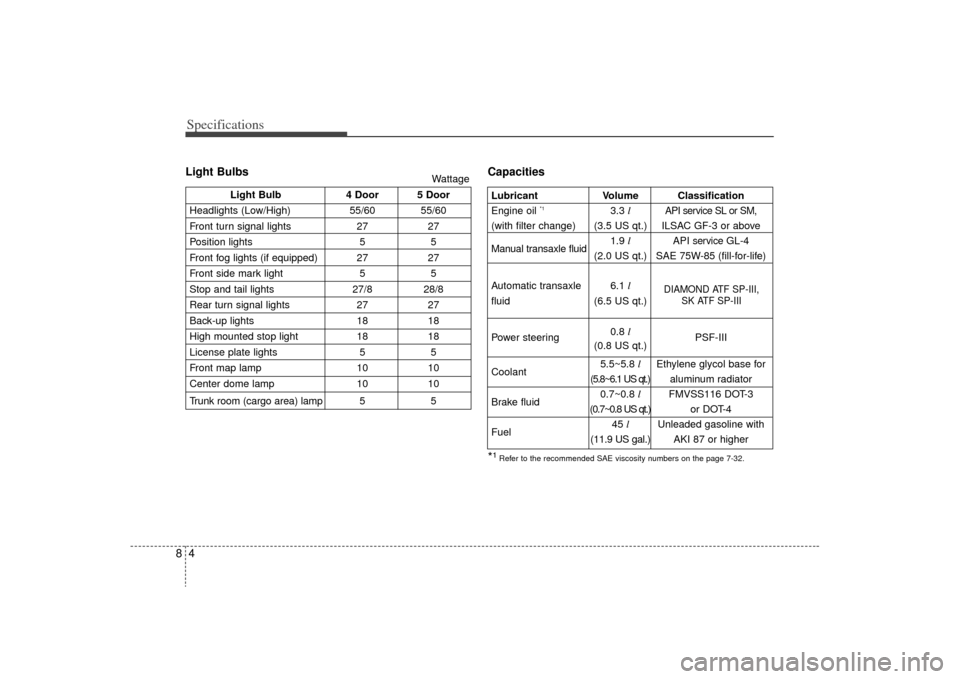
Specifications48Light BulbsCapacities
Light Bulb4 Door 5 Door
Headlights (Low/High) 55/60 55/60
Front turn signal lights 2727
Position lights 55
Front fog lights (if equipped) 27 27
Front side mark light 55
Stop and tail lights 27/8 28/8
Rear turn signal lights 2727
Back-up lights 1818
High mounted stop light 1818
License plate lights 55
Front map lamp 1010
Center dome lamp 1010
Trunk room (cargo area) lamp 5 5
Wattage
LubricantVolume Classification
Engine oil
*1
3.3 l
API service SL or SM,
(with filter change) (3.5 US qt.) ILSAC GF-3 or aboveManual transaxle fluid
1.9 l API
service
GL-4
(2.0 US qt.) SAE 75W-85 (fill-for-life)
Automatic transaxle 6.1 l
fluid (6.5 US qt.)
Power steering 0.8
l
PSF-III
(0.8 US qt.)
Coolant 5.5~5.8
lEthylene glycol base for
(5.8~6.1 US qt.) aluminum radiator
Brake fluid 0.7~0.8
lFMVSS116 DOT-3
(0.7~0.8 US qt.) o r D OT- 4
Fuel 45
l Unleaded gasoline with
(11.9 US gal.) AKI 87 or higher
*¹Refer to the recommended SAE viscosity numbers on the page 7-32.
DIAMOND ATF SP-III,
SK ATF SP-III