stop start KIA Rio 2014 3.G Owner's Guide
[x] Cancel search | Manufacturer: KIA, Model Year: 2014, Model line: Rio, Model: KIA Rio 2014 3.GPages: 397, PDF Size: 7.56 MB
Page 289 of 397
69
What to do in an emergency
If the TPMS indicator does not illumi-
nate for 3 seconds when the ignition
switch is turned to the ON position or
engine is running, or If it comes on
after blinking for approximately one
minute, take your car to your nearest
authorized kia dealer and have the
system checked.Low tire pressure tell-
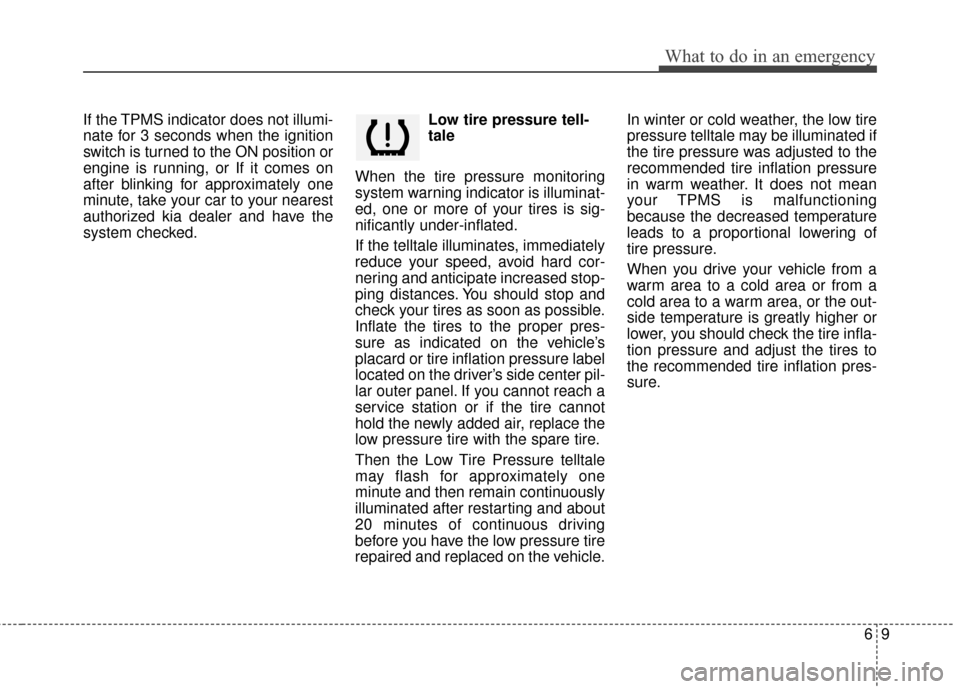
tale
When the tire pressure monitoring
system warning indicator is illuminat-
ed, one or more of your tires is sig-
nificantly under-inflated.
If the telltale illuminates, immediately
reduce your speed, avoid hard cor-
nering and anticipate increased stop-
ping distances. You should stop and
check your tires as soon as possible.
Inflate the tires to the proper pres-
sure as indicated on the vehicle’s
placard or tire inflation pressure label
located on the driver’s side center pil-
lar outer panel. If you cannot reach a
service station or if the tire cannot
hold the newly added air, replace the
low pressure tire with the spare tire.
Then the Low Tire Pressure telltale
may flash for approximately one
minute and then remain continuously
illuminated after restarting and about
20 minutes of continuous driving
before you have the low pressure tire
repaired and replaced on the vehicle. In winter or cold weather, the low tire
pressure telltale may be illuminated if
the tire pressure was adjusted to the
recommended tire inflation pressure
in warm weather. It does not mean
your TPMS is malfunctioning
because the decreased temperature
leads to a proportional lowering of
tire pressure.
When you drive your vehicle from a
warm area to a cold area or from a
cold area to a warm area, or the out-
side temperature is greatly higher or
lower, you should check the tire infla-
tion pressure and adjust the tires to
the recommended tire inflation pres-
sure.
Page 304 of 397
What to do in an emergency
24
6
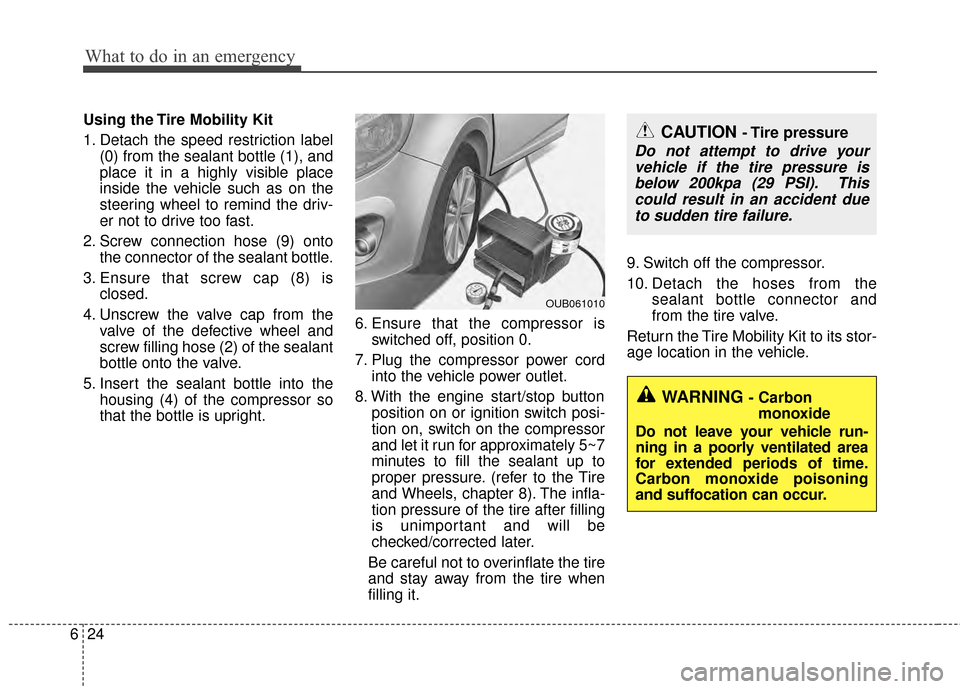
Using the Tire Mobility Kit
1. Detach the speed restriction label
(0) from the sealant bottle (1), and
place it in a highly visible place
inside the vehicle such as on the
steering wheel to remind the driv-
er not to drive too fast.
2. Screw connection hose (9) onto the connector of the sealant bottle.
3. Ensure that screw cap (8) is closed.
4. Unscrew the valve cap from the valve of the defective wheel and
screw filling hose (2) of the sealant
bottle onto the valve.
5. Insert the sealant bottle into the housing (4) of the compressor so
that the bottle is upright. 6. Ensure that the compressor is
switched off, position 0.
7. Plug the compressor power cord into the vehicle power outlet.
8. With the engine start/stop button position on or ignition switch posi-
tion on, switch on the compressor
and let it run for approximately 5~7
minutes to fill the sealant up to
proper pressure. (refer to the Tire
and Wheels, chapter 8). The infla-
tion pressure of the tire after filling
is unimportant and will be
checked/corrected later.
Be careful not to overinflate the tire
and stay away from the tire when
filling it. 9. Switch off the compressor.
10. Detach the hoses from the
sealant bottle connector and
from the tire valve.
Return the Tire Mobility Kit to its stor-
age location in the vehicle.
OUB061010
CAUTION - Tire pressure
Do not attempt to drive your vehicle if the tire pressure isbelow 200kpa (29 PSI). Thiscould result in an accident dueto sudden tire failure.
WARNING - Carbon monoxide
Do not leave your vehicle run-
ning in a poorly ventilated area
for extended periods of time.
Carbon monoxide poisoning
and suffocation can occur.
Page 366 of 397
Maintenance
56
7
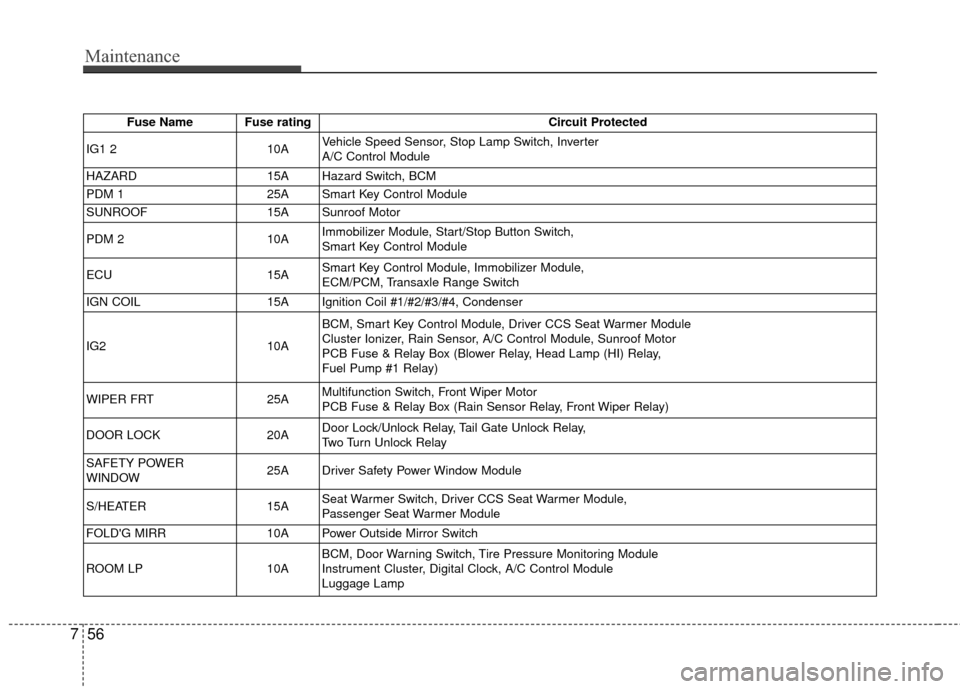
Fuse Name Fuse rating Circuit Protected
IG1 2 10AVehicle Speed Sensor, Stop Lamp Switch, Inverter
A/C Control Module
HAZARD 15A Hazard Switch, BCM
PDM 1 25A Smart Key Control Module
SUNROOF 15A Sunroof Motor
PDM 2 10AImmobilizer Module, Start/Stop Button Switch,
Smart Key Control Module
ECU 15ASmart Key Control Module, Immobilizer Module,
ECM/PCM, Transaxle Range Switch
IGN COIL 15A Ignition Coil #1/#2/#3/#4, Condenser
IG2 10ABCM, Smart Key Control Module, Driver CCS Seat Warmer Module
Cluster Ionizer, Rain Sensor, A/C Control Module, Sunroof Motor
PCB Fuse & Relay Box (Blower Relay, Head Lamp (HI) Relay,
Fuel Pump #1 Relay)
WIPER FRT 25AMultifunction Switch, Front Wiper Motor
PCB Fuse & Relay Box (Rain Sensor Relay, Front Wiper Relay)
DOOR LOCK 20ADoor Lock/Unlock Relay, Tail Gate Unlock Relay,
Two Turn Unlock Relay
SAFETY POWER
WINDOW 25A Driver Safety Power Window Module
S/HEATER 15ASeat Warmer Switch, Driver CCS Seat Warmer Module,
Passenger Seat Warmer Module
FOLD'G MIRR 10A Power Outside Mirror Switch
ROOM LP 10ABCM, Door Warning Switch, Tire Pressure Monitoring Module
Instrument Cluster, Digital Clock, A/C Control Module
Luggage Lamp
Page 378 of 397
Maintenance
68
7
Do not operate the engine in confined
or closed areas (such as garages) any
more than what is necessary to move
the vehicle in or out of the area.
When the vehicle is stopped in an open area for more than a short time
with the engine running, adjust the
ventilation system (as needed) to draw
outside air into the vehicle.
Never sit in a parked or stopped vehi- cle for any extended time with the
engine running.
When the engine stalls or fails to start, excessive attempts to restart the
engine may cause damage to the
emission control system.Operating precautions for catalyticconverters (if equipped)
Your vehicle is equipped with a catalytic
converter emission control device.
Therefore, the following precautions
must be observed: Use only UNLEADED FUEL for gaso-
line engines.
Do not operate the vehicle when there are signs of engine malfunction, such
as misfire or a noticeable loss of per-
formance.
Do not misuse or abuse the engine. Examples of misuse are coasting with
the ignition off and descending steep
grades in gear with the ignition off.
Do not operate the engine at high idle speed for extended periods (5 minutes
or more).
Do not modify or tamper with any part of the engine or emission control sys-
tem. All inspections and adjustments
must be made by an authorized Kia
dealer.
Avoid driving with a extremely low fuel level. Running out of fuel could cause
the engine to misfire, damaging the
catalytic converter.
Failure to observe these precautions
could result in damage to the catalytic
converter and to your vehicle.
Additionally, such actions could void your
warranties.
WARNING- Fire
Do not park, idle or drive the vehi- cle over or near flammable
objects, such as grass, vegeta-
tion, paper, leaves, etc. A hot
exhaust system can ignite flam-
mable items under your vehicle.
Also, do not remove the heat sink around the exhaust system, do
not seal the bottom of the vehicle
or do not coat the vehicle for cor-
rosion control. It may present a
fire risk under certain conditions.
WARNING- Catalytic converter
Keep away from the catalytic con-
verter and exhaust system while
the vehicle is running or immedi-
ately thereafter. The exhaust and
catalytic systems are very hot and
may burn you.
Page 391 of 397
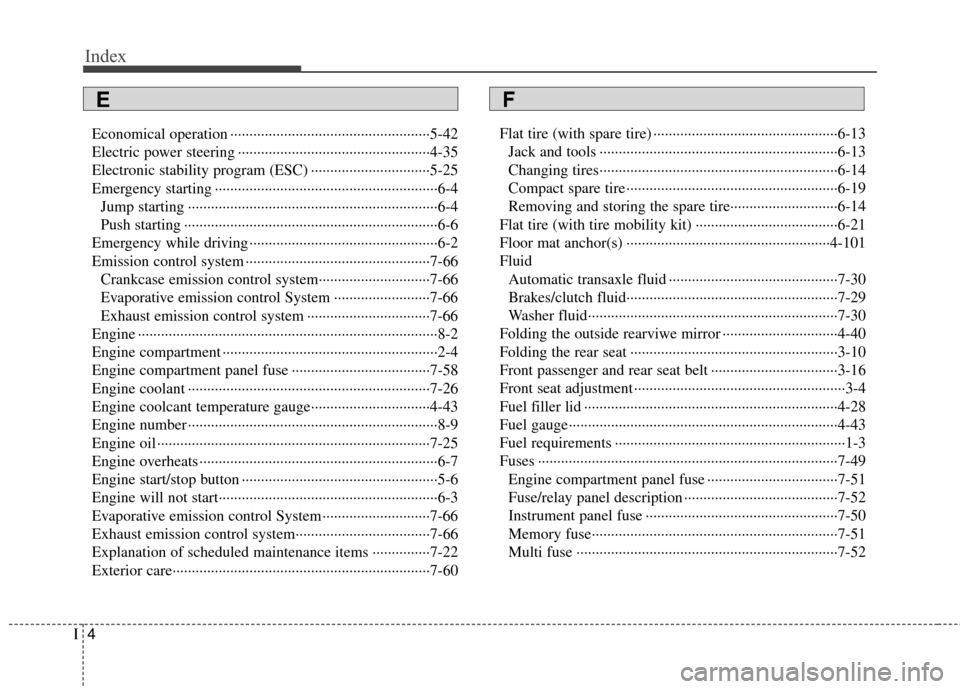
Index
4I
Economical operation ··················\
··················\
················5-42
Electric power steering ··················\
··················\
··············4-35
Electronic stability program (ESC) ··················\
·············5-25
Emergency starting ··················\
··················\
··················\
····6-4Jump starting ··················\
··················\
··················\
···········6-4
Push starting ··················\
··················\
··················\
············6-6
Emergency while driving ··················\
··················\
·············6-2
Emission control system ··················\
··················\
············7-66 Crankcase emission control system··················\
···········7-66
Evaporative emission control System ··················\
·······7-66
Exhaust emission control system ··················\
··············7-66
Engine ··················\
··················\
··················\
··················\
······8-2
Engine compartment ··················\
··················\
··················\
··2-4
Engine compartment panel fuse ··················\
··················\
7-58
Engine coolant ··················\
··················\
··················\
·········7-26
Engine coolcant temperature gauge··················\
·············4-43
Engine number ··················\
··················\
··················\
···········8-9
Engine oil ··················\
··················\
··················\
·················7-25\
Engine overheats ··················\
··················\
··················\
········6-7
Engine start/stop button ··················\
··················\
···············5-6
Engine will not start··················\
··················\
··················\
···6-3
Evaporative emission control System ··················\
··········7-66
Exhaust emission control system··················\
·················7-66\
Explanation of scheduled maintenance items ···············7-22
Exterior care··················\
··················\
··················\
·············7-60 Flat tire (with spare tire) ··················\
··················\
············6-13
Jack and tools ··················\
··················\
··················\
········6-13
Changing tires··················\
··················\
··················\
········6-14
Compact spare tire ··················\
··················\
··················\
·6-19
Removing and storing the spare tire···········\
·················6-14\
Flat tire (with tire mobility kit) ··················\
··················\
·6-21
Floor mat anchor(s) ··················\
··················\
·················4-10\
1
Fluid Automatic transaxle fluid ··················\
··················\
········7-30
Brakes/clutch fluid··················\
··················\
··················\
·7-29
Washer fluid··················\
··················\
··················\
···········7-30
Folding the outside rearviwe mirror ··················\
············4-40
Folding the rear seat ··················\
··················\
··················\
3-10
Front passenger and rear seat belt ··················\
···············3-16
Front seat adjustment ··················\
··················\
··················\
·3-4
Fuel filler lid ··················\
··················\
··················\
············4-28
Fuel gauge··················\
··················\
··················\
················4-43
Fuel requirements ··················\
··················\
··················\
······1-3
Fuses ··················\
··················\
··················\
··················\
······7-49 Engine compartment panel fuse ··················\
················7-51
Fuse/relay panel description ··················\
··················\
····7-52
Instrument panel fuse ··················\
··················\
··············7-50
Memory fuse··················\
··················\
··················\
··········7-51
Multi fuse ··················\
··················\
··················\
··············7-52
FE
Page 392 of 397
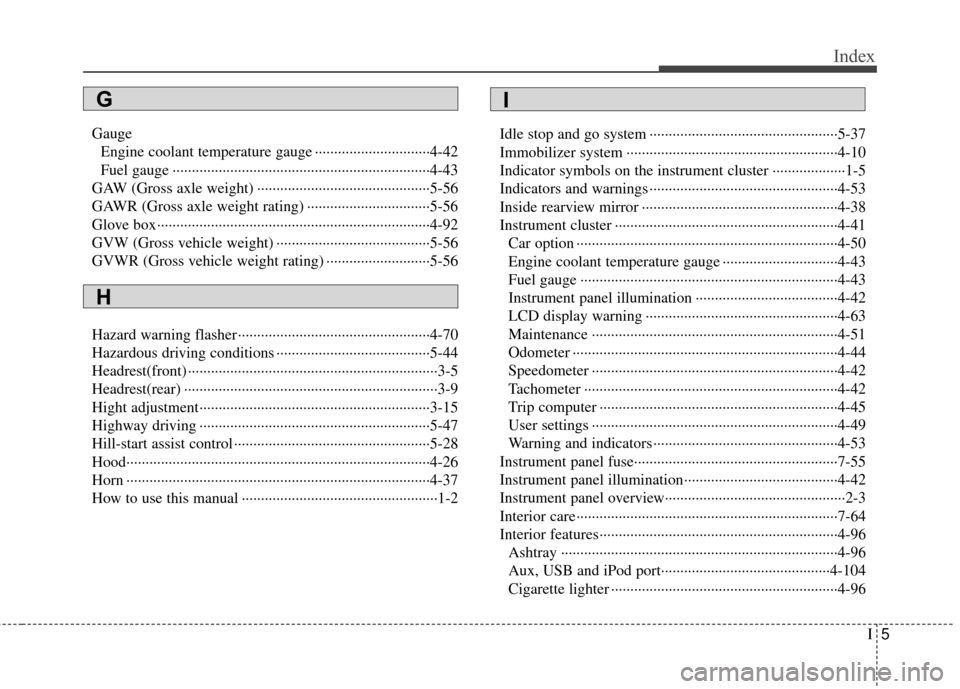
I5
Index
GaugeEngine coolant temperature gauge ··················\
············4-42
Fuel gauge ··················\
··················\
··················\
·············4-43
GAW (Gross axle weight) ··················\
··················\
·········5-56
GAWR (Gross axle weight rating) ··················\
··············5-56
Glove box··················\
··················\
··················\
·················4-92\
GVW (Gross vehicle weight) ··················\
··················\
····5-56
GVWR (Gross vehicle weight rating) ··················\
·········5-56
Hazard warning flasher ··················\
··················\
··············4-70
Hazardous driving conditions ··················\
··················\
····5-44
Headrest(front) ··················\
··················\
··················\
···········3-5
Headrest(rear) ··················\
··················\
··················\
············3-9
Hight adjustment··················\
··················\
··················\
······3-15
Highway driving ··················\
··················\
··················\
······5-47
Hill-start assist control ··················\
··················\
···············5-28
Hood··················\
··················\
··················\
··················\
·······4-26
Horn ··················\
··················\
··················\
··················\
·······4-37
How to use this manual ··················\
··················\
···············1-2 Idle stop and go system ··················\
··················\
·············5-37
Immobilizer system ··················\
··················\
··················\
·4-10
Indicator symbols on the instrument cluster ··················\
·1-5
Indicators and warnings ··················\
··················\
·············4-53
Inside rearview mirror ··················\
··················\
···············4-38
Instrument cluster ··················\
··················\
··················\
····4-41
Car option ··················\
··················\
··················\
··············4-50
Engine coolant temperature gauge ··················\
············4-43
Fuel gauge ··················\
··················\
··················\
·············4-43
Instrument panel illumination ··················\
··················\
·4-42
LCD display warning ··················\
··················\
··············4-63
Maintenance ··················\
··················\
··················\
··········4-51
Odometer ··················\
··················\
··················\
···············4-44
Speedometer ··················\
··················\
··················\
··········4-42
Tachometer ··················\
··················\
··················\
············4-42
Trip computer ··················\
··················\
··················\
········4-45
User settings ··················\
··················\
··················\
··········4-49
Warning and indicators ··················\
··················\
············4-53
Instrument panel fuse··················\
··················\
·················7-55\
Instrument panel illumination··················\
··················\
····4-42
Instrument panel overview··················\
··················\
···········2-3
Interior care··················\
··················\
··················\
··············7-64
Interior features··················\
··················\
··················\
········4-96 Ashtray ··················\
··················\
··················\
··················\
4-96
Aux, USB and iPod port··················\
··················\
········4-104
Cigarette lighter ··················\
··················\
··················\
·····4-96
G
H
I