SIDE MIRROR KIA RIO 2018 Owners Manual
[x] Cancel search | Manufacturer: KIA, Model Year: 2018, Model line: RIO, Model: KIA RIO 2018Pages: 490, PDF Size: 11.28 MB
Page 12 of 490
Your vehicle at a glance
22
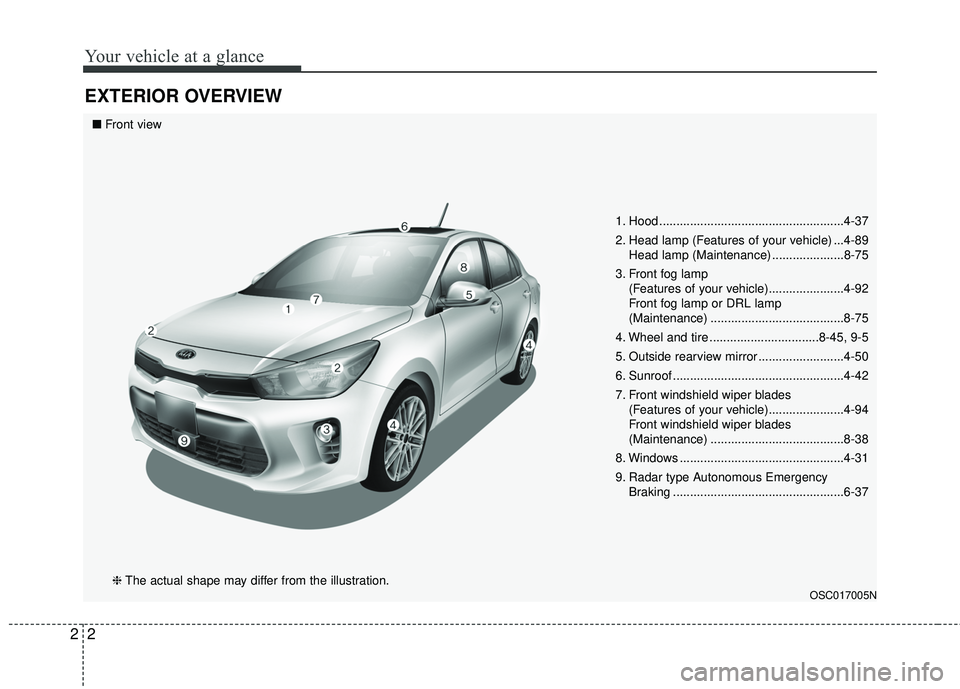
EXTERIOR OVERVIEW
1. Hood ......................................................4-37
2. Head lamp (Features of your vehicle) ...4-89Head lamp (Maintenance) .....................8-75
3. Front fog lamp (Features of your vehicle)......................4-92
Front fog lamp or DRL lamp
(Maintenance) .......................................8-75
4. Wheel and tire ................................8-45, 9-5
5. Outside rearview mirror .........................4-50
6. Sunroof ..................................................4-42
7. Front windshield wiper blades (Features of your vehicle)......................4-94
Front windshield wiper blades
(Maintenance) .......................................8-38
8. Windows ................................................4-31
9. Radar type Autonomous Emergency Braking ..................................................6-37
OSC017005N
■Front view
❈ The actual shape may differ from the illustration.
Page 15 of 490
25
Your vehicle at a glance
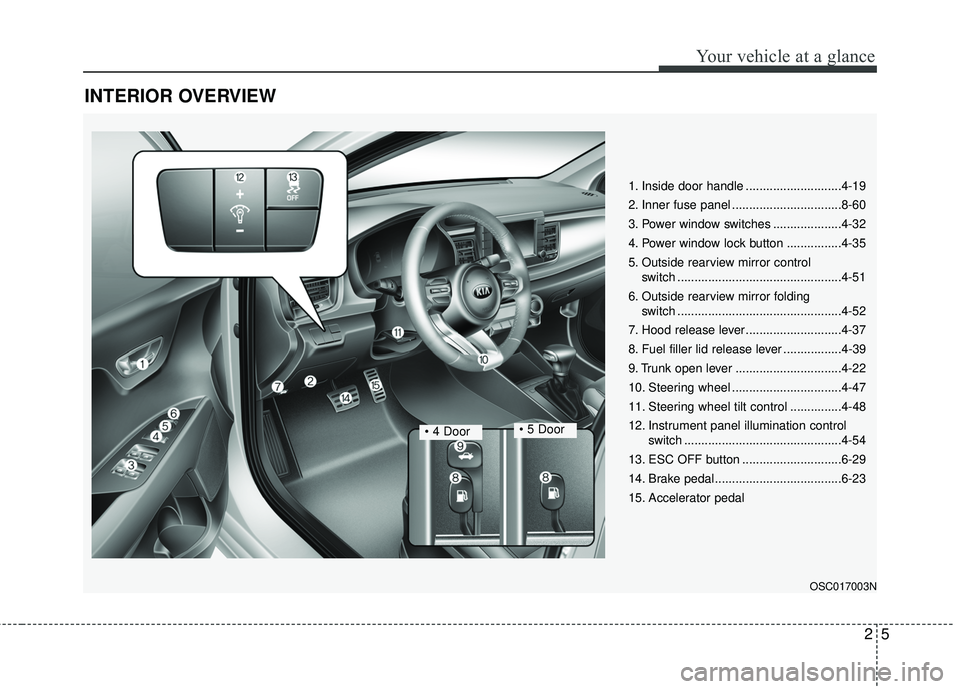
INTERIOR OVERVIEW
1. Inside door handle ............................4-19
2. Inner fuse panel ................................8-60
3. Power window switches ....................4-32
4. Power window lock button ................4-35
5. Outside rearview mirror control switch ................................................4-51
6. Outside rearview mirror folding switch ................................................4-52
7. Hood release lever ............................4-37
8. Fuel filler lid release lever .................4-39
9. Trunk open lever ...............................4-22
10. Steering wheel ................................4-47
11. Steering wheel tilt control ...............4-48
12. Instrument panel illumination control switch ..............................................4-54
13. ESC OFF button .............................6-29
14. Brake pedal .....................................6-23
15. Accelerator pedal
OSC017003N
• 4 Door
Page 122 of 490
Features of your vehicle
50
4
Inside rearview mirror
Adjust the rearview mirror so that the
center view through the rear window
is seen. Make this adjustment before
you start driving.
Do not place objects in the rear seat
which would interfere with your vision
through the rear window.
Day/night rearview mirror
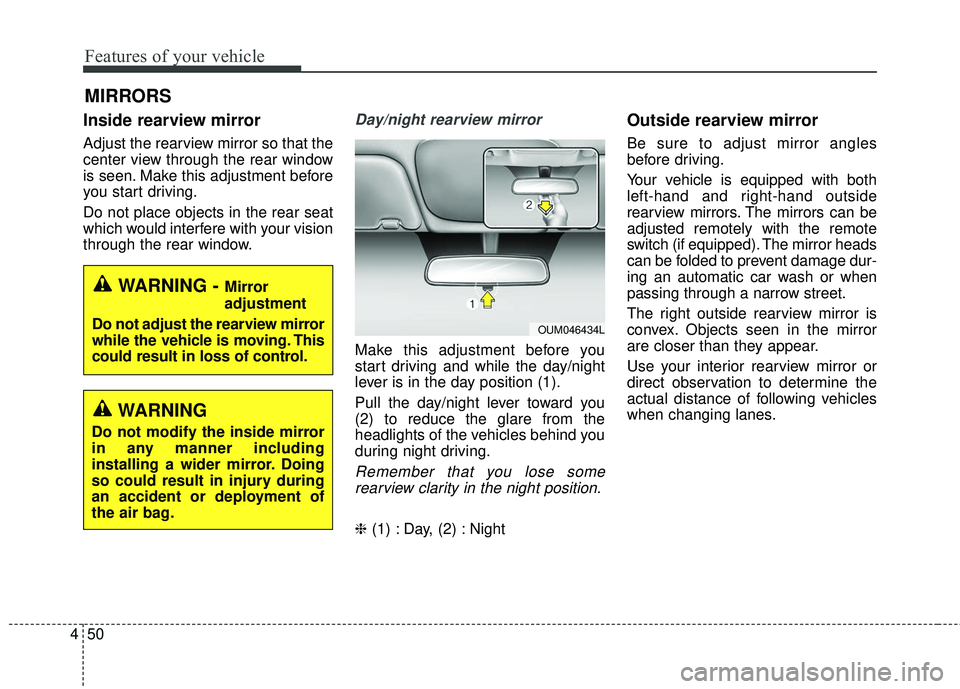
Make this adjustment before you
start driving and while the day/night
lever is in the day position (1).
Pull the day/night lever toward you
(2) to reduce the glare from the
headlights of the vehicles behind you
during night driving.
Remember that you lose some
rearview clarity in the night position.
❈ (1) : Day, (2) : Night
Outside rearview mirror
Be sure to adjust mirror angles
before driving.
Your vehicle is equipped with both
left-hand and right-hand outside
rearview mirrors. The mirrors can be
adjusted remotely with the remote
switch (if equipped). The mirror heads
can be folded to prevent damage dur-
ing an automatic car wash or when
passing through a narrow street.
The right outside rearview mirror is
convex. Objects seen in the mirror
are closer than they appear.
Use your interior rearview mirror or
direct observation to determine the
actual distance of following vehicles
when changing lanes.
MIRRORS
WARNING - Mirror
adjustment
Do not adjust the rearview mirror
while the vehicle is moving. This
could result in loss of control.
OUM046434L
WARNING
Do not modify the inside mirror
in any manner including
installing a wider mirror. Doing
so could result in injury during
an accident or deployment of
the air bag.
Page 123 of 490
451
Features of your vehicle
Remote control
Electric type
The electric remote control mirror
switch allows you to adjust the posi-
tion of the left and right outside
rearview mirrors. To adjust the posi-
tion of either mirror the ignition switch
should be in the ACC or ON position.
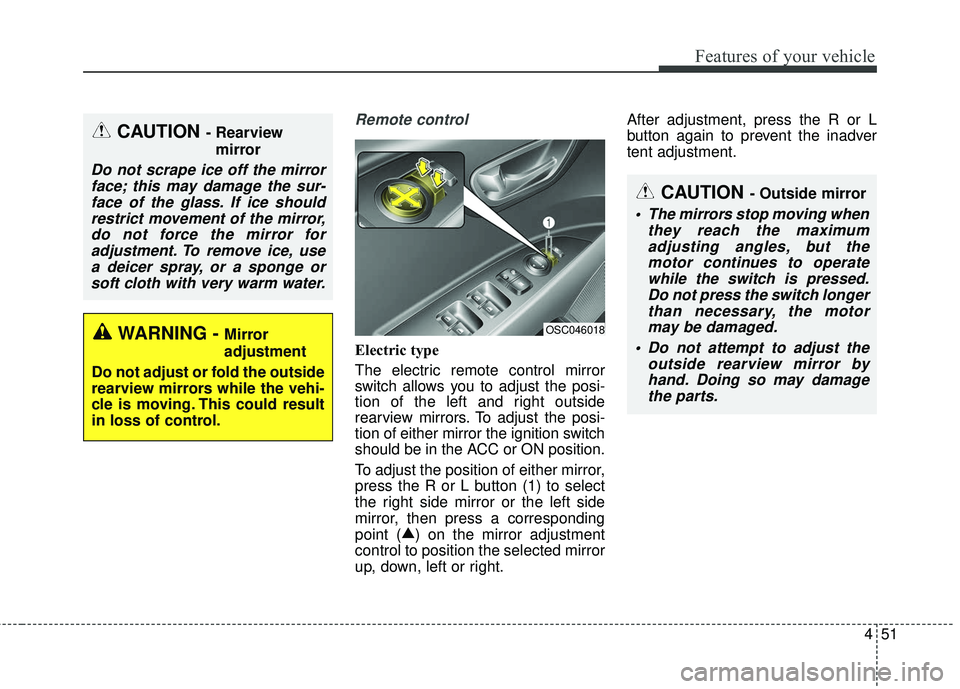
To adjust the position of either mirror,
press the R or L button (1) to select
the right side mirror or the left side
mirror, then press a corresponding
point (▲
) on the mirror adjustment
control to position the selected mirror
up, down, left or right. After adjustment, press the R or L
button again to prevent the inadver
tent adjustment.
CAUTION - Rearview
mirror
Do not scrape ice off the mirrorface; this may damage the sur-face of the glass. If ice shouldrestrict movement of the mirror,do not force the mirror foradjustment. To remove ice, usea deicer spray, or a sponge orsoft cloth with very warm water.
WARNING - Mirror
adjustment
Do not adjust or fold the outside
rearview mirrors while the vehi-
cle is moving. This could result
in loss of control.OSC046018
CAUTION - Outside mirror
The mirrors stop moving when they reach the maximumadjusting angles, but themotor continues to operatewhile the switch is pressed.Do not press the switch longerthan necessary, the motormay be damaged.
Do not attempt to adjust the outside rearview mirror byhand. Doing so may damagethe parts.
Page 124 of 490
Features of your vehicle
52
4
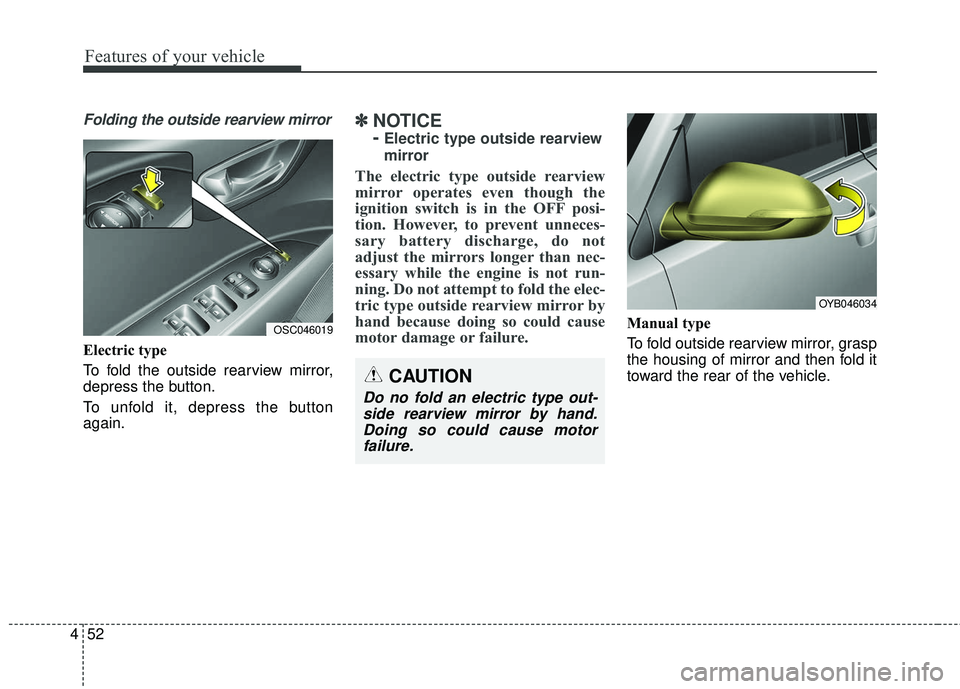
Folding the outside rearview mirror
Electric type
To fold the outside rearview mirror,
depress the button.
To unfold it, depress the button
again.
✽ ✽
NOTICE
-
Electric type outside rearview
mirror
The electric type outside rearview
mirror operates even though the
ignition switch is in the OFF posi-
tion. However, to prevent unneces-
sary battery discharge, do not
adjust the mirrors longer than nec-
essary while the engine is not run-
ning. Do not attempt to fold the elec-
tric type outside rearview mirror by
hand because doing so could cause
motor damage or failure.
Manual type
To fold outside rearview mirror, grasp
the housing of mirror and then fold it
toward the rear of the vehicle.OSC046019
CAUTION
Do no fold an electric type out-
side rearview mirror by hand.Doing so could cause motorfailure.
OYB046034
Page 175 of 490
4103
Features of your vehicle
If you want to defrost and defog the
front windshield, refer to “Windshield
Defrosting and Defogging” in this
section.
Rear window defroster
The defroster heats the window to
remove frost, fog and thin ice from
the interior and exterior of the rear
window, while the engine is running.
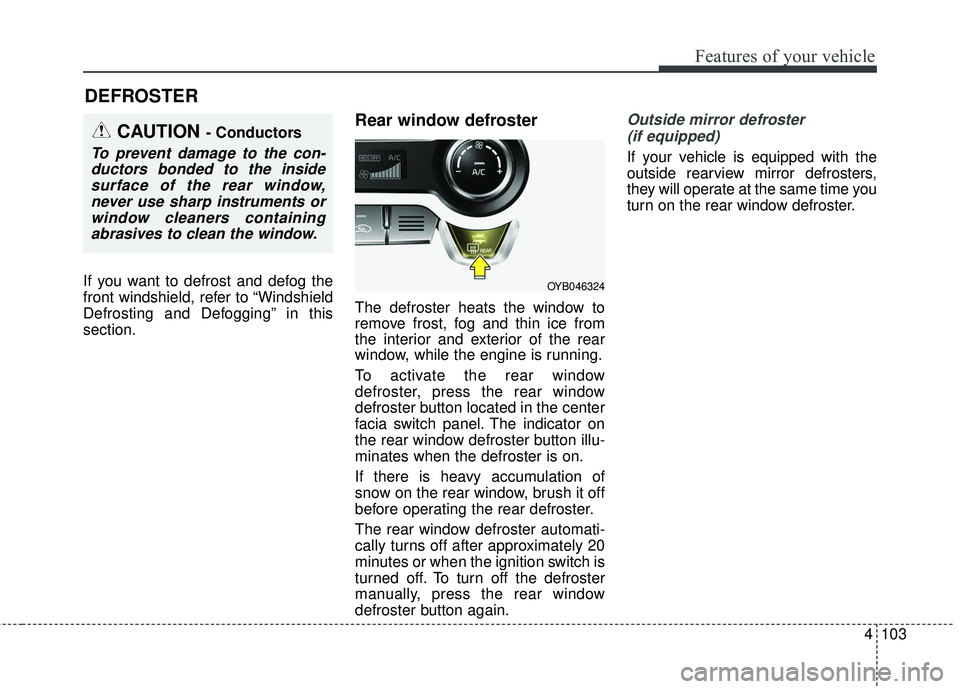
To activate the rear window
defroster, press the rear window
defroster button located in the center
facia switch panel. The indicator on
the rear window defroster button illu-
minates when the defroster is on.
If there is heavy accumulation of
snow on the rear window, brush it off
before operating the rear defroster.
The rear window defroster automati-
cally turns off after approximately 20
minutes or when the ignition switch is
turned off. To turn off the defroster
manually, press the rear window
defroster button again.
Outside mirror defroster (if equipped)
If your vehicle is equipped with the
outside rearview mirror defrosters,
they will operate at the same time you
turn on the rear window defroster.
DEFROSTER
OYB046324
CAUTION - Conductors
To prevent damage to the con-ductors bonded to the insidesurface of the rear window,never use sharp instruments orwindow cleaners containingabrasives to clean the window.
Page 195 of 490
4123
Features of your vehicle
WINDSHIELD DEFROSTING AND DEFOGGING
For maximum defrosting, set thetemperature control to the extreme
right/hot position and the fan speed
control to the highest speed.
If warm air to the floor is desired while defrosting or defogging, set the
mode to the floor-defrost position.
Before driving, clear all snow and ice from the windshield, rear win-
dow, outside rear view mirrors, and
all side windows.
Clear all snow and ice from the hood and air inlet in the cowl grill to
improve heater and defroster effi-
ciency and to reduce the probabili-
ty of fogging up the inside of the
windshield.Manual climate control system
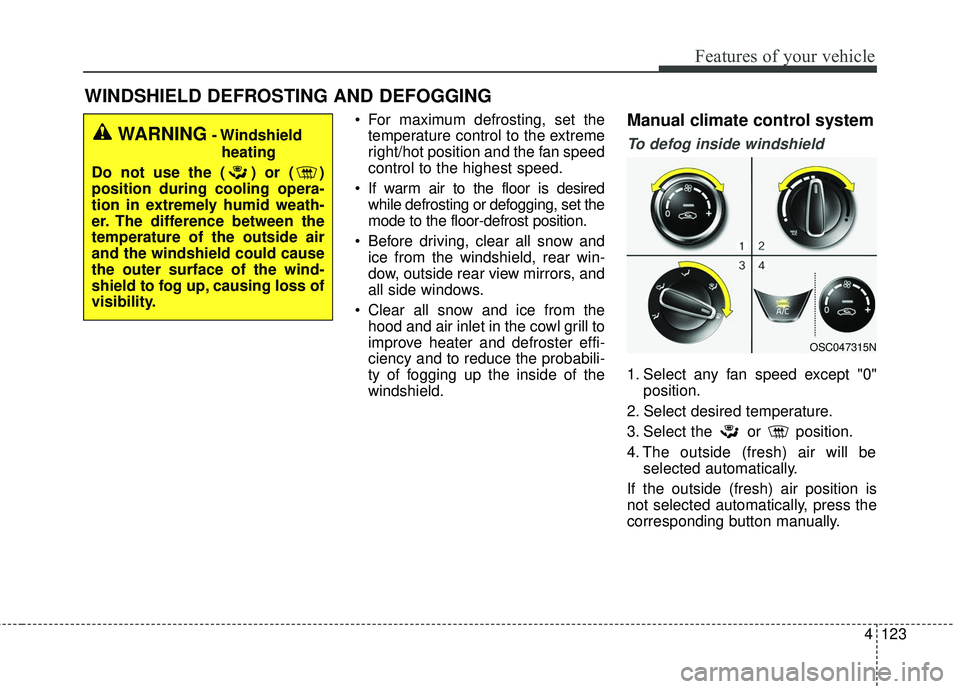
To defog inside windshield
1. Select any fan speed except "0" position.
2. Select desired temperature.
3. Select the or position.
4. The outside (fresh) air will be selected automatically.
If the outside (fresh) air position is
not selected automatically, press the
corresponding button manually.
WARNING- Windshield heating
Do not use the ( ) or ( )
position during cooling opera-
tion in extremely humid weath-
er. The difference between the
temperature of the outside air
and the windshield could cause
the outer surface of the wind-
shield to fog up, causing loss of
visibility.
OSC047315N
Page 201 of 490
4129
Features of your vehicle
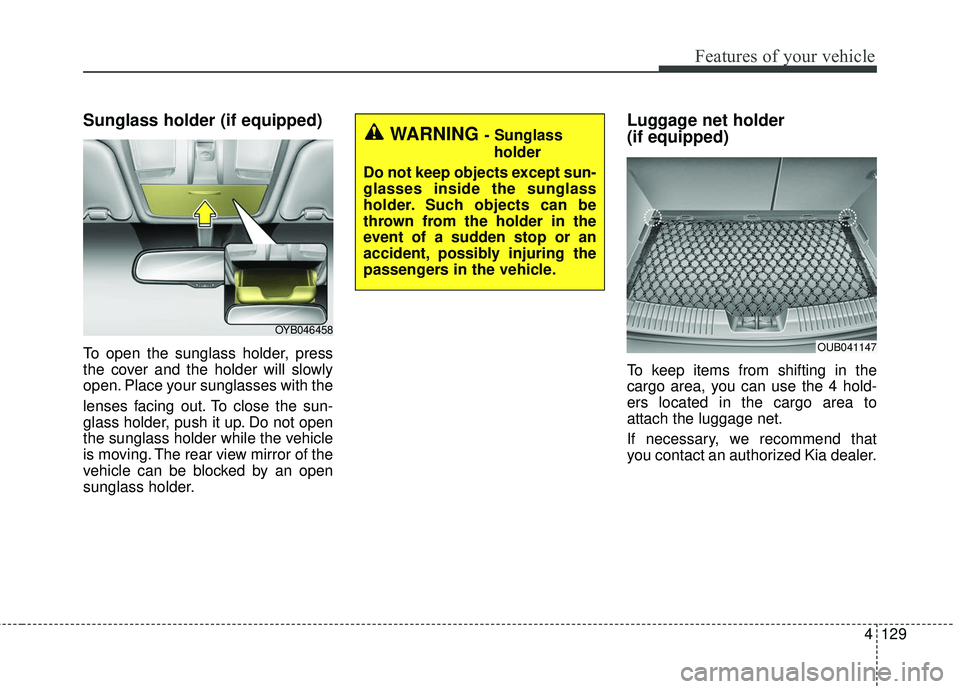
Sunglass holder (if equipped)
To open the sunglass holder, press
the cover and the holder will slowly
open. Place your sunglasses with the
lenses facing out. To close the sun-
glass holder, push it up. Do not open
the sunglass holder while the vehicle
is moving. The rear view mirror of the
vehicle can be blocked by an open
sunglass holder.
Luggage net holder
(if equipped)
To keep items from shifting in the
cargo area, you can use the 4 hold-
ers located in the cargo area to
attach the luggage net.
If necessary, we recommend that
you contact an authorized Kia dealer.
OYB046458
WARNING - Sunglassholder
Do not keep objects except sun-
glasses inside the sunglass
holder. Such objects can be
thrown from the holder in the
event of a sudden stop or an
accident, possibly injuring the
passengers in the vehicle.
OUB041147
Page 203 of 490
4131
Features of your vehicle
Cup holder
✽ ✽NOTICE
When cleaning spilled liquids, do
not dry the cup holder at high tem-
perature. This may damage the cup
holder.
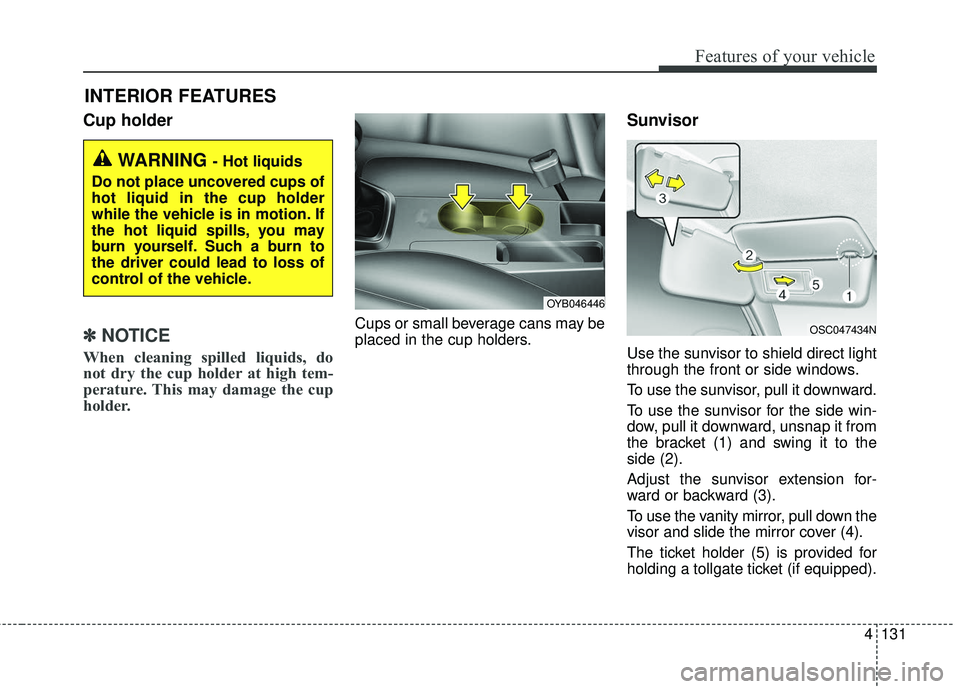
Cups or small beverage cans may be
placed in the cup holders.
Sunvisor
Use the sunvisor to shield direct light
through the front or side windows.
To use the sunvisor, pull it downward.
To use the sunvisor for the side win-
dow, pull it downward, unsnap it from
the bracket (1) and swing it to the
side (2).
Adjust the sunvisor extension for-
ward or backward (3).
To use the vanity mirror, pull down the
visor and slide the mirror cover (4).
The ticket holder (5) is provided for
holding a tollgate ticket (if equipped).
INTERIOR FEATURES
WARNING - Hot liquids
Do not place uncovered cups of
hot liquid in the cup holder
while the vehicle is in motion. If
the hot liquid spills, you may
burn yourself. Such a burn to
the driver could lead to loss of
control of the vehicle.
OYB046446
OSC047434N
Page 252 of 490
Driving your vehicle
46
Before entering vehicle
• Be sure that all windows, outsidemirror(s), and outside lights are
clean.
Check the condition of the tires.
Check under the vehicle for any sign of leaks.
Be sure there are no obstacles behind you if you intend to back up.
Necessary inspections
Fluid levels, such as engine oil,
engine coolant, brake fluid, and
washer fluid should be checked on a
regular basis, with the exact interval
depending on the fluid. Further
details are provided in Chapter 8,
“Maintenance”.
Before starting
Close and lock all doors.
Position the seat so that all con-trols are easily reached.
Buckle your seat belt.
Adjust the inside and outside rearview mirrors.
Be sure that all lights work.
Check all gauges.
Check the operation of warning lights when the ignition switch is
turned to the ON position.
Release the parking brake and make sure the brake warning light
goes off.
For safe operation, be sure you are
familiar with your vehicle and its
equipment.
BEFORE DRIVING
WARNING- Distracted driving
Focus on the road while driving.
The driver's primary responsi-
bility is in the safe and legal
operation of the vehicle. Use of
any hand held devices, other
equipment or vehicle systems
that distract the driver should
not be used during vehicle
operation.