buttons KIA RIO HATCHBACK 2008 Owners Manual
[x] Cancel search | Manufacturer: KIA, Model Year: 2008, Model line: RIO HATCHBACK, Model: KIA RIO HATCHBACK 2008Pages: 219, PDF Size: 5.17 MB
Page 84 of 219
375
Knowing your vehicle
✽
NOTICE
• Use the power outlet when the engine
is running, and remove a plug from
the power outlet after using the elec-
tric appliance. Using the power outlet
excessively or while the engine is not
running or leaving appliances plugged
into the power outlet when not in use
will cause battery discharge
• Only use the electric appliances which
are less than 12V and 10A in electric
capacity.
• Adjust the air-conditioner or heater to
the lowest operation level when you
have to use the power socket while
using air-conditioner or heater.
• Close the cover when not in use.
• Some electronic devices can cause
electronic interference when plugged
into a vehicle’s power outlet. These
devices may cause excessive audio
static and malfunctions in other elec-
tronic systems or devices used in your
vehicle.
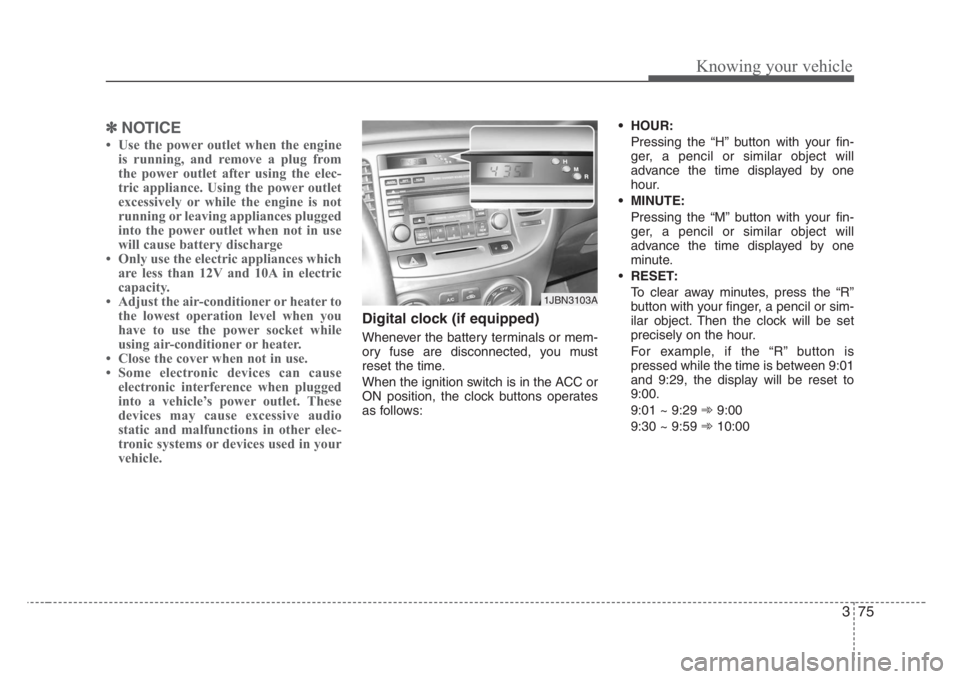
Digital clock (if equipped)
Whenever the battery terminals or mem-
ory fuse are disconnected, you must
reset the time.
When the ignition switch is in the ACC or
ON position, the clock buttons operates
as follows:• HOUR:
Pressing the “H” button with your fin-
ger, a pencil or similar object will
advance the time displayed by one
hour.
• MINUTE:
Pressing the “M” button with your fin-
ger, a pencil or similar object will
advance the time displayed by one
minute.
•RESET:
To clear away minutes, press the “R”
button with your finger, a pencil or sim-
ilar object. Then the clock will be set
precisely on the hour.
For example, if the “R” button is
pressed while the time is between 9:01
and 9:29, the display will be reset to
9:00.
9:01 ~ 9:29 ➾9:00
9:30 ~ 9:59 ➾10:00
1JBN3103A
Page 85 of 219
Knowing your vehicle
76 3
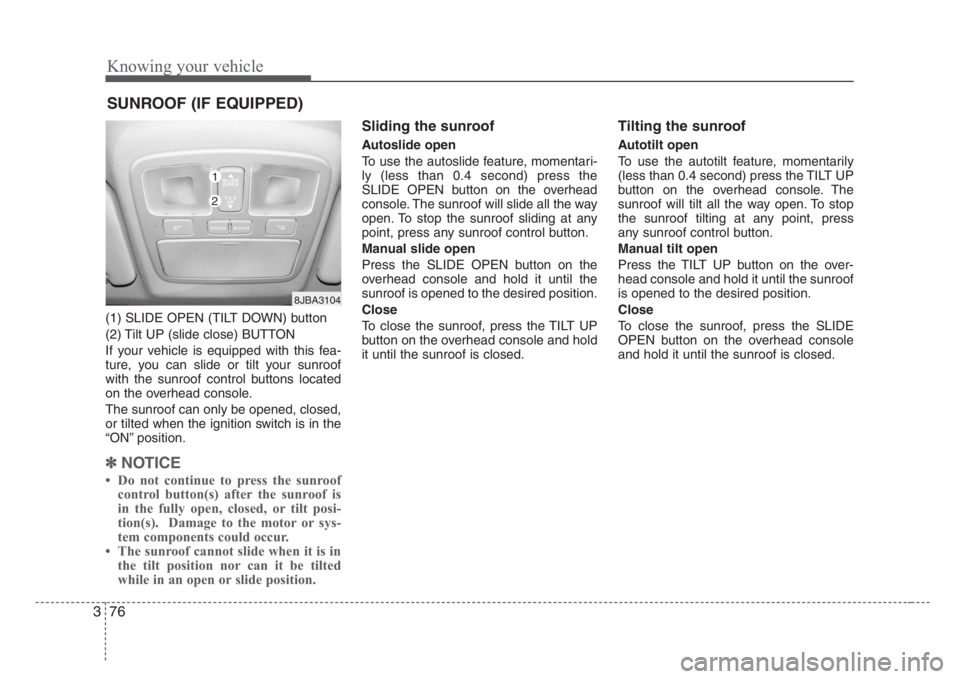
(1) SLIDE OPEN (TILT DOWN) button
(2) Tilt UP (slide close) BUTTON
If your vehicle is equipped with this fea-
ture, you can slide or tilt your sunroof
with the sunroof control buttons located
on the overhead console.
The sunroof can only be opened, closed,
or tilted when the ignition switch is in the
“ON” position.
✽
NOTICE
• Do not continue to press the sunroof
control button(s) after the sunroof is
in the fully open, closed, or tilt posi-
tion(s). Damage to the motor or sys-
tem components could occur.
• The sunroof cannot slide when it is in
the tilt position nor can it be tilted
while in an open or slide position.
Sliding the sunroof
Autoslide open
To use the autoslide feature, momentari-
ly (less than 0.4 second) press the
SLIDE OPEN button on the overhead
console. The sunroof will slide all the way
open. To stop the sunroof sliding at any
point, press any sunroof control button.
Manual slide open
Press the SLIDE OPEN button on the
overhead console and hold it until the
sunroof is opened to the desired position.
Close
To close the sunroof, press the TILT UP
button on the overhead console and hold
it until the sunroof is closed.
Tilting the sunroof
Autotilt open
To use the autotilt feature, momentarily
(less than 0.4 second) press the TILT UP
button on the overhead console. The
sunroof will tilt all the way open. To stop
the sunroof tilting at any point, press
any sunroof control button.
Manual tilt open
Press the TILT UP button on the over-
head console and hold it until the sunroof
is opened to the desired position.
Close
To close the sunroof, press the SLIDE
OPEN button on the overhead console
and hold it until the sunroof is closed.
SUNROOF (IF EQUIPPED)
8JBA3104
1
2
Page 92 of 219
383
Knowing your vehicle
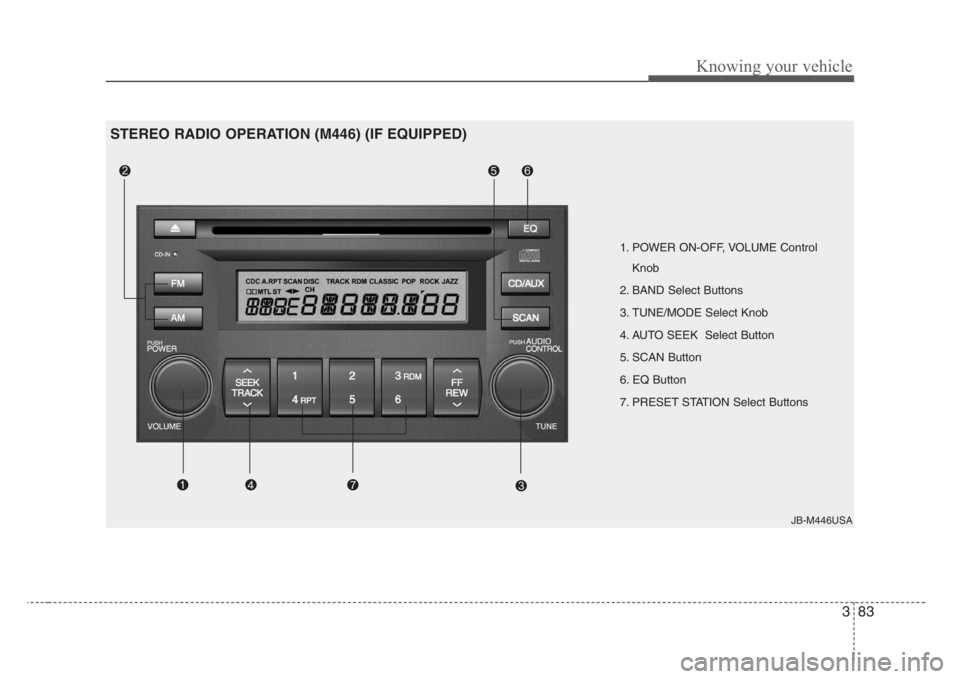
JB-M446USA
1. POWER ON-OFF, VOLUME Control
Knob
2. BAND Select Buttons
3. TUNE/MODE Select Knob
4. AUTO SEEK Select Button
5. SCAN Button
6. EQ Button
7. PRESET STATION Select Buttons
STEREO RADIO OPERATION (M446) (IF EQUIPPED)
Page 94 of 219
385
Knowing your vehicle
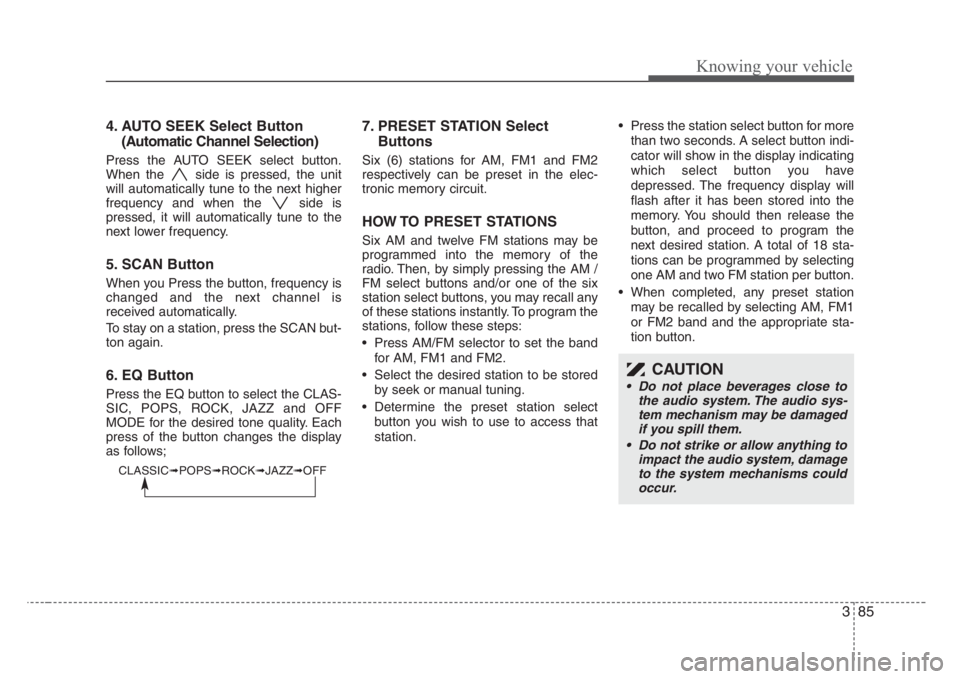
4. AUTO SEEK Select Button
(Automatic Channel Selection)
Press the AUTO SEEK select button.
When the side is pressed, the unit
will automatically tune to the next higher
frequency and when the side is
pressed, it will automatically tune to the
next lower frequency.
5. SCAN Button
When you Press the button, frequency is
changed and the next channel is
received automatically.
To stay on a station, press the SCAN but-
ton again.
6. EQ Button
Press the EQ button to select the CLAS-
SIC, POPS, ROCK, JAZZ and OFF
MODE for the desired tone quality. Each
press of the button changes the display
as follows;
7. PRESET STATION Select
Buttons
Six (6) stations for AM, FM1 and FM2
respectively can be preset in the elec-
tronic memory circuit.
HOW TO PRESET STATIONS
Six AM and twelve FM stations may be
programmed into the memory of the
radio. Then, by simply pressing the AM /
FM select buttons and/or one of the six
station select buttons, you may recall any
of these stations instantly. To program the
stations, follow these steps:
• Press AM/FM selector to set the band
for AM, FM1 and FM2.
• Select the desired station to be stored
by seek or manual tuning.
• Determine the preset station select
button you wish to use to access that
station.• Press the station select button for more
than two seconds. A select button indi-
cator will show in the display indicating
which select button you have
depressed. The frequency display will
flash after it has been stored into the
memory. You should then release the
button, and proceed to program the
next desired station. A total of 18 sta-
tions can be programmed by selecting
one AM and two FM station per button.
• When completed, any preset station
may be recalled by selecting AM, FM1
or FM2 band and the appropriate sta-
tion button.
CAUTION
• Do not place beverages close to
the audio system. The audio sys-
tem mechanism may be damaged
if you spill them.
• Do not strike or allow anything to
impact the audio system, damage
to the system mechanisms could
occur.
CLASSIC➟POPS➟ROCK➟JAZZ➟OFF
Page 99 of 219
Knowing your vehicle
90 3
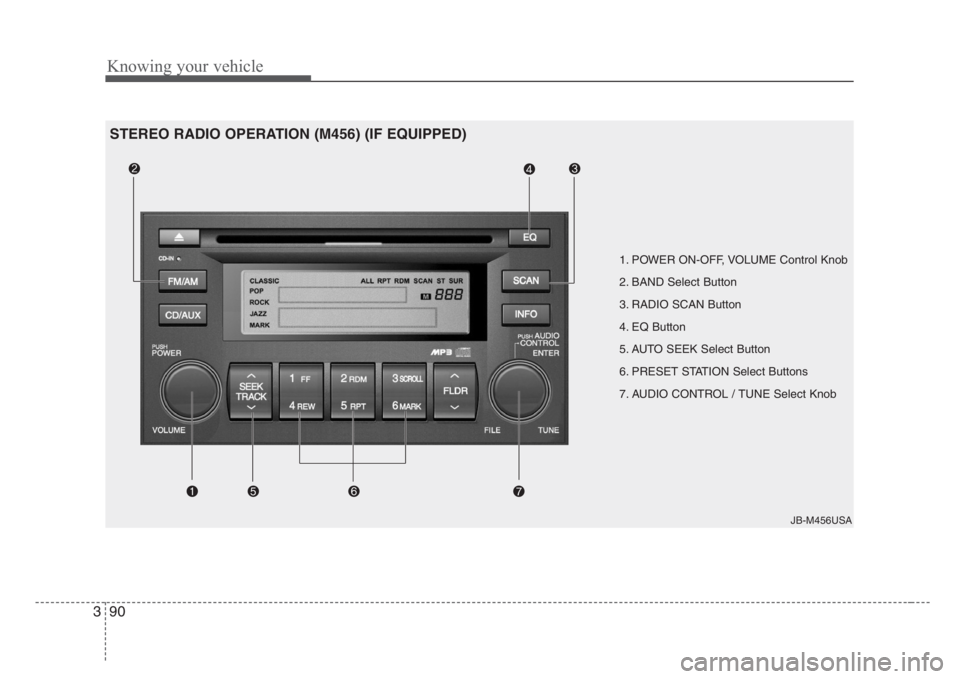
1. POWER ON-OFF, VOLUME Control Knob
2. BAND Select Button
3. RADIO SCAN Button
4. EQ Button
5. AUTO SEEK Select Button
6. PRESET STATION Select Buttons
7. AUDIO CONTROL / TUNE Select Knob
JB-M456USA
STEREO RADIO OPERATION (M456) (IF EQUIPPED)
Page 100 of 219
391
Knowing your vehicle
1. POWER ON-OFF Control Knob
• The radio unit may be operated when
the ignition key is in the "ACC" or "ON"
position. Press the button to switch the
power on. The LCD shows the radio
frequency in the radio mode, CD/ MP3
track in the CD/MP3 mode. To switch
the power off, press the button again.
• Push the FM/AM or CD/MP3 to turn on
that function without pushing Power
ON-OFF control knob.
VOLUME Control
Rotate the knob clockwise to increase
the volume and turn the knob counter-
clockwise to reduce the volume.
2. BAND Select Button
Pressing the FM/AM button changes the
AM, FM1 and FM2 bands. The mode
selected is shown on the display.
3. RADIO SCAN Button
When you press the button, frequency is
changed and the next channel is
received automatically.
To stay on a station, press the CD SCAN
button again.
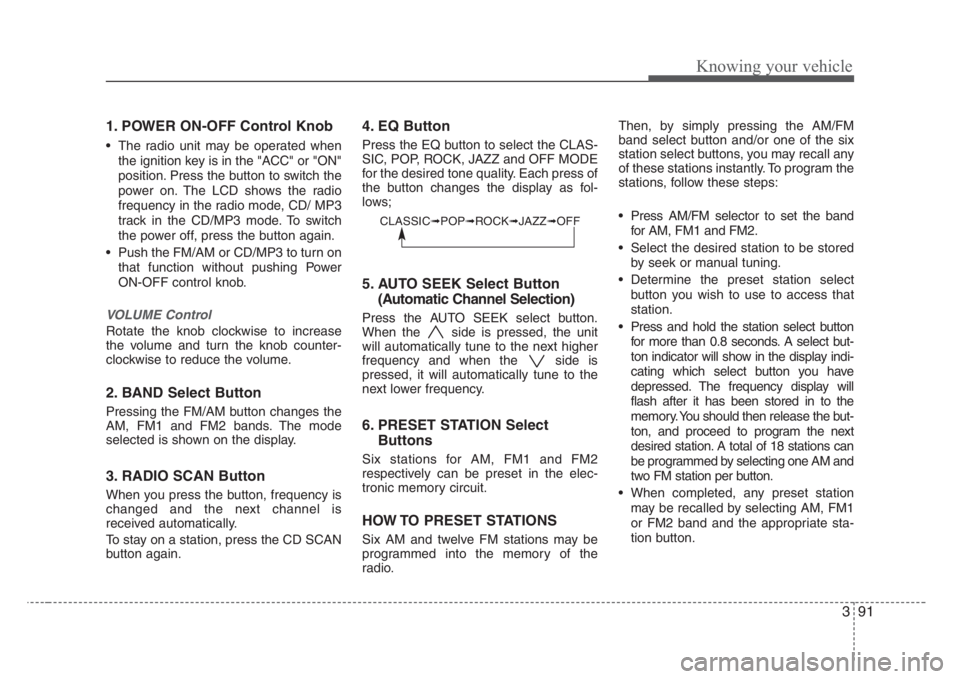
4. EQ Button
Press the EQ button to select the CLAS-
SIC, POP, ROCK, JAZZ and OFF MODE
for the desired tone quality. Each press of
the button changes the display as fol-
lows;
5. AUTO SEEK Select Button
(Automatic Channel Selection)
Press the AUTO SEEK select button.
When the side is pressed, the unit
will automatically tune to the next higher
frequency and when the side is
pressed, it will automatically tune to the
next lower frequency.
6. PRESET STATION Select
Buttons
Six stations for AM, FM1 and FM2
respectively can be preset in the elec-
tronic memory circuit.
HOW TO PRESET STATIONS
Six AM and twelve FM stations may be
programmed into the memory of the
radio.Then, by simply pressing the AM/FM
band select button and/or one of the six
station select buttons, you may recall any
of these stations instantly. To program the
stations, follow these steps:
• Press AM/FM selector to set the band
for AM, FM1 and FM2.
• Select the desired station to be stored
by seek or manual tuning.
• Determine the preset station select
button you wish to use to access that
station.
• Press and hold the station select button
for more than 0.8 seconds. A select but-
ton indicator will show in the display indi-
cating which select button you have
depressed. The frequency display will
flash after it has been stored in to the
memory. You should then release the but-
ton, and proceed to program the next
desired station. A total of 18 stations can
be programmed by selecting one AM and
two FM station per button.
• When completed, any preset station
may be recalled by selecting AM, FM1
or FM2 band and the appropriate sta-
tion button.
CLASSIC➟POP➟ROCK➟JAZZ➟OFF