sunroof KIA RIO HATCHBACK 2012 Owners Manual
[x] Cancel search | Manufacturer: KIA, Model Year: 2012, Model line: RIO HATCHBACK, Model: KIA RIO HATCHBACK 2012Pages: 385, PDF Size: 9.68 MB
Page 12 of 385
I9
Index
Luggage net ··················\
··················\
··················\
···········4-93
Luggage tray ··················\
··················\
··················\
··········4-94
Sunroof··················\
··················\
··················\
··················\
···4-31
Sunvisor ··················\
··················\
··················\
··················\
·4-98
Tachometer··················\
··················\
··················\
···············4-42
Tailgate··················\
··················\
··················\
··················\
···4-20 Emergency safety release ··················\
··················\
········4-21
Telescoping steering ··················\
··················\
··················\
4-36
Tether anchor system ··················\
··················\
·················3-26\
Theft-alarm system ··················\
··················\
··················\
··4-12
Tie-down hook ··················\
··················\
··················\
·········6-30
Tilt steering ··················\
··················\
··················\
··············4-36
Tire and loading information label ··················\
··············5-51
Tire mobility kit ··················\
··················\
··················\
·······6-21
Tire pressure monitoring system (TPMS) ··················\
·····6-8
Tire specification and pressure label ··················\
·············8-8
Tires and wheels ··················\
··················\
··················\
7-37,8-4 Checking tire inflation pressure ··················\
················7-38
Compact spare tire replacement ··················\
················7-41
Recommended cold tire inflation pressures ················7-37
Tire care ··················\
··················\
··················\
·················7-37\
Tire maintenance ··················\
··················\
··················\
···7-42
Tire replacement ··················\
··················\
··················\
····7-41
Tire rotation ··················\
··················\
··················\
···········7-39
Tire sidewall labeling ··················\
··················\
··············7-42 Tire traction ··················\
··················\
··················\
···········7-42
Wheel alignment and tire balance ··················\
·············7-40
Wheel replacement ··················\
··················\
··················\
7-42
Towing ··················\
··················\
··················\
··················\
···6-27
Towing Tie-down hook ··················\
··················\
··················\
·······6-30
Towing capacity ··················\
··················\
··················\
·······5-52
Transaxle Automatic transaxle ··················\
··················\
·················5-15\
Manual transaxle ··················\
··················\
··················\
···5-12
Trip computer ··················\
··················\
··················\
··········4-45
User settings··················\
··················\
··················\
·············4-49
Vehicle break-in process ··················\
··················\
··············1-4
Vehicle capacity weight ··················\
··················\
·············5-51
Vehicle certification label ··················\
··················\
············8-7
Vehicle curb weight ··················\
··················\
··················\
·5-56
Vehicle identification number (VIN) ··················\
·············8-7
Vehicle load limit ··················\
··················\
··················\
·····5-51 Cargo capacity ··················\
··················\
··················\
·······5-52
Certification label ··················\
··················\
··················\
··5-54
Seating capacity ··················\
··················\
··················\
·····5-52
Steps For Determining Correct Load Limit ················5-52
T
U
V
Page 76 of 385
4
Keys / 4-2
Smart key / 4-4
Remote keyless entry / 4-7
Theft-alarm system / 4-12
Door locks / 4-15
Tailgate / 4-20
Windows / 4-22
Hood / 4-26
Fuel filler lid / 4-28
Sunroof / 4-31
Steering wheel / 4-35
Mirrors / 4-38
Instrument cluster / 4-41
Rearview camera / 4-69
Hazard warning flasher / 4-70
Lighting / 4-70
Wipers and washers / 4-74
Interior light / 4-78
Defroster / 4-80
Manual climate control system / 4-81
Windshield defrosting and defogging / 4-90
Storage compartment / 4-92
Interior features / 4-96
Audio system / 4-102
Features of your vehicle
Page 98 of 385
423
Features of your vehicle
Power windows
The ignition switch must be in the ON
position for power windows to operate.
Each door has a power window switch
that controls the door’s window. The driv-
er has a power window lock switch which
can block the operation of passenger
windows.
The power windows can be operated for
approximately 30 seconds after the igni-
tion key is removed or turned to the ACC
or LOCK position. However, if the front
doors are opened, the power windows
cannot be operated even within the 30
second period.
In cold and wet climates, power windows
may not work properly due to freezing
conditions.
✽ ✽NOTICE
While driving with the rear windows
down or with the sunroof (if equipped)
in an open (or partially open) position,
your vehicle may demonstrate a wind
buffeting or pulsation noise. This noise
is a normal occurrence and can be
reduced or eliminated by taking the fol-
lowing actions. If the noise occurs with
one or both of the rear windows down,
partially lower both front windows
approximately one inch. If you experi-
ence the noise with the sunroof open,
slightly reduce the size of the sunroof
opening.
Window opening and closing
(if equipped)
The driver’s door has a master power
window switch that controls all the win-
dows in the vehicle.
To open or close a window, press down
or pull up the front portion of the corre-
sponding switch to the first detent posi-
tion (5).
Auto down window (if equipped) (Driver’s window)
Pressing the power window switch
momentarily to the second detent posi-
tion (6) completely lowers the driver’s
window even when the switch is
released. To stop the window at the
desired position while the window is in
operation, momentarily pull up the switch
to the opposite direction of the window
movement.
Page 106 of 385
431
Features of your vehicle
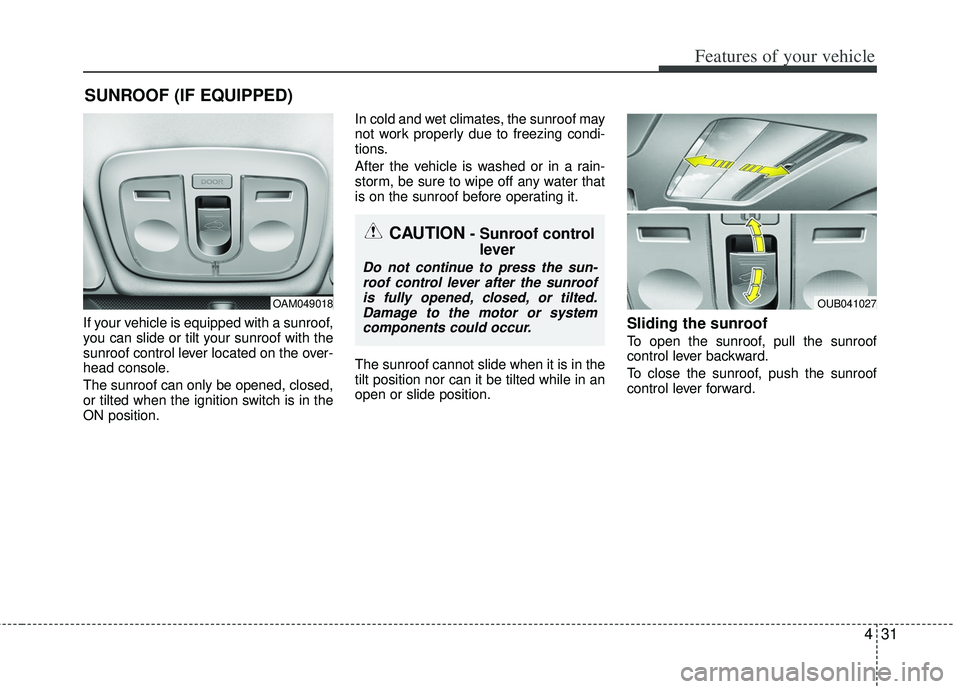
If your vehicle is equipped with a sunroof,
you can slide or tilt your sunroof with the
sunroof control lever located on the over-
head console.
The sunroof can only be opened, closed,
or tilted when the ignition switch is in the
ON position.In cold and wet climates, the sunroof may
not work properly due to freezing condi-
tions.
After the vehicle is washed or in a rain-
storm, be sure to wipe off any water that
is on the sunroof before operating it.
The sunroof cannot slide when it is in the
tilt position nor can it be tilted while in an
open or slide position.Sliding the sunroof
To open the sunroof, pull the sunroof
control lever backward.
To close the sunroof, push the sunroof
control lever forward.
SUNROOF (IF EQUIPPED)
CAUTION- Sunroof control
lever
Do not continue to press the sun-
roof control lever after the sunroofis fully opened, closed, or tilted.Damage to the motor or systemcomponents could occur.
OAM049018OUB041027
Page 107 of 385
Features of your vehicle
32
4
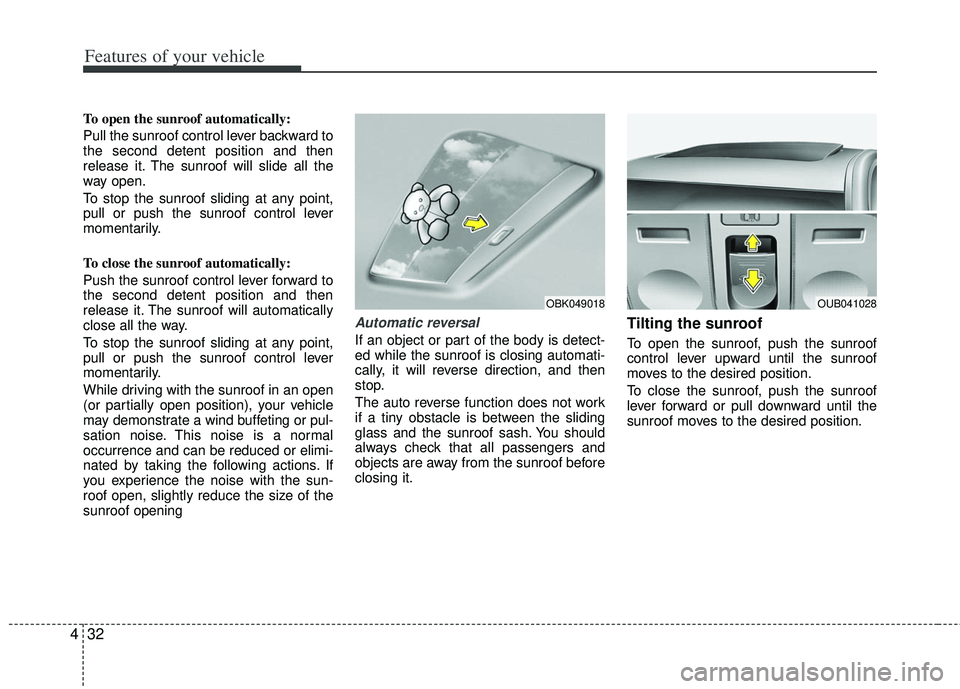
To open the sunroof automatically:
Pull the sunroof control lever backward to
the second detent position and then
release it. The sunroof will slide all the
way open.
To stop the sunroof sliding at any point,
pull or push the sunroof control lever
momentarily.
To close the sunroof automatically:
Push the sunroof control lever forward to
the second detent position and then
release it. The sunroof will automatically
close all the way.
To stop the sunroof sliding at any point,
pull or push the sunroof control lever
momentarily.
While driving with the sunroof in an open
(or partially open position), your vehicle
may demonstrate a wind buffeting or pul-
sation noise. This noise is a normal
occurrence and can be reduced or elimi-
nated by taking the following actions. If
you experience the noise with the sun-
roof open, slightly reduce the size of the
sunroof opening
Automatic reversal
If an object or part of the body is detect-
ed while the sunroof is closing automati-
cally, it will reverse direction, and then
stop.
The auto reverse function does not work
if a tiny obstacle is between the sliding
glass and the sunroof sash. You should
always check that all passengers and
objects are away from the sunroof before
closing it.
Tilting the sunroof
To open the sunroof, push the sunroof
control lever upward until the sunroof
moves to the desired position.
To close the sunroof, push the sunroof
lever forward or pull downward until the
sunroof moves to the desired position.
OBK049018OUB041028
Page 108 of 385
433
Features of your vehicle
Do not extend the face, neck, arms or
body outside the sunroof while driving.
Periodically remove any dirt that may
accumulate on the guide rail.
While using sunroof for a long time, a
dust between sunroof and roof panel can
make a noise. Open the sunroof and
remove regularly the dust using clean
cloth.
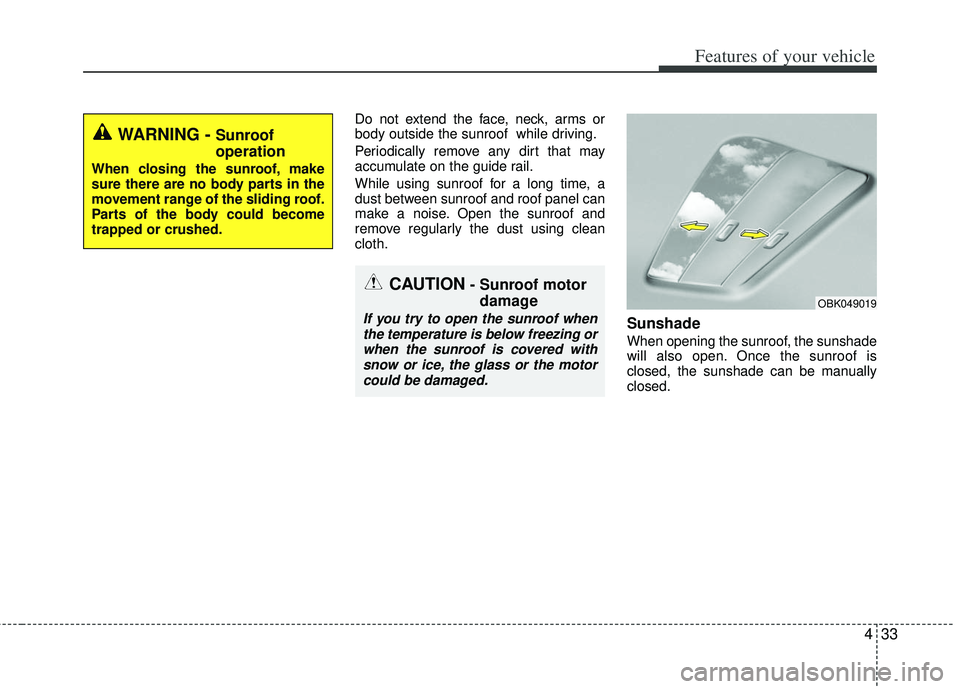
Sunshade
When opening the sunroof, the sunshade
will also open. Once the sunroof is
closed, the sunshade can be manually
closed.
OBK049019
WARNING - Sunroof
operation
When closing the sunroof, make
sure there are no body parts in the
movement range of the sliding roof.
Parts of the body could become
trapped or crushed.
CAUTION- Sunroof motordamage
If you try to open the sunroof when
the temperature is below freezing orwhen the sunroof is covered withsnow or ice, the glass or the motorcould be damaged.
Page 109 of 385
Features of your vehicle
34
4
Resetting the sunroof
Whenever the vehicle battery is discon-
nected or discharged, or related fuse is
blown, you must reset your sunroof sys-
tem as follows:
1. Turn the ignition switch to the ON posi-
tion and close the sunroof completely.
2. Release the control lever.
3. Push and hold the control lever for- ward (for more than 10 seconds) until
the sunroof tilts and slightly moves.
Then, release the lever.
4. Within 3 seconds, push and hold the control lever forward (for more than 5
seconds) until the sunroof is operated
as follows;
TILT DOWN → SLIDE OPEN →
SLIDE CLOSE
Then, release the control lever.
When this is complete, the sunroof sys-
tem is reset. ❈
For more detailed information, contact
an authorized Kia dealer.
✽ ✽
NOTICE
If the sunroof is not reset when the vehi-
cle battery is disconnected or dis-
charged, or related fuse is blown, the
sunroof may operate improperly.
Page 216 of 385
4141
Features of your vehicle
VOICE COMMAND
Starting Voice Command
the key on the steering wheel
remote controller.
then the system will say “Please say a
command. Beep”
❈ If voice command is in [Expert Mode],
then the system will only say a “Beep-”
❈ Setting Voice command [Normal
Mode]/[Expert Mode]:
Press the key Select [System]
through the TUNE knob or
key Select [Prompt Feedback] through
the TUNE knob Set [Normal
Mode]/[Expert Mode]
5
SETUP
CAUTION
For proper voice recognition, say the voice command after the guid- ance message and the “Beep”sound.
(Continued)
After downloading Bluetooth®
wireless technology contacts, thesystem requires some times toconvert the contacts into voiceinformation. During this time,voice recognition may not oper- ate properly.
Upon inputting your contacts, special symbols and numberscannot be recognized by voice.For example, “# John Doe%&” will be recognized as “John Doe”.
CAUTION IN USING
VOICE COMMAND
The voice recognition feature of this product supports recognitionof the commands listed withinthis user’s manual.
While using voice recognition, operating the steering remotecontrol or the device will termi- nate voice recognition and allowyou to manually operate desiredfunctions.
Position of the microphone is above the head of the driver’sseat. For superior performance,maintain good posture when say-ing voice commands.
Voice recognition may not func- tion properly due to outsidenoise. The following conditionscan affect the performance ofVoice Recognition:
- When the windows and sunroof are open
- When the heating/cooling sys- tem is on
- When passing a tunnel - When driving on rugged and uneven roads
(Continued)
Page 345 of 385
Maintenance
36
7
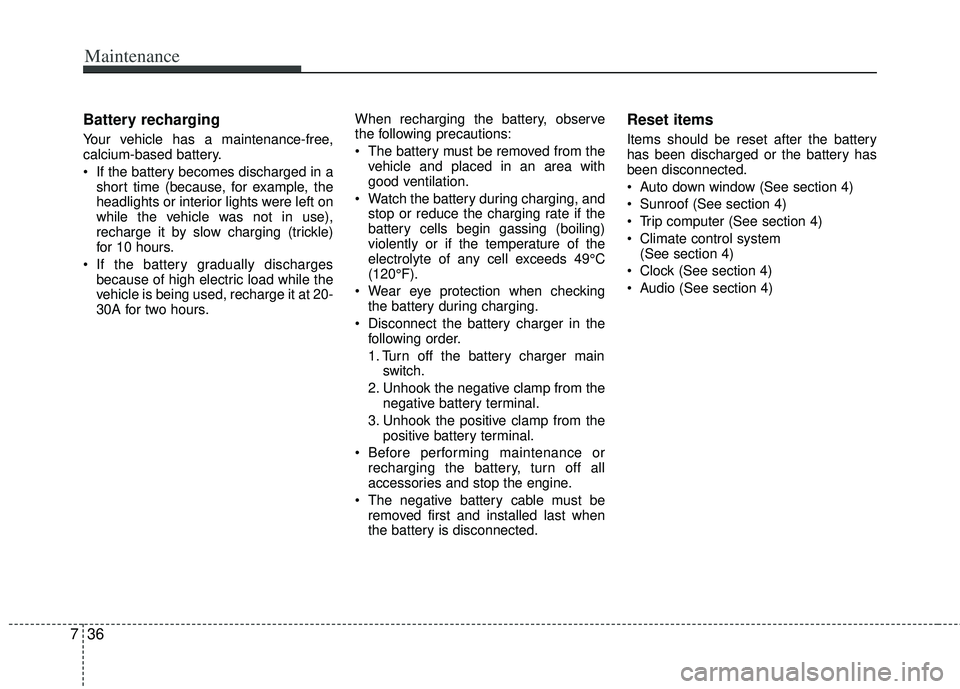
Battery recharging
Your vehicle has a maintenance-free,
calcium-based battery.
If the battery becomes discharged in a
short time (because, for example, the
headlights or interior lights were left on
while the vehicle was not in use),
recharge it by slow charging (trickle)
for 10 hours.
If the battery gradually discharges because of high electric load while the
vehicle is being used, recharge it at 20-
30A for two hours. When recharging the battery, observe
the following precautions:
The battery must be removed from the
vehicle and placed in an area with
good ventilation.
Watch the battery during charging, and stop or reduce the charging rate if the
battery cells begin gassing (boiling)
violently or if the temperature of the
electrolyte of any cell exceeds 49°C
(120°F).
Wear eye protection when checking the battery during charging.
Disconnect the battery charger in the following order.
1. Turn off the battery charger main switch.
2. Unhook the negative clamp from the negative battery terminal.
3. Unhook the positive clamp from the positive battery terminal.
Before performing maintenance or recharging the battery, turn off all
accessories and stop the engine.
The negative battery cable must be removed first and installed last when
the battery is disconnected.
Reset items
Items should be reset after the battery
has been discharged or the battery has
been disconnected.
Auto down window (See section 4)
Sunroof (See section 4)
Trip computer (See section 4)
Climate control system (See section 4)
Clock (See section 4)
Audio (See section 4)
Page 365 of 385
Maintenance
56
7
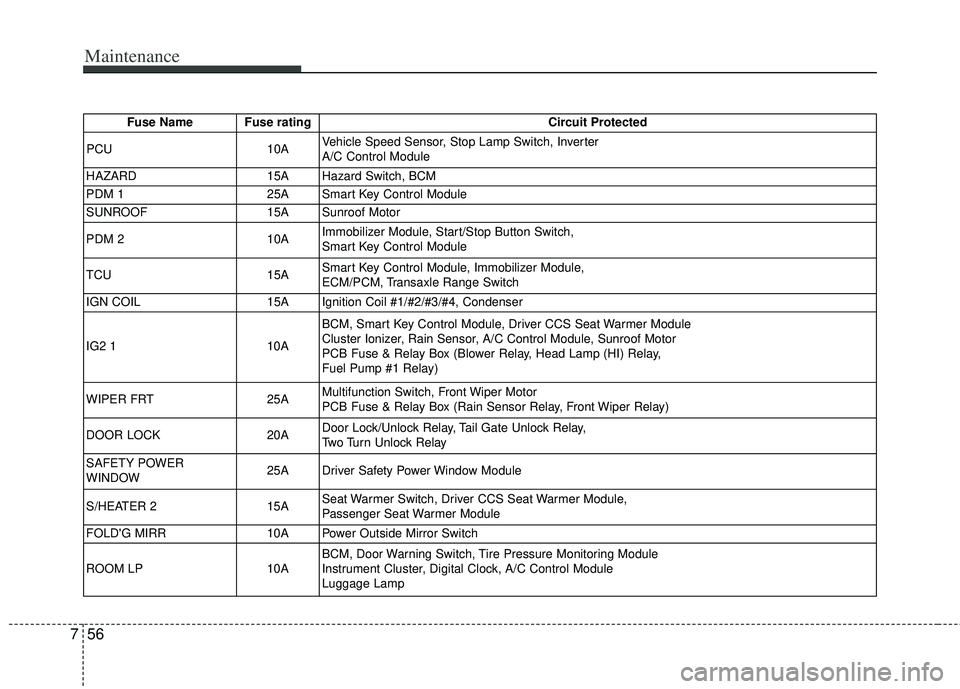
Fuse Name Fuse rating Circuit Protected
PCU 10AVehicle Speed Sensor, Stop Lamp Switch, Inverter
A/C Control Module
HAZARD 15A Hazard Switch, BCM
PDM 1 25A Smart Key Control Module
SUNROOF 15A Sunroof Motor
PDM 2 10AImmobilizer Module, Start/Stop Button Switch,
Smart Key Control Module
TCU 15ASmart Key Control Module, Immobilizer Module,
ECM/PCM, Transaxle Range Switch
IGN COIL 15A Ignition Coil #1/#2/#3/#4, Condenser
IG2 1 10ABCM, Smart Key Control Module, Driver CCS Seat Warmer Module
Cluster Ionizer, Rain Sensor, A/C Control Module, Sunroof Motor
PCB Fuse & Relay Box (Blower Relay, Head Lamp (HI) Relay,
Fuel Pump #1 Relay)
WIPER FRT 25AMultifunction Switch, Front Wiper Motor
PCB Fuse & Relay Box (Rain Sensor Relay, Front Wiper Relay)
DOOR LOCK 20ADoor Lock/Unlock Relay, Tail Gate Unlock Relay,
Two Turn Unlock Relay
SAFETY POWER
WINDOW 25A Driver Safety Power Window Module
S/HEATER 2 15ASeat Warmer Switch, Driver CCS Seat Warmer Module,
Passenger Seat Warmer Module
FOLD'G MIRR 10A Power Outside Mirror Switch
ROOM LP 10ABCM, Door Warning Switch, Tire Pressure Monitoring Module
Instrument Cluster, Digital Clock, A/C Control Module
Luggage Lamp