brake rotor KIA RIO HATCHBACK 2017 Owners Manual
[x] Cancel search | Manufacturer: KIA, Model Year: 2017, Model line: RIO HATCHBACK, Model: KIA RIO HATCHBACK 2017Pages: 532, PDF Size: 12.04 MB
Page 336 of 532

Driving your vehicle
24
5
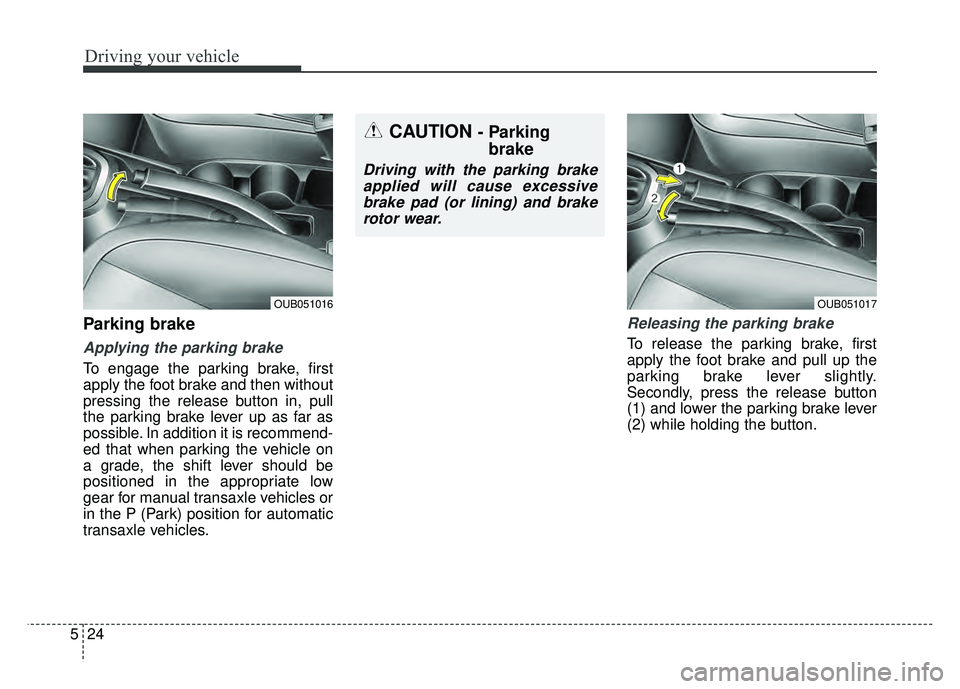
Parking brake
Applying the parking brake
To engage the parking brake, first
apply the foot brake and then without
pressing the release button in, pull
the parking brake lever up as far as
possible. In addition it is recommend-
ed that when parking the vehicle on
a grade, the shift lever should be
positioned in the appropriate low
gear for manual transaxle vehicles or
in the P (Park) position for automatic
transaxle vehicles.
Releasing the parking brake
To release the parking brake, first
apply the foot brake and pull up the
parking brake lever slightly.
Secondly, press the release button
(1) and lower the parking brake lever
(2) while holding the button.
OUB051017
CAUTION - Parking
brake
Driving with the parking brake
applied will cause excessivebrake pad (or lining) and brakerotor wear.
OUB051016
Page 435 of 532

Maintenance
30
7
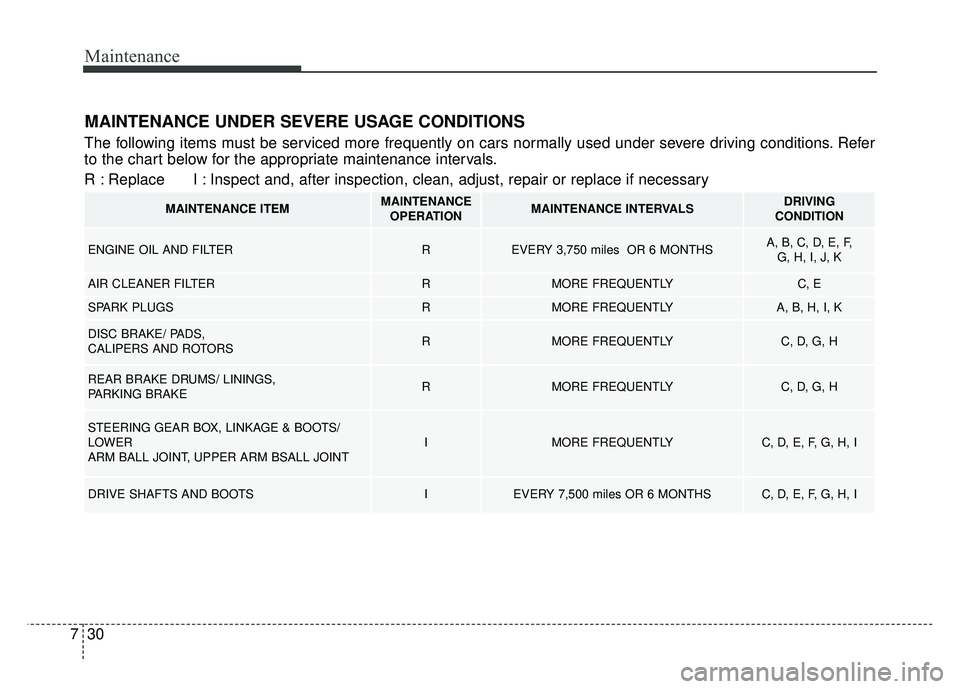
MAINTENANCE UNDER SEVERE USAGE CONDITIONS
The following items must be serviced more frequently on cars normally used under severe driving conditions. Refer
to the chart below for the appropriate maintenance intervals.
R : Replace I : Inspect and, after inspection, clean, adjust, repair or replace if neces\
sary
MAINTENANCE ITEMMAINTENANCE
OPERATIONMAINTENANCE INTERVALSDRIVING
CONDITION
ENGINE OIL AND FILTERREVERY 3,750 miles OR 6 MONTHSA, B, C, D, E, F, G, H, I, J, K
AIR CLEANER FILTERRMORE FREQUENTLYC, E
SPARK PLUGSRMORE FREQUENTLYA, B, H, I, K
DISC BRAKE/ PADS,
CALIPERS AND ROTORSRMORE FREQUENTLYC, D, G, H
REAR BRAKE DRUMS/ LININGS,
PARKING BRAKERMORE FREQUENTLYC, D, G, H
STEERING GEAR BOX, LINKAGE & BOOTS/
LOWER
ARM BALL JOINT, UPPER ARM BSALL JOINTIMORE FREQUENTLYC, D, E, F, G, H, I
DRIVE SHAFTS AND BOOTSIEVERY 7,500 miles OR 6 MONTHSC, D, E, F, G, H, I
Page 439 of 532

Maintenance
34
7
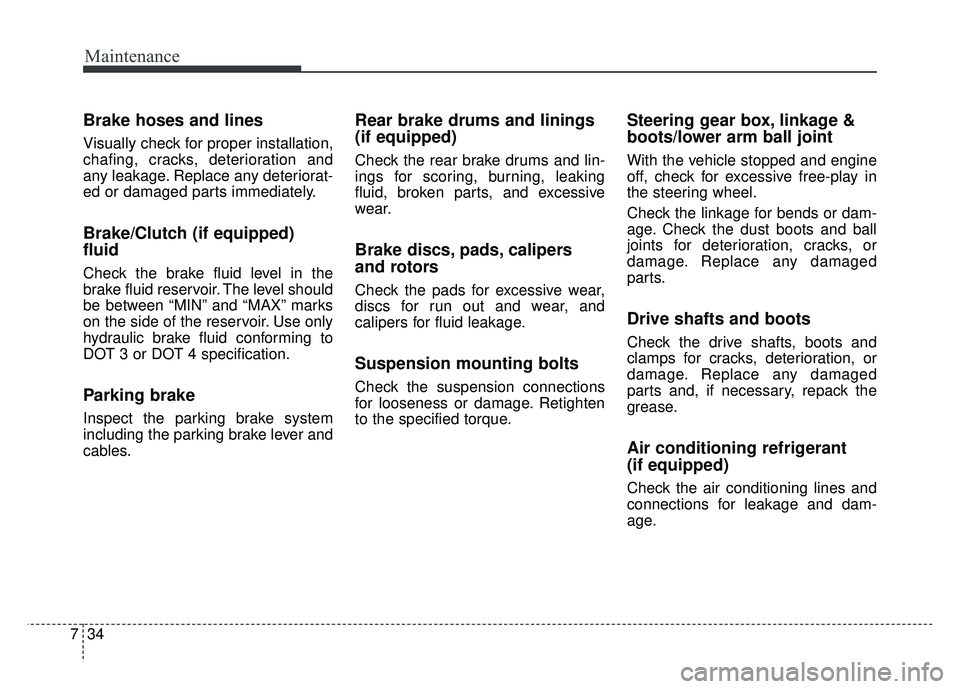
Brake hoses and lines
Visually check for proper installation,
chafing, cracks, deterioration and
any leakage. Replace any deteriorat-
ed or damaged parts immediately.
Brake/Clutch (if equipped)
fluid
Check the brake fluid level in the
brake fluid reservoir. The level should
be between “MIN” and “MAX” marks
on the side of the reservoir. Use only
hydraulic brake fluid conforming to
DOT 3 or DOT 4 specification.
Parking brake
Inspect the parking brake system
including the parking brake lever and
cables.
Rear brake drums and linings
(if equipped)
Check the rear brake drums and lin-
ings for scoring, burning, leaking
fluid, broken parts, and excessive
wear.
Brake discs, pads, calipers
and rotors
Check the pads for excessive wear,
discs for run out and wear, and
calipers for fluid leakage.
Suspension mounting bolts
Check the suspension connections
for looseness or damage. Retighten
to the specified torque.
Steering gear box, linkage &
boots/lower arm ball joint
With the vehicle stopped and engine
off, check for excessive free-play in
the steering wheel.
Check the linkage for bends or dam-
age. Check the dust boots and ball
joints for deterioration, cracks, or
damage. Replace any damaged
parts.
Drive shafts and boots
Check the drive shafts, boots and
clamps for cracks, deterioration, or
damage. Replace any damaged
parts and, if necessary, repack the
grease.
Air conditioning refrigerant
(if equipped)
Check the air conditioning lines and
connections for leakage and dam-
age.