warning light KIA RIO HATCHBACK 2018 Owner's Manual
[x] Cancel search | Manufacturer: KIA, Model Year: 2018, Model line: RIO HATCHBACK, Model: KIA RIO HATCHBACK 2018Pages: 492, PDF Size: 10.36 MB
Page 87 of 492
415
Features of your vehicle
Using the transmitter
Park the vehicle and stop the engine.
Arm the system as described below.
1.Turn off the engine and remove theignition key from the ignition
switch.
2.Make sure that all doors (and tail- gate), the engine hood are closed
and latched.
3.Lock the doors by pressing the lock button on the transmitter.
After completion of the steps
above, the hazard warning lights
will blink once to indicate that the
system is armed.
If any door (and tailgate) or engine
hood remains open, the hazard
warning lights won't operate and
theft-alarm will not arm. After this, if
all doors (and tailgate) and engine
hood are closed, the hazard warn-
ing lights blink once. • Do not arm the system until all
passengers have left the vehi-
cle. If the system is armed while
a passenger(s) remains in the
vehicle, the alarm may be acti-
vated when the remaining pas-
senger(s) leave the vehicle. If
any door, tailgate or engine
hood is opened within 30 sec-
onds after entering the armed
stage, the system is disarmed to
prevent unnecessary alarm.
Theft-alarm stage
The alarm will be activated if any of
the following occurs while the system
is armed.
A front or rear door is opened withoutusing the mechanical key or trans-
mitter (or smart key).
The trunk/tailgate is opened with- out using the mechanical key or
transmitter (or smart key).
The engine hood is opened.
The horn will sound and the hazard
warning lights will blink continuously for
approximately 27 seconds (2times). To
turn off the system, unlock the doors
with the transmitter (or smart key).
Page 88 of 492
Features of your vehicle
16
4
Disarmed stage
The system will be disarmed when:
Transmitter
- The door unlock button is pressed.
- The engine is started. (within 3
seconds)
- The ignition switch is in the "ON" position for 30 seconds or more.
Smart key
- The door unlock button is pressed.
- The button of the front outside dooris pressed while carrying the smart
key.
- The engine is started. (within 3 seconds)
After the doors are unlocked, the haz-
ard warning lights will blink twice to
indicate that the system is disarmed.
After pressing the unlock button, if any
door (or trunk/tailgate) is not opened
within 30 seconds, the system will be
rearmed. Avoid trying to start the engine
while the alarm is activated. The
vehicle starting motor is disabled
during the theft-alarm stage.
If the system is not disarmed with
the transmitter, insert the key into
the ignition switch, turn the ignition
switch to the ON position and wait
for 30 seconds. Then the system
will be disarmed.
If you lose your keys, consult your authorized Kia dealer.
If the system is not disarmed with the transmitter, insert the key into
the ignition switch and start the
engine. Then the system will be
disarmed.
If you lose your keys, consult your authorized Kia dealer.
Page 96 of 492
Features of your vehicle
24
4
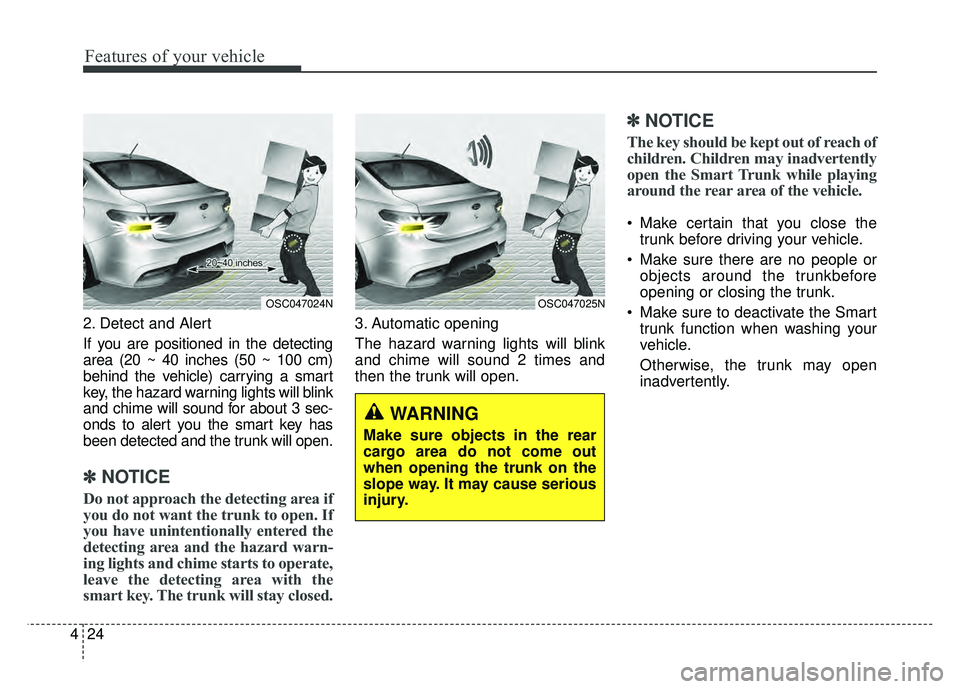
2. Detect and Alert
If you are positioned in the detecting
area (20 ~ 40 inches (50 ~ 100 cm)
behind the vehicle) carrying a smart
key, the hazard warning lights will blink
and chime will sound for about 3 sec-
onds to alert you the smart key has
been detected and the trunk will open.
✽ ✽
NOTICE
Do not approach the detecting area if
you do not want the trunk to open. If
you have unintentionally entered the
detecting area and the hazard warn-
ing lights and chime starts to operate,
leave the detecting area with the
smart key. The trunk will stay closed.
3. Automatic opening
The hazard warning lights will blink
and chime will sound 2 times and
then the trunk will open.
✽ ✽NOTICE
The key should be kept out of reach of
children. Children may inadvertently
open the Smart Trunk while playing
around the rear area of the vehicle.
Make certain that you close the
trunk before driving your vehicle.
Make sure there are no people or objects around the trunkbefore
opening or closing the trunk.
Make sure to deactivate the Smart trunk function when washing your
vehicle.
Otherwise, the trunk may open
inadvertently.
OSC047024NOSC047025N
WARNING
Make sure objects in the rear
cargo area do not come out
when opening the trunk on the
slope way. It may cause serious
injury.
Page 108 of 492
Features of your vehicle
36
4
Opening the hood
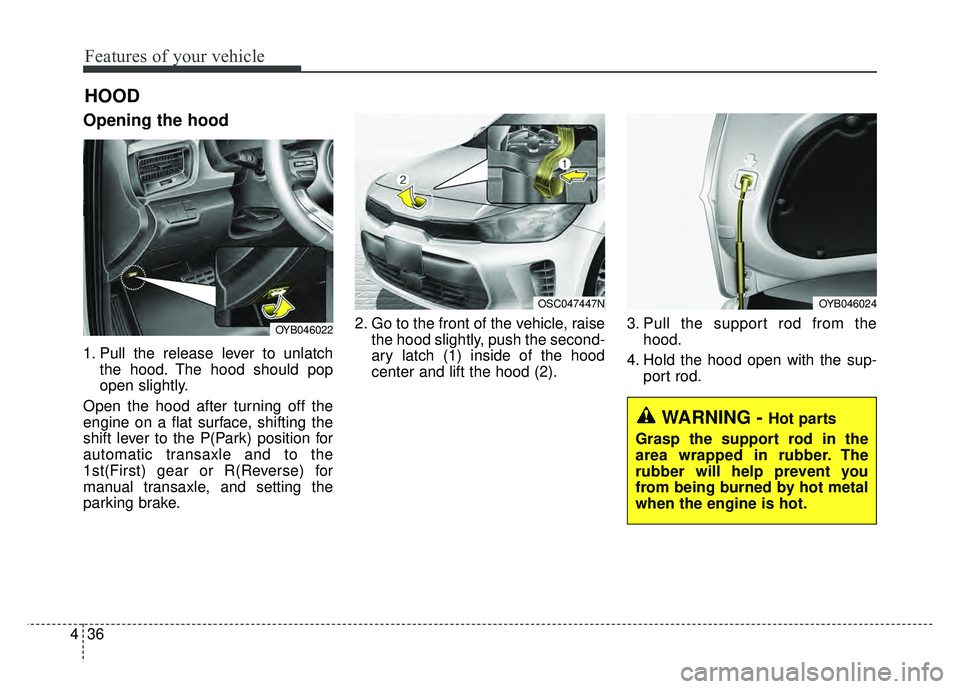
1. Pull the release lever to unlatch
the hood. The hood should pop
open slightly.
Open the hood after turning off the
engine on a flat surface, shifting the
shift lever to the P(Park) position for
automatic transaxle and to the
1st(First) gear or R(Reverse) for
manual transaxle, and setting the
parking brake. 2. Go to the front of the vehicle, raise
the hood slightly, push the second-
ary latch (1) inside of the hood
center and lift the hood (2). 3. Pull the support rod from the
hood.
4. Hold the hood open with the sup- port rod.
HOOD
OYB046022
OSC047447NOYB046024
WARNING - Hot parts
Grasp the support rod in the
area wrapped in rubber. The
rubber will help prevent you
from being burned by hot metal
when the engine is hot.
Page 109 of 492
437
Features of your vehicle
Closing the hood
1. Before closing the hood, check thefollowing:
partment must be correctly
installed.
bustible material must be
removed from the engine com-
partment.
2. Return the support rod to its clip to prevent it from rattling.
3. Lower the hood until it is about 1ft (30 cm) above the closed position
and let it drop. Make sure that it
locks into place.
4. Check that the hood has engaged properly. If the hood can be raised
slightly, it is not properly engaged.
Open it again and close it with a lit-
tle more force.
Hood open warning
(if equipped)
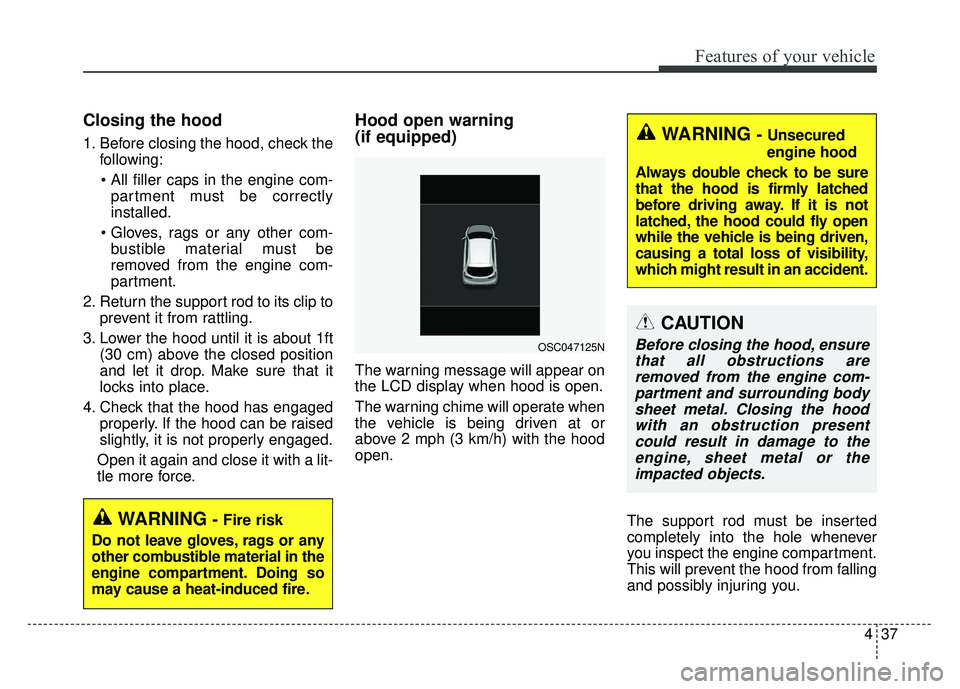
The warning message will appear on
the LCD display when hood is open.
The warning chime will operate when
the vehicle is being driven at or
above 2 mph (3 km/h) with the hood
open.
The support rod must be inserted
completely into the hole whenever
you inspect the engine compartment.
This will prevent the hood from falling
and possibly injuring you.
WARNING- Fire risk
Do not leave gloves, rags or any
other combustible material in the
engine compartment. Doing so
may cause a heat-induced fire.
OSC047125N
WARNING - Unsecured
engine hood
Always double check to be sure
that the hood is firmly latched
before driving away. If it is not
latched, the hood could fly open
while the vehicle is being driven,
causing a total loss of visibility,
which might result in an accident.
CAUTION
Before closing the hood, ensure that all obstructions areremoved from the engine com-partment and surrounding bodysheet metal. Closing the hoodwith an obstruction presentcould result in damage to theengine, sheet metal or theimpacted objects.
Page 110 of 492
Features of your vehicle
38
4
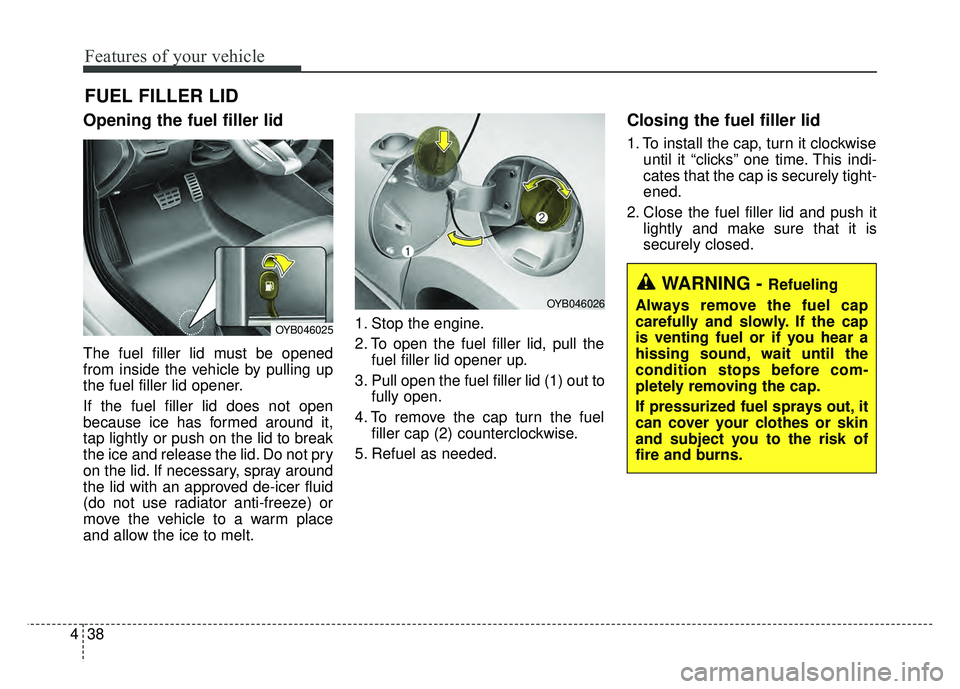
Opening the fuel filler lid
The fuel filler lid must be opened
from inside the vehicle by pulling up
the fuel filler lid opener.
If the fuel filler lid does not open
because ice has formed around it,
tap lightly or push on the lid to break
the ice and release the lid. Do not pry
on the lid. If necessary, spray around
the lid with an approved de-icer fluid
(do not use radiator anti-freeze) or
move the vehicle to a warm place
and allow the ice to melt. 1. Stop the engine.
2. To open the fuel filler lid, pull the
fuel filler lid opener up.
3. Pull open the fuel filler lid (1) out to fully open.
4. To remove the cap turn the fuel filler cap (2) counterclockwise.
5. Refuel as needed.
Closing the fuel filler lid
1. To install the cap, turn it clockwise until it “clicks” one time. This indi-
cates that the cap is securely tight-
ened.
2. Close the fuel filler lid and push it lightly and make sure that it is
securely closed.
FUEL FILLER LID
WARNING - Refueling
Always remove the fuel cap
carefully and slowly. If the cap
is venting fuel or if you hear a
hissing sound, wait until the
condition stops before com-
pletely removing the cap.
If pressurized fuel sprays out, it
can cover your clothes or skin
and subject you to the risk of
fire and burns.
OYB046025
OYB046026
Page 111 of 492

439
Features of your vehicle
✽
✽NOTICE
Tighten the cap until it clicks one time,
otherwise the fuel cap open warning
indicator light will illuminate.
Always check that the fuel cap is
installed securely to prevent fuel
spillage in the event of an accident.
WARNING - Fire/
explosion risk
Read and follow all warnings
posted at the gas station facili-
ty. Failure to follow all warnings
will result in severe personal
injury, severe burns or death
due to fire or explosion.
WARNING - Cell phone fires
Do not use cellular phones while
refueling. Electric current and/or
electronic interference from cel-
lular phones can potentially
ignite fuel vapors causing a fire.
WARNING- Portable fuel container
When using an approved portable
fuel container, be sure to place
the container on the ground prior
to refueling. Static electricity dis-
charge from the container can
ignite fuel vapors causing a fire.
Once refueling has begun, con-
tact with the vehicle should be
maintained until the filling is com-
plete. Use only approved portable
plastic fuel containers designed
to carry and store gasoline.WARNING - Static electricity
Before touching the fuel noz- zle, you should eliminate
potentially dangerous static
electricity discharge by touch-
ing another metal part of the
vehicle, a safe distance away
from the fuel filler neck, noz-
zle, or other gas source.
Do not get back into a vehicle once you have begun refuel-
ing since you can generate
static electricity by touching,
rubbing or sliding against any
item or fabric (polyester, satin,
nylon, etc.) capable of produc-
ing static electricity. Static
electricity discharge can
ignite fuel vapors resulting in
rapid burning. If you must re-
enter the vehicle, you should
once again eliminate poten-
tially dangerous static elec-
tricity discharge by touching a
metal part of the vehicle, away
from the fuel filler neck, noz-
zle or other gasoline source.
Page 112 of 492
Features of your vehicle
40
4
Make sure to refuel your vehicle
according to the “Fuel requirements”
suggested in chapter 1.
If the fuel filler cap requires replace-
ment, use only a genuine Kia cap or
the equivalent specified for your vehi-
cle. An incorrect fuel filler cap can
result in a serious malfunction of the
fuel system or emission control sys-
tem.
CAUTION- Exterior paint
Do not spill fuel on the exterior
surfaces of the vehicle. Anytype of fuel spilled on paintedsurfaces may damage the paint.
WARNING - Refueling&
Vehicle fires
When refueling, always shut the
engine off. Sparks produced by
electrical components related
to the engine can ignite fuel
vapors causing a fire. Once
refueling is complete, check to
make sure the filler cap and
filler door are securely closed,
before starting the engine.
WARNING - Smoking
DO NOT use matches or a lighter
and DO NOT SMOKE or leave a
lit cigarette in your vehicle while
at a gas station especially during
refueling. Automotive fuel is
highly flammable and can, when
ignited, result in fire.
Page 115 of 492
443
Features of your vehicle
To close the sunroof automatically:
Push the sunroof control lever for-
ward to the second detent position
and then release it. The sunroof will
automatically close all the way.
To stop the sunroof sliding at any
point, pull or push the sunroof control
lever momentarily.
While driving with the sunroof in an
open (or partially open position),
your vehicle may demonstrate a wind
buffeting or pulsation noise. This
noise is a normal occurrence and
can be reduced or eliminated by tak-
ing the following actions. If you expe-
rience the noise with the sunroof
open, slightly reduce the size of the
sunroof opening.Automatic reversal
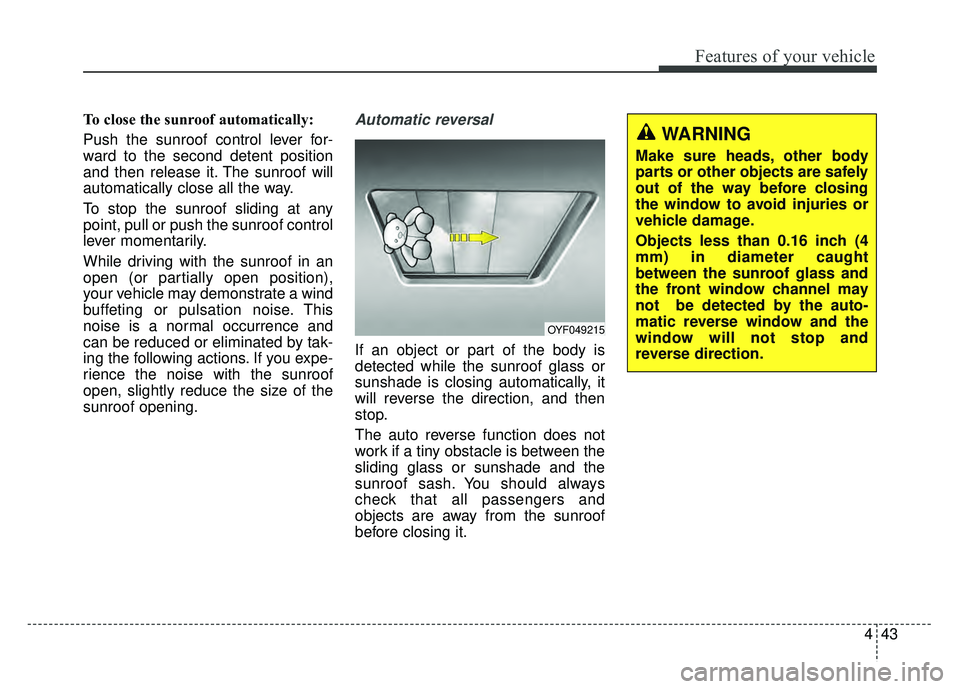
If an object or part of the body is
detected while the sunroof glass or
sunshade is closing automatically, it
will reverse the direction, and then
stop.
The auto reverse function does not
work if a tiny obstacle is between the
sliding glass or sunshade and the
sunroof sash. You should always
check that all passengers and
objects are away from the sunroof
before closing it.
OYF049215
WARNING
Make sure heads, other body
parts or other objects are safely
out of the way before closing
the window to avoid injuries or
vehicle damage.
Objects less than 0.16 inch (4
mm) in diameter caught
between the sunroof glass and
the front window channel may
not be detected by the auto-
matic reverse window and the
window will not stop and
reverse direction.
Page 119 of 492
447
Features of your vehicle
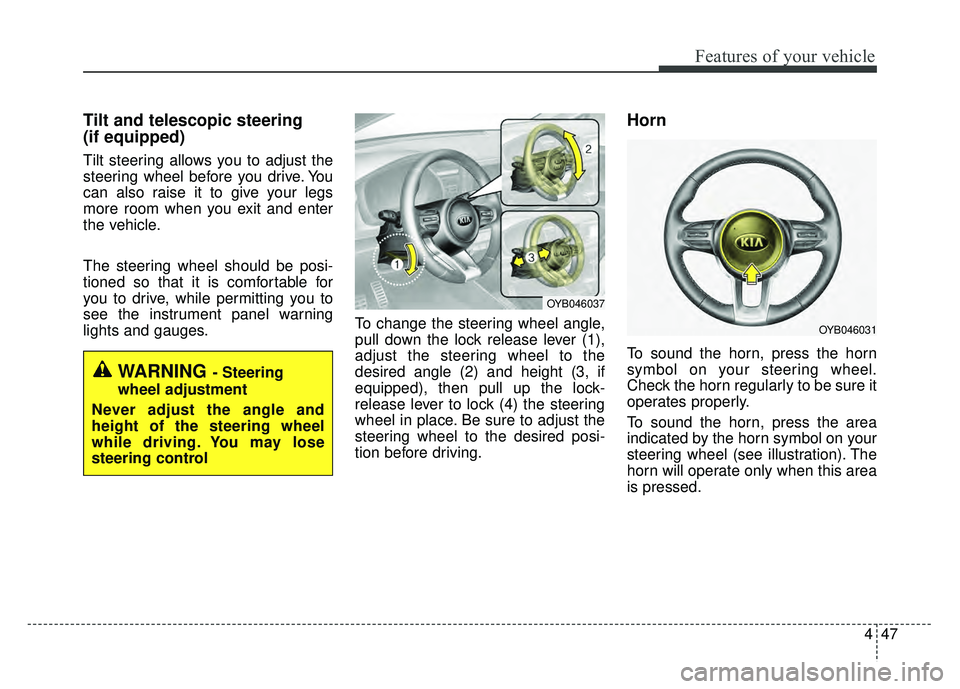
Tilt and telescopic steering
(if equipped)
Tilt steering allows you to adjust the
steering wheel before you drive. You
can also raise it to give your legs
more room when you exit and enter
the vehicle.
The steering wheel should be posi-
tioned so that it is comfortable for
you to drive, while permitting you to
see the instrument panel warning
lights and gauges.To change the steering wheel angle,
pull down the lock release lever (1),
adjust the steering wheel to the
desired angle (2) and height (3, if
equipped), then pull up the lock-
release lever to lock (4) the steering
wheel in place. Be sure to adjust the
steering wheel to the desired posi-
tion before driving.
Horn
To sound the horn, press the horn
symbol on your steering wheel.
Check the horn regularly to be sure it
operates properly.
To sound the horn, press the area
indicated by the horn symbol on your
steering wheel (see illustration). The
horn will operate only when this area
is pressed.
WARNING - Steering
wheel adjustment
Never adjust the angle and
height of the steering wheel
while driving. You may lose
steering control
OYB046037
OYB046031