interior lights KIA RIO HATCHBACK 2019 Owners Manual
[x] Cancel search | Manufacturer: KIA, Model Year: 2019, Model line: RIO HATCHBACK, Model: KIA RIO HATCHBACK 2019Pages: 503, PDF Size: 10.42 MB
Page 63 of 503

Safety features of your vehicle
46
3
✽ ✽
NOTICE
• Do not use car seat cushions that
cover up the surface of the seat
and aftermarket manufactured
passenger seat heaters.
• After conducting car interior clean- ing using steam or detergent, the
seat should be dried properly.
Afterward, check for normal oper-
ation of the “PASS AIR BAG
“OFF” and air bag warning lights.
• Any service related to the passen- ger seat and the ODS must be
done at Kia service center.
• After the passenger seat has been removed or installed for repair
purposes, check for normal opera-
tion of the “PASS AIR BAG
“OFF” and air bag warning lights
with a person seated or not seated
in the passenger seat.
✽ ✽ NOTICE
When the “PASS AIR BAG “OFF”
symbol is illuminated, the passenger
air bag system will not operate. The
passenger air bag system will oper-
ate when necessary if the symbol is
not illuminated.
✽ ✽NOTICE
Do not modify or replace the front
passenger seat. Don't place anything
on or attach anything such as a blan-
ket, front seat cover or after market
seat heater to the front passenger
seat. This can adversely affect the
occupant detection system.
WARNING - ODS System
Riding in an improper position
adversely affects the Occupant
Detection System and may
result in the deactivation of the
front passenger airbag. It is
important for the driver to
instruct the passenger as to the
proper seating instructions as
contained in this manual.
SC CAN (ENG) 3.QXP 7/18/2018 5:57 PM Page 46
Page 80 of 503

Steering wheel . . . . . . . . . . . . . . . . . . . . . . . . . . . . . 4-51
• Electric Power Steering (EPS) . . . . . . . . . . . . . . . . . . 4-51
• Tilt and telescopic steering . . . . . . . . . . . . . . . . . . . . . 4-52
• Horn . . . . . . . . . . . . . . . . . . . . . . . . . . . . . . . . . . . . \
. . . 4-52
• Heated steering wheel . . . . . . . . . . . . . . . . . . . . . . . . . 4-53
Mirrors . . . . . . . . . . . . . . . . . . . . . . . . . . . . . . . . . . 4-54\
• Inside rearview mirror . . . . . . . . . . . . . . . . . . . . . . . . 4-54
• Outside rearview mirror. . . . . . . . . . . . . . . . . . . . . . . 4-54
Instrument cluster . . . . . . . . . . . . . . . . . . . . . . . . . 4-57
• Instrument Cluster Control . . . . . . . . . . . . . . . . . . . . 4-58
• LCD window control . . . . . . . . . . . . . . . . . . . . . . . . . . 4-58
• Gauges . . . . . . . . . . . . . . . . . . . . . . . . . . . . . . . . . . . . \
. 4-59
• Transmission shift indicator . . . . . . . . . . . . . . . . . . . . 4-62
LCD windows . . . . . . . . . . . . . . . . . . . . . . . . . . . . . 4-64
• Over view . . . . . . . . . . . . . . . . . . . . . . . . . . . . . . . . . . . 4-\
64
• Trip information (Trip computer) . . . . . . . . . . . . . . . 4-64
• LCD modes (for type B cluster) . . . . . . . . . . . . . . . . . 4-69
• Service mode . . . . . . . . . . . . . . . . . . . . . . . . . . . . . . . . 4-70
• User settings mode (for type B cluster) . . . . . . . . . . . 4-70
Warning and indicator lights . . . . . . . . . . . . . . . . 4-79
• Warning lights . . . . . . . . . . . . . . . . . . . . . . . . . . . . . . . 4-79
• Indicator lights. . . . . . . . . . . . . . . . . . . . . . . . . . . . . . . 4-87
Rear view monitor . . . . . . . . . . . . . . . . . . . . . . . . . 4-91
• Rear view monitor . . . . . . . . . . . . . . . . . . . . . . . . . . . . 4-91
Lighting . . . . . . . . . . . . . . . . . . . . . . . . . . . . . . . . . . 4-92\
• Battery saver function. . . . . . . . . . . . . . . . . . . . . . . . . 4-92
• Headlight escort function . . . . . . . . . . . . . . . . . . . . . . 4-92
• Headlight welcome function . . . . . . . . . . . . . . . . . . . . 4-92
• Daytime running light . . . . . . . . . . . . . . . . . . . . . . . . . 4-93
• Lighting control . . . . . . . . . . . . . . . . . . . . . . . . . . . . . . 4-93
• High beam operation. . . . . . . . . . . . . . . . . . . . . . . . . . 4-95
• Turn signals and lane change signals . . . . . . . . . . . . 4-96
• Front fog light . . . . . . . . . . . . . . . . . . . . . . . . . . . . . . . 4-97
Wipers and washers . . . . . . . . . . . . . . . . . . . . . . . . 4-98
• Windshield wipers . . . . . . . . . . . . . . . . . . . . . . . . . . . . 4-99
• Windshield washers (front) . . . . . . . . . . . . . . . . . . . 4-100
• Rear window wiper and washer switch (for 5 door) . . . . . . . . . . . . . . . . . . . . . . . . . . . . . . . . 4-102
Interior light . . . . . . . . . . . . . . . . . . . . . . . . . . . . . 4-103
• Automatic turn off function . . . . . . . . . . . . . . . . . . . 4-103
• Map lamp . . . . . . . . . . . . . . . . . . . . . . . . . . . . . . . . . . 4-10\
3
• Room lamp . . . . . . . . . . . . . . . . . . . . . . . . . . . . . . . . . 4-104
• Luggage room lamp . . . . . . . . . . . . . . . . . . . . . . . . . 4-106
• Glove box lamp . . . . . . . . . . . . . . . . . . . . . . . . . . . . . 4-106
• Vanity mirror lamp . . . . . . . . . . . . . . . . . . . . . . . . . . 4-107
Defroster . . . . . . . . . . . . . . . . . . . . . . . . . . . . . . . . 4-108
• Rear window defroster . . . . . . . . . . . . . . . . . . . . . . . 4-108
4
SC CAN (ENG) 4.QXP 7/18/2018 5:45 PM Page 2
Page 132 of 503

Features of your vehicle
54
4
Inside rearview mirror
Adjust the rearview mirror so that the
center view through the rear window
is seen. Make this adjustment before
you start driving.
Do not place objects in the rear seat
which would interfere with your vision
through the rear window.
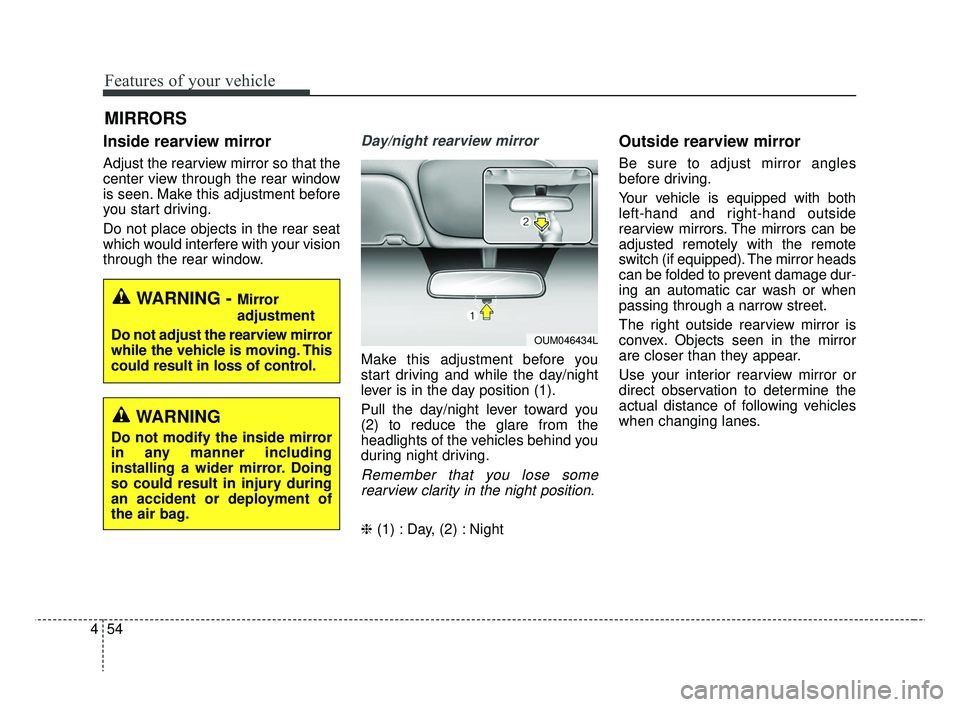
Day/night rearview mirror
Make this adjustment before you
start driving and while the day/night
lever is in the day position (1).
Pull the day/night lever toward you
(2) to reduce the glare from the
headlights of the vehicles behind you
during night driving.
Remember that you lose some
rearview clarity in the night position.
❈ (1) : Day, (2) : Night
Outside rearview mirror
Be sure to adjust mirror angles
before driving.
Your vehicle is equipped with both
left-hand and right-hand outside
rearview mirrors. The mirrors can be
adjusted remotely with the remote
switch (if equipped). The mirror heads
can be folded to prevent damage dur-
ing an automatic car wash or when
passing through a narrow street.
The right outside rearview mirror is
convex. Objects seen in the mirror
are closer than they appear.
Use your interior rearview mirror or
direct observation to determine the
actual distance of following vehicles
when changing lanes.
MIRRORS
WARNING - Mirror
adjustment
Do not adjust the rearview mirror
while the vehicle is moving. This
could result in loss of control.
OUM046434L
WARNING
Do not modify the inside mirror
in any manner including
installing a wider mirror. Doing
so could result in injury during
an accident or deployment of
the air bag.
SC CAN (ENG) 4.QXP 7/18/2018 5:48 PM Page 54
Page 181 of 503

4103
Features of your vehicle
Do not use the interior lights for
extended periods when the engine is
not running.
It may cause battery discharge.Automatic turn off function
(if equipped)
The interior lights automatically turn
off approximately 20 minutes after
the ignition switch is turned off.
If your vehicle is equipped with the
theft alarm system, the interior lights
automatically turn off approximately
5 seconds after the system is in
armed stage.
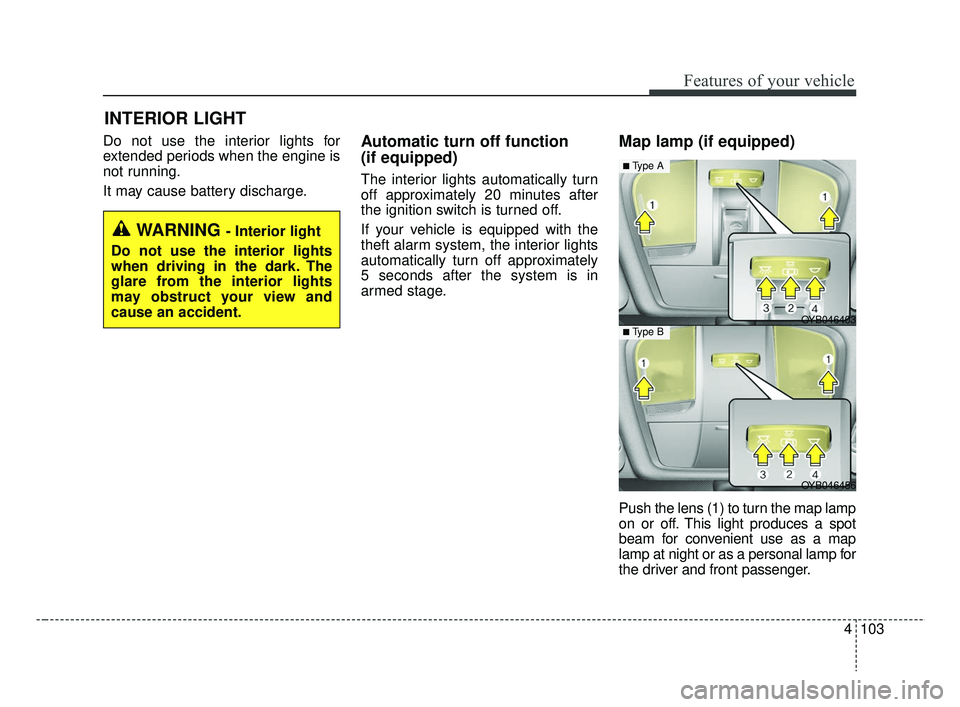
Map lamp (if equipped)
Push the lens (1) to turn the map lamp
on or off. This light produces a spot
beam for convenient use as a map
lamp at night or as a personal lamp for
the driver and front passenger.
INTERIOR LIGHT
WARNING - Interior light
Do not use the interior lights
when driving in the dark. The
glare from the interior lights
may obstruct your view and
cause an accident.
OYB046456
OYB046403
■ Type A
■ Type B
SC CAN (ENG) 4.QXP 7/18/2018 5:50 PM Page 103
Page 430 of 503

Maintenance
58
8
✽ ✽
NOTICE
• Set all switches to ON before driv-
ing.
• If the vehicle is going to be unused for over 1 month, set all switches
to OFF to prevent the batteries
from draining.
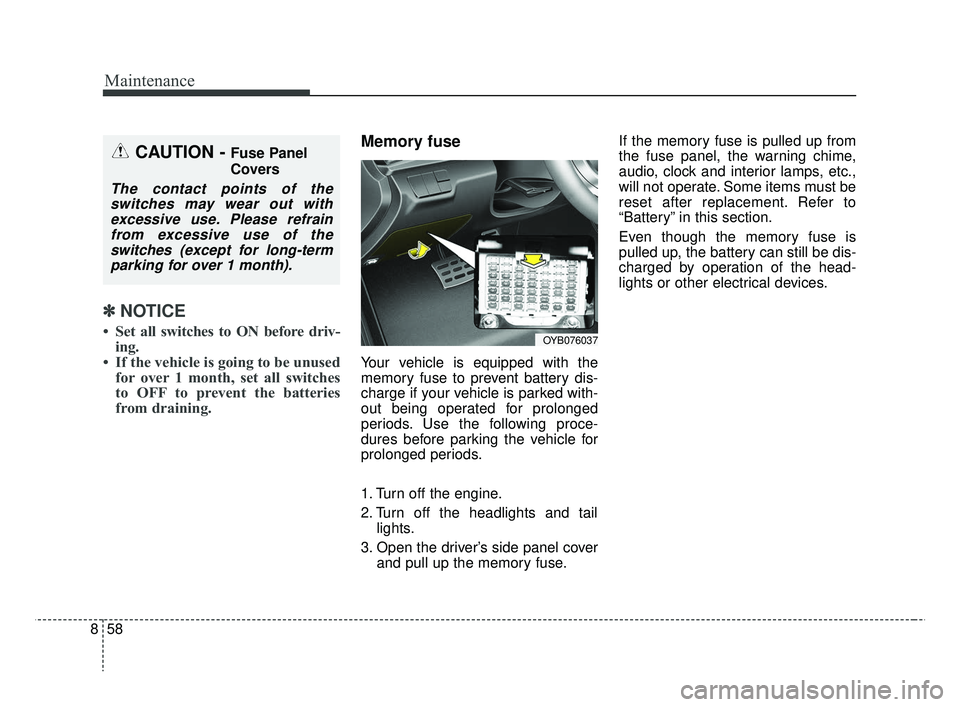
Memory fuse
Your vehicle is equipped with the
memory fuse to prevent battery dis-
charge if your vehicle is parked with-
out being operated for prolonged
periods. Use the following proce-
dures before parking the vehicle for
prolonged periods.
1. Turn off the engine.
2. Turn off the headlights and tail
lights.
3. Open the driver’s side panel cover and pull up the memory fuse. If the memory fuse is pulled up from
the fuse panel, the warning chime,
audio, clock and interior lamps, etc.,
will not operate. Some items must be
reset after replacement. Refer to
“Battery” in this section.
Even though the memory fuse is
pulled up, the battery can still be dis-
charged by operation of the head-
lights or other electrical devices.
CAUTION - Fuse Panel
Covers
The contact points of the
switches may wear out withexcessive use. Please refrainfrom excessive use of theswitches (except for long-termparking for over 1 month).
OYB076037
SC CAN (ENG) 8.qxp 7/18/2018 5:34 PM Page 58