KIA Rondo 2015 3.G Owner's Manual
Manufacturer: KIA, Model Year: 2015, Model line: Rondo, Model: KIA Rondo 2015 3.GPages: 564, PDF Size: 19.11 MB
Page 131 of 564
443
Features of your vehicle
Electric power steering (EPS)
The power steering uses a motor to
assist you in steering the vehicle. If
the engine is off or if the power steer-
ing system becomes inoperative, the
vehicle may still be steered, but it will
require increased steering effort.
The motor driven power steering is
controlled by a power steering con-
trol unit which senses the steering
wheel torque and vehicle speed to
command the motor.
The steering becomes heavier as
the vehicle’s speed increases and
becomes lighter as the vehicle’s
speed decreases for optimum steer-
ing control.
Should you notice any change in the
effort required to steer during normal
vehicle operation, have the power
steering checked by an authorized
Kia dealer.
✽ ✽NOTICE
The following symptoms may occur
during normal vehicle operation:
• The EPS warning light does not
illuminate.
• The steering gets heavy immedi- ately after turning the ignition
switch on. This happens as the sys-
tem performs the EPS system
diagnostics. When the diagnostics
are completed, the steering wheel
will return to its normal condition.
• A click noise may be heard from the EPS relay after the ignition
switch is turned to the ON or
LOCK (OFF) position.
• A motor noise may be heard when the vehicle is at a stop or at a low
driving speed.
• If the Electric Power Steering System does not operate normally,
the warning light will illuminate on
the instrument cluster. The steer-
ing wheel may become difficult to
control or operate abnormally.
Take your vehicle to an authorized
Kia dealer and have the vehicle
checked as soon as possible. (Continued)
STEERING WHEEL
CAUTION
If the Electric Power Steering
System does not operate nor-mally, the warning light willilluminate on the instrumentcluster. The steering wheelmay require increased steer-ing effort. Take your vehicle toan authorized Kia dealer andhave the vehicle checked assoon as possible.
When you operate the steering wheel in low temperature,noise may occur. If temperaturerises, the noise will likely disap-pear. This is a normal condition.
When the vehicle is stationary, when the steering wheel isturned all the way to the left orright continuously, the steer-ing wheel becomes harder toturn. The power assist is limit-ed to protect the motor fromoverheating.
As time passes, the steeringwheel return to its normalcondition.
Page 132 of 564
Features of your vehicle
44
4
(Continued)
• When you operate the steering
wheel in low temperature, abnor-
mal noise may occur. If tempera-
ture rises, the noise will likely dis-
appear. This is a normal condition.
• When the charging system warn- ing light comes on due to the low
voltage (When the alternator or
battery) does not operate normal-
ly or it malfunctions), the steering
wheel may require increased
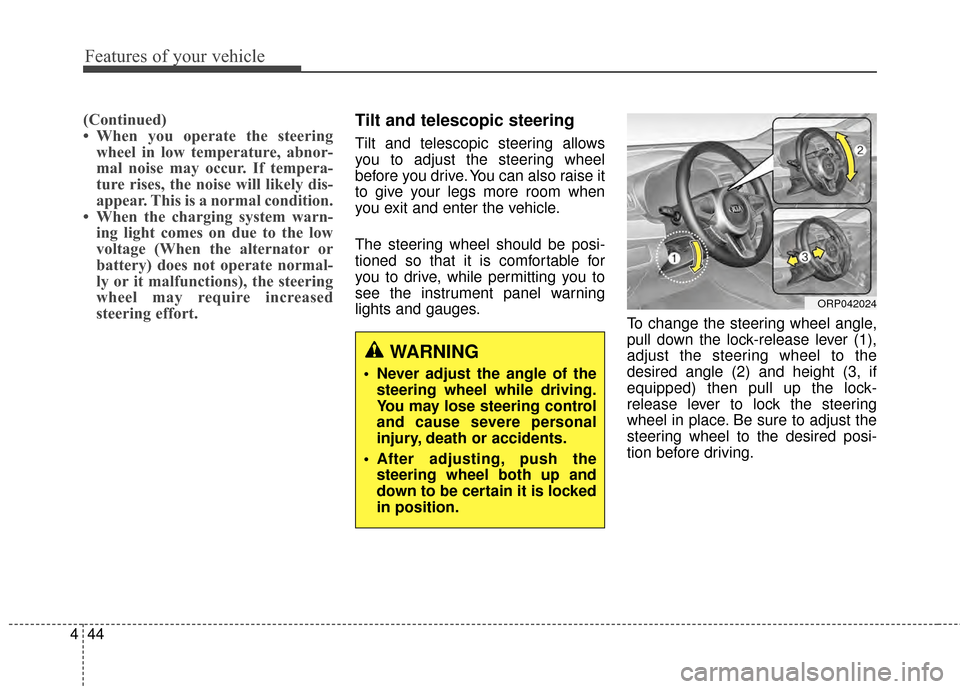
steering effort.Tilt and telescopic steering
Tilt and telescopic steering allows
you to adjust the steering wheel
before you drive. You can also raise it
to give your legs more room when
you exit and enter the vehicle.
The steering wheel should be posi-
tioned so that it is comfortable for
you to drive, while permitting you to
see the instrument panel warning
lights and gauges. To change the steering wheel angle,
pull down the lock-release lever (1),
adjust the steering wheel to the
desired angle (2) and height (3, if
equipped) then pull up the lock-
release lever to lock the steering
wheel in place. Be sure to adjust the
steering wheel to the desired posi-
tion before driving.
WARNING
Never adjust the angle of the
steering wheel while driving.
You may lose steering control
and cause severe personal
injury, death or accidents.
After adjusting, push the steering wheel both up and
down to be certain it is locked
in position.
ORP042024
Page 133 of 564
445
Features of your vehicle
Heated steering wheel
(if equipped)
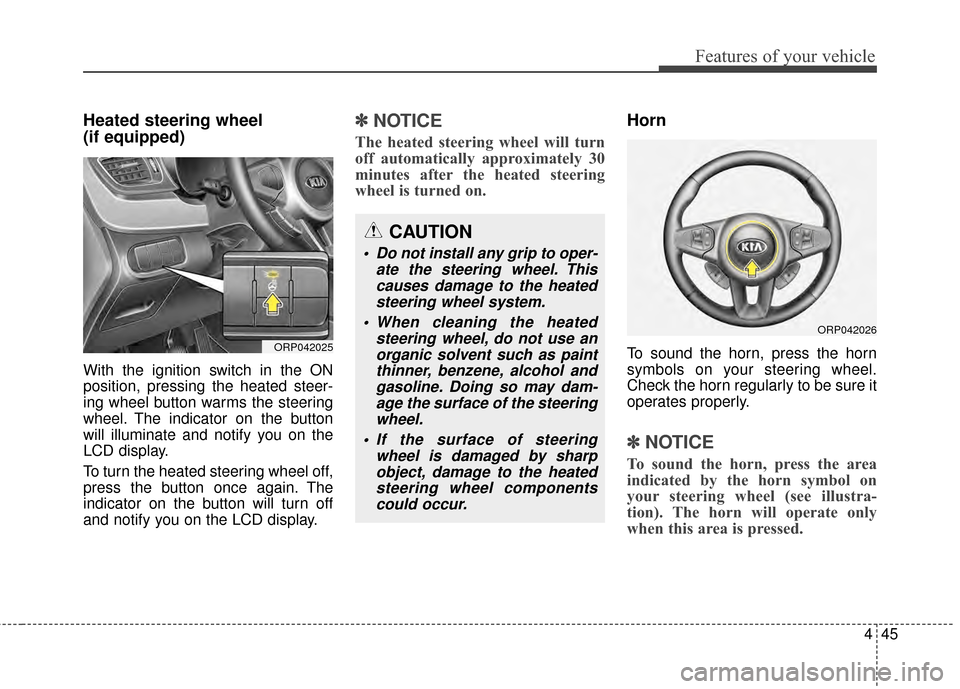
With the ignition switch in the ON
position, pressing the heated steer-
ing wheel button warms the steering
wheel. The indicator on the button
will illuminate and notify you on the
LCD display.
To turn the heated steering wheel off,
press the button once again. The
indicator on the button will turn off
and notify you on the LCD display.
✽ ✽NOTICE
The heated steering wheel will turn
off automatically approximately 30
minutes after the heated steering
wheel is turned on.
Horn
To sound the horn, press the horn
symbols on your steering wheel.
Check the horn regularly to be sure it
operates properly.
✽ ✽NOTICE
To sound the horn, press the area
indicated by the horn symbol on
your steering wheel (see illustra-
tion). The horn will operate only
when this area is pressed.
ORP042025
CAUTION
Do not install any grip to oper-
ate the steering wheel. Thiscauses damage to the heatedsteering wheel system.
When cleaning the heated steering wheel, do not use anorganic solvent such as paintthinner, benzene, alcohol andgasoline. Doing so may dam-age the surface of the steeringwheel.
If the surface of steering wheel is damaged by sharpobject, damage to the heatedsteering wheel componentscould occur.
ORP042026
Page 134 of 564
Features of your vehicle
46
4
FLEX STEER (if equipped)
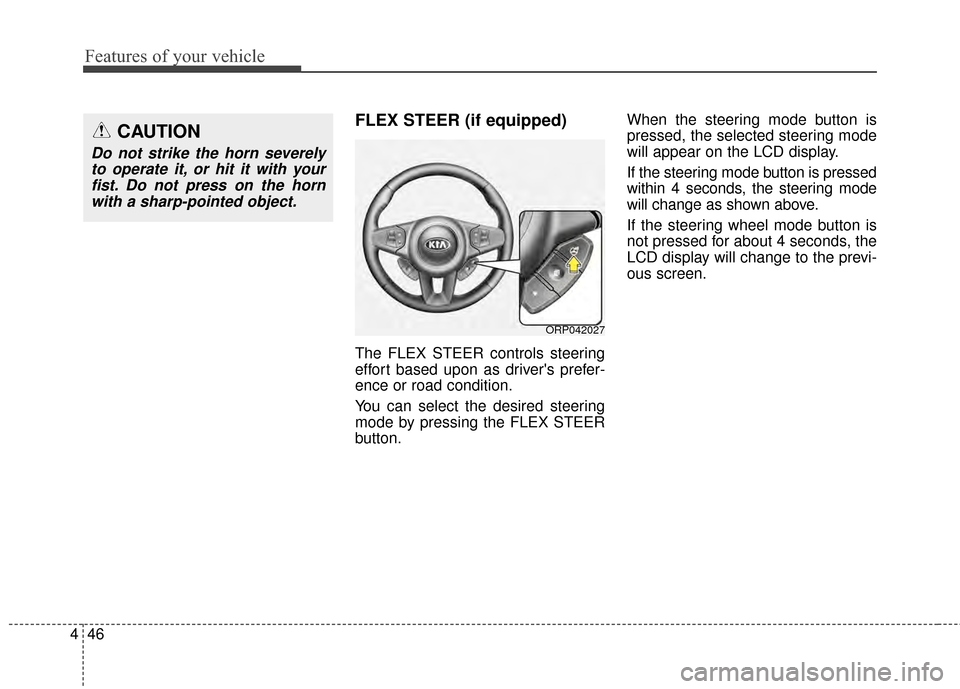
The FLEX STEER controls steering
effort based upon as driver's prefer-
ence or road condition.
You can select the desired steering
mode by pressing the FLEX STEER
button. When the steering mode button is
pressed, the selected steering mode
will appear on the LCD display.
If the steering mode button is pressed
within 4 seconds, the steering mode
will change as shown above.
If the steering wheel mode button is
not pressed for about 4 seconds, the
LCD display will change to the previ-
ous screen.
CAUTION
Do not strike the horn severely
to operate it, or hit it with yourfist. Do not press on the hornwith a sharp-pointed object.
ORP042027
Page 135 of 564
447
Features of your vehicle
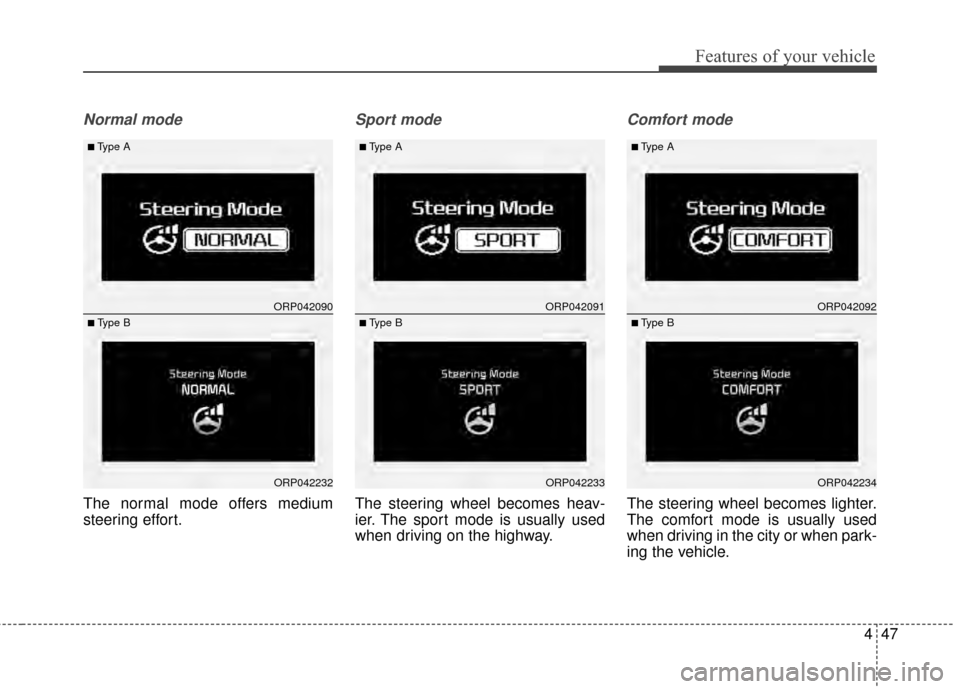
Normal mode
The normal mode offers medium
steering effort.
Sport mode
The steering wheel becomes heav-
ier. The sport mode is usually used
when driving on the highway.
Comfort mode
The steering wheel becomes lighter.
The comfort mode is usually used
when driving in the city or when park-
ing the vehicle.
ORP042090
ORP042232
■Type A
■ Type B
ORP042091
ORP042233
■Type A
■ Type B
ORP042092
ORP042234
■Type A
■ Type B
Page 136 of 564
Features of your vehicle
48
4
CAUTION
For your safety, if you press
the steering mode buttonwhile operating the steeringwheel, the LCD display willchange, but the steering effortwill not change immediately.After operating the steeringwheel, the steering effort willchange automatically to theselected mode.
Use caution when changing the steering mode while driving.
When the electronic power steering is not operating prop-erly, the flex steering wheelwill not work.
Page 137 of 564
449
Features of your vehicle
Inside rearview mirror
Adjust the rearview mirror so that the
center view through the rear window
is seen. Make this adjustment before
you start driving.
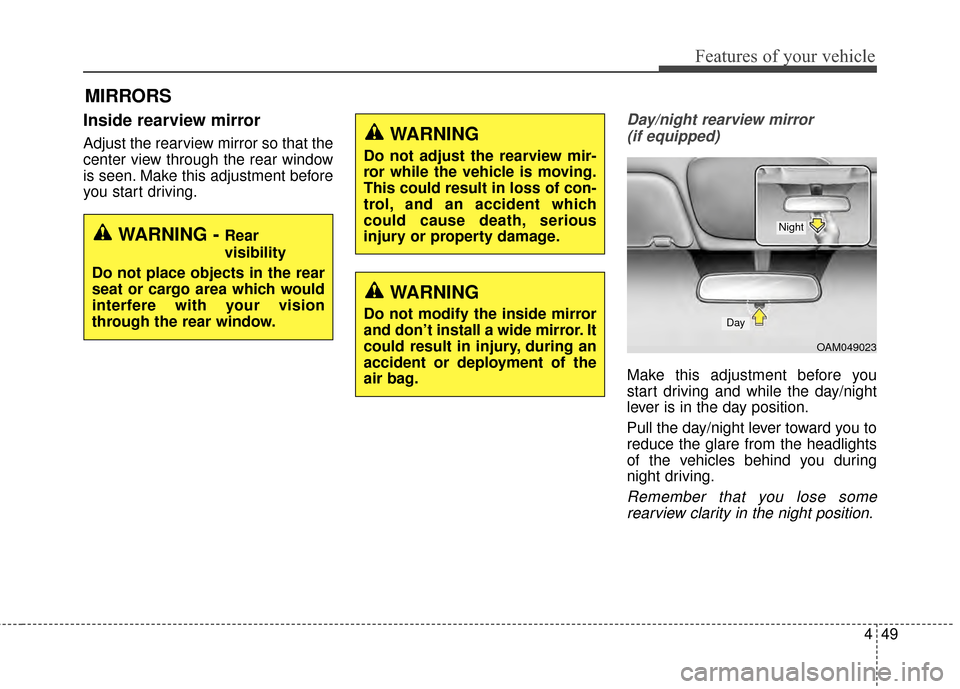
Day/night rearview mirror (if equipped)
Make this adjustment before you
start driving and while the day/night
lever is in the day position.
Pull the day/night lever toward you to
reduce the glare from the headlights
of the vehicles behind you during
night driving.
Remember that you lose somerearview clarity in the night position.
MIRRORS
WARNING - Rear
visibility
Do not place objects in the rear
seat or cargo area which would
interfere with your vision
through the rear window.
WARNING
Do not adjust the rearview mir-
ror while the vehicle is moving.
This could result in loss of con-
trol, and an accident which
could cause death, serious
injury or property damage.
WARNING
Do not modify the inside mirror
and don’t install a wide mirror. It
could result in injury, during an
accident or deployment of the
air bag.
OAM049023
Day
Night
Page 138 of 564
Features of your vehicle
50
4
Electric chromic mirror (ECM)
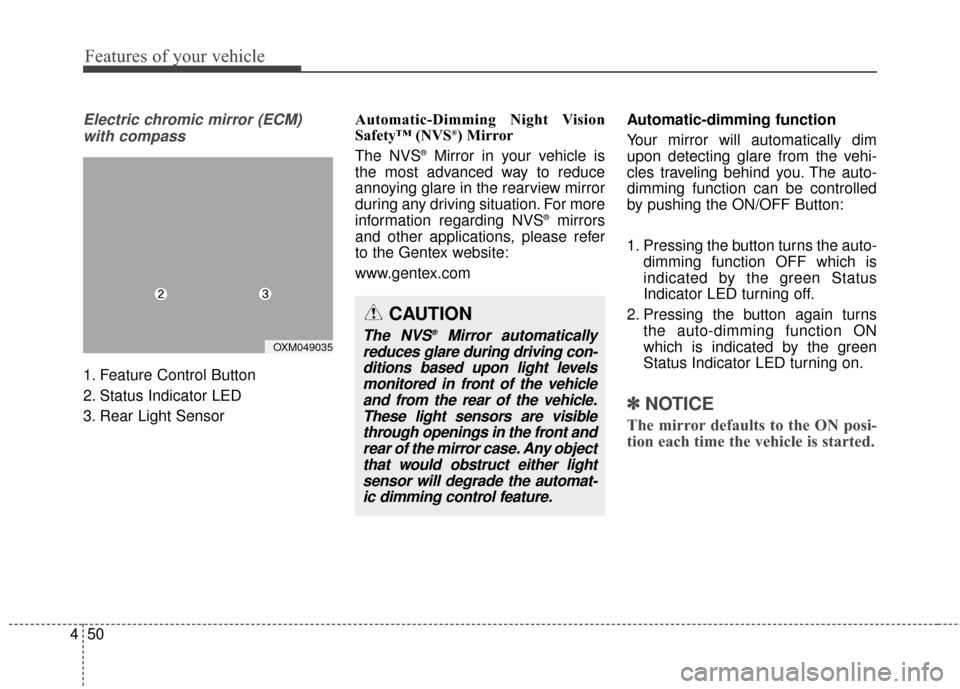
with compass
1. Feature Control Button
2. Status Indicator LED
3. Rear Light Sensor Automatic-Dimming Night Vision
Safety™ (NVS
®) Mirror
The NVS®Mirror in your vehicle is
the most advanced way to reduce
annoying glare in the rearview mirror
during any driving situation. For more
information regarding NVS
®mirrors
and other applications, please refer
to the Gentex website:
www.gentex.com Automatic-dimming function
Your mirror will automatically dim
upon detecting glare from the vehi-
cles traveling behind you. The auto-
dimming function can be controlled
by pushing the ON/OFF Button:
1. Pressing the button turns the auto-
dimming function OFF which is
indicated by the green Status
Indicator LED turning off.
2. Pressing the button again turns the auto-dimming function ON
which is indicated by the green
Status Indicator LED turning on.
✽ ✽NOTICE
The mirror defaults to the ON posi-
tion each time the vehicle is started.
CAUTION
The NVS®Mirror automatically
reduces glare during driving con- ditions based upon light levelsmonitored in front of the vehicleand from the rear of the vehicle.These light sensors are visiblethrough openings in the front andrear of the mirror case. Any objectthat would obstruct either lightsensor will degrade the automat-ic dimming control feature.OXM049035
Page 139 of 564
451
Features of your vehicle
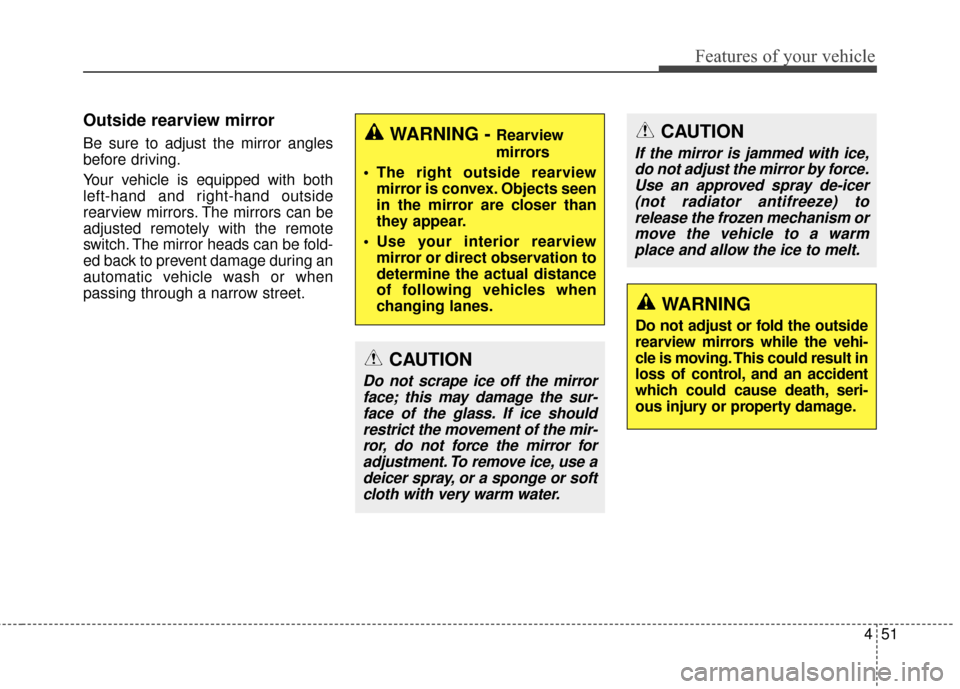
Outside rearview mirror
Be sure to adjust the mirror angles
before driving.
Your vehicle is equipped with both
left-hand and right-hand outside
rearview mirrors. The mirrors can be
adjusted remotely with the remote
switch. The mirror heads can be fold-
ed back to prevent damage during an
automatic vehicle wash or when
passing through a narrow street.WARNING - Rearview
mirrors
The right outside rearview mirror is convex. Objects seen
in the mirror are closer than
they appear.
Use your interior rearview mirror or direct observation to
determine the actual distance
of following vehicles when
changing lanes.
CAUTION
Do not scrape ice off the mirrorface; this may damage the sur-face of the glass. If ice shouldrestrict the movement of the mir-ror, do not force the mirror foradjustment. To remove ice, use adeicer spray, or a sponge or softcloth with very warm water.
CAUTION
If the mirror is jammed with ice,do not adjust the mirror by force.Use an approved spray de-icer(not radiator antifreeze) torelease the frozen mechanism ormove the vehicle to a warmplace and allow the ice to melt.
WARNING
Do not adjust or fold the outside
rearview mirrors while the vehi-
cle is moving. This could result in
loss of control, and an accident
which could cause death, seri-
ous injury or property damage.
Page 140 of 564
Features of your vehicle
52
4
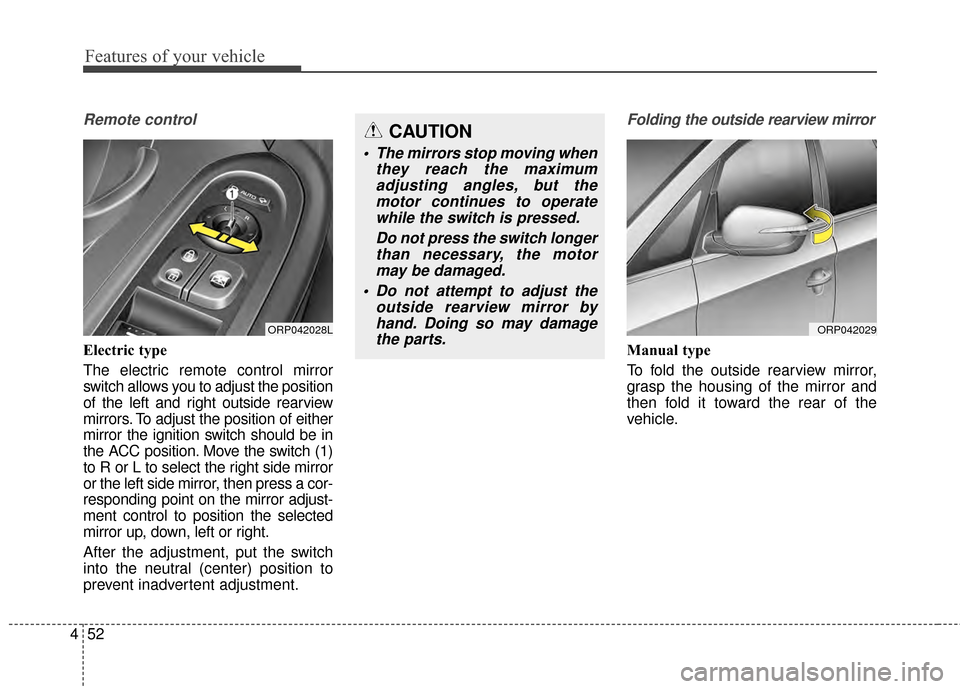
Remote control
Electric type
The electric remote control mirror
switch allows you to adjust the position
of the left and right outside rearview
mirrors. To adjust the position of either
mirror the ignition switch should be in
the ACC position. Move the switch (1)
to R or L to select the right side mirror
or the left side mirror, then press a cor-
responding point on the mirror adjust-
ment control to position the selected
mirror up, down, left or right.
After the adjustment, put the switch
into the neutral (center) position to
prevent inadvertent adjustment.
Folding the outside rearview mirror
Manual type
To fold the outside rearview mirror,
grasp the housing of the mirror and
then fold it toward the rear of the
vehicle.
ORP042028L
CAUTION
The mirrors stop moving when
they reach the maximumadjusting angles, but themotor continues to operatewhile the switch is pressed.
Do not press the switch longerthan necessary, the motormay be damaged.
Do not attempt to adjust the outside rearview mirror byhand. Doing so may damagethe parts.
ORP042029