engine KIA Rondo 2017 3.G Owner's Manual
[x] Cancel search | Manufacturer: KIA, Model Year: 2017, Model line: Rondo, Model: KIA Rondo 2017 3.GPages: 625, PDF Size: 19.69 MB
Page 580 of 625
Maintenance
80
8
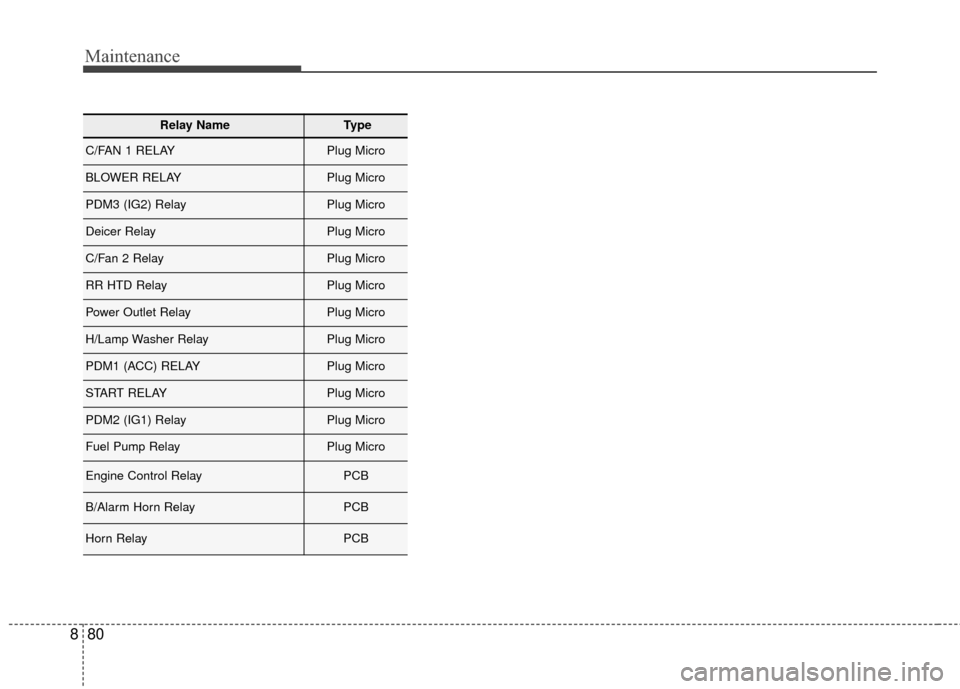
Relay NameType
C/FAN 1 RELAYPlug Micro
BLOWER RELAYPlug Micro
PDM3 (IG2) RelayPlug Micro
Deicer RelayPlug Micro
C/Fan 2 RelayPlug Micro
RR HTD RelayPlug Micro
Power Outlet RelayPlug Micro
H/Lamp Washer RelayPlug Micro
PDM1 (ACC) RELAYPlug Micro
START RELAYPlug Micro
PDM2 (IG1) RelayPlug Micro
Fuel Pump RelayPlug Micro
Engine Control RelayPCB
B/Alarm Horn RelayPCB
Horn RelayPCB
Page 581 of 625
881
Maintenance
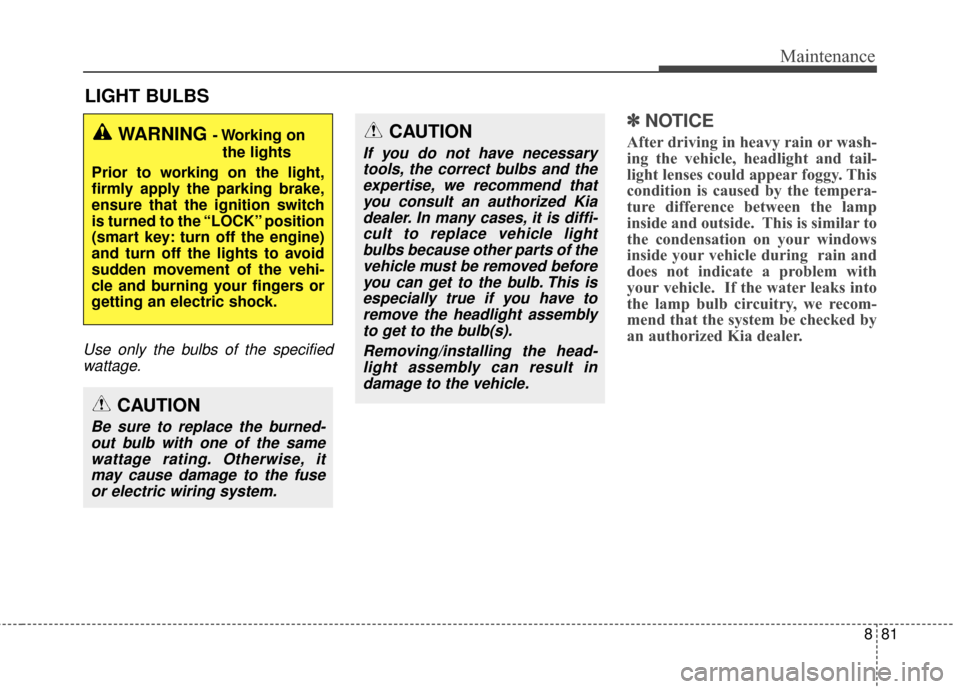
LIGHT BULBS
Use only the bulbs of the specifiedwattage.
✽ ✽ NOTICE
After driving in heavy rain or wash-
ing the vehicle, headlight and tail-
light lenses could appear foggy. This
condition is caused by the tempera-
ture difference between the lamp
inside and outside. This is similar to
the condensation on your windows
inside your vehicle during rain and
does not indicate a problem with
your vehicle. If the water leaks into
the lamp bulb circuitry, we recom-
mend that the system be checked by
an authorized Kia dealer.WARNING - Working on
the lights
Prior to working on the light,
firmly apply the parking brake,
ensure that the ignition switch
is turned to the “LOCK” position
(smart key: turn off the engine)
and turn off the lights to avoid
sudden movement of the vehi-
cle and burning your fingers or
getting an electric shock.
CAUTION
Be sure to replace the burned- out bulb with one of the samewattage rating. Otherwise, itmay cause damage to the fuseor electric wiring system.
CAUTION
If you do not have necessarytools, the correct bulbs and theexpertise, we recommend thatyou consult an authorized Kiadealer. In many cases, it is diffi-cult to replace vehicle lightbulbs because other parts of thevehicle must be removed beforeyou can get to the bulb. This isespecially true if you have toremove the headlight assemblyto get to the bulb(s).
Removing/installing the head-light assembly can result indamage to the vehicle.
Page 582 of 625
Maintenance
82
8
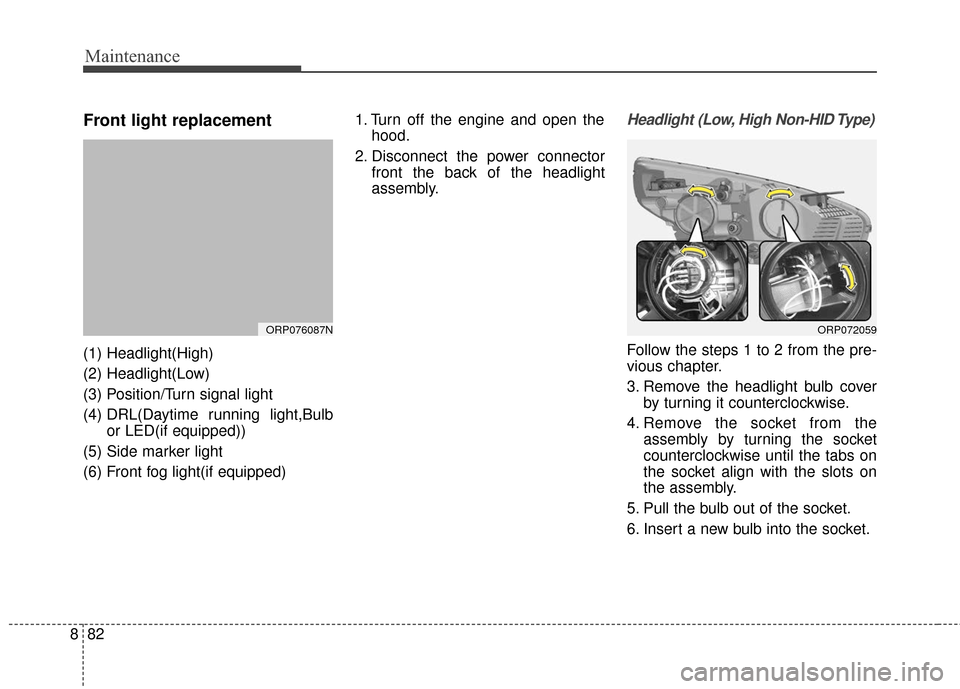
Front light replacement
(1) Headlight(High)
(2) Headlight(Low)
(3) Position/Turn signal light
(4) DRL(Daytime running light,Bulb
or LED(if equipped))
(5) Side marker light
(6) Front fog light(if equipped) 1. Turn off the engine and open the
hood.
2. Disconnect the power connector front the back of the headlight
assembly.
Headlight (Low, High Non-HID Type)
Follow the steps 1 to 2 from the pre-
vious chapter.
3. Remove the headlight bulb coverby turning it counterclockwise.
4. Remove the socket from the assembly by turning the socket
counterclockwise until the tabs on
the socket align with the slots on
the assembly.
5. Pull the bulb out of the socket.
6. Insert a new bulb into the socket.
ORP076087NORP072059
Page 587 of 625
887
Maintenance
Outside light
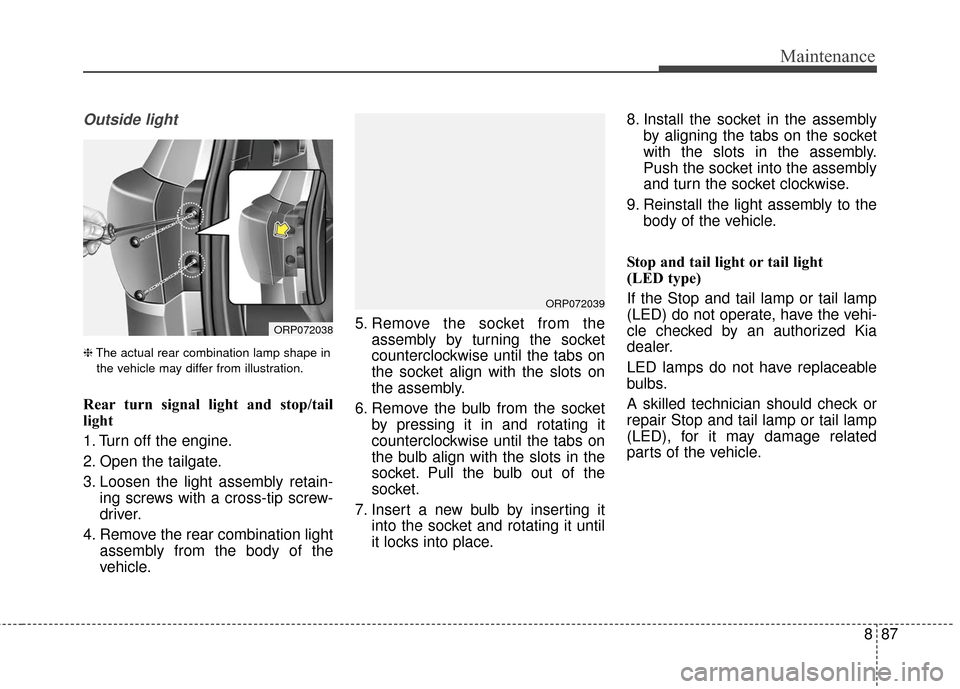
❈The actual rear combination lamp shape in
the vehicle may differ from illustration.
Rear turn signal light and stop/tail
light
1. Turn off the engine.
2. Open the tailgate.
3. Loosen the light assembly retain- ing screws with a cross-tip screw-
driver.
4. Remove the rear combination light assembly from the body of the
vehicle. 5. Remove the socket from the
assembly by turning the socket
counterclockwise until the tabs on
the socket align with the slots on
the assembly.
6. Remove the bulb from the socket by pressing it in and rotating it
counterclockwise until the tabs on
the bulb align with the slots in the
socket. Pull the bulb out of the
socket.
7. Insert a new bulb by inserting it into the socket and rotating it until
it locks into place. 8. Install the socket in the assembly
by aligning the tabs on the socket
with the slots in the assembly.
Push the socket into the assembly
and turn the socket clockwise.
9. Reinstall the light assembly to the body of the vehicle.
Stop and tail light or tail light
(LED type)
If the Stop and tail lamp or tail lamp
(LED) do not operate, have the vehi-
cle checked by an authorized Kia
dealer.
LED lamps do not have replaceable
bulbs.
A skilled technician should check or
repair Stop and tail lamp or tail lamp
(LED), for it may damage related
parts of the vehicle.
ORP072039
ORP072038
Page 588 of 625
Maintenance
88
8
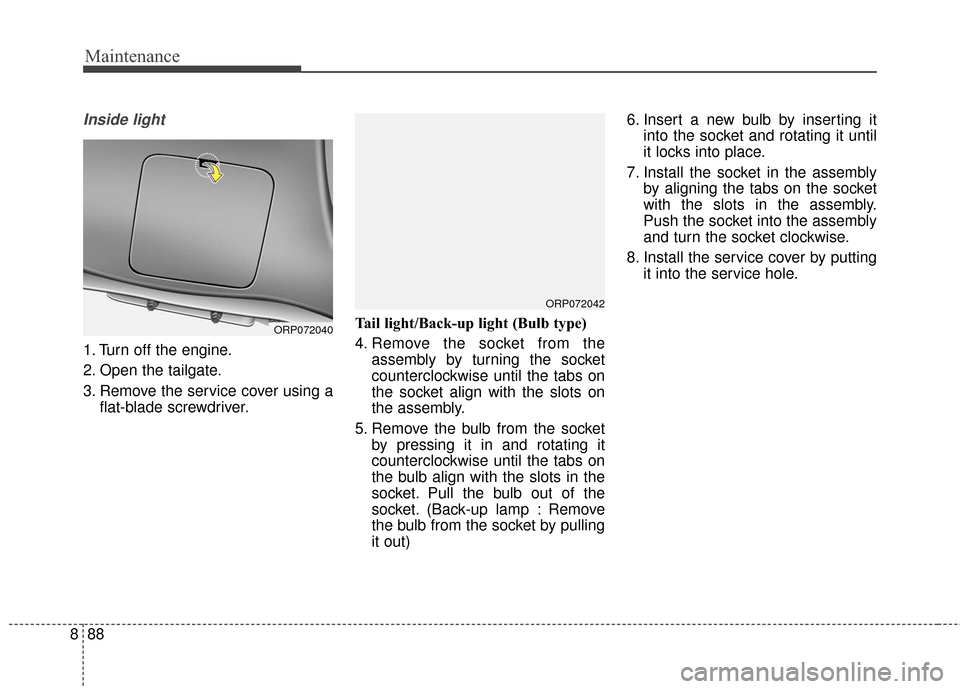
Inside light
1. Turn off the engine.
2. Open the tailgate.
3. Remove the service cover using a
flat-blade screwdriver. Tail light/Back-up light (Bulb type)
4. Remove the socket from the
assembly by turning the socket
counterclockwise until the tabs on
the socket align with the slots on
the assembly.
5. Remove the bulb from the socket by pressing it in and rotating it
counterclockwise until the tabs on
the bulb align with the slots in the
socket. Pull the bulb out of the
socket. (Back-up lamp : Remove
the bulb from the socket by pulling
it out) 6. Insert a new bulb by inserting it
into the socket and rotating it until
it locks into place.
7. Install the socket in the assembly by aligning the tabs on the socket
with the slots in the assembly.
Push the socket into the assembly
and turn the socket clockwise.
8. Install the service cover by putting it into the service hole.
ORP072042
ORP072040
Page 593 of 625
893
Maintenance
High-pressure washing
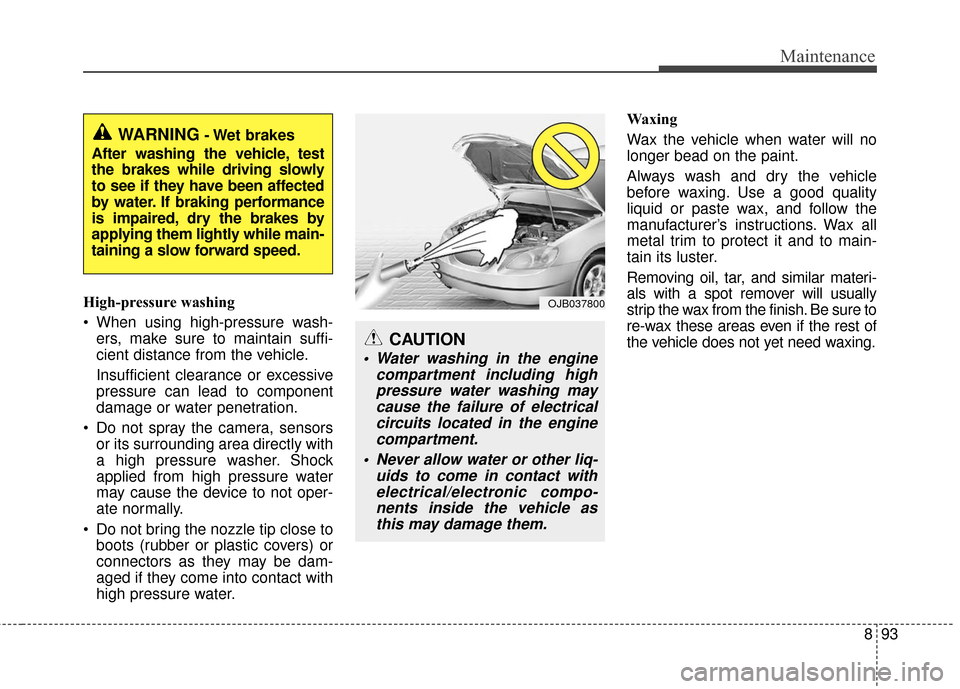
When using high-pressure wash-ers, make sure to maintain suffi-
cient distance from the vehicle.
Insufficient clearance or excessive
pressure can lead to component
damage or water penetration.
Do not spray the camera, sensors or its surrounding area directly with
a high pressure washer. Shock
applied from high pressure water
may cause the device to not oper-
ate normally.
Do not bring the nozzle tip close to boots (rubber or plastic covers) or
connectors as they may be dam-
aged if they come into contact with
high pressure water. Waxing
Wax the vehicle when water will no
longer bead on the paint.
Always wash and dry the vehicle
before waxing. Use a good quality
liquid or paste wax, and follow the
manufacturer’s instructions. Wax all
metal trim to protect it and to main-
tain its luster.
Removing oil, tar, and similar materi-
als with a spot remover will usually
strip the wax from the finish. Be sure to
re-wax these areas even if the rest of
the vehicle does not yet need waxing.
CAUTION
Water washing in the engine
compartment including highpressure water washing maycause the failure of electricalcircuits located in the enginecompartment.
Never allow water or other liq- uids to come in contact withelectrical/electronic compo-nents inside the vehicle asthis may damage them.
OJB037800
WARNING- Wet brakes
After washing the vehicle, test
the brakes while driving slowly
to see if they have been affected
by water. If braking performance
is impaired, dry the brakes by
applying them lightly while main-
taining a slow forward speed.
Page 601 of 625
8101
Maintenance
Canister
Fuel vapors generated inside the fuel
tank are absorbed and stored in the
onboard canister. When the engine is
running, the fuel vapors absorbed in
the canister are drawn into the surge
tank through the purge control sole-
noid valve.
Purge Control Solenoid Valve(PCSV)
The purge control solenoid valve is
controlled by the Engine Control
Module (ECM); when the engine
coolant temperature is low during
idling, the PCSV closes so that evap-
orated fuel is not taken into the
engine. After the engine warms up
during ordinary driving, the PCSV
opens to introduce evaporated fuel to
the engine.
3. Exhaust emission control system
The Exhaust Emission Control
System is a highly effective system
which controls exhaust emissions
while maintaining good vehicle per-
formance.
Vehicle modifications
This vehicle should not be modified.
Modification of your vehicle could
affect its performance, safety or
durability and may even violate gov-
ernmental safety and emissions reg-
ulations.
In addition, damage or performance
problems resulting from any modifi-
cation may not be covered under
warranty.
If you use unauthorized electronic
devices, it may cause the vehicle to
operate abnormally, wire damage,
battery discharge and fire. For your
safety, do not use unauthorized
electronic devices.
Engine exhaust gas precautions(carbon monoxide)
Carbon monoxide can be present with other exhaust fumes.
Therefore, if you smell exhaust
fumes of any kind inside your vehi-
cle, have it inspected and repaired
immediately. If you ever suspect
exhaust fumes are coming into
your vehicle, drive it only with all
the windows fully open. Have your
vehicle checked and repaired
immediately.
WARNING- Exhaust
Engine exhaust gases contain
carbon monoxide (CO). Though
colorless and odorless, it is
dangerous and could be lethal if
inhaled. Follow the instructions
on this page to avoid CO poi-
soning.
Page 602 of 625
Maintenance
102
8
Do not operate the engine in con-
fined or closed areas (such as
garages) any more than what is
necessary to move the vehicle in or
out of the area.
When the vehicle is stopped in an open area for more than a short
time with the engine running,
adjust the ventilation system (as
needed) to draw outside air into the
vehicle.
Never sit in a parked or stopped vehicle for any extended time with
the engine running.
When the engine stalls or fails to start, excessive attempts to restart
the engine may cause damage to
the emission control system.Operating precautions for catalyt-ic converters Your vehicle is equipped with a cat-
alytic converter emission control
device.
Therefore, the following precautions
must be observed:
Use only UNLEADED FUEL for gasoline engines.
Do not operate the vehicle when there are signs of engine malfunc-
tion, such as misfire or a noticeable
loss of performance.
Do not misuse or abuse the engine. Examples of misuse are
coasting with the ignition off and
descending steep grades in gear
with the ignition off.
Do not operate the engine at high idle speed for extended periods (5
minutes or more).
Do not modify or tamper with any part of the engine or emission con-
trol system. All inspections and
adjustments must be made by an
authorized Kia dealer.
WARNING- Fire
A hot exhaust system can ignite flammable items under
your vehicle. Do not park, idle
or drive the vehicle over or
near flammable objects, such
as grass, vegetation, paper,
leaves, etc.
The exhaust system and cat- alytic system are very hot
while the engine is running or
immediately after the engine
is turned off. Keep away from
the exhaust and catalyctic
system, or you may get
burned.
Also, do not remove the heat
sink around the exhaust sys-
tem, do not seal the bottom of
the vehicle or do not coat the
vehicle for corrosion control.
It may present a fire risk under
certain conditions.
Page 603 of 625
8103
Maintenance
Avoid driving with an extremely lowfuel level. Running out of fuel could
cause the engine to misfire, dam-
aging the catalytic converter.
Failure to observe these precautions
could result in damage to the catalyt-
ic converter and to your vehicle.
Additionally, such actions could void
your warranties.
Page 604 of 625
Specifications & Consumer information
Engine . . . . . . . . . . . . . . . . . . . . . . . . . . . . . . . . . . . . \
9-2
Dimensions . . . . . . . . . . . . . . . . . . . . . . . . . . . . . . . . 9-2
Bulb wattage . . . . . . . . . . . . . . . . . . . . . . . . . . . . . . . 9-3
Tires and wheels . . . . . . . . . . . . . . . . . . . . . . . . . . . . 9-4
Gross vehicle weight. . . . . . . . . . . . . . . . . . . . . . . . . 9-5
Luggage volume . . . . . . . . . . . . . . . . . . . . . . . . . . . . 9-5
Recommended lubricants and capacities . . . . . . . . 9-6
• Recommended sae viscosity number . . . . . . . . . . . . . . 9-7
Vehicle identification number (VIN) . . . . . . . . . . . 9-8
Vehicle certification label. . . . . . . . . . . . . . . . . . . . . 9-8
Engine number . . . . . . . . . . . . . . . . . . . . . . . . . . . . . 9-9
Tire specification and pressure label . . . . . . . . . . . 9-9
9