check engine KIA Sedona 2008 2.G User Guide
[x] Cancel search | Manufacturer: KIA, Model Year: 2008, Model line: Sedona, Model: KIA Sedona 2008 2.GPages: 339, PDF Size: 6.71 MB
Page 142 of 339
3 133
Features of your vehicle
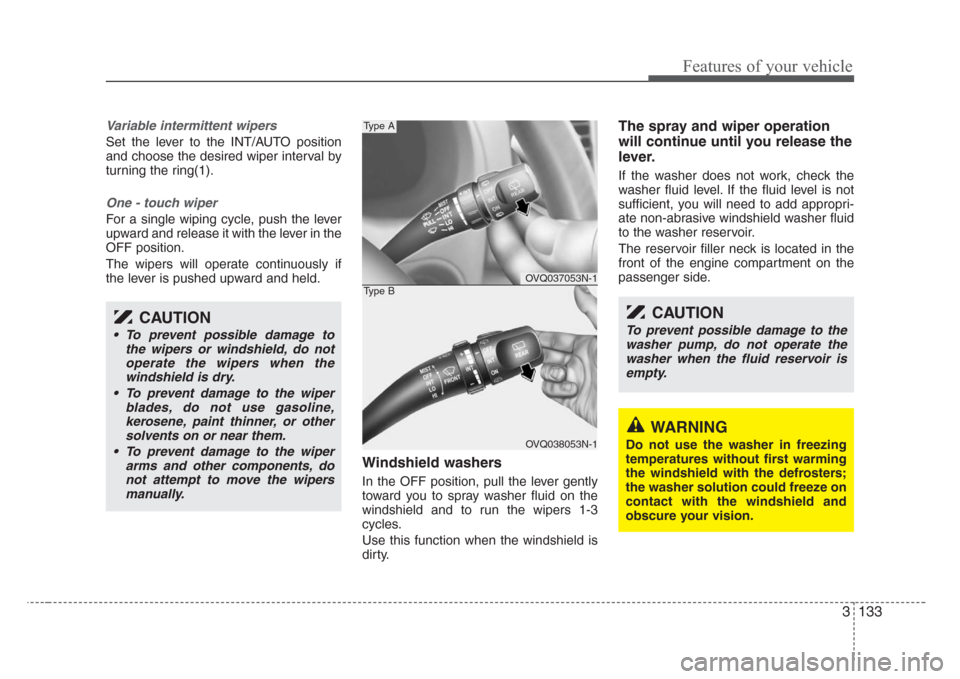
Variable intermittent wipers
Set the lever to the INT/AUTO position
and choose the desired wiper interval by
turning the ring(1).
One - touch wiper
For a single wiping cycle, push the lever
upward and release it with the lever in the
OFF position.
The wipers will operate continuously if
the lever is pushed upward and held.
Windshield washers
In the OFF position, pull the lever gently
toward you to spray washer fluid on the
windshield and to run the wipers 1-3
cycles.
Use this function when the windshield is
dirty.
The spray and wiper operation
will continue until you release the
lever.
If the washer does not work, check the
washer fluid level. If the fluid level is not
sufficient, you will need to add appropri-
ate non-abrasive windshield washer fluid
to the washer reservoir.
The reservoir filler neck is located in the
front of the engine compartment on the
passenger side.
CAUTION
• To prevent possible damage to
the wipers or windshield, do not
operate the wipers when the
windshield is dry.
• To prevent damage to the wiper
blades, do not use gasoline,
kerosene, paint thinner, or other
solvents on or near them.
• To prevent damage to the wiper
arms and other components, do
not attempt to move the wipers
manually.
CAUTION
To prevent possible damage to the
washer pump, do not operate the
washer when the fluid reservoir is
empty.
WARNING
Do not use the washer in freezing
temperatures without first warming
the windshield with the defrosters;
the washer solution could freeze on
contact with the windshield and
obscure your vision.
OVQ037053N-1
OVQ038053N-1
Type A
Type B
Page 155 of 339
Features of your vehicle
146 3
Air conditioning system operation tips
• If the vehicle has been parked in direct
sunlight during hot weather, open the
windows for a short time to let the hot
air inside the vehicle escape.
• To help reduce moisture inside of win-
dows on rainy humid days, decrease
the humidity inside the vehicle by oper-
ating the air conditioning system.
• During air conditioning system opera-
tion, you may occasionally notice a
slight change in engine speed as the
air conditioning compressor cycles on.
This is a normal system operation
characteristics.
• Use the air conditioning system every
month if only for a few minutes to
ensure maximum system perfor-
mance.
• When using the air conditioning sys-
tem, you may notice clear water drip-
ping (or even puddling) on the ground
under the passenger side of the vehi-
cle. This is a normal system operation
characteristics.
• Operating the air conditioning system
in the recirculated air position does
provide maximum cooling, however,
continual operation in this mode may
cause the air inside the vehicle to
become stale.Checking the amount of air con-
ditioner refrigerant and compres-
sor lubricant
When the amount of refrigerant is low,
the performance of the air conditioning is
reduced. Overfilling also has a bad influ-
ence on the air conditioning system.
Therefore, if abnormal operation is
found, have the system inspected by an
authorized Kia dealer.
CAUTION
• When using the air conditioning
system, monitor the temperature
gauge closely while driving up
hills or in heavy traffic when out-
side temperatures are high. Air
conditioning system operation
may cause engine overheating.
Continue to use the blower fan
but turn the air conditioning sys-
tem off if the temperature gauge
indicates engine overheating.
• When opening the windows in
humid weather air conditioning
may create water droplets inside
the vehicle. Since excessive
water droplets may cause dam-
age to electrical equipment, air
conditioning should only be run
with the windows closed.
CAUTION
The air conditioning system should
be serviced by an authorized Kia
dealer. Improper service may cause
serious injury.
CAUTION
When the performance of the air
conditioning system is reduced it is
important that the correct type and
amount of oil and refrigerant is
used. Otherwise, damage to the
compressor and abnormal system
operation may occur.
Page 234 of 339
Driving your vehicle
2 4
Before entering vehicle:
• Be sure that all windows, outside mir-
ror(s), and outside lights are clean.
• Check the condition of the tires.
• Check under the vehicle for any sign of
leaks.
• Be sure there are no obstacles behind
you if you intend to back up.
Necessary inspections
Fluid levels, such as engine oil, engine
coolant, brake fluid, and washer fluid
should be checked on a regular basis,
with the exact interval depending on the
fluid. Further details are provided in
Section 6, Maintenance.
Before starting
• Close and lock all doors.
• Position the seat so that all controls are
easily reached.
• Adjust the inside and outside rearview
mirrors.
• Be sure that all lights work.
• Check all gauges.
• Check the operation of warning lights
when the ignition switch is turned to
the ON position.
• Release the parking brake and make
sure the brake warning light goes out.
For safe operation, be sure you are famil-
iar with your vehicle and its equipment.
BEFORE DRIVING
WARNING- Driving under
the influence of alcohol or
drugs
Drinking and driving is dangerous.
Drunk driving is the number one
contributor to the highway death
toll each year. Even a small amount
of alcohol will affect your reflexes,
perceptions and judgement. Driving
while under the influence of drugs
is as dangerous or more dangerous
than driving drunk.
You are much more likely to have a
serious accident if you drink or take
drugs and drive.
If you are drinking or taking drugs,
don’t drive. Do not ride with a driv-
er who has been drinking or taking
drugs. Choose a designated driver
or call a cab.
Page 235 of 339
43
Driving your vehicle
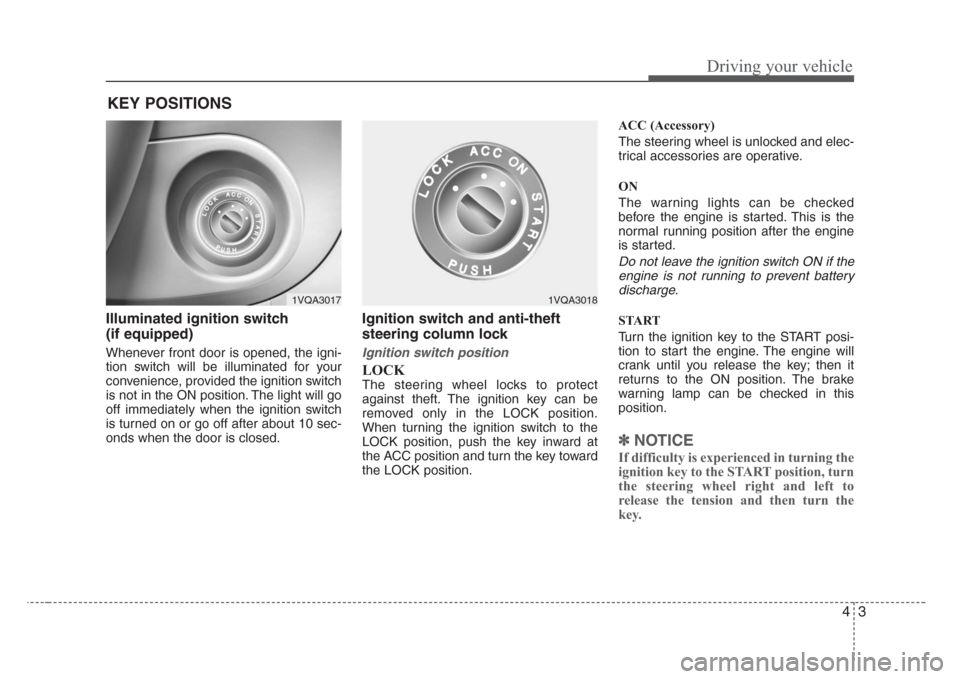
Illuminated ignition switch
(if equipped)
Whenever front door is opened, the igni-
tion switch will be illuminated for your
convenience, provided the ignition switch
is not in the ON position. The light will go
off immediately when the ignition switch
is turned on or go off after about 10 sec-
onds when the door is closed.
Ignition switch and anti-theft
steering column lock
Ignition switch position
LOCK
The steering wheel locks to protect
against theft. The ignition key can be
removed only in the LOCK position.
When turning the ignition switch to the
LOCK position, push the key inward at
the ACC position and turn the key toward
the LOCK position.ACC (Accessory)
The steering wheel is unlocked and elec-
trical accessories are operative.
ON
The warning lights can be checked
before the engine is started. This is the
normal running position after the engine
is started.
Do not leave the ignition switch ON if the
engine is not running to prevent battery
discharge.
START
Turn the ignition key to the START posi-
tion to start the engine. The engine will
crank until you release the key; then it
returns to the ON position. The brake
warning lamp can be checked in this
position.
✽
NOTICE
If difficulty is experienced in turning the
ignition key to the START position, turn
the steering wheel right and left to
release the tension and then turn the
key.
KEY POSITIONS
1VQA30171VQA3018
Page 249 of 339
417
Driving your vehicle
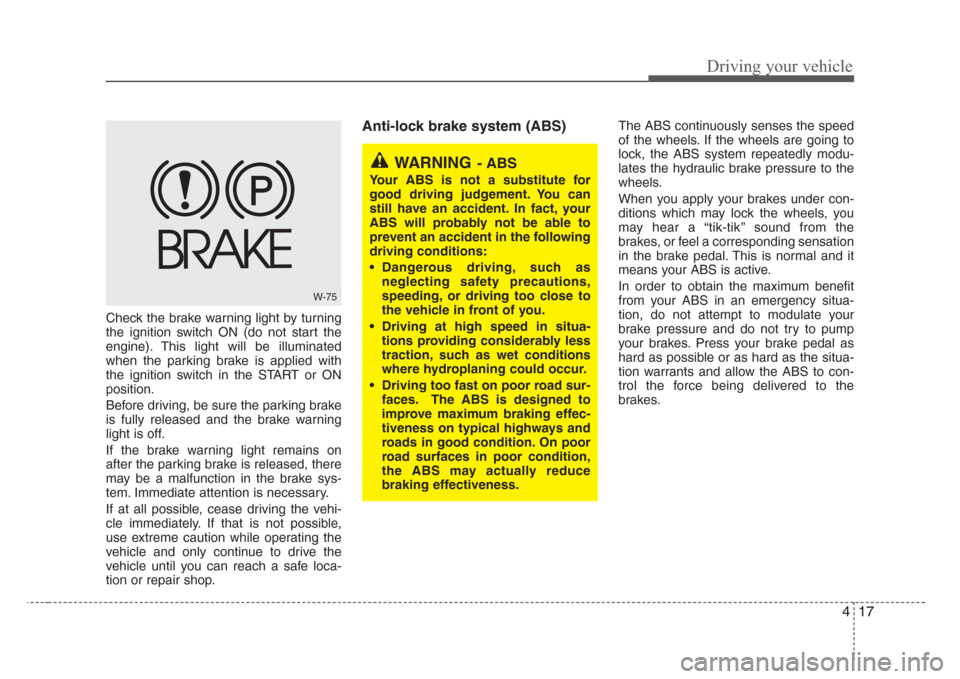
Check the brake warning light by turning
the ignition switch ON (do not start the
engine). This light will be illuminated
when the parking brake is applied with
the ignition switch in the START or ON
position.
Before driving, be sure the parking brake
is fully released and the brake warning
light is off.
If the brake warning light remains on
after the parking brake is released, there
may be a malfunction in the brake sys-
tem. Immediate attention is necessary.
If at all possible, cease driving the vehi-
cle immediately. If that is not possible,
use extreme caution while operating the
vehicle and only continue to drive the
vehicle until you can reach a safe loca-
tion or repair shop.
Anti-lock brake system (ABS) The ABS continuously senses the speed
of the wheels. If the wheels are going to
lock, the ABS system repeatedly modu-
lates the hydraulic brake pressure to the
wheels.
When you apply your brakes under con-
ditions which may lock the wheels, you
may hear a “tik-tik’’ sound from the
brakes, or feel a corresponding sensation
in the brake pedal. This is normal and it
means your ABS is active.
In order to obtain the maximum benefit
from your ABS in an emergency situa-
tion, do not attempt to modulate your
brake pressure and do not try to pump
your brakes. Press your brake pedal as
hard as possible or as hard as the situa-
tion warrants and allow the ABS to con-
trol the force being delivered to the
brakes.
W-75
WARNING- ABS
Your ABS is not a substitute for
good driving judgement. You can
still have an accident. In fact, your
ABS will probably not be able to
prevent an accident in the following
driving conditions:
• Dangerous driving, such as
neglecting safety precautions,
speeding, or driving too close to
the vehicle in front of you.
• Driving at high speed in situa-
tions providing considerably less
traction, such as wet conditions
where hydroplaning could occur.
• Driving too fast on poor road sur-
faces. The ABS is designed to
improve maximum braking effec-
tiveness on typical highways and
roads in good condition. On poor
road surfaces in poor condition,
the ABS may actually reduce
braking effectiveness.
Page 251 of 339
419
Driving your vehicle
The Electronic Stability Control (ESC)
monitors information from various vehicle
sensors and then compares the driver's
commands with the actual behavior of the
vehicle. If an unstable condition occurs - a
sudden evasive movement for example -
ESC intervenes within fractions of a
second via the engine computer and
brake system and attempts to stabilize
the vehicle.
ESC operation
ESC ON condition
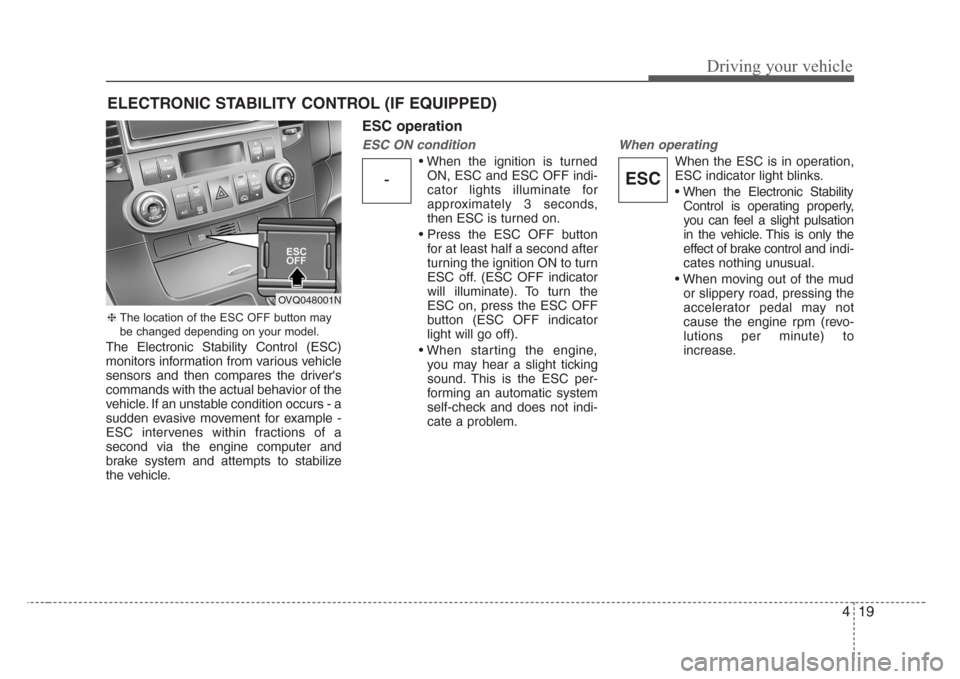
• When the ignition is turned
ON, ESC and ESC OFF indi-
cator lights illuminate for
approximately 3 seconds,
then ESC is turned on.
• Press the ESC OFF button
for at least half a second after
turning the ignition ON to turn
ESC off. (ESC OFF indicator
will illuminate). To turn the
ESC on, press the ESC OFF
button (ESC OFF indicator
light will go off).
• When starting the engine,
you may hear a slight ticking
sound. This is the ESC per-
forming an automatic system
self-check and does not indi-
cate a problem.
When operating
When the ESC is in operation,
ESC indicator light blinks.
• When the Electronic Stability
Control is operating properly,
you can feel a slight pulsation
in the vehicle. This is only the
effect of brake control and indi-
cates nothing unusual.
• When moving out of the mud
or slippery road, pressing the
accelerator pedal may not
cause the engine rpm (revo-
lutions per minute) to
increase.
ELECTRONIC STABILITY CONTROL (IF EQUIPPED)
-ESC
❈The location of the ESC OFF button may
be changed depending on your model.
OVQ048001N
Page 260 of 339
Driving your vehicle
28 4
• We recommend that you carry emer-
gency equipment, including a window
scraper, windshield de-icer, a bag of
sand or salt, flares, a small shovel and
jumper cables.
• Make sure you have sufficient ethyl-
ene-glycol coolant in the radiator.
• Check the battery condition and
cables. Cold temperatures reduce the
capacity of any battery, so it must be in
excellent condition to provide enough
winter starting power.
• Make sure the engine oil viscosity is
suitable for cold weather.
• Check the ignition system for loose
connections and damage.
• Use antifreeze-formulated windshield
washer fluid. (Do not use engine
coolant antifreeze.)
• Do not use the parking brake if it might
freeze. When parking, shift to P (Park)
with an automatic transaxle and block
the rear wheels.Snow tires
If you mount snow tires on your Kia,
make sure they are radial tires of the
same size and load range as the original
tires. Mount snow tires on all four wheels
to balance your vehicle’s handling in all
weather conditions. Keep in mind that the
traction provided by snow tires on dry
roads may not be as high as your vehi-
cle's original equipment tires. You should
drive cautiously even when the roads are
clear. Check with the tire dealer for max-
imum speed recommendations.
Do not install studded tires without first
checking local, state and municipal regu-
lations for possible restrictions against
their use.
WINTER DRIVING
WARNING- Snow tire size
Snow tires should be equivalent in
size and type to the vehicle's stan-
dard tires. Otherwise, the safety and
handling of your vehicle may be
adversely affected.
TRAILER TOWING
WARNING- Towing a trail-
er
If you don't use the correct equip-
ment and drive improperly, you can
lose control when you pull a trailer.
For example, if the trailer is too
heavy, the brakes may not work well
- or even at all. You and your pas-
sengers could be seriously or fatal-
ly injured. Pull a trailer only if you
have followed all the steps in this
section.
WARNING- Weight limits
Before towing, make sure the total
trailer weight, gross combination
weight, gross vehicle weight, gross
axle weight and trailer tongue load
are all within the limits.
Page 263 of 339
431
Driving your vehicle
Following distance
Stay at least twice as far behind the vehi-
cle ahead as you would when driving
your vehicle without a trailer. This can
help you avoid situations that require
heavy braking and sudden turns.
Passing
You’ll need more passing distance up
ahead when you’re towing a trailer. And,
because of the increased vehicle length,
you’ll need to go much farther beyond the
passed vehicle before you can return to
your lane.
Backing up
Hold the bottom of the steering wheel
with one hand. Then, to move the trailer
to the left, just move your hand to the left.
To move the trailer to the right, move your
hand to the right. Always back up slowly
and, if possible, have someone guide
you.
Making turns
When you’re turning with a trailer, make
wider turns than normal. Do this so your
trailer won’t strike soft shoulders, curbs,
road signs, trees, or other objects. Avoid
jerky or sudden maneuvers. Signal well
in advance.
Turn signals when towing a trailer
When you tow a trailer, your vehicle has
to have a different turn signal flasher and
extra wiring. The green arrows on your
instrument panel will flash whenever you
signal a turn or lane change. Properly
connected, the trailer lights will also flash
to alert other drivers you’re about to turn,
change lanes, or stop.
When towing a trailer, the green arrows
on your instrument panel will flash for
turns even if the bulbs on the trailer are
burned out. Thus, you may think drivers
behind you are seeing your signals
when, in fact, they are not. It’s important
to check occasionally to be sure the trail-
er bulbs are still working. You must also
check the lights every time you discon-
nect and then reconnect the wires.
Do not connect a trailer lighting system
directly to your vehicle’s lighting system.
Use only an approved trailer wiring har-
ness.
Your Authorized Kia Dealer can assist
you in installing the wiring harness.
Driving on grades
Reduce speed and shift to a lower gear
before you start down a long or steep
downgrade. If you don’t shift down, you
might have to use your brakes so much
that they would get hot and no longer
operate efficiently.
On a long uphill grade, shift down and
reduce your speed to around 70 km/h (45
mph) to reduce the possibility of engine
and transaxle overheating.
If your trailer weighs more than the max-
imum trailer weight without trailer brakes
and you have an automatic transaxle,
you should drive in D (Drive) when tow-
ing a trailer.
Operating your vehicle in D (Drive) when
towing a trailer will minimize heat build up
and extend the life of your transaxle.
WARNING
Failure to use an approved trailer
wiring harness could result in dam-
age to the vehicle electrical system
and/or personal injury.
Page 265 of 339
433
Driving your vehicle
Maintenance when trailer towing
Your vehicle will need service more often
when you regularly pull a trailer.
Important items to pay particular atten-
tion to include engine oil, automatic
transaxle fluid, axle lubricant and cooling
system fluid. Brake condition is another
important item to frequently check. Each
item is covered in this manual, and the
Index will help you find them quickly. If
you’re trailering, it’s a good idea to review
these sections before you start your trip.
Don’t forget to also maintain your trailer
and hitch. Follow the maintenance
schedule that accompanied your trailer
and check it periodically. Preferably, con-
duct the check at the start of each day’s
driving. Most importantly, all hitch nuts
and bolts should be tight.
If you do decide to pull a trailer
Here are some important points if you
decide to pull a trailer:
• State, provincial, county and municipal
government have varying trailering
laws. Make sure your hitch, mirrors,
lights and wiring arrangements are
legal, not only where you live, but also
where you’ll be driving. A good source
for this information is provincial or local
law enforcement agencies.
• Consider using a sway control. You can
ask a hitch dealer about sway control.
• After your odometer indicates 800 km
(500 miles) or more, you can tow a
trailer. For the first 800 km (500 miles)
that you tow a trailer, don’t drive over
80 km/h (50 mph) and don’t make
starts at full throttle. This helps your
engine and other parts of your vehicle
“wear” in at the heavier loads.
• Always drive your vehicle at a moder-
ate speed (less than 100 km/h (60
mph)).
• On a long uphill grade, do not exceed
70 km/h (45 mph) or the posted towing
speed limit, whichever is lower.
• The important considerations have to
do with weight:CAUTION
• Due to higher load during trailer
usage, overheating might occur
in hot days or during uphill driv-
ing. If the coolant gauge indicates
over-heating, switch off the A/C
and stop the vehicle in a safe area
to cool down the engine.
• When towing check transaxle
fluid more frequently.
• If your vehicle is not equipped
with the air conditioner, you
should install a condenser fan to
improve engine performance
when towing a trailer.
Page 271 of 339
What to do in an emergency
4 5
Jump starting procedure
1. Make sure the booster battery is 12-
volt and that its negative terminal is
grounded.
2. If the booster battery is in another
vehicle, do not allow the vehicles to
touch.
3. Turn off all unnecessary electrical
loads.
4. Connect the jumper cables in the exact
sequence shown in the previous illus-
tration. First connect one end of a
jumper cable to the positive terminal of
the discharged battery (1), then con-
nect the other end to the positive ter-
minal on the booster battery (2).
Proceed to connect one end of the
other jumper cable to the negative ter-
minal of the booster battery (3), then
the other end to a solid, stationary,
metallic point (for example, the engine
lifting bracket) away from the battery
(4). Do not connect it to or near any
part that moves when the engine is
cranked.Do not allow the jumper cables to con-
tact anything except the correct bat-
tery terminals or the correct ground.
Do not lean over the battery when
making connections.
5. Start the engine of the vehicle with the
booster battery and let it run at 2,000
rpm, then start the engine of the vehi-
cle with the discharged battery.
If the cause of your battery discharging is
not apparent, you should have your vehi-
cle checked by an Authorized Kia Dealer.
Push-starting
Vehicles equipped with automatic
transaxle cannot be push-started.
Follow the directions in this section for
jump-starting.
CAUTION
Never tow a vehicle to start it
because the sudden surge forward
when the engine starts could cause
a collision with the tow vehicle.
CAUTION-Battery cables
Do not connect the jumper cable
from the negative terminal of the
booster battery to the negative ter-
minal of the discharged battery.
This can cause the discharged bat-
tery to overheat and crack, releas-
ing battery acid.