parking brake KIA Sedona 2014 3.G User Guide
[x] Cancel search | Manufacturer: KIA, Model Year: 2014, Model line: Sedona, Model: KIA Sedona 2014 3.GPages: 382, PDF Size: 4.67 MB
Page 262 of 382
Driving your vehicle
44
STARTING THE ENGINE
1. Make sure the parking brake isapplied.
2. Place the transaxle shift lever in P (Park). Depress the brake pedal fully.
You can also start the engine whenthe shift lever is in the N (Neutral)position.
3. Turn the ignition switch to START and hold it there until the engine starts (a
maximum of 10 seconds), then
release the key.
4. In extremely cold weather (below -18°C / 0°F) or after the vehicle has
not been operated for several days, let
the engine warm up without depress-
ing the accelerator.
Whether the engine is cold or warm, itshould be started without depressingthe accelerator.
WARNING- Ignition key
Never turn the ignition switch to LOCK or ACC while the vehicle is
moving. This would result in loss of
directional control and braking
function, which could cause an
accident.
The anti-theft steering column lock is not a substitute for the parking
brake. Before leaving the driver’s
seat, always make sure the shift
lever is engaged in P (Park) for
automatic transaxle, set the park-
ing brake fully and shut the engine
off. Unexpected and sudden vehi-
cle movement may occur if these
precautions are not taken.
Never reach for the ignition switch, or any other controls through the
steering wheel while the vehicle is
in motion. The presence of your
hand or arm in this area could
cause a loss of vehicle control, an
accident and serious bodily injury
or death.
Do not place any movable objects around the driver’s seat as they
may move while driving, interfere
with the driver and lead to an acci-
dent.
CAUTION
If the engine stalls while you are inmotion, do not attempt to move theshift lever to the P (Park) position. If traffic and road conditions permit,you may put the shift lever in the N (Neutral) position while the vehicleis still moving and turn the ignition switch to the START position in anattempt to restart the engine.
CAUTION
Do not engage the starter for morethan 10 seconds. If the engine stallsout or fails to start, wait 5 to 10 sec- onds before re-engaging the starter.Improper use of the starter may damage it.
WARNING
Always wear appropriate shoes
when operating your vehicle.
Unsuitable shoes (high heels, ski
boots,etc.) may interfere with your
ability to use the brake and acceler-
ator pedal.
Page 264 of 382
Driving your vehicle
64
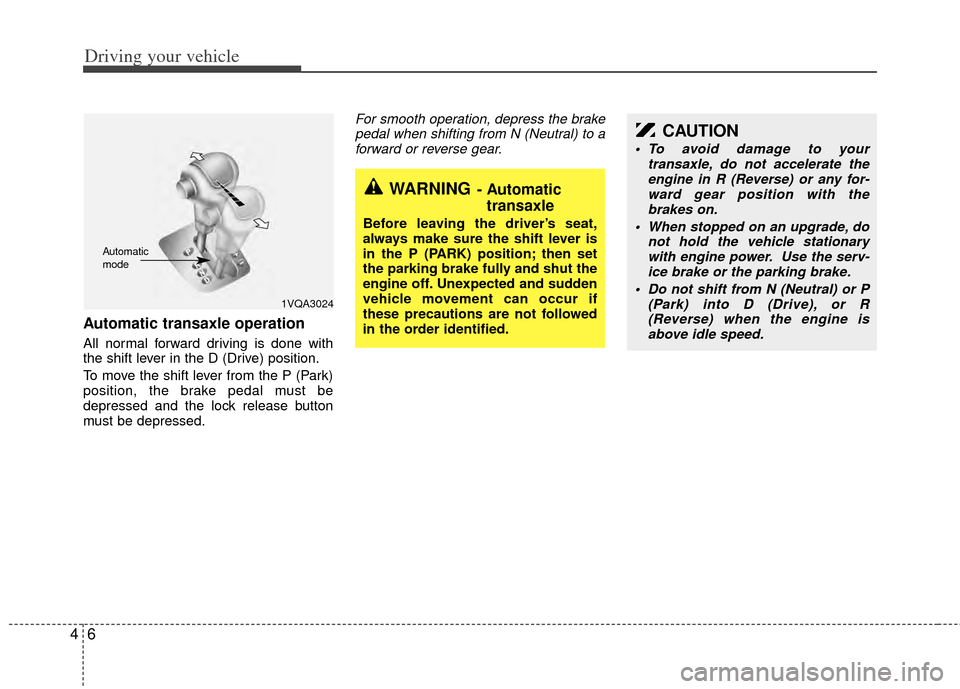
Automatic transaxle operation
All normal forward driving is done with
the shift lever in the D (Drive) position.
To move the shift lever from the P (Park)
position, the brake pedal must be
depressed and the lock release button
must be depressed.
For smooth operation, depress the brakepedal when shifting from N (Neutral) to aforward or reverse gear.
WARNING- Automatic transaxle
Before leaving the driver’s seat,
always make sure the shift lever is
in the P (PARK) position; then set
the parking brake fully and shut the
engine off. Unexpected and sudden
vehicle movement can occur if
these precautions are not followed
in the order identified.
1VQA3024
Automatic
mode
CAUTION
To avoid damage to your
transaxle, do not accelerate theengine in R (Reverse) or any for- ward gear position with thebrakes on.
When stopped on an upgrade, do not hold the vehicle stationarywith engine power. Use the serv- ice brake or the parking brake.
Do not shift from N (Neutral) or P (Park) into D (Drive), or R(Reverse) when the engine is above idle speed.
Page 265 of 382
47
Driving your vehicle
Transaxle ranges
P (park)
Always come to a complete stop before
shifting into P (Park). This position locks
the transaxle and prevents the front
wheels from rotating.
R (reverse)
Use this position to drive the vehicle
backward.
N (neutral)
The wheels and transaxle are not locked.
The vehicle will roll freely even on the
slightest incline unless the parking brake
or service brakes are applied.
D (drive)
This is the normal forward driving posi-
tion. The transaxle will automatically shift
through a 6-gear sequence, providing the
best fuel economy and power.
For extra power when passing another
vehicle or climbing grades, depress the
accelerator fully, at which time the
transaxle will automatically downshift to
the next lower gear.
✽ ✽NOTICE
Always come to a complete stop before
shifting into D (Drive).
(Continued)
Never leave a child unattended in
a vehicle.
CAUTION
The transaxle may be damaged ifyou shift into P (Park) while the vehicle is in motion.
CAUTION
Always come to a complete stopbefore shifting into or out of R (Reverse); you may damage thetransaxle if you shift into R while the vehicle is in motion, except asexplained in “Rocking the Vehicle”,in this manual.
WARNING
Shifting into P (Park) while the vehicle is in motion will cause the
drive wheels to lock which will
cause you to lose control of the
vehicle.
Do not use the P (Park) position in place of the parking brake.
Always make sure the shift lever
is latched in the P (Park) position
so that it cannot be moved unless
the lock release button is pushed
in, AND set the parking brake
fully.
Before leaving the driver’s seat, always make sure the shift lever
is in the P (PARK) position. Set
the parking brake fully, shut the
engine off and take the key with
you. Unexpected and sudden
vehicle movement can occur if
you do not follow these precau-
tions in the order specified.
(Continued)
Page 267 of 382
49
Driving your vehicle
Moving up a steep grade from a
standing start
To move up a steep grade from a stand-
ing start, depress the brake pedal, shift
the shift lever to D (Drive). Select the
appropriate gear depending on load
weight and steepness of the grade, and
release the parking brake. Depress the
accelerator gradually while releasing the
service brakes.
When accelerating from a stop on a
steep hill, the vehicle may have a ten-
dency to roll backwards. Shifting the
shift lever into 2 (Second Gear) while
in Sports mode will help prevent the
vehicle from rolling backwards.
Shift lock system
For your safety, the automatic transaxle
has a shift lock system which prevents
shifting the transaxle out of P (Park)
unless the brake pedal is depressed.
To shift the transaxle out of P (Park):
1. Depress and hold the brake pedal.
2. Start the engine or turn the ignition tothe ON position.
3. Depress the lock release button and move the shift lever.
If the brake pedal is repeatedly
depressed and released with the shift
lever in the P (Park) position, a chattering
noise near the shift lever may be heard.
This is a normal condition.
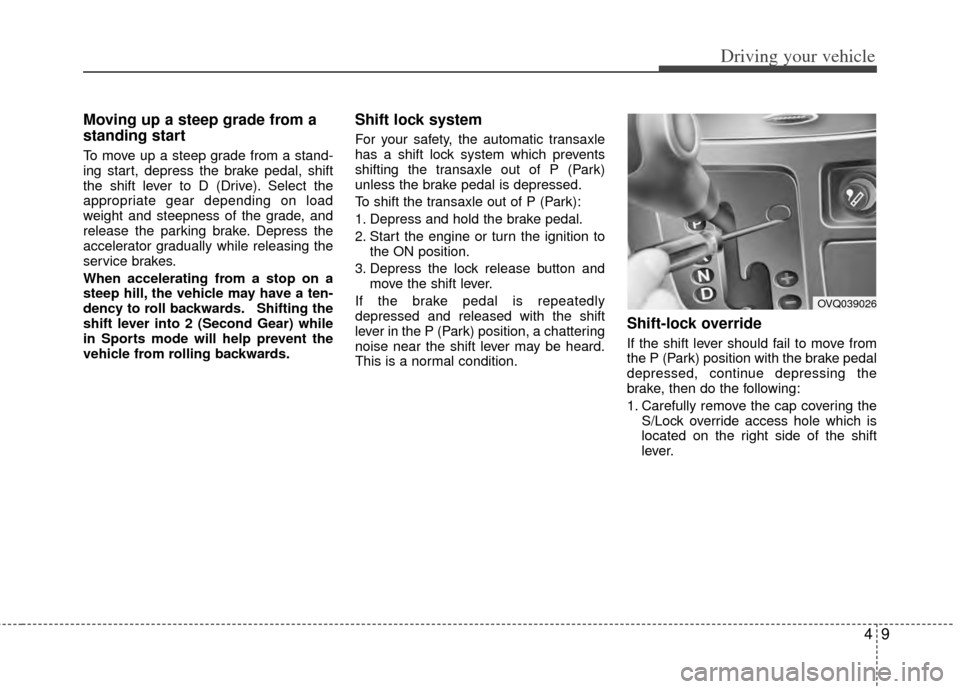
Shift-lock override
If the shift lever should fail to move from
the P (Park) position with the brake pedal
depressed, continue depressing the
brake, then do the following:
1. Carefully remove the cap covering the S/Lock override access hole which is
located on the right side of the shift
lever.
OVQ039026
Page 272 of 382
Driving your vehicle
14
4
Power brakes
Your vehicle has power-assisted brakes
that adjust automatically through normal
usage.
In the event that the power-assisted
brakes lose power because of a stalled
engine or some other reason, you can
still stop your vehicle by applying greater
force to the brake pedal than you nor-
mally would. The stopping distance, how-
ever, will be longer.
When the engine is not running, the
reserve brake power is partially depleted
each time the brake pedal is applied. Do
not pump the brake pedal when the
power assist has been interrupted.
Pump the brake pedal only when neces-
sary to maintain steering control on slip-
pery surfaces.
In the event of brake failure
If service brakes fail to operate while the
vehicle is in motion, you can make an
emergency stop with the parking brake.
The stopping distance, however, will be
much greater than normal.
BRAKE SYSTEM
(Continued)
When descending a long or steep
hill, shift to a lower gear and
avoid continuous application of
the brakes. Continuous brake
application will cause the brakes
to overheat and could result in a
temporary loss of braking per-
formance.
Wet brakes may result in the vehi- cle not slowing down at the usual
rate and pulling to one side when
the brakes are applied. Applying
the brakes lightly will indicate
whether they have been affected
in this way. Always test your
brakes in this fashion after driv-
ing through deep water. To dry the
brakes, apply them lightly while
maintaining a safe forward speed
until brake performance returns
to normal.
Always, confirm the position of the brake and accelerator pedal
before driving. If you don't check
the position of the accelerator
and brake pedal before driving,
you may depress the accelerator
instead of the brake pedal. It may
cause a serious accident.
WARNING- Parking brake
Applying the parking brake while
the vehicle is moving at normal
speeds can cause a sudden loss of
control of the vehicle. If you must
use the parking brake to stop the
vehicle, use great caution in apply-
ing the brake.
WARNING- Brakes
Do not drive with your foot rest-ing on the brake pedal. This will
create abnormal high brake tem-
peratures, excessive brake lining
and pad wear, and increased
stopping distances.
(Continued)
Page 273 of 382
415
Driving your vehicle
Disc brakes wear indicator
Your vehicle has disc brakes.
When your brake pads are worn and new
pads are required, you will hear a high-
pitched warning sound from your front
brakes or rear brakes (if equipped). You
may hear this sound come and go or it
may occur whenever you depress the
brake pedal.
Please remember that some driving con-
ditions or climates may cause a brake
squeal when you first apply (or lightly
apply) the brakes. This is normal and
does not indicate a problem with your
brakes.
Parking on curbed streets
When parking your vehicle on an uphillgrade, park as close to the curb as
possible and turn the front wheels
away from the curb so that the front
wheels will contact the curb if the vehi-
cle moves backward.
When parking your vehicle on a down- hill grade, park as close to the curb as
possible and turn the front wheels
toward the curb so that the front
wheels will contact the curb if the vehi-
cle moves forward.
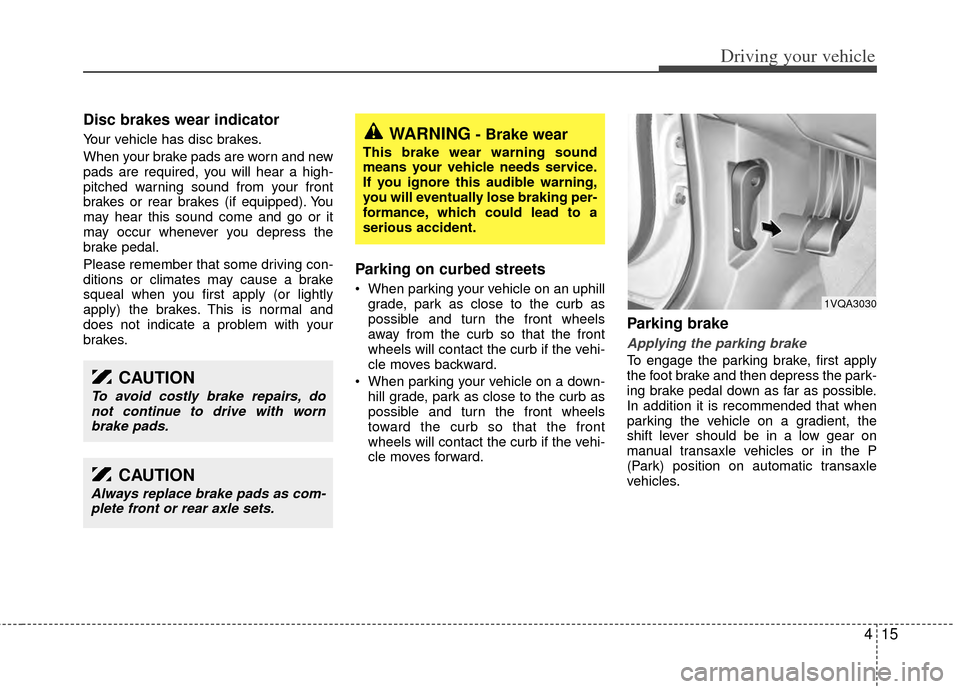
Parking brake
Applying the parking brake
To engage the parking brake, first apply
the foot brake and then depress the park-
ing brake pedal down as far as possible.
In addition it is recommended that when
parking the vehicle on a gradient, the
shift lever should be in a low gear on
manual transaxle vehicles or in the P
(Park) position on automatic transaxle
vehicles.
WARNING- Brake wear
This brake wear warning sound
means your vehicle needs service.
If you ignore this audible warning,
you will eventually lose braking per-
formance, which could lead to a
serious accident.
CAUTION
Always replace brake pads as com-plete front or rear axle sets.
CAUTION
To avoid costly brake repairs, donot continue to drive with wornbrake pads.
1VQA3030
Page 274 of 382
Driving your vehicle
16
4
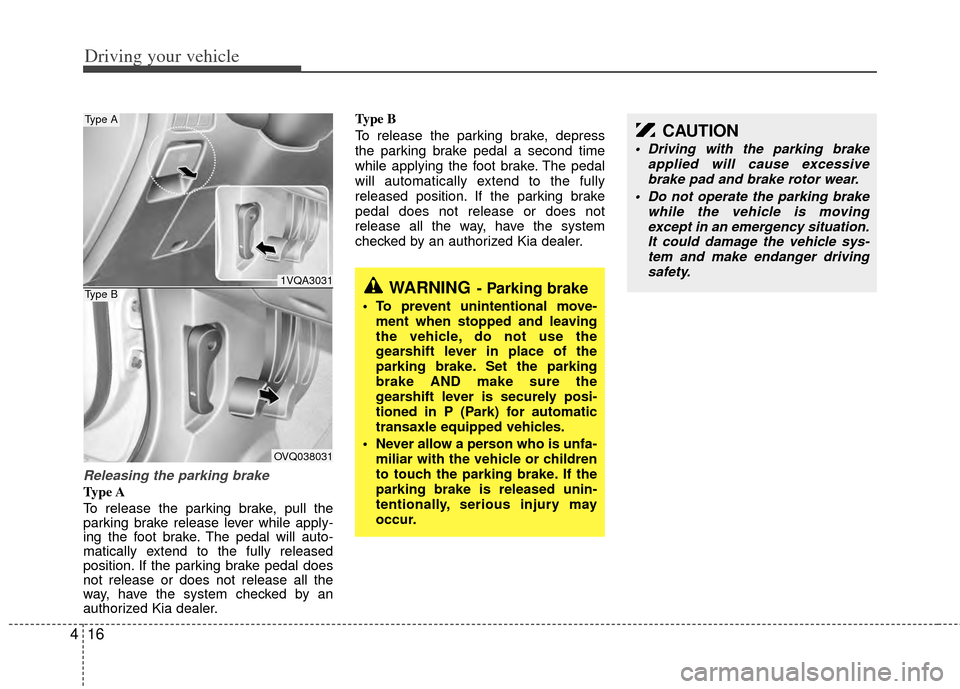
Releasing the parking brake
Type A
To release the parking brake, pull the
parking brake release lever while apply-
ing the foot brake. The pedal will auto-
matically extend to the fully released
position. If the parking brake pedal does
not release or does not release all the
way, have the system checked by an
authorized Kia dealer. Type B
To release the parking brake, depress
the parking brake pedal a second time
while applying the foot brake. The pedal
will automatically extend to the fully
released position. If the parking brake
pedal does not release or does not
release all the way, have the system
checked by an authorized Kia dealer.
CAUTION
Driving with the parking brake
applied will cause excessivebrake pad and brake rotor wear.
Do not operate the parking brake while the vehicle is movingexcept in an emergency situation. It could damage the vehicle sys-tem and make endanger driving safety.
WARNING- Parking brake
To prevent unintentional move- ment when stopped and leaving
the vehicle, do not use the
gearshift lever in place of the
parking brake. Set the parking
brake AND make sure the
gearshift lever is securely posi-
tioned in P (Park) for automatic
transaxle equipped vehicles.
Never allow a person who is unfa- miliar with the vehicle or children
to touch the parking brake. If the
parking brake is released unin-
tentionally, serious injury may
occur.
1VQA3031
OVQ038031
Type A
Type B
Page 275 of 382
417
Driving your vehicle
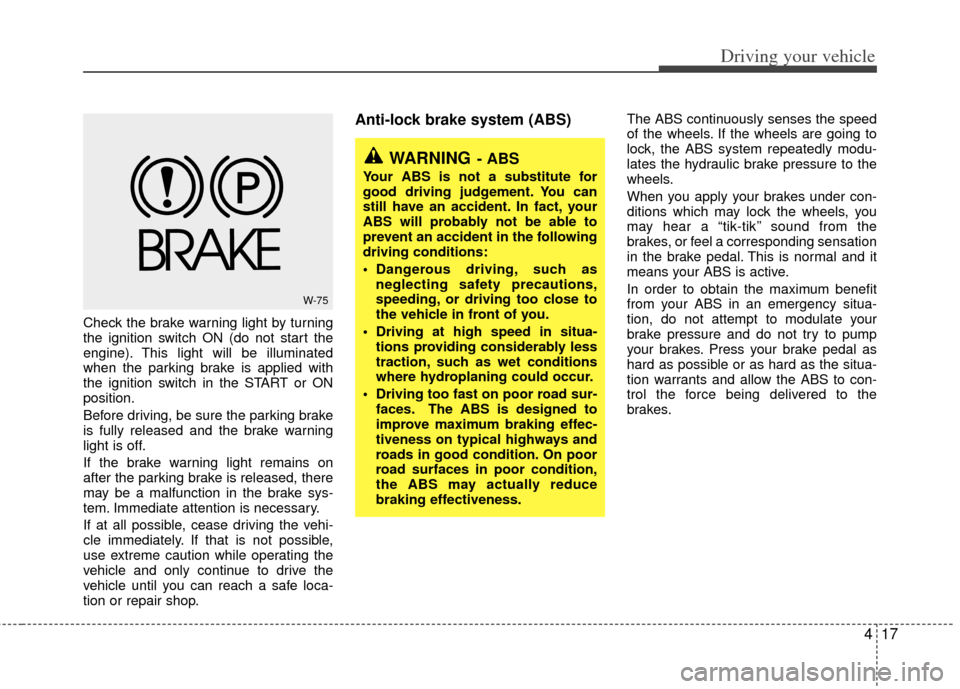
Check the brake warning light by turning
the ignition switch ON (do not start the
engine). This light will be illuminated
when the parking brake is applied with
the ignition switch in the START or ON
position.
Before driving, be sure the parking brake
is fully released and the brake warning
light is off.
If the brake warning light remains on
after the parking brake is released, there
may be a malfunction in the brake sys-
tem. Immediate attention is necessary.
If at all possible, cease driving the vehi-
cle immediately. If that is not possible,
use extreme caution while operating the
vehicle and only continue to drive the
vehicle until you can reach a safe loca-
tion or repair shop.
Anti-lock brake system (ABS) The ABS continuously senses the speed
of the wheels. If the wheels are going to
lock, the ABS system repeatedly modu-
lates the hydraulic brake pressure to the
wheels.
When you apply your brakes under con-
ditions which may lock the wheels, you
may hear a “tik-tik’’ sound from the
brakes, or feel a corresponding sensation
in the brake pedal. This is normal and it
means your ABS is active.
In order to obtain the maximum benefit
from your ABS in an emergency situa-
tion, do not attempt to modulate your
brake pressure and do not try to pump
your brakes. Press your brake pedal as
hard as possible or as hard as the situa-
tion warrants and allow the ABS to con-
trol the force being delivered to the
brakes.
W-75
WARNING- ABS
Your ABS is not a substitute for
good driving judgement. You can
still have an accident. In fact, your
ABS will probably not be able to
prevent an accident in the following
driving conditions:
Dangerous driving, such asneglecting safety precautions,
speeding, or driving too close to
the vehicle in front of you.
Driving at high speed in situa- tions providing considerably less
traction, such as wet conditions
where hydroplaning could occur.
Driving too fast on poor road sur- faces. The ABS is designed to
improve maximum braking effec-
tiveness on typical highways and
roads in good condition. On poor
road surfaces in poor condition,
the ABS may actually reduce
braking effectiveness.
Page 281 of 382
423
Driving your vehicle
Non-operational conditions of
rear parking assist system
Rear parking assist system may notoperate normally when:
1. Moisture is frozen to the sensor. (It will operate normally when moisture
melts.)
2. Sensor is covered with foreign matter, such as snow or water, or the sensor
cover is blocked. (It will operate nor-
mally when the material is removed or
the sensor is no longer blocked.)
3. Driving on uneven road surfaces (unpaved roads, gravel, bumps, gradi-
ent).
4. Objects generating excessive noise (vehicle horns, loud motorcycle
engines, or truck air brakes) are within
range of the sensor.
5. Heavy rain or water spray exists.
6. Wireless transmitters or mobile phones are within range of the sensor.
7. Sensor is covered with snow.
8. Trailer towing
Detecting range may decrease when:
1. Sensor is stained with foreign matter such as snow or water. (Sensing range
will return to normal when removed.)
2. Outside air temperature is extremely hot or cold.
Following objects may not be recog-nized by the sensor:
1. Sharp or slim objects such as ropes, chains or small poles.
2. Objects which tend to absorb sensor frequency such as clothes, spongy
material or snow.
3. Undetectable objects smaller than 1 m (40 in.) and narrower than 14 cm (6 in.)
in diameter.
CAUTION
1. The rear parking assist system may not sound sequentiallydepending on the speed and shapes of the objects detected.
2. The rear parking assist system may malfunction if the vehiclebumper height or sensor installa-tion has been modified or dam- aged. Any non-factory installedequipment or accessories mayalso interfere with the sensor per- formance.
3. Sensor may not recognize objects less than 40 cm (15 in.)from the sensor, or it may sensean incorrect distance. Use cau- tion.
4. When sensor is frozen or stained with snow, dirt, or water, sensormay be inoperative until the stains are removed using a softcloth.
5. Do not push, scratch or strike the sensor. Sensor damage couldoccur.
Page 287 of 382
429
Driving your vehicle
We recommend that you carry emer-gency equipment, including a window
scraper, windshield de-icer, a bag of
sand or salt, flares, a small shovel and
jumper cables.
Make sure you have sufficient ethyl- ene-glycol coolant in the radiator.
Check the battery condition and cables. Cold temperatures reduce the
capacity of any battery, so it must be in
excellent condition to provide enough
winter starting power.
Make sure the engine oil viscosity is suitable for cold weather.
Check the ignition system for loose connections and damage.
Use antifreeze-formulated windshield washer fluid. (Do not use engine
coolant antifreeze.)
Do not use the parking brake if it might freeze. When parking, shift to P (Park)
with an automatic transaxle and block
the rear wheels.Snow tires
If you mount snow tires on your Kia,
make sure they are radial tires of the
same size and load range as the original
tires. Mount snow tires on all four wheels
to balance your vehicle’s handling in all
weather conditions. Keep in mind that the
traction provided by snow tires on dry
roads may not be as high as your vehi-
cle's original equipment tires. You should
drive cautiously even when the roads are
clear. Check with the tire dealer for max-
imum speed recommendations.
Do not install studded tires without firstchecking local, state and municipal regu-lations for possible restrictions againsttheir use.
WINTER DRIVING
WARNING- Snow tire size
Snow tires should be equivalent in
size and type to the vehicle's stan-
dard tires. Otherwise, the safety and
handling of your vehicle may be
adversely affected.