steering KIA Sedona 2015 3.G Owner's Guide
[x] Cancel search | Manufacturer: KIA, Model Year: 2015, Model line: Sedona, Model: KIA Sedona 2015 3.GPages: 566, PDF Size: 16.71 MB
Page 183 of 566
Features of your vehicle
90
4
Warning Messages
(for Type B and C cluaster)
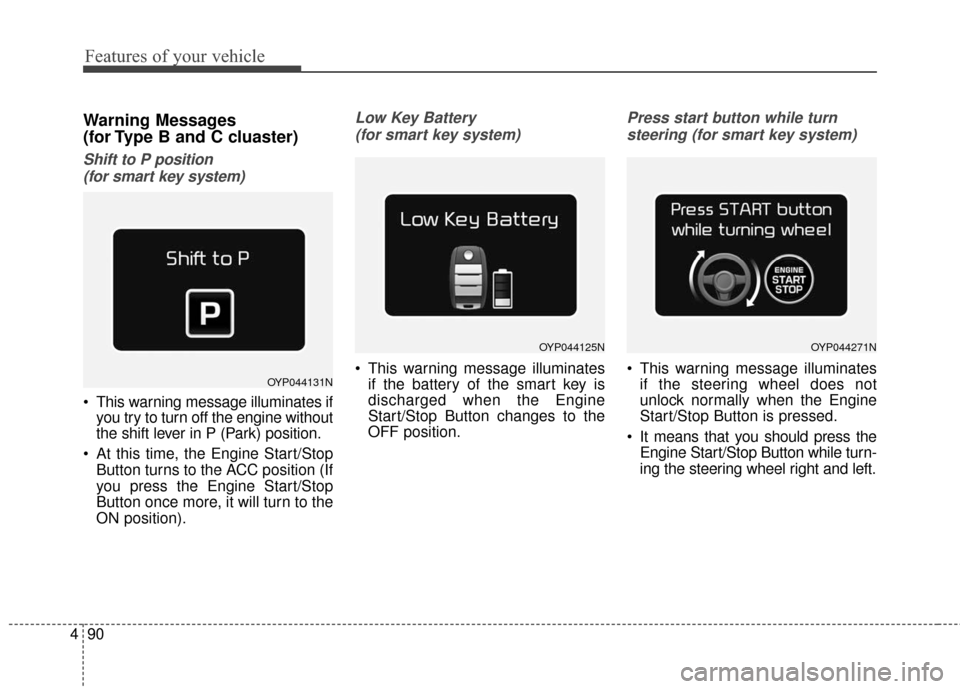
Shift to P position
(for smart key system)
This warning message illuminates if you try to turn off the engine without
the shift lever in P (Park) position.
At this time, the Engine Start/Stop Button turns to the ACC position (If
you press the Engine Start/Stop
Button once more, it will turn to the
ON position).
Low Key Battery
(for smart key system)
This warning message illuminates if the battery of the smart key is
discharged when the Engine
Start/Stop Button changes to the
OFF position.
Press start button while turn
steering (for smart key system)
This warning message illuminates if the steering wheel does not
unlock normally when the Engine
Start/Stop Button is pressed.
It means that you should press the Engine Start/Stop Button while turn-
ing the steering wheel right and left.OYP044131N
OYP044125NOYP044271N
Page 187 of 566
Features of your vehicle
94
4
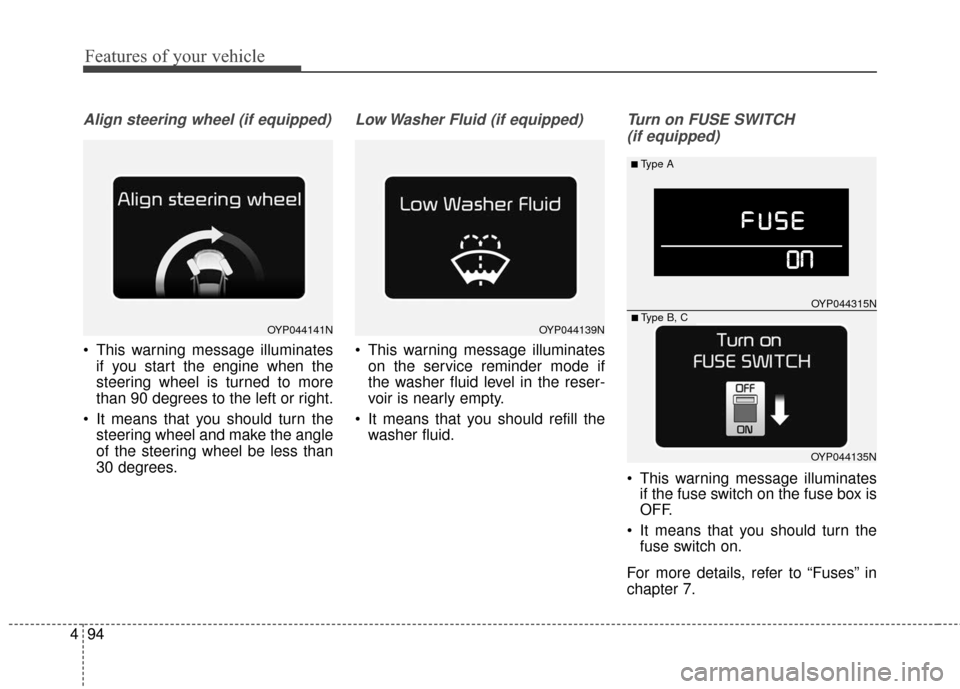
Align steering wheel (if equipped)
This warning message illuminates
if you start the engine when the
steering wheel is turned to more
than 90 degrees to the left or right.
It means that you should turn the steering wheel and make the angle
of the steering wheel be less than
30 degrees.
Low Washer Fluid (if equipped)
This warning message illuminateson the service reminder mode if
the washer fluid level in the reser-
voir is nearly empty.
It means that you should refill the washer fluid.
Turn on FUSE SWITCH
(if equipped)
This warning message illuminates if the fuse switch on the fuse box is
OFF.
It means that you should turn the fuse switch on.
For more details, refer to “Fuses” in
chapter 7.
OYP044141NOYP044139N
■Type A
OYP044315N
OYP044135N■ Type B, C
Page 190 of 566
497
Features of your vehicle
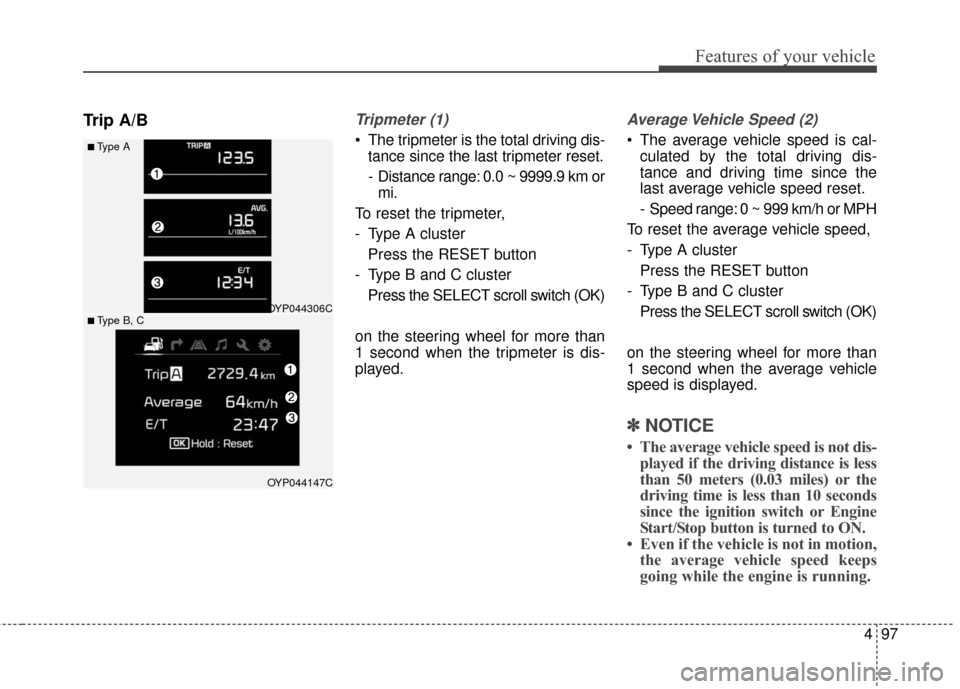
Trip A/BTripmeter (1)
The tripmeter is the total driving dis-tance since the last tripmeter reset.
- Distance range: 0.0 ~ 9999.9 km ormi.
To reset the tripmeter,
- Type A cluster Press the RESET button
- Type B and C cluster Press the SELECT scroll switch (OK)
on the steering wheel for more than
1 second when the tripmeter is dis-
played.
Average Vehicle Speed (2)
The average vehicle speed is cal- culated by the total driving dis-
tance and driving time since the
last average vehicle speed reset.
- Speed range: 0 ~ 999 km/h or MPH
To reset the average vehicle speed,
- Type A cluster Press the RESET button
- Type B and C cluster Press the SELECT scroll switch (OK)
on the steering wheel for more than
1 second when the average vehicle
speed is displayed.
✽ ✽ NOTICE
• The average vehicle speed is not dis-
played if the driving distance is less
than 50 meters (0.03 miles) or the
driving time is less than 10 seconds
since the ignition switch or Engine
Start/Stop button is turned to ON.
• Even if the vehicle is not in motion, the average vehicle speed keeps
going while the engine is running.
■Type A
OYP044306C
OYP044147C
■ Type B, C
Page 191 of 566
Features of your vehicle
98
4
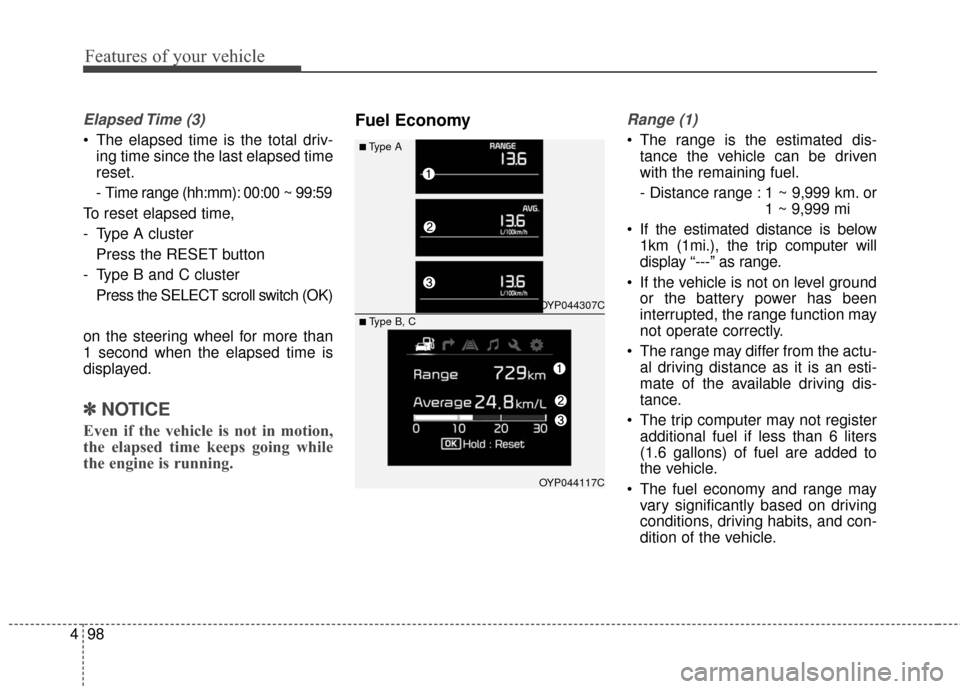
Elapsed Time (3)
The elapsed time is the total driv-
ing time since the last elapsed time
reset.
- Time range (hh:mm): 00:00 ~ 99:59
To reset elapsed time,
- Type A cluster Press the RESET button
- Type B and C cluster Press the SELECT scroll switch (OK)
on the steering wheel for more than
1 second when the elapsed time is
displayed.
✽ ✽ NOTICE
Even if the vehicle is not in motion,
the elapsed time keeps going while
the engine is running.
Fuel EconomyRange (1)
The range is the estimated dis-
tance the vehicle can be driven
with the remaining fuel.
- Distance range : 1 ~ 9,999 km. or 1 ~ 9,999 mi
If the estimated distance is below 1km (1mi.), the trip computer will
display “---” as range.
If the vehicle is not on level ground or the battery power has been
interrupted, the range function may
not operate correctly.
The range may differ from the actu- al driving distance as it is an esti-
mate of the available driving dis-
tance.
The trip computer may not register additional fuel if less than 6 liters
(1.6 gallons) of fuel are added to
the vehicle.
The fuel economy and range may vary significantly based on driving
conditions, driving habits, and con-
dition of the vehicle.■Type A
OYP044307C
OYP044117C
■ Type B, C
Page 192 of 566
499
Features of your vehicle
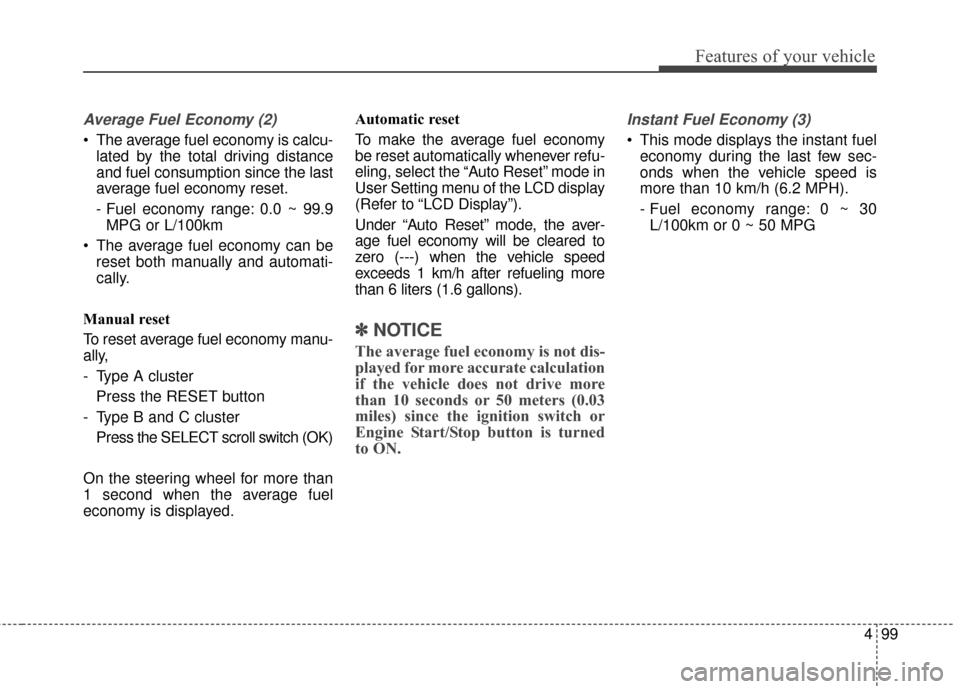
Average Fuel Economy (2)
The average fuel economy is calcu-lated by the total driving distance
and fuel consumption since the last
average fuel economy reset.
- Fuel economy range: 0.0 ~ 99.9MPG or L/100km
The average fuel economy can be reset both manually and automati-
cally.
Manual reset
To reset average fuel economy manu-
ally,
- Type A cluster Press the RESET button
- Type B and C cluster Press the SELECT scroll switch (OK)
On the steering wheel for more than
1 second when the average fuel
economy is displayed. Automatic reset
To make the average fuel economy
be reset automatically whenever refu-
eling, select the “Auto Reset” mode in
User Setting menu of the LCD display
(Refer to “LCD Display”).
Under “Auto Reset” mode, the aver-
age fuel economy will be cleared to
zero (---) when the vehicle speed
exceeds 1 km/h after refueling more
than 6 liters (1.6 gallons).
✽ ✽
NOTICE
The average fuel economy is not dis-
played for more accurate calculation
if the vehicle does not drive more
than 10 seconds or 50 meters (0.03
miles) since the ignition switch or
Engine Start/Stop button is turned
to ON.
Instant Fuel Economy (3)
This mode displays the instant fuel
economy during the last few sec-
onds when the vehicle speed is
more than 10 km/h (6.2 MPH).
- Fuel economy range: 0 ~ 30L/100km or 0 ~ 50 MPG
Page 197 of 566
Features of your vehicle
104
4
✽
✽
NOTICE- Electronic Brake
force Distribution
(EBD) System
Warning Light
When the ABS Warning Light is on
or both ABS and Parking Brake &
Brake Fluid Warning Lights are on,
the speedometer, odometer, or trip-
meter may not work. Also, the EPS
Warning Light may illuminate and
the steering effort may increase or
decrease.
In this case, have your vehicle inspect-
ed by an authorized Kia dealer as
soon as possible.
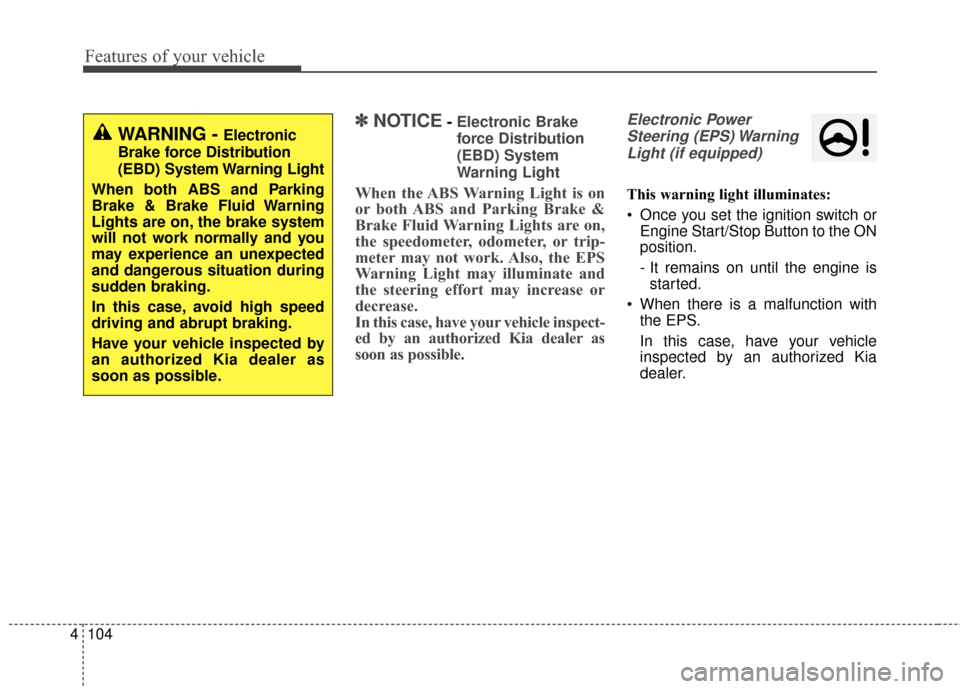
Electronic Power
Steering (EPS) WarningLight (if equipped)
This warning light illuminates:
Once you set the ignition switch or Engine Start/Stop Button to the ON
position.
- It remains on until the engine isstarted.
When there is a malfunction with the EPS.
In this case, have your vehicle
inspected by an authorized Kia
dealer.
WARNING - Electronic
Brake force Distribution
(EBD) System Warning Light
When both ABS and Parking
Brake & Brake Fluid Warning
Lights are on, the brake system
will not work normally and you
may experience an unexpected
and dangerous situation during
sudden braking.
In this case, avoid high speed
driving and abrupt braking.
Have your vehicle inspected by
an authorized Kia dealer as
soon as possible.
Page 215 of 566
Features of your vehicle
122
4
Battery saver function
The purpose of this feature is to
prevent the battery from being dis-
charged if the lights are left in the
ON position. The system automati-
cally shuts off the parking lights 30
seconds after the ignition key is
removed and the driver’s door is
opened and closed.
With this feature, the parking lights will turn off automatically if the driver
parks on the side of the road at night
and opens the driver’s side door.
If necessary, to keep the parking
lights on when the ignition key is
removed, perform the following:
1) Open the driver-side door.
2) Turn the parking lights OFF and ON again using the light switch
on the steering column.
Headlight escort function
If you turn the ignition switch to the
ACC or OFF position with the head-
lights ON, the headlights remain on
for about 5 minutes. However, if the
driver's door is opened and closed,
the headlights are turned off after 15
seconds.
The headlights can be turned off by
pressing the lock button on the trans-
mitter (or smart key) twice or turning
the light switch to the OFF position.
If the driver gets out of the vehicle
through other doors (except driver’s
door), the battery saver function
does not operate and the headlight
escort function does not turn off
automatically. Therefore, It causes
the battery to be discharged. In this
case, make sure to turn off the lamp
before getting out of the vehicle.
Daytime running light
Daytime Running Lights (DRL) can
make it easier for others to see the
front of your vehicle during the day.
DRL can be helpful in many different
driving conditions, and it is especially
helpful after dawn and before sunset.
The DRL system will turn OFF when:
The headlights are ON.
Engine stops.
The parking brake is applied.
LIGHTING
Page 281 of 566
Features of your vehicle
188
4
✽
✽
NOTICE
If you install an after market HID
head lamp, your vehicle’s audio and
electronic device may malfunction.
Antenna
Your vehicle uses a roof antenna to
receive AM or/and FM broadcast sig-
nals.
When reinstalling your roof antenna,
it is important that it is fully tightened
and adjusted to the upright position
to ensure proper reception.
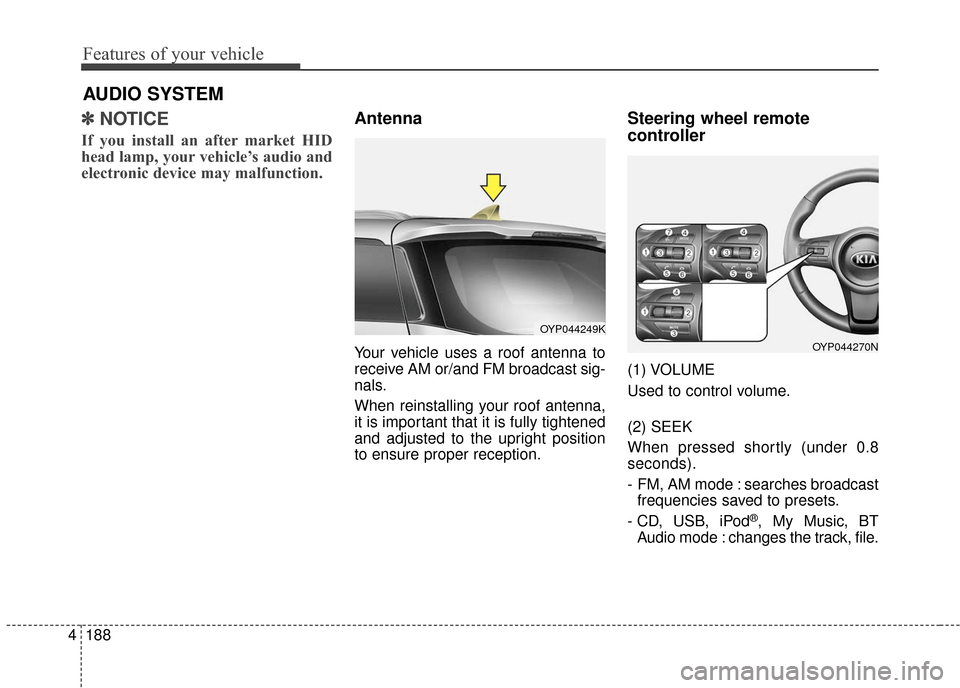
Steering wheel remote
controller
(1) VOLUME
Used to control volume.
(2) SEEK
When pressed shortly (under 0.8
seconds).
- FM, AM mode : searches broadcast
frequencies saved to presets.
- CD, USB, iPod
®, My Music, BT
Audio mode : changes the track, file.
AUDIO SYSTEM
OYP044249K
OYP044270N
Page 315 of 566
Features of your vehicle
222
4
PHONE (for Type A-1)
Before using the Bluetooth® Wireless
Technology phone features
Bluetooth®Wireless
Technology phone, you must first
pair and connect the
Bluetooth®
Wireless Technology mobile phone.
connected, it is not possible to
enter Phone mode. Once a phone
is paired or connected, the guid-
ance screen will be displayed.
tion (IGN/ACC ON), the
Bluetooth®
Wireless Technology phone will be
automatically connected. Even if
you are outside, the
Bluetooth®
Wireless Technology phone will be
automatically connected once you
are in the vicinity of the vehicle. If
you do not want automatic
Bluetooth®Wireless Technology
phone connection, set the
Bluetooth®Wireless Technology
power to OFF
Making a call using the
Steering-wheel mount controls
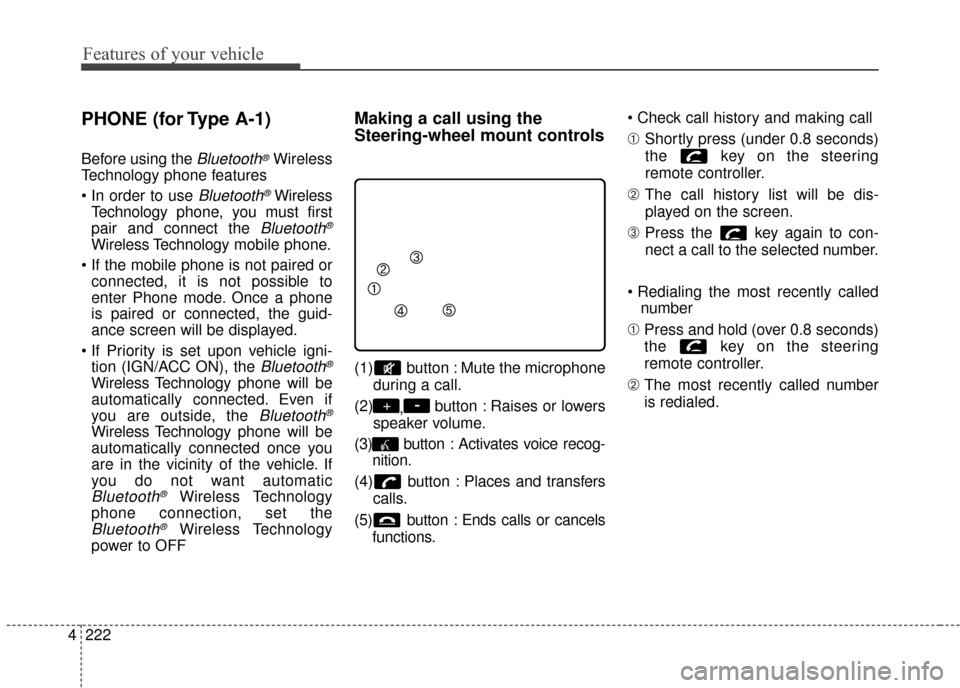
(1) button : Mute the microphone
during a call.
(2) ,button : Raises or lowers
speaker volume.
(3) button : Activates voice recog- nition.
(4) button : Places and transfers calls.
(5) button : Ends calls or cancels functions.
➀
Shortly press (under 0.8 seconds)
the key on the steering
remote controller.
➁ The call history list will be dis-
played on the screen.
\b Press the key again to con-
nect a call to the selected number.
number
➀ Press and hold (over 0.8 seconds)
the key on the steering
remote controller.
➁ The most recently called number
is redialed.
-+
Page 317 of 566
Features of your vehicle
224
4
Pairing Key / Key on
the Steering Remote Controller
When No Devices have been Paired
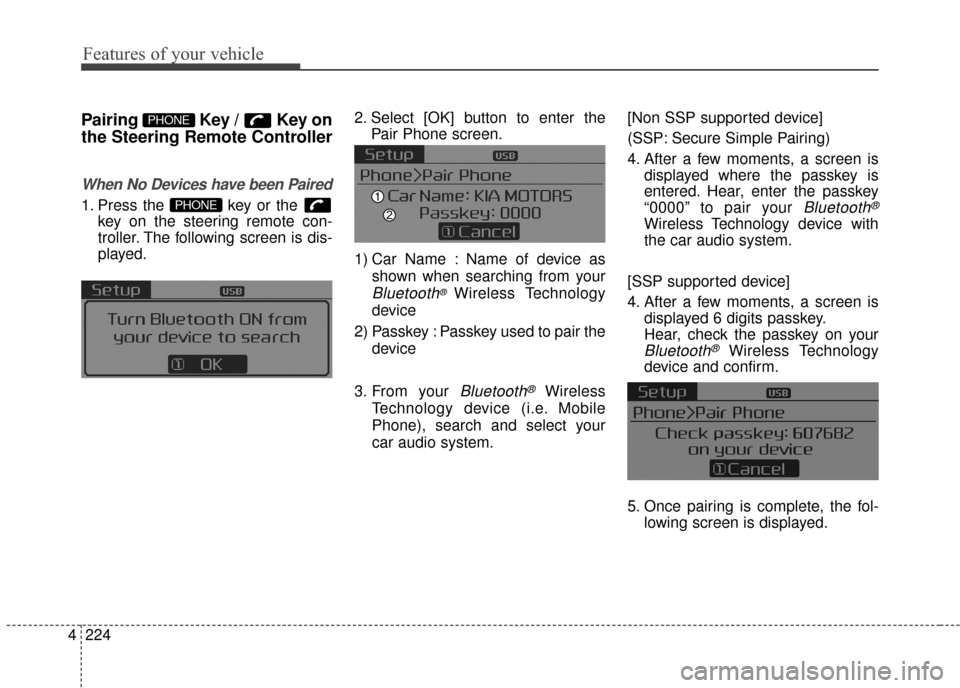
1. Press the key or the
key on the steering remote con-
troller. The following screen is dis-
played. 2. Select [OK] button to enter the
Pair Phone screen.
1) Car Name : Name of device as shown when searching from your
Bluetooth®Wireless Technology
device
2) Passkey : Passkey used to pair the device
3. From your
Bluetooth®Wireless
Technology device (i.e. Mobile
Phone), search and select your
car audio system. [Non SSP supported device]
(SSP: Secure Simple Pairing)
4. After a few moments, a screen is
displayed where the passkey is
entered. Hear, enter the passkey
“0000” to pair your
Bluetooth®
Wireless Technology device with
the car audio system.
[SSP supported device]
4. After a few moments, a screen is displayed 6 digits passkey.
Hear, check the passkey on your
Bluetooth®Wireless Technology
device and confirm.
5. Once pairing is complete, the fol- lowing screen is displayed.
PHONE
PHONE