ECU KIA Sephia 2006 2.G User Guide
[x] Cancel search | Manufacturer: KIA, Model Year: 2006, Model line: Sephia, Model: KIA Sephia 2006 2.GPages: 273, PDF Size: 2.83 MB
Page 63 of 273

Knowing your vehicle52
3
1
2
3
4
5
6
7
8
9
WARNING
- Child
restraint
Check that the child restraint
system is secure by pushing
and pulling it in different direc-
tions. Incorrectly fitted child
restraints may swing, twist, tip
or come away causing death or
injury.
Securing a child restraint seat
with “Tether Anchor” system
Child restraint hook holders are
located on the shelf or floor behind
the rear seats.
1. Open the tether anchor cover on the shelf or floor behind the rear
seats. 2. Route the child restraint seat strap
over the seatback.
For vehicles with adjustable head-
rest, route the tether strap under
the headrest and between the
headrest posts, otherwise route
the tether strap over the top of the
seatback.
3. Connect the tether strap hook to the correct child restraint hook
holder and tighten to secure the
seat.
2GHN3300A
WARNING
If the tether strap is secured
incorrectly, the child restraint
seat may not be restrained
properly in the event of a colli-
sion.
1LDN3200/1LDN3200A
4 Door5 Door
LD CAN (ENG) new 3-1~.qxd 7/29/05 10:28 AM Page 52
Page 65 of 273

Knowing your vehicle54
3
1
2
3
4
5
6
7
8
9
ISOFIX anchors have been provided
in your vehicle. The ISOFIX anchors
are located in the left and right out-
board rear seating positions. Their
locations are shown in the illustra-
tion. There is no ISOFIX anchor pro-
vided for the center rear seating
position.
The ISOFIX anchors are located
between the seatback and the seat
cushion of the rear seat left and right
outboard seating positions. Follow the child seat manufacturer
’s
instructions to properly install child
restraint seats with ISOFIX or
ISOFIX-compatible attachments.
Once you have installed the ISOFIX
child restraint, assure that the seat is
properly attached to the ISOFIX and
tether anchors. Also, test the child
restraint seat before you place the
child in it. Tilt the seat from side to
side. Also try to tug the seat forward.
Check to see if the anchors hold the
seat in place.
WARNING
If the child restraint is not
anchored properly, the risk of a
child being seriously injured or
killed in a collision greatly
increases.
1LDN3100/SBGQ03102
WARNING
When using the vehicle's
"ISOFIX" system to install a
child restraint system in the rear
seat, all unused vehicle rear
seat belt metal latch plates or
tabs must be latched securely in
their seat belt buckles and the
seat belt webbing must be
retracted behind the child
restraint to prevent the child
from reaching and taking hold
of unretracted seat belts.
Unlatched metal latch plates or
tabs may allow the child to
reach the unretracted seat belts
which may result in strangula-
tion and a serious injury or
death to the child in the child
restraint.
LD CAN (ENG) new 3-1~.qxd 7/29/05 10:28 AM Page 54
Page 66 of 273

355
1
2
3
4
5
6
7
8
9
Knowing your vehicle
(Continued)In a crash, the child restraint
seat ISOFIX attachments may
not be strong enough to
secure the child restraint seat
improperly in the rear center
seating position and may
break, causing serious injury
or death.
Attach the ISOFIX or ISOFIX- compatible child restraint seat
only to the appropriate loca-
tions shown in the illustration.
Always follow the installation and use instructions provided
by the manufacturer of the
child restraint.
WARNING
Do not mount more than onechild restraint to a single teth-
er or to a child restraint lower
anchorage point. The improp-
er increased load may cause
the anchorage points or tether
anchor to break, causing seri-
ous injury or death.
Do not install a child restraint seat at the rear center seating
position using the vehicle’s
ISOFIX anchors. The ISOFIX
anchors are only provided for
the left and right outboard rear
seating positions. Do not mis-
use the ISOFIX anchors by
attempting to attach a child
restraint seat in the middle
rear seating position to the
ISOFIX anchors.
(Continued)
LD CAN (ENG) new 3-1~.qxd 7/29/05 10:28 AM Page 55
Page 79 of 273

Knowing your vehicle68
3
1
2
3
4
5
6
7
8
9
Curtain airbag (if equipped)Curtain airbags are located along
both sides of the roof rails above the
front and rear doors.
They are designed to help protect the
heads of the front seat occupants
and the rear outboard seat occupants
in certain side impact collisions.
If the curtain airbag deploys, it
remains inflated for approximately 3
seconds. The curtain airbag deploy-
ment occurs only on the side of the
vehicle affected by the impact.
The side airbags (side and curtain
airbags) are not designed to deploy
during collisions from the front or
rear of the vehicle or in most rollover
situations.
The curtain airbags are designed to
deploy only during certain side-
impact collisions, depending on the
crash severity, angle, speed and
impact. The curtain airbags are not
designed to deploy in all side impact
situations.
WARNING
In order for side airbags (side
and curtain airbags) to pro-
vide its best protection, both
front seat occupants and both
outboard rear occupants
should sit in an upright posi-
tion with the seat belts proper-
ly fastened. Especially, chil-
dren should sit in a proper
child restraint system.
(Continued)
(Continued)
When children are seated inthe rear outboard seats, they
must be seated in the proper
child restraint system. Make
sure to put the child restraint
system as far away from the
door side as possible, and
secure the child restraint sys-
tem to be locked in position.
Do not allow the passengers to lean their heads or bodies
onto doors, put their arms on
the doors, stretch their arms
out of the window, or place
objects between the doors
and passengers when they are
seated on the seats where
side airbags are equipped.
Never try to open or repair any components of the side cur-
tain airbag system. This
should be done only by an
authorized Kia dealer.
Failure to follow the above men-
tioned instructions can result in
injury or death to the vehicle
occupants in an accident.
1LDA20521LDA2057
LD CAN (ENG) new 3-1~.qxd 7/29/05 10:29 AM Page 68
Page 87 of 273

Knowing your vehicle76
3
1
2
3
4
5
6
7
8
9
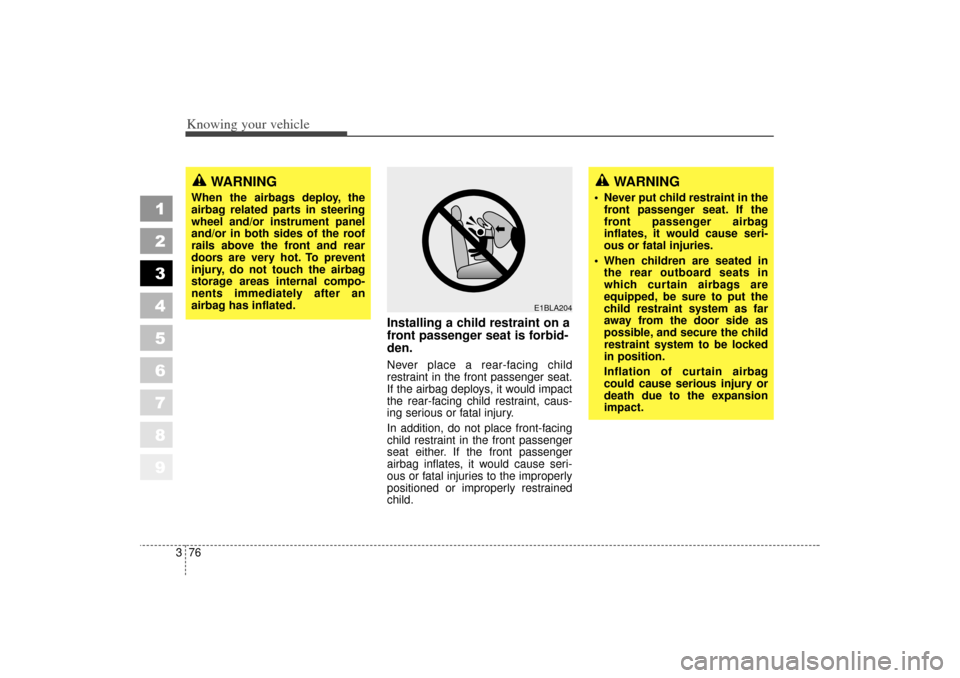
Installing a child restraint on a
front passenger seat is forbid-
den.Never place a rear-facing child
restraint in the front passenger seat.
If the airbag deploys, it would impact
the rear-facing child restraint, caus-
ing serious or fatal injury.
In addition, do not place front-facing
child restraint in the front passenger
seat either. If the front passenger
airbag inflates, it would cause seri-
ous or fatal injuries to the improperly
positioned or improperly restrained
child.
WARNING
Never put child restraint in the
front passenger seat. If the
front passenger airbag
inflates, it would cause seri-
ous or fatal injuries.
When children are seated in the rear outboard seats in
which curtain airbags are
equipped, be sure to put the
child restraint system as far
away from the door side as
possible, and secure the child
restraint system to be locked
in position.
Inflation of curtain airbag
could cause serious injury or
death due to the expansion
impact.
WARNING
When the airbags deploy, the
airbag related parts in steering
wheel and/or instrument panel
and/or in both sides of the roof
rails above the front and rear
doors are very hot. To prevent
injury, do not touch the airbag
storage areas internal compo-
nents immediately after an
airbag has inflated.
E1BLA204
LD CAN (ENG) new 3-1~.qxd 7/29/05 10:29 AM Page 76
Page 91 of 273

Knowing your vehicle80
3
1
2
3
4
5
6
7
8
9
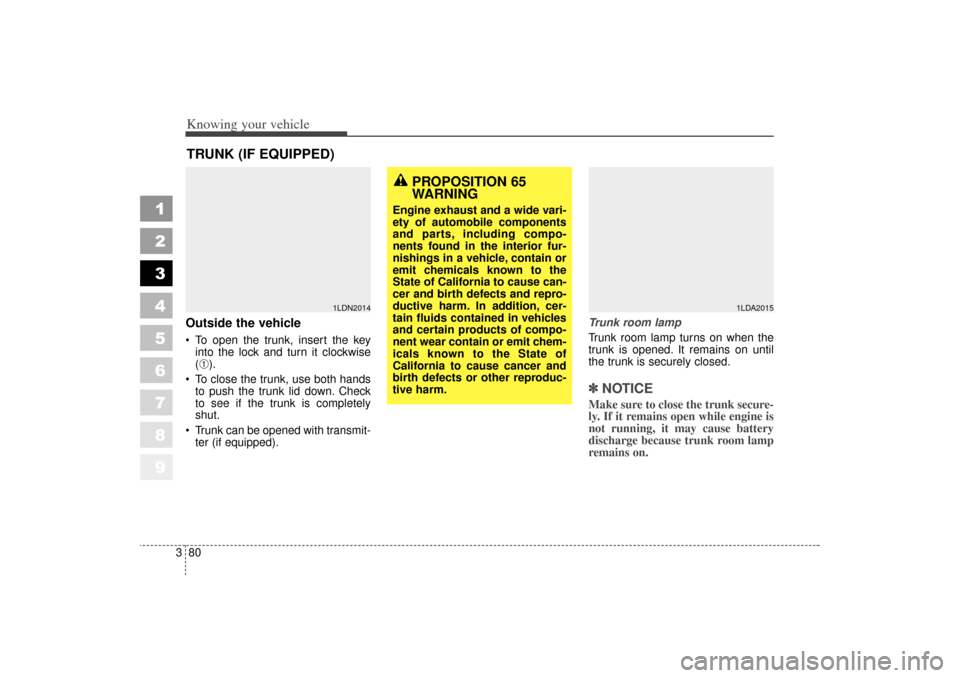
Outside the vehicle To open the trunk, insert the key
into the lock and turn it clockwise
(
➀).
To close the trunk, use both hands
to push the trunk lid down. Check
to see if the trunk is completely
shut.
Trunk can be opened with transmit-
ter (if equipped). Trunk room lamp
Trunk room lamp turns on when the
trunk is opened. It remains on until
the trunk is securely closed.
✽ ✽
NOTICEMake sure to close the trunk secure-
ly. If it remains open while engine is
not running, it may cause battery
discharge because trunk room lamp
remains on.
TRUNK (IF EQUIPPED)
1LDN2014
PROPOSITION 65
WARNING
Engine exhaust and a wide vari-
ety of automobile components
and parts, including compo-
nents found in the interior fur-
nishings in a vehicle, contain or
emit chemicals known to the
State of California to cause can-
cer and birth defects and repro-
ductive harm. In addition, cer-
tain fluids contained in vehicles
and certain products of compo-
nent wear contain or emit chem-
icals known to the State of
California to cause cancer and
birth defects or other reproduc-
tive harm.
1LDA2015
LD CAN (ENG) new 3-1~.qxd 7/29/05 10:29 AM Page 80
Page 95 of 273

Knowing your vehicle84
3
1
2
3
4
5
6
7
8
9
Closing the hood1. Before closing the hood, check the
following:
• All filler caps in engine compart- ment must be correctly installed.
Gloves, rags or any other com- bustible material must be
removed from the engine com-
partment.
2. Secure the support rod in its clip.
3. Lower the hood to about 12 inches (30 cm) height and then let it drop
to properly lock in place.
Make sure the hood is properly
locked before driving.
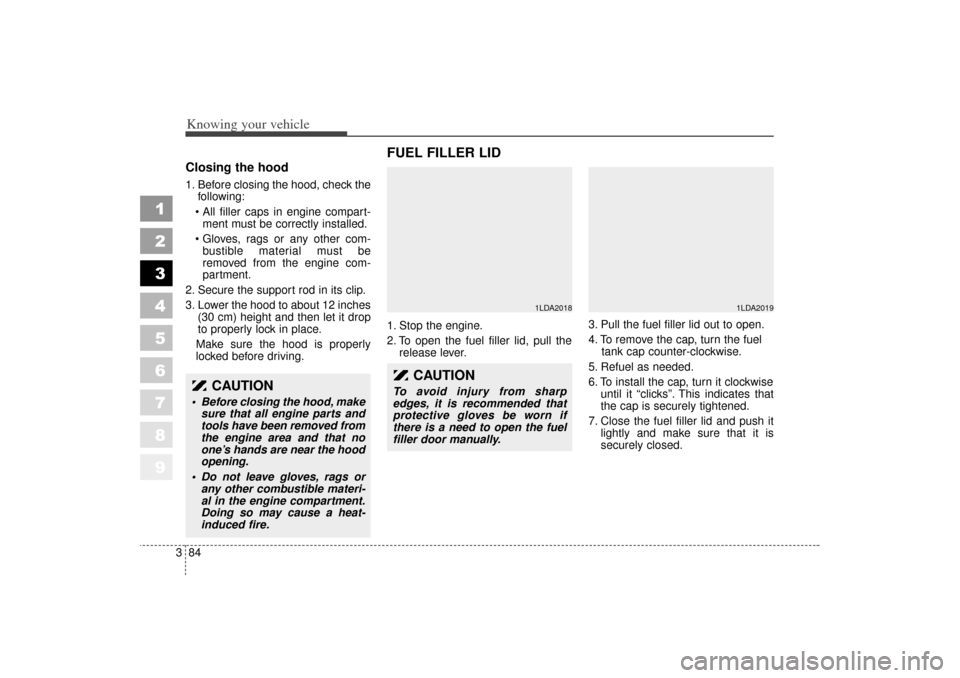
FUEL FILLER LID 1. Stop the engine.
2. To open the fuel filler lid, pull the release lever. 3. Pull the fuel filler lid out to open.
4. To remove the cap, turn the fuel
tank cap counter-clockwise.
5. Refuel as needed.
6. To install the cap, turn it clockwise until it “clicks”. This indicates that
the cap is securely tightened.
7. Close the fuel filler lid and push it lightly and make sure that it is
securely closed.
1LDA2018
1LDA2019
CAUTION
• Before closing the hood, makesure that all engine parts and
tools have been removed from
the engine area and that no
one’s hands are near the hood
opening.
Do not leave gloves, rags or any other combustible materi-
al in the engine compartment.
Doing so may cause a heat-
induced fire.
CAUTION
To avoid injury from sharp
edges, it is recommended that
protective gloves be worn if
there is a need to open the fuel
filler door manually.
LD CAN (ENG) 3-84~.qxd 7/29/05 10:15 AM Page 84
Page 97 of 273

Knowing your vehicle86
3
1
2
3
4
5
6
7
8
9
✽ ✽
NOTICE• Make sure to refuel with gasoline
(unleaded fuel) only for the gaso-
line engine vehicles.
Check to make sure the fuel filler cap is securely closed after refuel-
ing.
If the fuel filler cap requires replacement, use only a genuine
Kia cap or the equivalent specified
for your vehicle. An incorrect fuel
filler cap can result in a serious
malfunction of the fuel system or
emission control system. Correct
replacement caps are available at
authorized Kia dealers.
Do not spill fuel on the exterior surfaces of the vehicle. Any type of
fuel spilled on painted surfaces
may damage the paint.
A loose fuel filler cap may cause the “Check Engine” (Malfunction
Indicator) light in the instrument
panel to illuminate unnecessarily.
If the fuel filler lid will not open in cold weather because the area
around it is frozen, push or lightly
tap the lid.
(Continued)
When refueling always shut
the engine off. Sparks pro-
duced by electrical compo-
nents related to the engine
can ignite fuel vapors causing
a fire. Always insure that the
engine is OFF before and dur-
ing refueling. Once refueling
is complete, check to make
sure the fuel filler cap and
door are securely closed,
before starting the engine.
Do not light any fire around a gas station. DO NOT use
matches or a lighter and DO
NOT SMOKE or leave a lit cig-
arette in your vehicle while at
a gas station especially during
refueling. Automotive fuel is
highly flammable and can,
when ignited, result in explo-
sion by flames.
(Continued)
(Continued)
If a fire breaks out during refu-eling, leave the vicinity of the
vehicle, and immediately con-
tact the manager of the gas
station or contact the police
and local fire department.
Follow any safety instructions
they provide.
LD CAN (ENG) 3-84~.qxd 7/29/05 10:15 AM Page 86
Page 104 of 273

393
1
2
3
4
5
6
7
8
9
Knowing your vehicle
✽ ✽NOTICE To avoid possible theft, do not
leave valuables in the storage com-
partment.
Since stored items may move while driving, be sure to position them
in the storage compartment so
that they do not make noise or
cause a potential safety hazard
when the vehicle is moving.
Always keep the storage compart- ment covers closed while driving.
Do not attempt to place many
items in the storage compartment
that the storage compartment
cover can not close securely.
Center console storageTo open either of the console storage
compartments, pull up on the locking
tab
➀
or
➁.
These compartments can be used to
store small items required by the
driver or front passenger.
STORAGE COMPARTMENT
WARNING
Do not store cigarette lighters,
propane cylinders, or other
flammable/explosive materials
in the vehicle. These items may
catch fire and/or explode if the
vehicle is exposed to hot tem-
peratures for extended periods.
1LDA2157
LD CAN (ENG) 3-84~.qxd 7/29/05 10:15 AM Page 93
Page 108 of 273

397
1
2
3
4
5
6
7
8
9
Knowing your vehicle
Rear (if equipped)
You can open the rear ashtray by
pulling it out by its top edge. To
remove the ashtray to empty or
clean, push the tab (
➀) inside, lift the
ashtray up slightly and pull it all the
way out.
Cup holder
WARNING
- Ashtray use
Do not use the vehicle’s ash- trays as waste receptacles.
Putting lit cigarettes or match- es in an ashtray with other
combustible materials may
cause a fire.
WARNING
- Hot liquids
Do not place uncovered cups of hot liquid in the cup holder
while the vehicle is in motion.
If the hot liquid spills, you
could be burned. Such a burn
to the driver could cause a
loss of control of the vehicle.
To reduce the risk of personal injury in the event of sudden
stop or collision, do not place
uncovered or insecure bot-
tles, glasses, cans, etc., in the
cup holder while the vehicle is
in motion.
1LDA2154
LD CAN (ENG) 3-84~.qxd 7/29/05 10:15 AM Page 97