door lock KIA Sephia 2009 2.G User Guide
[x] Cancel search | Manufacturer: KIA, Model Year: 2009, Model line: Sephia, Model: KIA Sephia 2009 2.GPages: 291, PDF Size: 2.63 MB
Page 23 of 291
313
1
2
3
4
5
6
7
8
9
Knowing your vehicle
Power windows (if equipped)(1) Driver’s door power window
switch
(2) F ront passenger’s door power
window switch
(3) Rear door (left) power window switch
(4) Rear door (right) power window switch
(5) Window opening and closing
(6) Automatic power window down* (Driver’s window)
(7) Power window lock switch
*: if equipped
The ignition switch must be in the ON
position for power windows to oper-
ate. Each door has a power window
switch that controls the door’s win-
dow. However, the driver has a power
window lock switch which can block
the operation of passenger windows.
WINDOWS
OLD026010
Page 24 of 291
Knowing your vehicle14
3
1
2
3
4
5
6
7
8
9
The power windows can be operated
for approximately 30 seconds after
the ignition key is removed or turned
to the ACC or LOCK position.
However, if the front doors are
opened, the power windows cannot
be operated even within the 30 sec-
onds after the ignition key removal.✽ ✽
NOTICEWhile driving with the rear windows
down or with the sunroof (if
equipped) in an open(or partially
open position), your vehicle may
demonstrate a wind buffeting or
pulsation noise. This noise is a nor-
mal occurrence and can be reduced
or eliminated by taking the follow-
ing actions. If the noise occurs with
one or both of the rear windows
down, partially lower both front
windows approximately one inch. If
you experience the noise with the
snroof open, slightly reduce the size
of the sunroof opening.
Window opening and closingThe driver’s door has a master power
window switch that controls all the
windows in the vehicle.
To open or close a window, press
down or pull up the front portion of
the corresponding switch to the first
detent position (5).
Auto down window (if equipped)
(Driver’s window)Depressing the power window switch
momentarily to the second detent
position (6) completely lowers the
driver’s window even when the
switch is released. To stop the win-
dow at the desired position while the
window is in operation, pull up the
switch momentarily to the opposite
direction of the window movement.
If the power window is not operated
correctly, the automatic power win-
dow system must be reset as follows:
1. Turn the ignition switch to the ON position.
OUN026011
OUN026012
Page 25 of 291
315
1
2
3
4
5
6
7
8
9
Knowing your vehicle
2. Close driver’s window and contin-ue pulling up on driver’s power
window switch for at least 1 sec-
ond after the window is complete-
ly closed.Power window lock switch The driver can disable the powerwindow switches on a passenger
door by depressing the power win-
dow lock switch located on the dri-
ver’s door to LOCK (pressed).
When the power window lock switch is ON, the driver’s master
control cannot operate the passen-
ger door power windows either.
Manual windows (if equipped)Use the window crank to open and
close each window.
3FDA2015
OLD026013
CAUTION
To prevent the power windowsystem from the possibility ofdamage, do not open or closetwo windows at the same time.This will also ensure thelongevity of the fuse.
WARNING
Make sure heads and hands are safely out of the way before
closing a window.
Do not allow children to play with the power windows. Keep
the driver’s door power window
lock switch in the LOCK posi-
tion (depressed). Serious injury
can result from unintentional
window operation by the child.
Do not extend face or arms out- side through the window open-
ing while driving.
Always double check to make sure all arms, hands and other
obstructions are safely out of
the way before closing a win-
dow.
Page 33 of 291
323
1
2
3
4
5
6
7
8
9
Knowing your vehicle
Active headrest (if equipped)
The active headrest is designed to
move forward and upward during a
rear impact. This helps to prevent the
driver's and front passenger’s head
from moving backward and thus
helps prevent neck injuries.
Rear seatSplit folding rear seat (if equipped)The rear seatbacks fold forward to
provide additional cargo space and
to provide access to the cargo area.
To fold the rear seatback(s) down, pull the lock release lever, then fold
the seatback forward and down.
To raise the seatback, lift and push it firmly until it clicks into place.
When you return the seatback to its upright position, reposition the
rear safety belts so that they can
be used by rear seat passengers.
4 Door (if equipped)
1. Pull the lock release lever.
2. Move the rear three-point seatbelts to the outside (1) so that they
don’t interfere with the seatback
when lowering.
3. Fold the seatback forward and down firmly (2).
1LDN20381LDN3025
HNF2041-1
Page 34 of 291
Knowing your vehicle24
3
1
2
3
4
5
6
7
8
9
5 Door (if equipped)
1. Lift the front of seat cushion (1) up.
2. Lift the rear of seat cushion up (
2). 3 Move the seat cushion firmly until it
clicks ( 3).
4. Remove the headrest and put the headrest poles into the holes on
the rear of the seat cushion (4). 5. Pull the lock release lever (5).
6. Fold the seatback forward and
down firmly (6).
1LDA22431LDA2244
1LDA22411LDA2242
1LDA22391LDA2240
Page 35 of 291

325
1
2
3
4
5
6
7
8
9
Knowing your vehicle
✽ ✽NOTICEWhen you fold the rear seatback or
put luggage on the rear seat cushion,
insert the buckle in the pocket
between the rear seatback and cush-
ion. Doing so can prevent the buckle
from being damaged by the rear
seatback or luggage.
To unfold the rear seat:1. Move the rear center shoulder belt
(1) to the side so that it is clear of
the seatback.
2. Lift and push the seatback back- ward firmly until it clicks into place
(2).
Move and push the seat cushion
downward firmly to the proper
position (5 Door, if equipped).
3. Replace the rear safty belt to the proper position.
✽ ✽NOTICEIf the seat belt is locked during the
seatback folding, pull out and
retract the seat belt to release it.
1LDN3026A
1LDN3026B
CAUTION
When returning the rear seat-
backs to the upright position,remember to return the rearshoulder belts to their properposition.
Do not remove the floor carpet in your vehicle. Emission con-trol system componentscause high exhaust tempera-tures under the floor.
WARNING
- Cargo danger
Cargo should always be
secured to prevent it from shift-
ing and causing injury to the
vehicle occupants.
Page 44 of 291
Knowing your vehicle34
3
1
2
3
4
5
6
7
8
9
✽ ✽
NOTICEIf you are not able to pull out the
safety belt from the retractor, firmly
pull the belt out and release it. Then
you will be able to pull the belt out
smoothly.
5. Adjust the shoulder anchor posi-
tion to your size. To raise the
anchor position, push the anchor
up ( 1). To lower the anchor posi-
tion, press ( 2) the button and slide
the anchor down ( 3). After adjust-
ment, make sure the anchor is
locked in position.
If the height of the adjusting seat belt
is too near your neck, you will not be
getting the most effective protection.
The shoulder portion should be
adjusted so that it lies across your
chest and midway over your shoulder
nearest the door and not your neck.
OUN026100
WARNING -
Beld adjust
The height adjuster must be in the locked position when the
vehicle is moving.
The misadjustment of height of the shoulder belt could
reduce the effectiveness of
the seat belt in a crash.
Page 56 of 291
Knowing your vehicle46
3
1
2
3
4
5
6
7
8
9
7. Double check that the retractor is
in the “Auto Lock” mode by
attempting to pull more of the safe-
ty belt out of the retractor. If you
cannot, the retractor is in the “Auto
Lock” mode.
To remove the child restraint, press
the release button on the buckle and
then pull the lap/shoulder belt out of
the restraint and allow the safety belt
to retract fully.
✽ ✽ NOTICEWhen the safety belt is allowed to
retract to its fully stowed position,
the retractor will automatically
switch from the “Auto Lock” mode
to the emergency lock mode for nor-
mal adult usage.
Securing a child restraint seat
with “Tether Anchor” systemChild restraint hook holders are
located on the shelf or floor behind
the rear seats.
1. Open the tether anchor cover on the shelf or floor behind the rear
seats.
WARNING
- Auto lock
mode
The lap/shoulder belt automati-
cally returns to the “emergency
lock mode” whenever the belt is
allowed to retract fully.
Therefore, the preceding seven
steps must be followed each
time a child restraint is
installed.
If the safety belt is not placed in
the “auto lock” mode, severe
injury or death could occur to
the child and/or other occupants
in the vehicle in a collision,
since the child restraint will not
be effectively held in place.
1LDN3200/1LDN3200A
4 Door5 Door
Page 67 of 291
357
1
2
3
4
5
6
7
8
9
Knowing your vehicle
WARNING
- Side and cur-tain air bags
In order for side and curtain air bags to provide the best
protection, both front seat
occupants and both outboard
rear occupants should sit in
an upright position with the
safety belts properly fastened.
Importantly, children should
sit in a proper child restraint
system in the rear seat.
When children are seated in the rear outboard seats, they
must be seated in the proper
child restraint system. Make
sure to put the child restraint
system as far away from the
door side as possible, and
secure the child restraint sys-
tem in a locked position.
(Continued)
(Continued)
If a small child is seated onthe rear outboard seat cush-
ion, it is probable that they will
below the deployment level of
the side curtain airbag and
thus not protected by that
airbag.
Do not allow the passengers to lean their heads or bodies
onto doors, put their arms on
the doors, stretch their arms
out of the window, or place
objects between the doors
and passengers when they are
seated on seats equipped with
side air bags.
Never try to open or repair any components of the side cur-
tain air bag system. This
should only be done by an
authorized Kia dealer.
Failure to follow the above men-
tioned instructions can result in
severe injury or death to the
vehicle occupants in an acci-
dent.
The curtain air bag deployment
occurs only on the side of the vehi-
cle affected by the impact.
The side air bags (side and curtain air bags) are not designed to
deploy during collisions from the
front or rear of the vehicle or in
most rollover situations.
The curtain air bags are designed to deploy only during certain side-
impact collisions, depending on the
crash severity, angle, speed and
impact.
Page 75 of 291
365
1
2
3
4
5
6
7
8
9
Knowing your vehicle
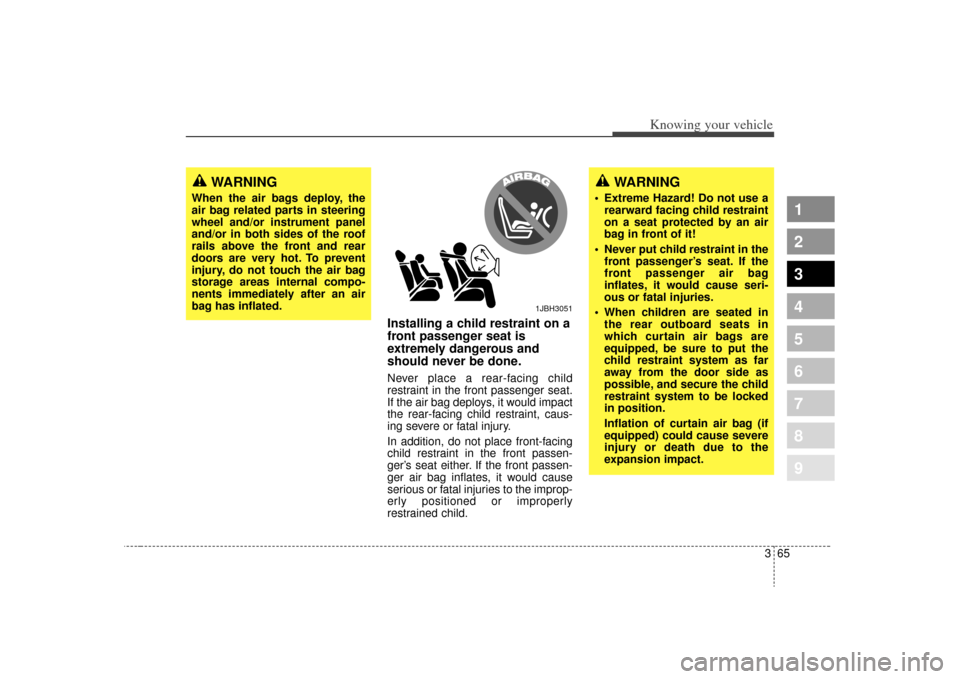
Installing a child restraint on a
front passenger seat is
extremely dangerous and
should never be done.Never place a rear-facing child
restraint in the front passenger seat.
If the air bag deploys, it would impact
the rear-facing child restraint, caus-
ing severe or fatal injury.
In addition, do not place front-facing
child restraint in the front passen-
ger’s seat either. If the front passen-
ger air bag inflates, it would cause
serious or fatal injuries to the improp-
erly positioned or improperly
restrained child.
WARNING
Extreme Hazard! Do not use arearward facing child restraint
on a seat protected by an air
bag in front of it!
Never put child restraint in the front passenger’s seat. If the
front passenger air bag
inflates, it would cause seri-
ous or fatal injuries.
When children are seated in the rear outboard seats in
which curtain air bags are
equipped, be sure to put the
child restraint system as far
away from the door side as
possible, and secure the child
restraint system to be locked
in position.
Inflation of curtain air bag (if
equipped) could cause severe
injury or death due to the
expansion impact.
WARNING
When the air bags deploy, the
air bag related parts in steering
wheel and/or instrument panel
and/or in both sides of the roof
rails above the front and rear
doors are very hot. To prevent
injury, do not touch the air bag
storage areas internal compo-
nents immediately after an air
bag has inflated.
1JBH3051