automatic KIA Sorento 2008 1.G Owner's Guide
[x] Cancel search | Manufacturer: KIA, Model Year: 2008, Model line: Sorento, Model: KIA Sorento 2008 1.GPages: 326, PDF Size: 8.63 MB
Page 122 of 326
3 113
Knowing your vehicle
6. File Search Knob
Rotate the knob clockwise or counter-
clockwise to manually advance up or
down the track list of the CD currently
played. This function allows you to quick-
ly scroll to a specific track number. It is
especially useful if you are playing a MP3
orWMA CDwhich contains many direc-
tories and tracks. The LCD screen dis-
plays the track number you have scrolled
to.
Once the track number you want is dis-
played, press the File Search knob to
ENTERyour selection and begin play-
back of the selected track.
✽
NOTICE
You must push the File Search knob to
select the track for playback. Otherwise,
the CD player will not jump to the track
number displayed in the number count-
er.
Use the File Search knob and the DIR
and buttons in together to quick-
ly search for a track you want on a MP3
CD with many directories and tracks.
7. RPT, RDM, MARK & INFO buttons
These buttons correspond to the Repeat,
Random Playback, Marklist and Disc
Information functions.
Turn to the next section of your handbook
for detailed instructions.
Playing CDs, MP3 and WMA discs
1. Loading CDs
Model D446:
Only one CD can be loaded at any one
time. If there is already a disc inserted in
the CD player, eject the disc before load-
ing a new CD.
To load a CD, gently insert the CD into
the CD slot. The CD will be automatically
loaded. The CD player then starts to play
the CD.
✽
NOTICE
Do not force-load the CD as it will
damage the loading mechanism and
cause your disc to jam in the player.
If a CD cannot be loaded, check if
there is already a disc in the player
and eject it first.
Only one CD can be loaded at any one
time.
Page 123 of 326
Knowing your vehicle
114 3
Model D465
You can load one or more CDs (maxi-
mum of 6) into the CD changer through
the CD loading slot. To do so:
1. Press the Loadbutton to load 1 CD.
The LCD screen displays the number
assigned to the CD as a flashing num-
ber. For example, if the CD changer
currently contains 4 CDs, the loaded
disc will be CD 5.
OR
Press and hold the Loadbutton for
more than 2 seconds to load more than
1 CD.
The LCD screen displays empty slots
in the CD changer as flashing num-
bers.
2. The LCD screen displays the instruc-
tions for loading one or more CDs.
Follow the instructions - Wait, Insert
CD1, Loading CD 1, Reading CD1,…
Reading CD6.
3. Once you have finished loading the CD
or CDs, the CD player automatically
plays the first track of the last CD
loaded.
If the audio system was in Radio mode
while you were loading the CDs, it
automatically switches to CD player
mode.✽
NOTICE
The LCD screen displays Changer Full
to indicate that the CD changer is full.
Do not try to load any other disc.
2. Ejecting CDs
Model D446
Press the CD EJECT ( ) button to
eject the CD in the CD player.
Model D465
Press the button once to eject the
last CD played.
Press and hold button for more than
2 seconds to eject all the CDs in the
changer in sequence beginning with the
last CD played.
✽
NOTICE
You can eject discs without switching on
the audio system using the Power ON-
OFF knob.
To eject 1 CD:
Press the EJECTbutton once.
If you are playing a CD, playback will
automatically switch to the next available
CD.
The LCD screen displays the number of
the CD ejected as a flashing number.
If there are no other disc left in the CD
changer, the audio system automatically
switches to Radio mode and resumes
with the last channel or frequency select-
ed.
OR
If the audio system is in Radio mode, the
last CD played will be ejected.
The LCD screen displays the number of
the CD ejected as a flashing number.
To eject all CDs:
Press and hold the EJECTbutton for
more than 2 seconds to eject all the CDs
in the CD changer.
The LCD screen displays the CDs being
ejected in the CD changer as flashing
numbers. The CDs are ejected in
sequence. Follow the instructions dis-
played on the LCD screen to remove all
CDs from the changer.
Page 124 of 326
3 115
Knowing your vehicle
✽
NOTICE
If the audio system is in Radio mode,
you can eject CDs without interrupting
the operation of the radio.
3. Selecting a disc to play
Model D446
Only the CD loaded in the player can be
played.
Model D465
You can select any disc loaded in the CD
changer for playback.
To do so:
Press the corresponding CD selector
button (1~6).
The CD changer automatically loads the
selected CD and begins playback of the
first track.
The LCD screen displays the selected
CD as a flashing number.
4. Selecting and playing tracks
(songs)
To select tracks, you can use one of 3
methods:
Method 1:
Press the Track UporTrack Downbut-
ton repeatedly until you find the track you
want.
Method 2:
Rotate the File Search knob to scroll to
the track you want. The number counter
in the LCD screen shows you the track
number.
Press the File Search knob to ENTER
your selection and begin playback.Method 3 (only for MP3 and WMA
CDs):
Press the DIR UporDownbuttons
repeatedly to switch to the directory you
want on the CD.
The LCD screen displays the name of
the directory you have switched to.
Rotate the File Search knob to scroll to
the track you want in the selected direc-
tory. The number counter in the LCD
screen shows you the track number.
Press the File Search knobtoENTER
your selection and begin playback.
Page 127 of 326
Knowing your vehicle
118 3
Using External Controls
1. The Dimmer control
The Dimmer control setting determines
the brightness of the entire vehicle's dis-
plays.
Turn the scroll wheel up or down to
increase or decrease the brightness of
the vehicle's instrument panels, backlit
displays and the audio system's LCD
screen and backlit controls.
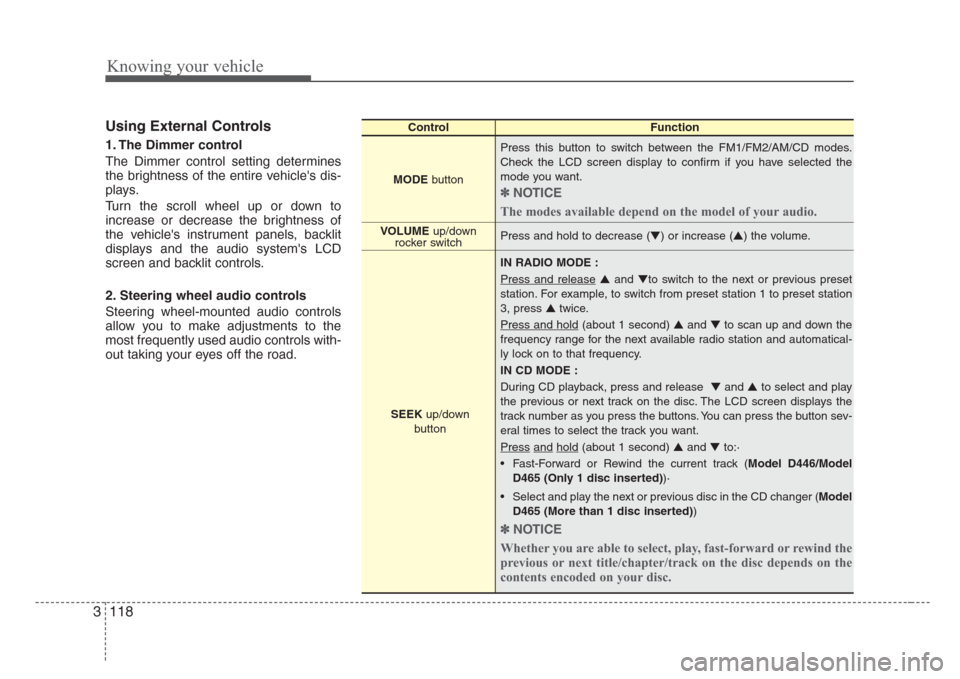
2. Steering wheel audio controls
Steering wheel-mounted audio controls
allow you to make adjustments to the
most frequently used audio controls with-
out taking your eyes off the road.
ControlFunction
MODEbuttonPress this button to switch between the FM1/FM2/AM/CD modes.
Check the LCD screen display to confirm if you have selected the
mode you want.
✽
NOTICE
The modes available depend on the model of your audio.
Press and hold to decrease (▼) or increase (▲) the volume.
IN RADIO MODE :
Press and release
▲and▼to switch to the next or previous preset
station. For example, to switch from preset station 1 to preset station
3, press ▲twice.
Press and hold
(about 1 second) ▲and▼to scan up and down the
frequency range for the next available radio station and automatical-
ly lock on to that frequency.
IN CD MODE :
During CD playback, press and release ▼and▲to select and play
the previous or next track on the disc. The LCD screen displays the
track number as you press the buttons. You can press the button sev-
eral times to select the track you want.
Press
andhold(about 1 second) ▲and▼to:·
• Fast-Forward or Rewind the current track (Model D446/Model
D465 (Only 1 disc inserted))·
• Select and play the next or previous disc in the CD changer (Model
D465 (More than 1 disc inserted))
✽
NOTICE
Whether you are able to select, play, fast-forward or rewind the
previous or next title/chapter/track on the disc depends on the
contents encoded on your disc.
VOLUME up/down
rocker switch
SEEKup/down
button
Page 128 of 326
3 119
Knowing your vehicle
Troubleshooting Poor Radio
Reception
Problem:
Fading Signals / Interference /
Increased interference/ Static
FM Broadcasts - The further you move
away from the radio station's transmitting
source (normally within a city or town),
the weaker the signal will be. You might
experience abrupt breaks in transmis-
sion, garbled sound and also static even
though your radio remains tuned to the
same frequency.
AM Broadcasts - Even though AM radio
signals travel further and stronger than
FM radio signals, weather or terrain con-
ditions might adversely affect your radio's
ability to receive the signals.
Solution:
Use your audio system's Scan function to
automatically search for and select
another radio station with good signal
strength.Problem:
High-pitched static, distortion or a
'fluttering' sound (Multi-Path
Cancellation)
Radio stations transmitting on frequen-
cies that are very close to each other
may cause distortion or 'fluttering'. This
effect is known as Multi-Path
Cancellation. This normally occurs when
your tuner is receiving a station's trans-
mission as both direct and 'reflected'
radio signals or when your tuner receives
signals from more than 1 radio station
transmitting on frequencies that are very
close to each other.
Solution:
If the problem is caused by a temporary
deterioration in the signal strength of one
station's transmission, reduce the levels
of your audio system's Treble and Middle
settings to suppress the sound. If the
problem is caused by interference from
another station, select another radio sta-
tion with good and clear signal strength.Problem:
Interference from another FM radio
broadcast ('station-swapping')
FM radio stations transmit on frequen-
cies that are very close to each other on
the FM band. When you travel further
and further away from a transmitting
source, the signal strength of that trans-
mission decreases. Your radio's ability to
'lock' on to that specific frequency is
affected. This is because your radio is
designed to lock on to the strongest sig-
nal it can detect. Therefore, another radio
station broadcasting on a frequency very
close to your original station could 'inter-
fere' with your reception and you might
start to hear the broadcast of the second
station. You will normally experience this
when you are moving away from a weak
signal and towards a stronger one.
Page 129 of 326
Knowing your vehicle
120 3
Solution:
Use your audio system's Scan function to
automatically search for and select
another radio station with good signal
strength.
Problem:
Interference caused by cellular
phones and 2-way radios
Operating cellular phones and 2-way
radios inside or within close proximity of
your car may interfere with your radio
reception. You may hear static, clicks,
sounds or other types of white noise from
your speakers.
Solution:
Cease operation of cellular phone or 2-
way radios. Alternatively, move away
from your car. The interference to your
radio reception should be reduced.Caring for your Audio System
Your audio system contains sophisticat-
ed electronics and precision-engineered
parts and components that are not user-
serviceable. To ensure trouble-free oper-
ation, please observe the following pre-
cautions:
1. General Use and Operation
Your audio system contains precision
electronic components that are tempera-
ture-, moisture-, and static-sensitive. You
should take care not to subject your
audio system to extremes in tempera-
tures or moisture. For example, if you
have parked your car in the sun, the inte-
rior of the car could be very hot. Ventilate
the car to reduce the interior temperature
before trying to operate the audio sys-
tem.
Never try to insert anything other than
properly formatted CDs into the CD play-
er. Foreign objects can cause the deli-
cate mechanism to jam and render your
CD player unusable. You must also follow
the instructions displayed on your audio
system's LCD screen.
For example, if your audio system is dis-
playing "Wait", you should never try to
force-load a CD into the CD player.
WARNING
• Your car's electrical systems con-
tain sensitive electronics compo-
nents. Interference from cellular
phones, 2-way radios and other
transmitting devices could
adversely affect the safe opera-
tion of your vehicle. This could
compromise the safety of both
the driver and other passengers
in the vehicle.
• When using cellular phones,2-
way radios and other transmitting
devices in your vehicle, always
use a separate external antenna.
For restrictions on the use of
communications and transmitting
devices, please consult the rele-
vant product documentation.
• Local laws may prohibit the use
of cellular phones while driving. If
you need to make or answer a call
while driving, please s
top the
vehicle in a safe place before pro-
ceeding.
Page 131 of 326
4
Ignition switch / 4-2
Starting the engine / 4-4
Automatic transmission / 4-5
Four wheel drive (4WD) / 4-10
Limited slip differential / 4-19
Brake system / 4-20
Steering wheel / 4-25
Cruise control system / 4-27
Electronic stability control / 4-30
Rear parking assist system / 4-33
Instrument cluster / 4-36
Gauges / 4-37
Warnings and indicators / 4-39
Multi-meter / 4-45
Lighting / 4-51
Wipers and washers / 4-54
Defroster / 4-57
Hazard warning flasher / 4-58
Manual climate control system / 4-59
Automatic climate control system / 4-66
Windshield defrosting and defogging / 4-75
Driving your vehicle
Page 133 of 326
43
Driving your vehicle
START
Turn the ignition key to the START posi-
tion to start the engine. The engine will
crank until you release the key; then it
returns to the ON position. The brake
warning lamp can be checked in this
position.
✽
NOTICE
If difficulty is experienced in turning the
ignition key, turn the steering wheel
right and left to release the tension and
then turn the key.
Automatic transmission
When turning the ignition switch to the
LOCK position, the shift lever must be in
the P (Park) position.
WARNING-Ignition key
• Never turn the ignition switch to
LOCK or ACC while the vehicle is
moving. This would result in loss
of directional control and braking
function, which could cause an
immediate accident.
• Before leaving the driver’s seat,
always make sure the shift lever
is engaged in 1
stgear for manual
transmission or P (Park) for auto-
matic transmission,set the park-
ing brake fully and shut the
engine off. Unexpected and sud-
den vehicle movement may occur
if these precautions are not
taken.
(Continued)
(Continued)
• Never reach for the ignition
switch, or any other controls
through the steering wheel while
the vehicle is in motion. The pres-
ence of your hand or arm in this
area could cause a loss of vehicle
control, an accident and serious
bodily injury or death.
• Do not place any movable objects
around the driver’s seat as they
may move while driving, interfere
with the driver and lead to an
accident.
Page 134 of 326
Driving your vehicle
4 4
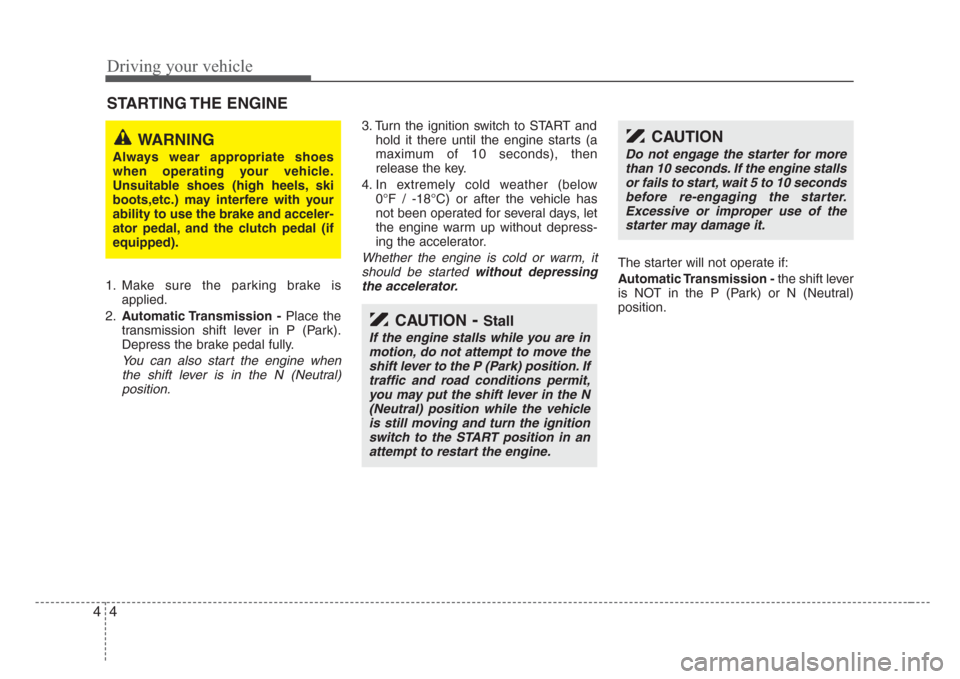
1. Make sure the parking brake is
applied.
2.Automatic Transmission -Place the
transmission shift lever in P (Park).
Depress the brake pedal fully.
You can also start the engine when
the shift lever is in the N (Neutral)
position.
3. Turn the ignition switch to START and
hold it there until the engine starts (a
maximum of 10 seconds), then
release the key.
4. In extremely cold weather (below
0°F / -18°C) or after the vehicle has
not been operated for several days, let
the engine warm up without depress-
ing the accelerator.
Whether the engine is cold or warm, it
should be started without depressing
the accelerator.The starter will not operate if:
Automatic Transmission -the shift lever
is NOT in the P (Park) or N (Neutral)
position.
STARTING THE ENGINE
CAUTION-Stall
If the engine stalls while you are in
motion, do not attempt to move the
shift lever to the P (Park) position. If
traffic and road conditions permit,
you may put the shift lever in the N
(Neutral) position while the vehicle
is still moving and turn the ignition
switch to the START position in an
attempt to restart the engine.
CAUTION
Do not engage the starter for more
than 10 seconds. If the engine stalls
or fails to start, wait 5 to 10 seconds
before re-engaging the starter.
Excessive or improper use of the
starter may damage it.
WARNING
Always wear appropriate shoes
when operating your vehicle.
Unsuitable shoes (high heels,ski
boots,etc.) may interfere with your
ability to use the brake and acceler-
ator pedal, and the clutch pedal (if
equipped).
Page 135 of 326
45
Driving your vehicle
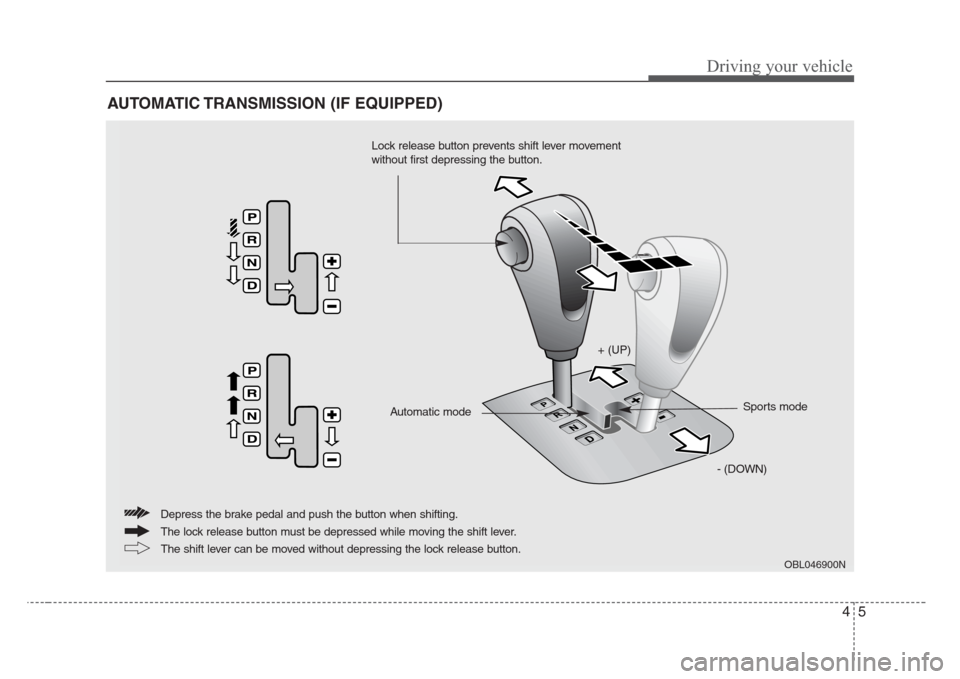
AUTOMATIC TRANSMISSION (IF EQUIPPED)
OBL046900N
+ (UP)
- (DOWN)Sports mode
Automatic mode
The lock release button must be depressed while moving the shift lever. Depress the brake pedal and push the button when shifting.
The shift lever can be moved without depressing the lock release button.
Lock release button prevents shift lever movement
without first depressing the button.