ESP KIA Sorento 2012 2.G User Guide
[x] Cancel search | Manufacturer: KIA, Model Year: 2012, Model line: Sorento, Model: KIA Sorento 2012 2.GPages: 388, PDF Size: 7.56 MB
Page 136 of 388
Features of your vehicle46
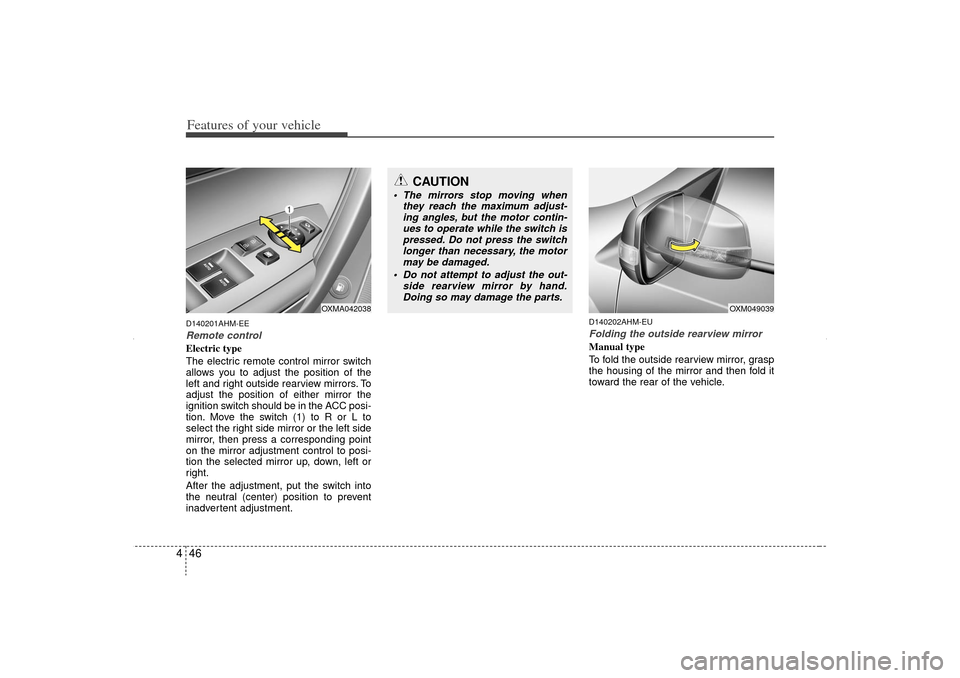
4D140201AHM-EERemote controlElectric type
The electric remote control mirror switch
allows you to adjust the position of the
left and right outside rearview mirrors. To
adjust the position of either mirror the
ignition switch should be in the ACC posi-
tion. Move the switch (1) to R or L to
select the right side mirror or the left side
mirror, then press a corresponding point
on the mirror adjustment control to posi-
tion the selected mirror up, down, left or
right.
After the adjustment, put the switch into
the neutral (center) position to prevent
inadvertent adjustment.
D140202AHM-EUFolding the outside rearview mirrorManual type
To fold the outside rearview mirror, grasp
the housing of the mirror and then fold it
toward the rear of the vehicle.
CAUTION
The mirrors stop moving when
they reach the maximum adjust-ing angles, but the motor contin- ues to operate while the switch ispressed. Do not press the switchlonger than necessary, the motor may be damaged.
Do not attempt to adjust the out- side rearview mirror by hand.Doing so may damage the parts.
OXM049039
OXMA042038
XM CAN (ENG) 4(~105).QXP 4/19/2011 10:37 AM Page 46
Page 153 of 388
463
Features of your vehicle
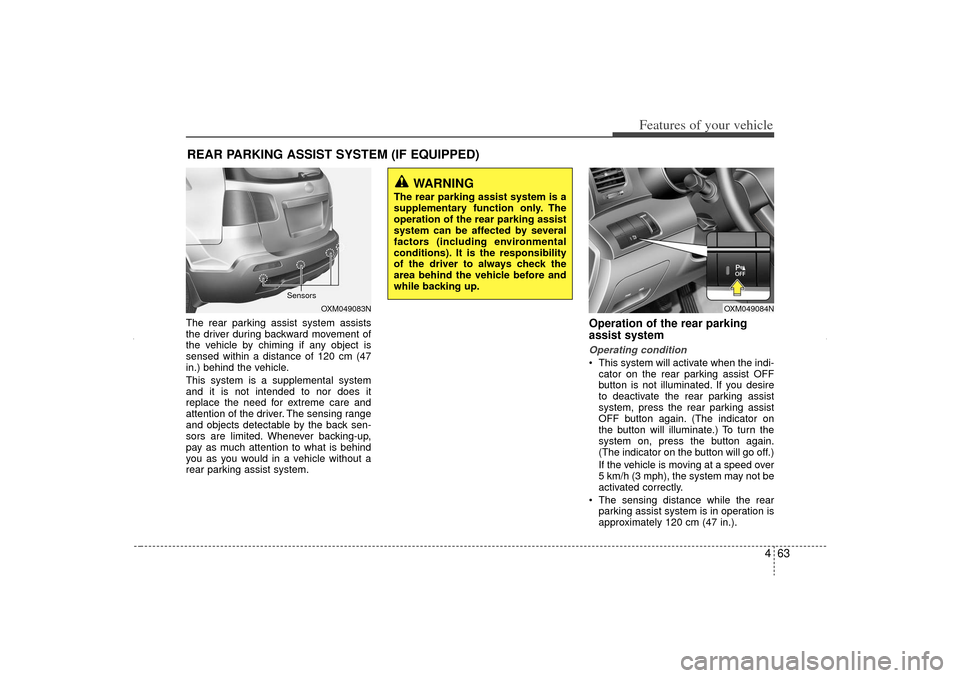
The rear parking assist system assists
the driver during backward movement of
the vehicle by chiming if any object is
sensed within a distance of 120 cm (47
in.) behind the vehicle.
This system is a supplemental system
and it is not intended to nor does it
replace the need for extreme care and
attention of the driver. The sensing range
and objects detectable by the back sen-
sors are limited. Whenever backing-up,
pay as much attention to what is behind
you as you would in a vehicle without a
rear parking assist system.
Operation of the rear parking
assist systemOperating condition This system will activate when the indi-cator on the rear parking assist OFF
button is not illuminated. If you desire
to deactivate the rear parking assist
system, press the rear parking assist
OFF button again. (The indicator on
the button will illuminate.) To turn the
system on, press the button again.
(The indicator on the button will go off.)
If the vehicle is moving at a speed over
5 km/h (3 mph), the system may not be
activated correctly.
The sensing distance while the rear parking assist system is in operation is
approximately 120 cm (47 in.).
REAR PARKING ASSIST SYSTEM (IF EQUIPPED)
WARNING
The rear parking assist system is a
supplementary function only. The
operation of the rear parking assist
system can be affected by several
factors (including environmental
conditions). It is the responsibility
of the driver to always check the
area behind the vehicle before and
while backing up.
OXM049083N
Sensors
OXM049084N
XM CAN (ENG) 4(~105).QXP 4/19/2011 10:38 AM Page 63
Page 155 of 388
465
Features of your vehicle
Rear parking assist system pre-
cautions The rear parking assist system maynot sound consistently depending on
the speed and shapes of the objects
detected.
The rear parking assist system may malfunction if the vehicle bumper
height or sensor installation has been
modified or damaged. Any non-factory
installed equipment or accessories
may also interfere with the sensor per-
formance.
The sensor may not recognize objects less than 40 cm (15 in.) from the sen-
sor, or it may sense an incorrect dis-
tance. Use caution.
When the sensor is frozen or stained with snow, dirt, or water, the sensor
may be inoperative until the stains are
removed using a soft cloth.
Do not push, scratch or strike the sen- sor. Sensor damage could occur.
✽ ✽ NOTICEThis system can only sense objects with-
in the range and location of the sensors;
It can not detect objects in other areas
where sensors are not installed. Also,
small or slim objects, such as poles or
objects located between sensors may not
be detected by the sensors.
Always visually check behind the vehi-
cle when backing up.
Be sure to inform any drivers of the
vehicle that may be unfamiliar with the
system regarding the systems capabili-
ties and limitations.
Self-diagnosisIf you don’t hear an audible warning
sound or if the buzzer sounds intermit-
tently when shifting the gear to the R
(Reverse) position, this may indicate a
malfunction in the rear parking assist sys-
tem. If this occurs, have your vehicle
checked by an authorized KIA dealer as
soon as possible.
WARNING
Pay close attention when the vehi-
cle is driven close to objects on the
road, particularly pedestrians, and
especially children. Be aware that
some objects may not be detected
by the sensors, due to the object’s
distance, size or material, all of
which can limit the effectiveness of
the sensor. Always perform a visu-
al inspection to make sure the vehi-
cle is clear of all obstructions
before moving the vehicle in any
direction.
WARNING
Your new vehicle warranty does not
cover any accidents or damage to
the vehicle or injuries to its occu-
pants due to a rear parking assist
system malfunction. Always drive
safely and cautiously.
XM CAN (ENG) 4(~105).QXP 4/19/2011 10:38 AM Page 65
Page 156 of 388
Features of your vehicle66
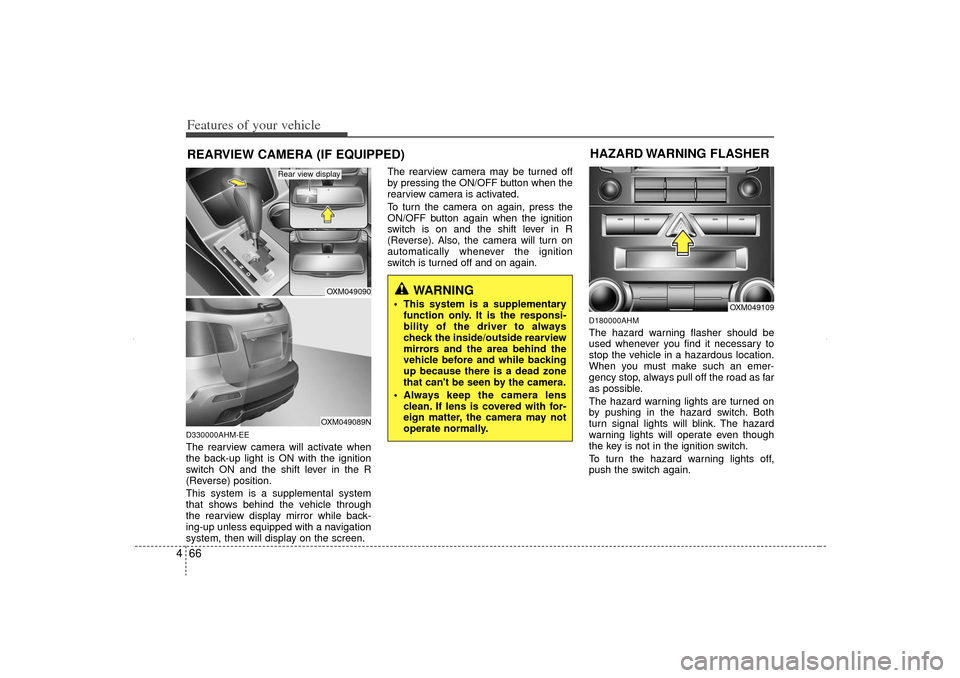
4D330000AHM-EEThe rearview camera will activate when
the back-up light is ON with the ignition
switch ON and the shift lever in the R
(Reverse) position.
This system is a supplemental system
that shows behind the vehicle through
the rearview display mirror while back-
ing-up unless equipped with a navigation
system, then will display on the screen. The rearview camera may be turned off
by pressing the ON/OFF button when the
rearview camera is activated.
To turn the camera on again, press the
ON/OFF button again when the ignition
switch is on and the shift lever in R
(Reverse). Also, the camera will turn on
automatically whenever the ignition
switch is turned off and on again.
D180000AHMThe hazard warning flasher should be
used whenever you find it necessary to
stop the vehicle in a hazardous location.
When you must make such an emer-
gency stop, always pull off the road as far
as possible.
The hazard warning lights are turned on
by pushing in the hazard switch. Both
turn signal lights will blink. The hazard
warning lights will operate even though
the key is not in the ignition switch.
To turn the hazard warning lights off,
push the switch again.
WARNING
This system is a supplementary
function only. It is the responsi-
bility of the driver to always
check the inside/outside rearview
mirrors and the area behind the
vehicle before and while backing
up because there is a dead zone
that can't be seen by the camera.
Always keep the camera lens clean. If lens is covered with for-
eign matter, the camera may not
operate normally.
REARVIEW CAMERA (IF EQUIPPED)
OXM049090OXM049089N
Rear view display
OXM049109
HAZARD WARNING FLASHER
XM CAN (ENG) 4(~105).QXP 4/19/2011 10:38 AM Page 66
Page 161 of 388
471
Features of your vehicle
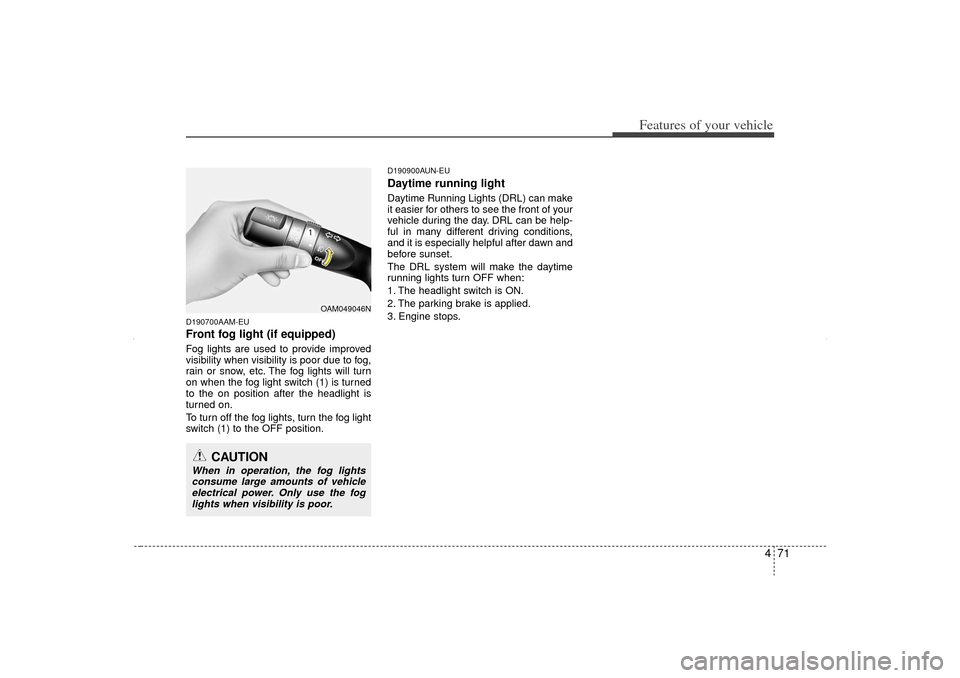
D190700AAM-EUFront fog light (if equipped)Fog lights are used to provide improved
visibility when visibility is poor due to fog,
rain or snow, etc. The fog lights will turn
on when the fog light switch (1) is turned
to the on position after the headlight is
turned on.
To turn off the fog lights, turn the fog light
switch (1) to the OFF position.
D190900AUN-EUDaytime running light Daytime Running Lights (DRL) can make
it easier for others to see the front of your
vehicle during the day. DRL can be help-
ful in many different driving conditions,
and it is especially helpful after dawn and
before sunset.
The DRL system will make the daytime
running lights turn OFF when:
1. The headlight switch is ON.
2. The parking brake is applied.
3. Engine stops.
OAM049046N
CAUTION
When in operation, the fog lightsconsume large amounts of vehicleelectrical power. Only use the fog lights when visibility is poor.
XM CAN (ENG) 4(~105).QXP 4/19/2011 10:39 AM Page 71
Page 185 of 388
495
Features of your vehicle
For maximum defrosting, set the tem-perature control to the extreme
right/hot position and the fan speed
control to the highest speed.
If warm air to the floor is desired while defrosting or defogging, set the mode
to the floor-defrost position.
Before driving, clear all snow and ice from the windshield, rear window, out-
side rear view mirrors, and all side win-
dows.
Clear all snow and ice from the hood and air inlet in the cowl grill to improve
heater and defroster efficiency and to
reduce the probability of fogging up the
inside of the windshield.
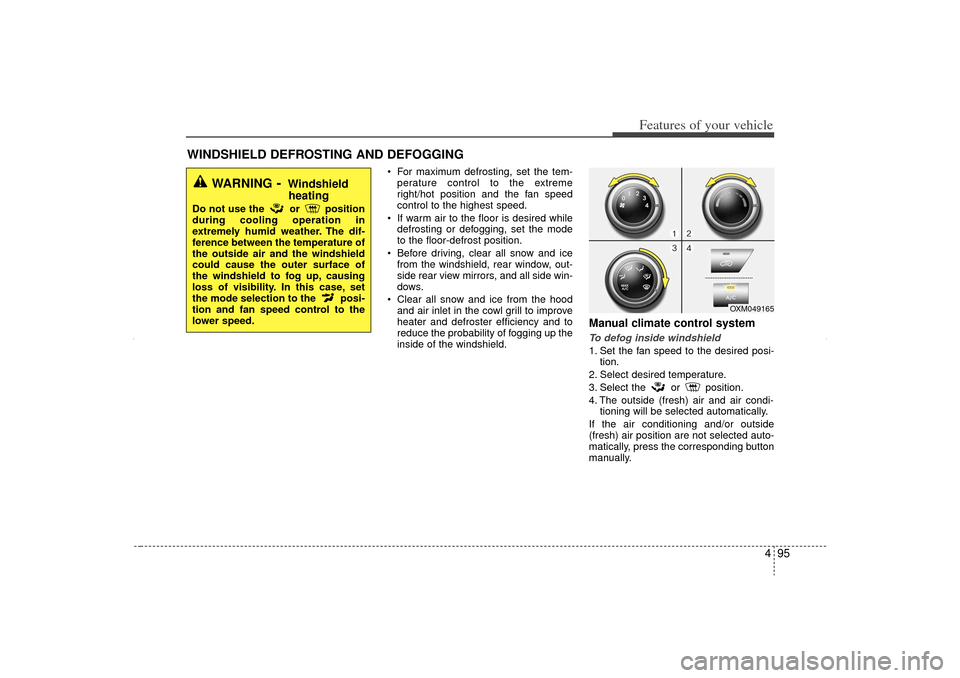
Manual climate control systemTo defog inside windshield 1. Set the fan speed to the desired posi- tion.
2. Select desired temperature.
3. Select the or position.
4. The outside (fresh) air and air condi- tioning will be selected automatically.
If the air conditioning and/or outside
(fresh) air position are not selected auto-
matically, press the corresponding button
manually.
WINDSHIELD DEFROSTING AND DEFOGGING
OXM049165
WARNING
- Windshield heating
Do not use the or position
during cooling operation in
extremely humid weather. The dif-
ference between the temperature of
the outside air and the windshield
could cause the outer surface of
the windshield to fog up, causing
loss of visibility. In this case, set
the mode selection to the posi-
tion and fan speed control to the
lower speed.
XM CAN (ENG) 4(~105).QXP 4/19/2011 10:42 AM Page 95
Page 186 of 388
Features of your vehicle96
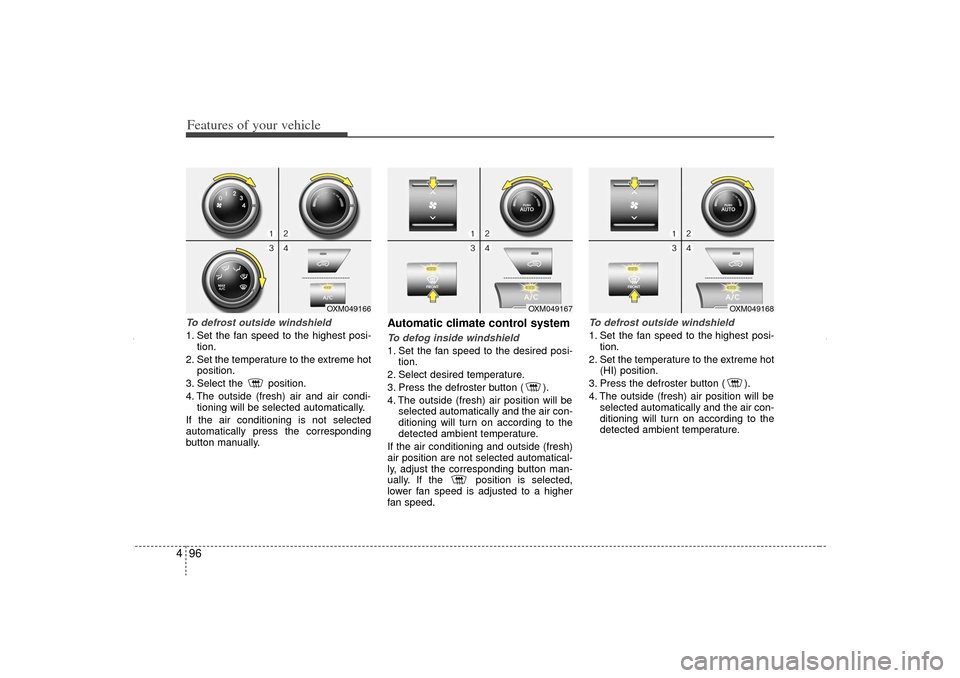
4To defrost outside windshield 1. Set the fan speed to the highest posi-
tion.
2. Set the temperature to the extreme hot position.
3. Select the position.
4. The outside (fresh) air and air condi- tioning will be selected automatically.
If the air conditioning is not selected
automatically press the corresponding
button manually.
Automatic climate control systemTo defog inside windshield 1. Set the fan speed to the desired posi- tion.
2. Select desired temperature.
3. Press the defroster button ( ).
4. The outside (fresh) air position will be selected automatically and the air con-
ditioning will turn on according to the
detected ambient temperature.
If the air conditioning and outside (fresh)
air position are not selected automatical-
ly, adjust the corresponding button man-
ually. If the position is selected,
lower fan speed is adjusted to a higher
fan speed.
To defrost outside windshield 1. Set the fan speed to the highest posi- tion.
2. Set the temperature to the extreme hot (HI) position.
3. Press the defroster button ( ).
4. The outside (fresh) air position will be selected automatically and the air con-
ditioning will turn on according to the
detected ambient temperature.
OXM049167
OXM049168
OXM049166
XM CAN (ENG) 4(~105).QXP 4/19/2011 10:42 AM Page 96
Page 195 of 388
4 105
Features of your vehicle
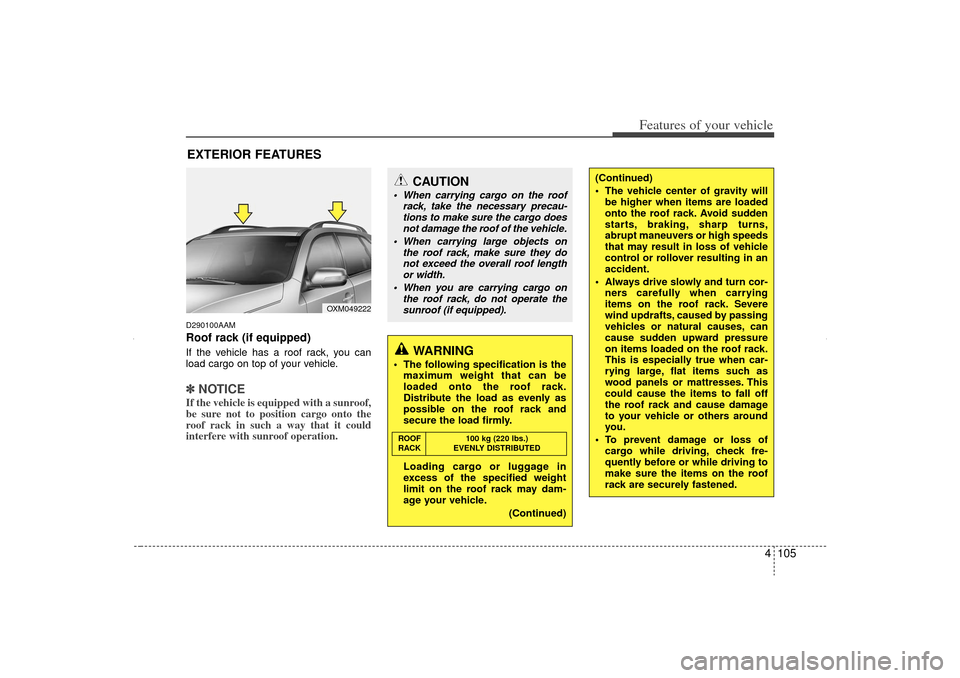
D290100AAMRoof rack (if equipped)If the vehicle has a roof rack, you can
load cargo on top of your vehicle.✽ ✽NOTICEIf the vehicle is equipped with a sunroof,
be sure not to position cargo onto the
roof rack in such a way that it could
interfere with sunroof operation.EXTERIOR FEATURES
CAUTION
When carrying cargo on the roof
rack, take the necessary precau-tions to make sure the cargo does not damage the roof of the vehicle.
When carrying large objects on the roof rack, make sure they donot exceed the overall roof length or width.
When you are carrying cargo on the roof rack, do not operate thesunroof (if equipped).
WARNING
The following specification is the maximum weight that can be
loaded onto the roof rack.
Distribute the load as evenly as
possible on the roof rack and
secure the load firmly.
Loading cargo or luggage in
excess of the specified weight
limit on the roof rack may dam-
age your vehicle.
(Continued)ROOF100 kg (220 lbs.)
RACK EVENLY DISTRIBUTED
(Continued)
The vehicle center of gravity will be higher when items are loaded
onto the roof rack. Avoid sudden
starts, braking, sharp turns,
abrupt maneuvers or high speeds
that may result in loss of vehicle
control or rollover resulting in an
accident.
Always drive slowly and turn cor- ners carefully when carrying
items on the roof rack. Severe
wind updrafts, caused by passing
vehicles or natural causes, can
cause sudden upward pressure
on items loaded on the roof rack.
This is especially true when car-
rying large, flat items such as
wood panels or mattresses. This
could cause the items to fall off
the roof rack and cause damage
to your vehicle or others around
you.
To prevent damage or loss of cargo while driving, check fre-
quently before or while driving to
make sure the items on the roof
rack are securely fastened.
OXM049222
XM CAN (ENG) 4(~105).QXP 4/19/2011 10:43 AM Page 105
Page 203 of 388
4 113
Features of your vehicle
Using RADIO, SETUP, VOLUME
and AUDIO CONTROL
1. FM/AM Selection Button The FM/AM button toggles between FM
and AM. Listed below are the paths as
the system switches from FM to AM and
back to FM.
FM/AM : FM1
➟FM2
➟AM
➟FM1...
FM : FM1
➟FM2
➟FM1...
2. Power ON/OFF Button & Volume Control Knob Turns the audio system on/off when
the ignition switch is on ACC or ON.
If the knob is turned clockwise/counter- clockwise, the volume will increase
/decrease.3. Automatic Station Seek Button When the [SEEK ] is pressed, it will
automatically tune to the next lower
station.
When the [SEEK ] is pressed, it will automatically tune to the next higher
station.
4. SCAN Button When the button is pressed, it auto-matically scans the radio stations
upwards.
The SCAN feature steps through each station, starting from the initial station,
for ten seconds.
Press the [SCAN] button again to stop the scan feature and to listen to the
currently selected channel.5. MUTE ButtonWhen the button is pressed, stops sound
and “Audio Mute” is displayed on LCD.6. Preset Selection Button Press [1]~[6] buttons less than 0.8 sec-onds to play the station saved in each
button.
Press [1]~[6] b utton more than 0.8 sec-
onds or longer to save the current sta-
tion to the respective button with a
beep.
7. TUNE Knob & Audio Control Knob Rotate the knob clockwise or counter-
clock wise to increase or decrease from
current frequency.
(AM 10 kHz, FM 200 kHz)
Pressing the button changes the BASS,
MIDDLE, TREBLE, FADER and BAL-
ANCE TUNE mode. The mode selected
is shown on the display. After selecting
each mode, rotate the Audio control knob
clockwise or counterclockwise.
BASS Control
To increase the BASS, rotate the knob
clockwise, while to decrease the BASS,
rotate the knob counterclockwise.
MIDDLE Control
To increase the MIDDLE, rotate the knob
clockwise, while to decrease the MID-
DLE, rotate the knob counterclockwise.
TREBLE Control
To increase the TREBLE, rotate the knob
clockwise, while to decrease the TRE-
BLE, rotate the knob counterclockwise.
XM CAN (ENG) 4(106~audio).QXP 4/19/2011 10:48 AM Page 113
Page 215 of 388
4 125
Features of your vehicle
Satellite radio channels:SIRIUS Satellite Radio has over 130 chan-
nels, including 69 channels of 100% com-
mercial-free music, plus sports, news, talk
and entertainment available nationwide in
your vehicle. For more information and a
complete list of SIRIUS Satellite Radio
channels, visit sirius.com in the United
States, sirius-canada.ca in Canada, or call
SIRIUS at 1-888-539-7474.
Satellite radio reception factors:
To receive the satellite signal, your vehi-
cle has been equipped with a satellite
radio antenna located on the roof of your
vehicle. The vehicle roof provides the
best location for an unobstructed, open
view of the sky, a requirement of a satel-
lite radio system. Like AM/FM, there are
several factors that can affect satellite
radio reception performance:
Antenna obstructions: For optimalreception performance, keep the
antenna clear of snow and ice build-up
and keep luggage and other material
as far away from the antenna as possi-
ble.
Terrain: Hills, mountains, tall buildings, bridges, tunnels, freeway overpasses,
parking garages, dense tree foliage
and thunderstorms can interfere with
your reception.
SIRIUS Satellite Radio service:SIRIUS Satellite Radio is a subscription-
based satellite radio service that broad-
casts music, sports, news and entertain-
ment programming to radio receivers,
which are available for installation in
motor vehicles or factory installed, as
well as for the home, portable and wire-
less devices, and through an Internet
connection on personal computer.
Vehicles that are equipped with a factory
installed SIRIUS Satellite Radio system
include:
Hardware and an introductory trial sub-scription term, which begins on the
date of sale or lease of the vehicle.
For a small upgrade fee, access to SIRIUS music channels, and other
select channels over the Internet using
any computer connected to the
Internet (U.S. customers only).
For information on extended subscrip-
tion terms, contact SIRIUS at 1-888-
539-7474.
NOTE:Satellite Radio requires SIRIUS
®
com-
patible receiver and a subscription serv-
ice fee after trial period.
Vehicles without a factory-installed
radio receiver require hardware pur-
chase and installation. Please see your
dealer for further details. All fees and
programming subject to change.
Subscriptions governed by the SIRIUS
Terms & Conditions available at
www
.sirius.com
/ serviceterms.
Available only in the 48 contiguous
United States and the District of
Columbia. Service available in Canada;
see www
.siriuscanada.ca
KIA shall not be responsible for any
such programming changes.Satellite Radio Electronic Serial
Number (ESN):
This 12-digit Satellite
Serial Number is needed to re-activate,
modify or track your satellite radio
account. You will need this number when
communicating with SIRIUS.
SIRIUS Satellite Radio information (if equipped)
XM CAN (ENG) 4(106~audio).QXP 4/19/2011 10:48 AM Page 125