ignition KIA SORENTO 2014 Navigation System Quick Reference Guide
[x] Cancel search | Manufacturer: KIA, Model Year: 2014, Model line: SORENTO, Model: KIA SORENTO 2014Pages: 236, PDF Size: 7.61 MB
Page 142 of 236
4-28
Using Bluetooth® Wireless Technology
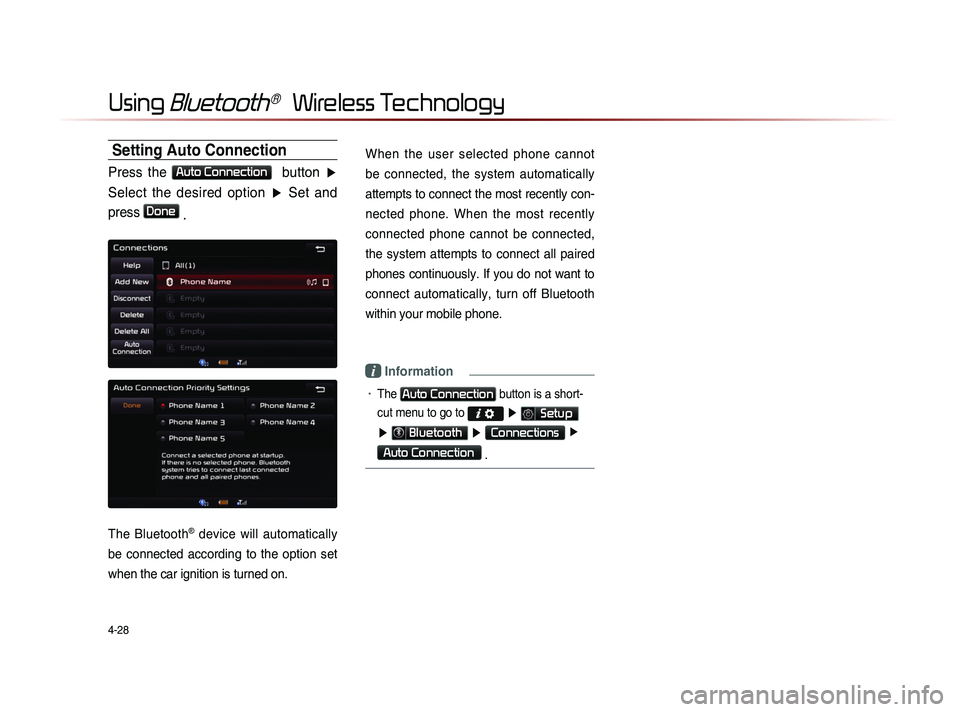
Setting Auto Connection
Press the Auto Connection button ▶
Select the desired option ▶ Set and
press
Done .
The Bluetooth® device will automatically
be connected according to the option set
when the car ignition is turned on.
When the user selected phone cannot
be connected, the system automatically
attempts to connect the most recently con-
nected phone. When the most recently
connected phone cannot be connected,
the system attempts to connect all paired
phones continuously. If you do not want to
connect automatically, turn off Bluetooth
within your mobile phone.
i Information
• The Auto Connection button is a short-
cut menu to go to
▶ Setup
▶ Bluetooth ▶ Connections ▶
Auto Connection
.
Page 160 of 236
UVO eServices(Optional)
When the vehicle ignition is not turned on
When the phone Bluetooth® feature is set to off
When the phone Bluetooth® cannot be connected or becomes
disconnected
When there are no phones paired with the vehicle
When calls are unavailable by being within out of service zones
When the power turns off due to phone power (battery) issues
When a Bluetooth® device without phone feature support has
been connected, such as an MP3 device
When the system is booting
When the system power supply is unstable
When the attempted call is blocked due to user operations
When the 9-1-1 call is unstable due to phone or other communi- cation network issues
When the call feature is not operating due to phone settings set by the user
When the phone cannot be controlled via Bluetooth® due to
phone states and characteristics
The Crash Notification Assist feature may not operate in the following situations.
Page 166 of 236
6-6
UVO eServices(Optional)
Vehicle Diagnostics
Conducting Vehicle Diagnostics
Vehicle Diagnostics is available only when
the ignition is turned on and the vehicle is
parked.
It also requires that UVO eServices is
activated, and the Registered Phone is
connected via Bluetooth before starting
Vehicle Diagnostics.
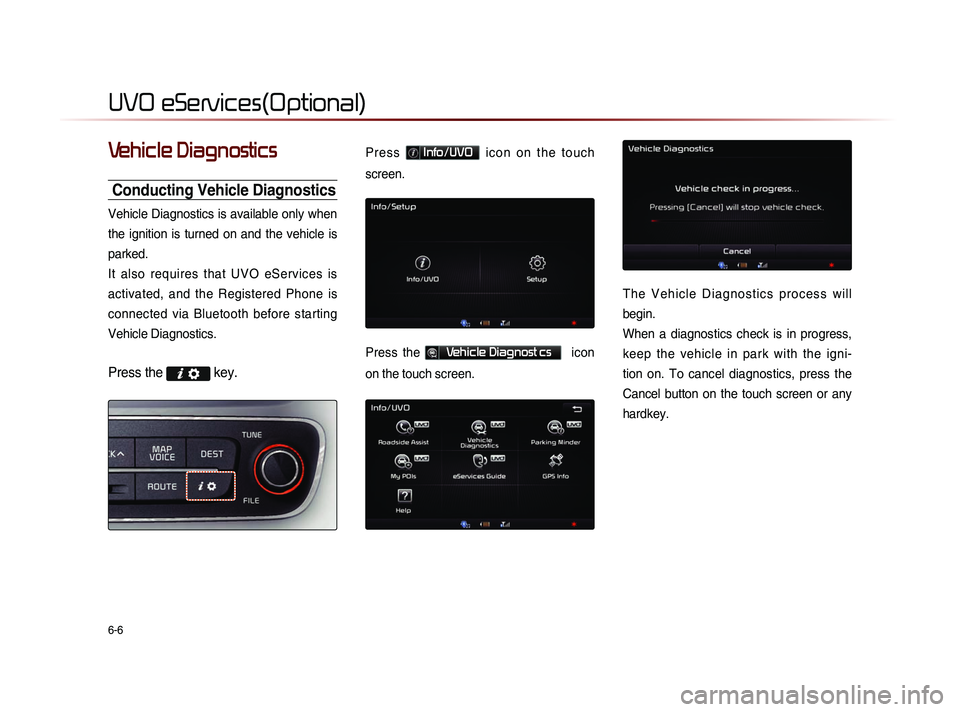
Press the key.
P r e s s Info/UVO i c o n o n t h e t o u c h
screen.
Press the Vehicle Diagnost cs icon
on the touch screen.
T h e V e h i c l e D i a g n o s t i c s p r o c e s s w i l l
begin.
When a diagnostics check is in progress,
keep the vehicle in park with the igni-
tion on. To cancel diagnostics, press the
Cancel button on the touch screen or any
hardkey.
Page 169 of 236
UVO eServices
Information l
6-9
Scheduled Diagnostics
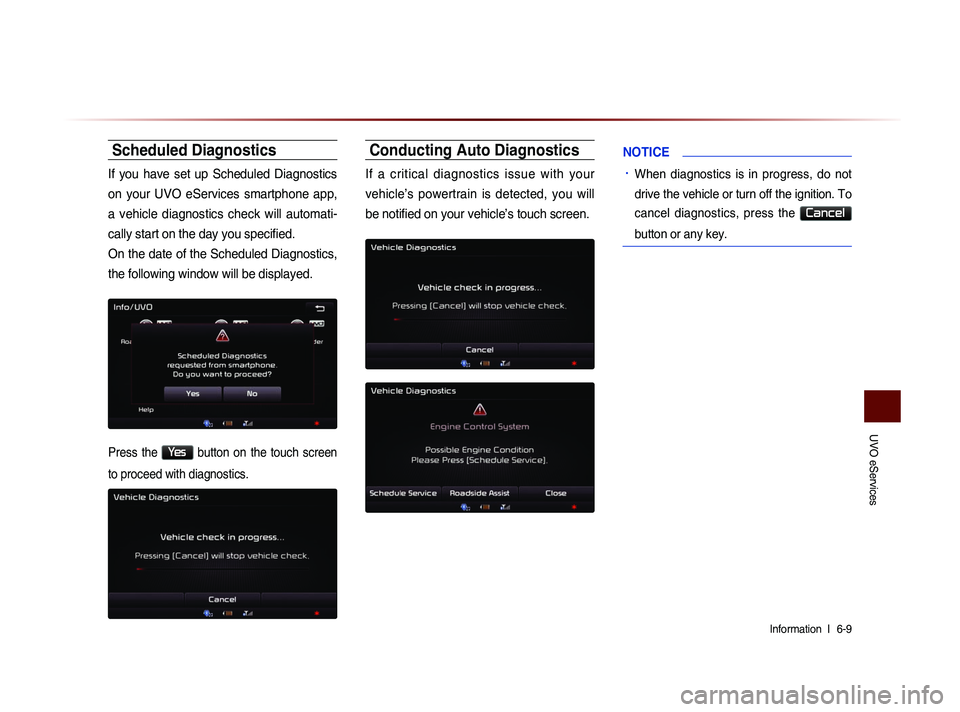
If you have set up Scheduled Diagnostics
on your UVO eServices smartphone app,
a vehicle diagnostics check will automati-
cally start on the day you specified.
On the date of the Scheduled Diagnostics,
the following window will be displayed.
Press the Yes button on the touch screen
to proceed with diagnostics.
Conducting Auto Diagnostics
If a critical diagnostics issue with your
vehicle’s powertrain is detected, you will
be notified on your vehicle’s touch screen.
NOTICE
• When diagnostics is in progress, do not
drive the vehicle or turn off the ignition. To
cancel diagnostics, press the
Cancel
button or any key.
Page 171 of 236
UVO eServices
Information l
6-11
NOTICE
• Ensure that you have logged in to the
UVO eServices app, and your phone is
connected to the UVO eServices system
via Bluetooth connection.
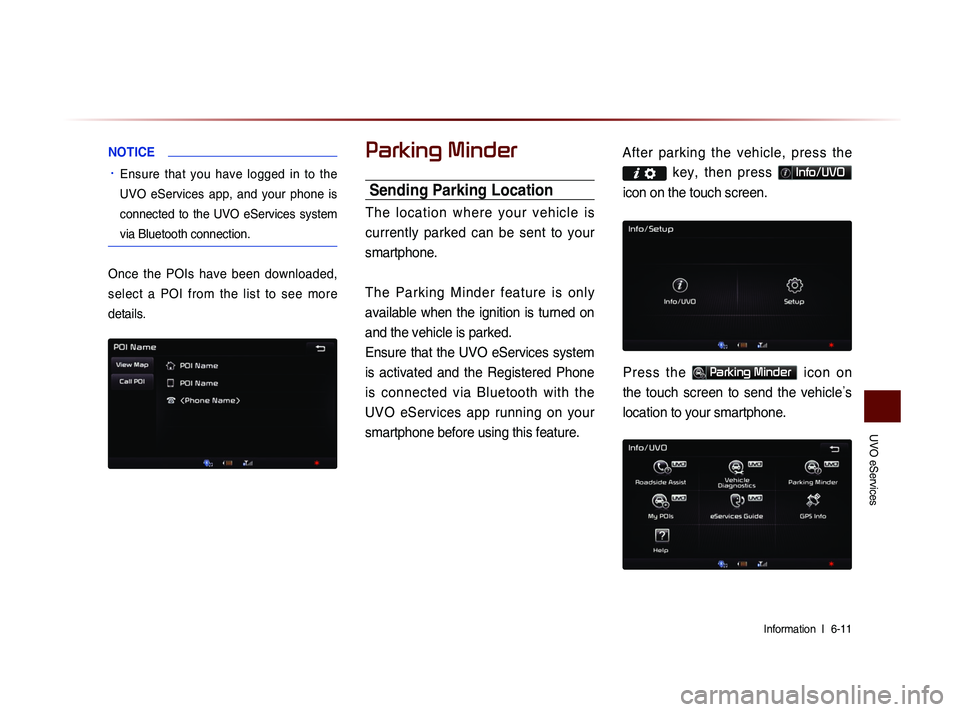
Once the POIs have been downloaded,
select a POI from the list to see more
details.
Parking Minder
Sending Parking Location
The location where your vehicle is
currently parked can be sent to your
smartphone.
The Parking Minder feature is only
available when the ignition is turned on
and the vehicle is parked.
Ensure that the UVO eServices system
is activated and the Registered Phone
is connected via Bluetooth with the UVO eServices app running on your
smartphone before using this feature. After parking the vehicle, pre
ss the
key, then press Info/UVO
icon on the touch screen.
Press the Parking Minder icon on
the touch screen to send the vehicle ’s
location to your smartphone.
Page 185 of 236
Rear Camera
Other Features l
7-7
About Rear Detection
Camera
• This system has been equipped with a
rear camera for user safety by allowing a
wider rear range of vision.
• The rear camera will operate automati-
cally when the ignition KEY is turned ON
and the transmission lever is set to R.
The rear camera will automatically stop
operating when set to a different lever.
Operating sequence of the Rear
Camera
1. Position the ignition key in ACC or ON.
2. Position the transmission lever to R.
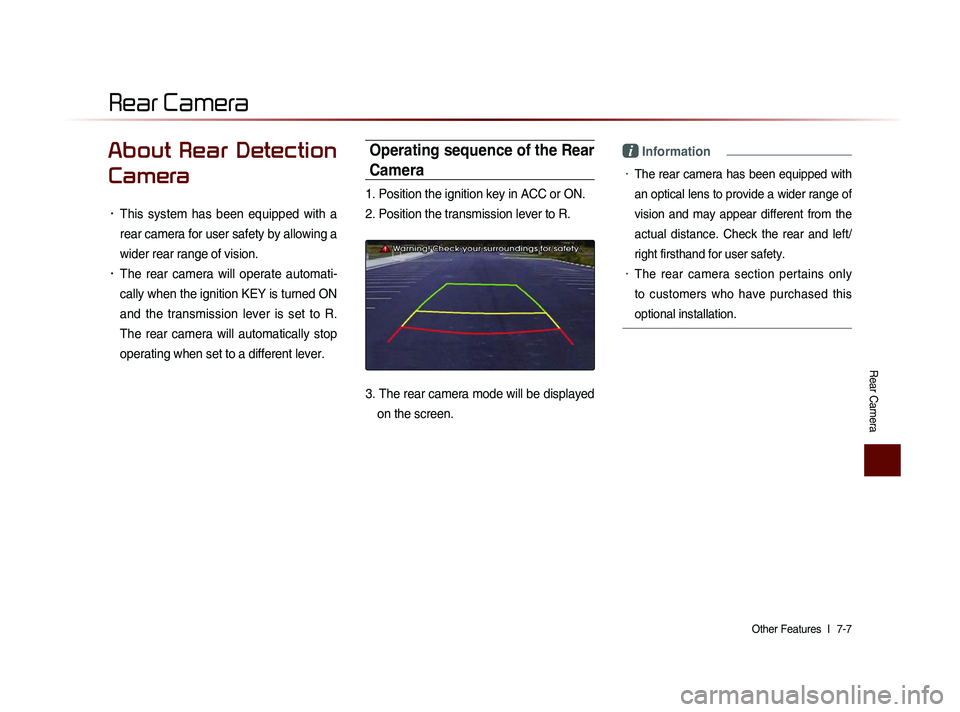
3. The rear camera mode will be displayed
on the screen.
i Information
• The rear camera has been equipped with
an optical lens to provide a wider range of
vision and may appear different from the
actual distance. Check the rear and left/
right firsthand for user safety.
• The rear camera section pertains only
to customers who have purchased this
optional installation.
Rear Camera
Page 210 of 236
8-24
Using Setup
After inserting the SD card with the update
file, press
Ok to start the update.
Once updating is complete, the system will
automatically restart.
i Information
• This product requires regular updates for
software corrections, new functions and
map updates. Updating may require up to
1 hour depending on the data size.
• Turning off the power or ejecting the
SD card during the update process may
result in data loss. Make sure to keep the
ignition on and wait until updating is com-
plete.
• Map and software updates can be down-
loaded from the designated website
(http://www.mapnsoft.com) and updated
through the SD card.
CAUTION
• Please use only the SD card that was
included with the vehicle purchase.
• The use of a separately purchased SD
card may result in damage due to heat
related deformation.
• Product malfunctions caused by the use
of separately purchased SD cards shall
not be covered within the product war-
ranty.
• Repeatedly connecting/disconnecting
the SD card in a short period of time may
cause damage to the device.
Display Off
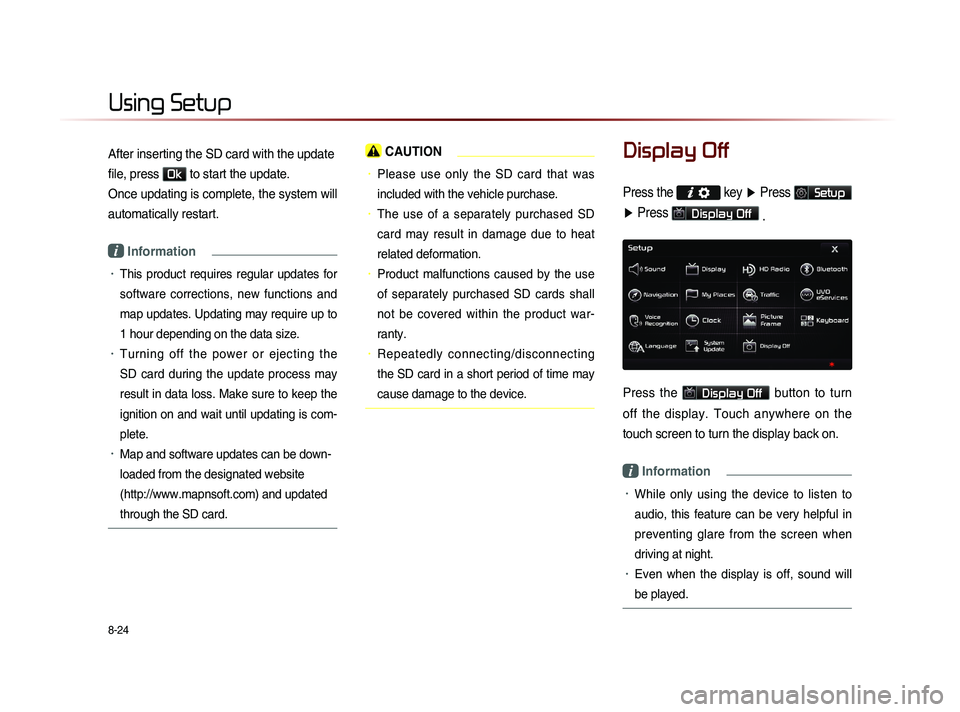
Press the key ▶ Press Setup
▶ Press
Display Off
.
Press the Display Off button to turn
off the display. Touch anywhere on the
touch screen to turn the display back on.
i Information
• While only using the device to listen to
audio, this feature can be very helpful in
preventing glare from the screen when
driving at night.
• Even when the display is off, sound will
be played.