Position sensor KIA SORENTO 2019 User Guide
[x] Cancel search | Manufacturer: KIA, Model Year: 2019, Model line: SORENTO, Model: KIA SORENTO 2019Pages: 573, PDF Size: 10.61 MB
Page 221 of 573
4133
Features of your vehicle
Front windshield washers
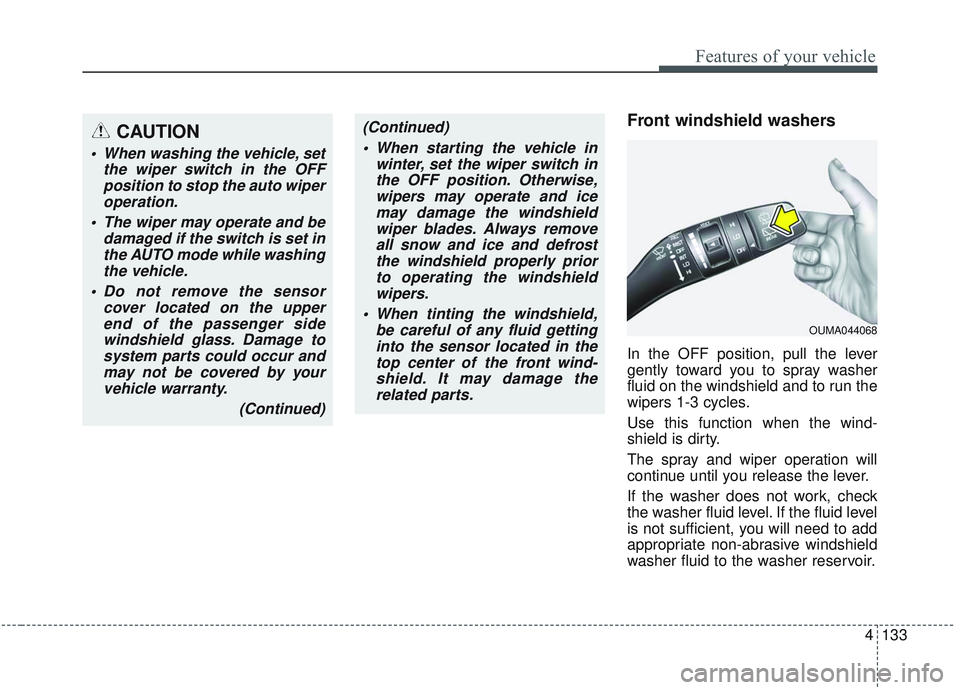
In the OFF position, pull the lever
gently toward you to spray washer
fluid on the windshield and to run the
wipers 1-3 cycles.
Use this function when the wind-
shield is dirty.
The spray and wiper operation will
continue until you release the lever.
If the washer does not work, check
the washer fluid level. If the fluid level
is not sufficient, you will need to add
appropriate non-abrasive windshield
washer fluid to the washer reservoir.
OUMA044068
(Continued) When starting the vehicle in winter, set the wiper switch inthe OFF position. Otherwise,wipers may operate and icemay damage the windshieldwiper blades. Always removeall snow and ice and defrostthe windshield properly priorto operating the windshieldwipers.
When tinting the windshield, be careful of any fluid gettinginto the sensor located in thetop center of the front wind-shield. It may damage therelated parts.CAUTION
When washing the vehicle, set the wiper switch in the OFFposition to stop the auto wiperoperation.
The wiper may operate and be damaged if the switch is set inthe AUTO mode while washingthe vehicle.
Do not remove the sensor cover located on the upperend of the passenger sidewindshield glass. Damage tosystem parts could occur andmay not be covered by yourvehicle warranty.
(Continued)
Page 242 of 573
Features of your vehicle
154
4
✽ ✽
NOTICE
Never place anything over the sensor
located on the instrument panel to
ensure better control of the heating
and cooling system.
Manual heating and air condi-
tioning
The heating and cooling system can
be controlled manually by pressing
buttons or turning knob(s) other than
the AUTO button. In this case, the
system works sequentially according
to the order of buttons or knob(s)
selected.
1. Start the engine.
2. Set the mode to the desired posi-
tion.
For improving the effectiveness of
heating and cooling;
- Heating:
- Cooling:
3. Set the temperature control to the desired position.
4. Set the air intake control to the outside (fresh) air position.
5. Set the fan speed control to the desired speed.
6. If air conditioning is desired, turn the air conditioning system on.
Press the AUTO button in order to
convert to full automatic control of
the system.
Mode selection
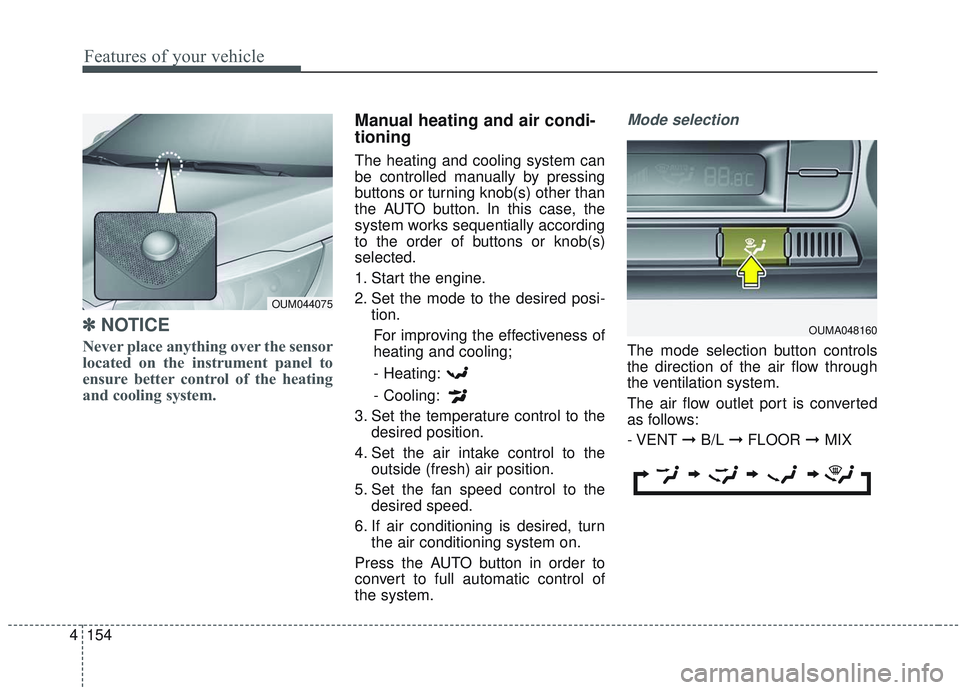
The mode selection button controls
the direction of the air flow through
the ventilation system.
The air flow outlet port is converted
as follows:
- VENT \b B/L \b FLOOR \b MIX
OUM044075
OUMA048160
Page 256 of 573

Features of your vehicle
168
4
Auto defogging system
(if equipped)
Auto defogging reduces the probabil-
ity of fogging up the inside of the
windshield by automatically sensing
the moisture of inside the windshield.
The auto defogging system operates
when the heater or air conditioning is
on. This indicator illuminates
when the auto defogging
system senses the mois-
ture on the inside of the
windshield and operates.
If more moisture is in the vehicle,
higher steps operate as follow. For
example if auto defogging does not
defog inside the windshield at step 1
Outside air position, it tries to defog
again at step 2 Blowing air toward
the windshield.
Step 1 : Outside air position
Step 2 :Blowing air toward the wind-
shield
Step 3 : Increasing air flow toward the windshield
Step 4 : Operating the air conditioning
Step 5 : Maxim izing the air condi-
tioning To cancel or reset the Auto Defogging
System
Press the front windshield defroster
button for 3 seconds when the igni-
tion switch is in the ON position.
When the Auto Defogging System is
canceled, ADS OFF symbol will blink
3 times and the ADS OFF will be dis-
played on the climate control infor-
mation screen.
When the Auto Defogging System is
reset, ADS OFF symbol will blink 6
times without a signal.
✽ ✽
NOTICE
If the A/C off or recirculated air
position is manually selected while
the auto defogging system is on, the
auto defogging indicator will blink 3
times to give notice that manual
operation is canceled.
Do not remove the sensor cover
located on the upper end of the pas-
senger side windshield glass.
Damage to the system parts could
occur and may not be covered by
your vehicle warranty.
OUMA044405
Page 326 of 573

549
Driving your vehicle
The FCA system is designed to
detect and monitor the vehicle ahead
or detect a pedestrian (if equipped)
in the roadway through radar signals
and camera recognition to warn the
driver that a collision is imminent,
and if necessary, apply emergency
braking.✽ ✽NOTICE
Take the following precautions when
using the Forward Collision-
Avoidance Assist (FCA):
• This system is only a supplemental
system and it is not intended to,
nor does it replace the need for
extreme care and attention of the
driver. The sensing range and
objects detectable by the sensors
are limited. Pay attention to the
road conditions at all times.
• NEVER drive too fast in accor- dance with the road conditions or
while cornering.
• Always drive cautiously to prevent unexpected and sudden situations
from occurring. FCA does not stop
the vehicle completely and does
not avoid collisions.
System setting and activation
System setting
The driver can activate the FCA by
placing the ignition switch to the ON
position and by selecting 'User
Settings', 'Driver Assistance', and
‘Forward Collision-Avoidance Assist’.
The FCA deactivates, when the driv-
er cancels the system setting.
FORWARD COLLISION-AVOIDANCE ASSIST (FCA) (IF EQUIPPED)
WARNING - Forward
Collision-Avoidance Assist
(FCA) Limitations
The FCA system is a supple-
mental system and is not a sub-
stitute for safe driving prac-
tices. It is the responsibility of
the driver to always check the
speed and distance to the vehi-
cle ahead to ensure it is safety
to use the FCA system.
Page 330 of 573

553
Driving your vehicle
✽ ✽NOTICE
The FCA operates in accordance
with the risk levels, such as the dis-
tance from the vehicle/pedestrian in
front, the speed of the vehicle/pedes-
trian in front, and the driver's vehi-
cle operation. For the system to acti-
vate, do not attempt risky driving.
FCA front radar / camera sensor
In order for the FCA system to oper-
ate properly, always make sure the
sensor or sensor cover is clean and
free of dirt, snow, and debris. Dirt,
snow, or foreign substances on the
lens may adversely affect the sens-
ing performance of the sensor.
✽ ✽NOTICE
• Do not install any accessories, such
as a license plate bracket or
bumper sticker near the sensor
area. Do not replace the bumper
by yourself. Doing so may adverse-
ly affect the sensing performance.
• Always keep the sensor/bumper area clean.
• Use only a soft cloth to wash the vehicle. Also, do not spray highly
pressurized water on the sensor
installed on the bumper.
• Be careful not to apply unneces- sary force on the front sensor area.
When the sensor moves out of the
correct position due to external
force, the system may not operate
correctly even without the warn-
ing light or message. In this case,
we recommend you to have the
vehicle inspected by an authorized
Kia dealer.
• Use only the genuine Kia sensor cover. Do not arbitrarily apply
paint on the sensor cover. (Continued)WARNING
Never rely solely on the FCA to
stop a collision the drive can It
is the driver's responsibility to
safely maneuver the vehicle
under all conditions.
OUMA058054
OUMA058032
Page 355 of 573
Driving your vehicle
78
5
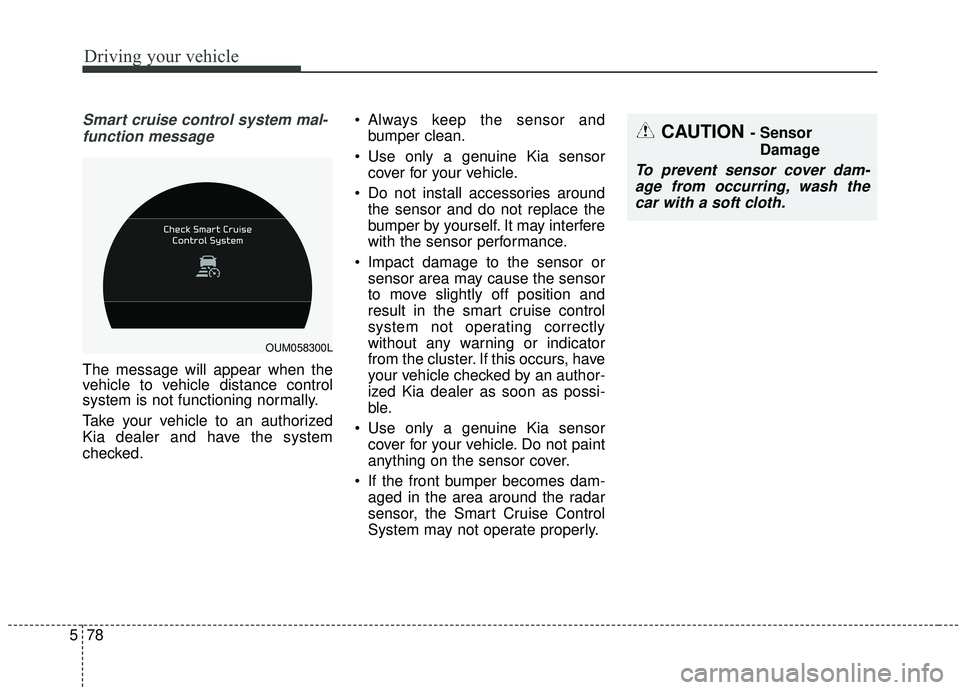
Smart cruise control system mal-
function message
The message will appear when the
vehicle to vehicle distance control
system is not functioning normally.
Take your vehicle to an authorized
Kia dealer and have the system
checked. Always keep the sensor and
bumper clean.
Use only a genuine Kia sensor cover for your vehicle.
Do not install accessories around the sensor and do not replace the
bumper by yourself. It may interfere
with the sensor performance.
Impact damage to the sensor or sensor area may cause the sensor
to move slightly off position and
result in the smart cruise control
system not operating correctly
without any warning or indicator
from the cluster. If this occurs, have
your vehicle checked by an author-
ized Kia dealer as soon as possi-
ble.
Use only a genuine Kia sensor cover for your vehicle. Do not paint
anything on the sensor cover.
If the front bumper becomes dam- aged in the area around the radar
sensor, the Smart Cruise Control
System may not operate properly.
CAUTION - Sensor
Damage
To prevent sensor cover dam-age from occurring, wash thecar with a soft cloth.
OUM058300L
Page 370 of 573

593
Driving your vehicle
LKA SYSTEM operation
To activate/deactivate the LKA SYS-
TEM:
With the ignition switch in the ON
position, press the LKA SYSTEM
button located on the instrument
panel on the lower left hand side of
the driver.
The indicator in the cluster display
will initially illuminate white.
When the indicator (white) activated
in the previous ignition cycle, the
system turns on without any control.If you press the LKA SYSTEM button
again, the indicator on the cluster
display will go off.
The color of indicator will change
depend on the condition of LKA
SYSTEM.
- White : Sensor does not detect the
lane marker or vehicle
speed is less than 64 km/h
(40 mph).
- Green : S ensor detects the lane
marker and system is able
to control the steering.
LKA SYSTEM activation
To see the LKA SYSTEM screen on the LCD display in the cluster,
Tab to the Assist mode ( ).
For further details, refer to [menu settings] in chapter 4, [crash pad].
After LKA SYSTEM is activated, if both lane markers are detected,
vehicle speed is over 64 km/h (40
mph) and all the activation condi-
tions are satisfied, a green steering
wheel indicator will illuminate and
the steering wheel will be controlled.
OUMA058031
WARNING
The Lane Keeping Assist
System is a system to help pre-
vent the driver from leaving the
lane. However, the driver should
not solely rely on the system
but always check the road con-
ditions when driving.
Page 381 of 573
Driving your vehicle
104
5
- The second stage alarm may be
deactivated.
To activate the alarm: Go to the User Settings Mode →
Driver Assistance and select
“Blind-Spot Collision Warning” on
the LCD display.
To deactivate the alarm: Go to the User Settings Mode →
Driver Assistance and deselect
“Blind-Spot Collision Warning” on
the LCD display.
✽ ✽
NOTICE
The alarm function helps alert the
driver. Deactivate this function only
when it is necessary
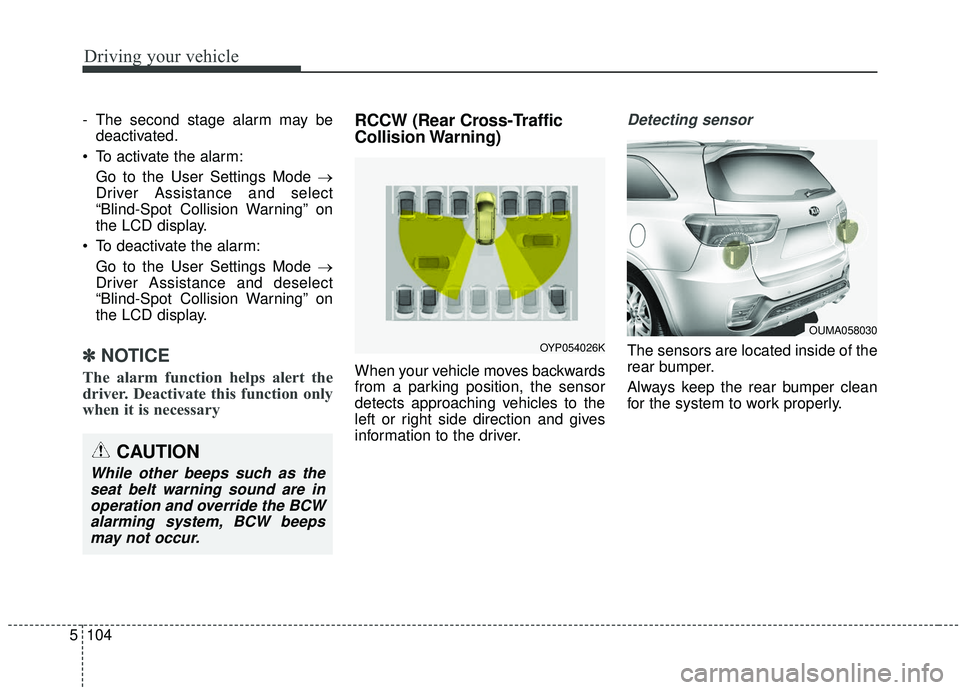
RCCW (Rear Cross-Traffic
Collision Warning)
When your vehicle moves backwards
from a parking position, the sensor
detects approaching vehicles to the
left or right side direction and gives
information to the driver.
Detecting sensor
The sensors are located inside of the
rear bumper.
Always keep the rear bumper clean
for the system to work properly.
OUMA058030
OYP054026K
CAUTION
While other beeps such as the
seat belt warning sound are inoperation and override the BCWalarming system, BCW beepsmay not occur.
Page 385 of 573
Driving your vehicle
108
5
Non-operating condition
Outside rearview mirror may not
alert the driver when:
- The outside rearview mirror housing
is damaged or covered with debris.
- The window is covered with debris.
- The windows are severely tinted.
DRIVER’S ATTENTION
The driver must be cautious in the
below situations, because the sys-
tem may not detect other vehicles
or objects in certain circumstances.
- The vehicle drives on a curved road or through a tollgate.
- The sensor is polluted with rain, snow, mud, etc.
- The rear bumper, in which the sensor is located, is covered or
blocked with a foreign matter
such as a sticker, a bumper
guard, a bicycle stand, etc.
- The rear bumper is damaged, or the sensor is out of the original
default position.
- The vehicle height gets lower or higher due to heavy loading in a
liftgate, abnormal tire pressure,
etc.
- The vehicle drives in a bad weather such as heavy rain or
snow.
(Continued)(Continued)
- There is a fixed object near the
vehicle, such as a guardrail,
pedestrian, animal, tunnel, etc.
- A big vehicle is near such as a bus or truck.
- A motorcycle or bicycle is near.
- A flat trailer is near.
- If the vehicle has started at the same time as the vehicle next to
you and has accelerated.
- When the other vehicle passes at a very fast speed.
- While changing lanes.
- When going down or up a steep road where the height of the lane
is different.
- When the other vehicle approaches very close.
- When a trailer or carrier is installed.
- When the temperature of the rear bumper is very high or low.
(Continued)
Page 428 of 573
What to do in an emergency
12
6
When you drive your vehicle from a
warm area to a cold area or from a
cold area to a warm area, or the out-
side temperature is greatly higher or
lower, you should check the tire infla-
tion pressure and adjust the tires to
the recommended tire inflation pres-
sure.
When filling tires with more air, con-
ditions to turn off the low tire pres-
sure telltale may not be met. This is
because a tire inflator has a margin
of error in performance. The low tire
pressure telltale will be turned off if
the tire pressure is above the recom-
mended tire inflation pressure.TPMS (Tire Pressure
Monitoring System)malfunction indicator
The low tire pressure telltale will illu-
minate after it blinks for approximate-
ly one minute when there is a prob-
lem with the Tire Pressure
Monitoring System. If the system is
able to correctly detect an underinfla-
tion warning at the same time as sys-
tem failure then it will illuminate both
the TPMS malfunction and low tire
pressure position telltales e.g. if
Front Left sensor fails, the TPMS
malfunction indicator illuminates, but
if the Front Right, Rear Left, or Rear
Right tire is under-inflated, the low
tire pressure position telltales may
illuminate together with the TPMS
malfunction indicator.
Have the system checked by an
authorized Kia dealer as soon as
possible to determine the cause of
the problem. The TPMS malfunction indicator
may be illuminated if the vehicle is
moving around electric power sup-
ply cables or radios transmitters
such as at police stations, govern-
ment and public offices, broadcast-
ing stations, military installations,
airports, or transmitting towers,
etc. This can interfere with normal
operation of the Tire Pressure
Monitoring System (TPMS).
The TPMS malfunction indicator may be illuminated if snow chains
are used or some separate elec-
tronic devices such as notebook
computer, mobile charger, remote
starter or navigation etc., are used
in the vehicle. This can interfere
with normal operation of the Tire
Pressure Monitoring System
(TPMS).
WARNING- Low pressure
damage
Do not drive on low pressure
tires. Significantly low tire pres-
sure can cause the tires to over-
heat and fail making the vehicle
unstable resulting in increased
braking distances and a loss of
vehicle control.