battery KIA SOUL 2009 Owners Manual
[x] Cancel search | Manufacturer: KIA, Model Year: 2009, Model line: SOUL, Model: KIA SOUL 2009Pages: 328, PDF Size: 29.57 MB
Page 13 of 328
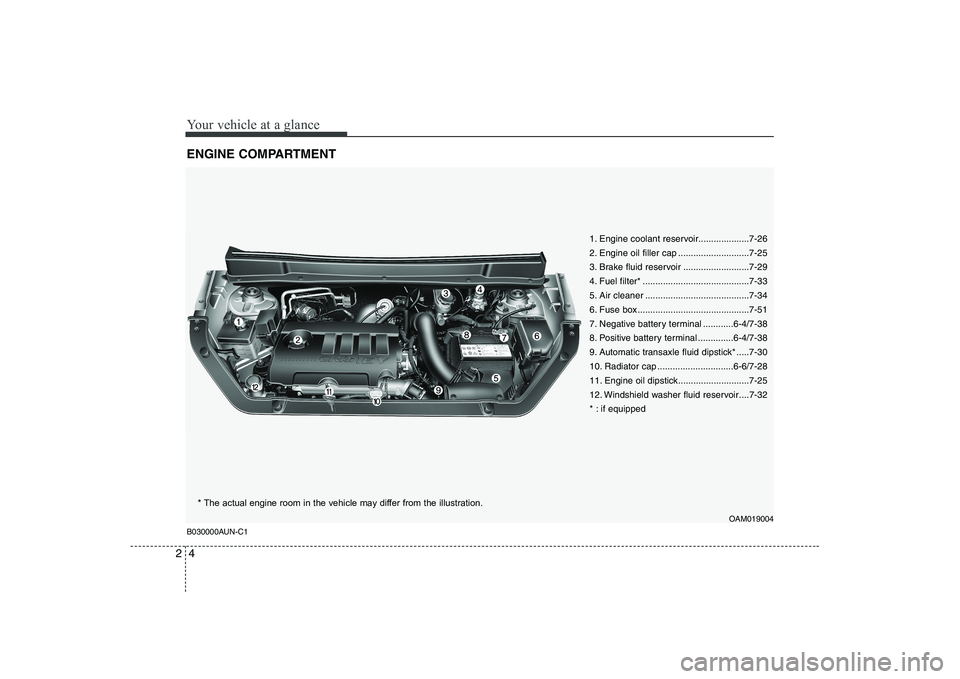
Your vehicle at a glance
4
2
ENGINE COMPARTMENT
B030000AUN-C1
OAM019004
1. Engine coolant reservoir....................7-26
2. Engine oil filler cap ............................7-25
3. Brake fluid reservoir ..........................7-29
4. Fuel filter* ..........................................7-33
5. Air cleaner .........................................7-34
6. Fuse box ............................................7-51
7. Negative battery terminal ............6-4/7-38
8. Positive battery terminal ..............6-4/7-38
9. Automatic transaxle fluid dipstick* .....7-30
10. Radiator cap ..............................6-6/7-28
11. Engine oil dipstick............................7-25
12. Windshield washer fluid reservoir ....7-32
* : if equipped
* The actual engine room in the vehicle may differ from the illustration.
Page 26 of 328
313
Safety features of your vehicle
C020100AUN Seat belt restraint systemSEAT BELTS
WARNING
For maximum restraint system protection, the seat belts must
always be used whenever the car
is moving.
Seat belts are most effective when seatbacks are in theupright position.
Children age 12 and under must always be properly restrained in
the rear seat. Never allow chil-
dren to ride in the front passen-
ger seat. If a child over 12 must
be seated in the front seat, he/she
must be properly belted and the
seat should be moved as far back
as possible.
Never wear the shoulder belt under your arm or behind your
back. An improperly positionedshoulder belt can cause serious
injuries in a crash. The shoulder
belt should be positioned midway
over your shoulder across your
collarbone.
(Continued)
WARNING
Seat belts are designed to bear
upon the bony structure of the
body, and should be worn low
across the front of the pelvis or the
pelvis, chest and shoulders, as
applicable; wearing the lap section
of the belt across the abdominal
area must be avoided. Seat belts should be adjusted as
firmly as possible, consistent with
comfort, to provide the protection
for which they have been designed.
A slack belt will greatly reduce the
protection afforded to the wearer.
Care should be taken to avoid con- tamination of the webbing with pol-
ishes, oils and chemicals, and par-
ticularly battery acid. Cleaning may
safely be carried out using mild
soap and water. The belt should bereplaced if webbing becomes
frayed, contaminated or damaged.
(Continued)(Continued)
Avoid wearing twisted seat belts.A twisted belt can't do its job as
well. In a collision, it could even
cut into you. Be sure the beltwebbing is straight and not twist-ed.
Be careful not to damage the belt webbing or hardware. If the belt
webbing or hardware is dam-
aged, replace it.
Page 57 of 328
Safety features of your vehicle
44
3
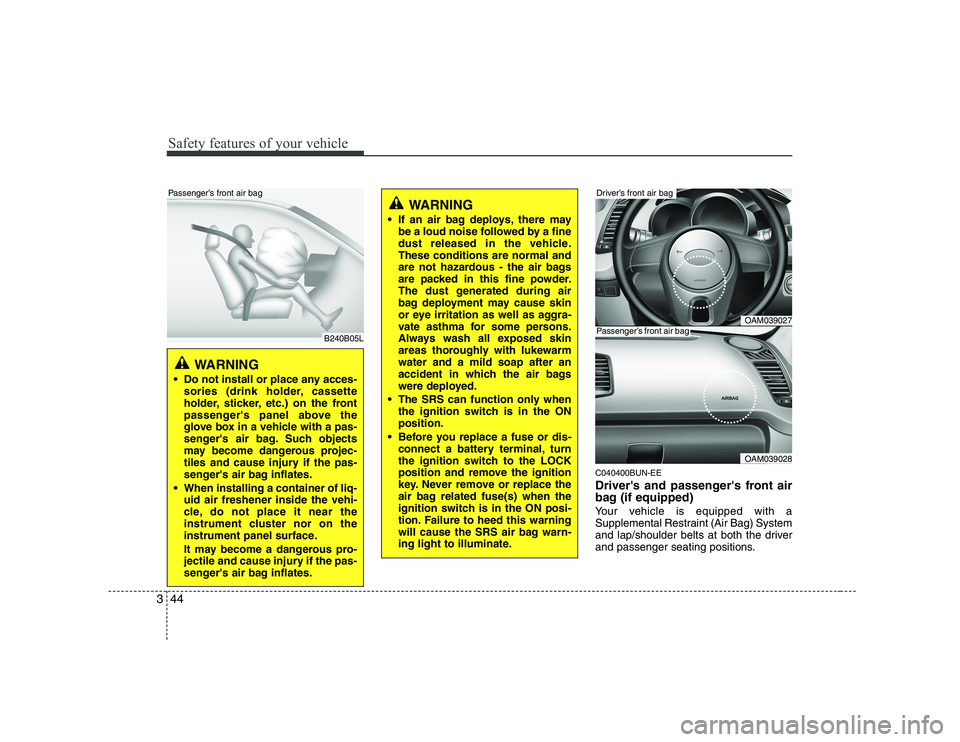
C040400BUN-EE
Driver's and passenger's front air
bag (if equipped)
Your vehicle is equipped with a
Supplemental Restraint (Air Bag) System
and lap/shoulder belts at both the driver
and passenger seating positions.
WARNING
If an air bag deploys, there may be a loud noise followed by a fine
dust released in the vehicle.These conditions are normal and
are not hazardous - the air bags
are packed in this fine powder.
The dust generated during air
bag deployment may cause skin
or eye irritation as well as aggra-
vate asthma for some persons.
Always wash all exposed skin
areas thoroughly with lukewarmwater and a mild soap after an
accident in which the air bags
were deployed.
The SRS can function only when the ignition switch is in the ONposition.
Before you replace a fuse or dis- connect a battery terminal, turn
the ignition switch to the LOCK
position and remove the ignition
key. Never remove or replace the
air bag related fuse(s) when the
ignition switch is in the ON posi-
tion. Failure to heed this warning
will cause the SRS air bag warn-
ing light to illuminate.
OAM039027
OAM039028
Driver’s front air bag
Passenger’s front air bag
WARNING
Do not install or place any acces- sories (drink holder, cassette
holder, sticker, etc.) on the front
passenger's panel above the
glove box in a vehicle with a pas-
senger's air bag. Such objects
may become dangerous projec-
tiles and cause injury if the pas-
senger's air bag inflates.
When installing a container of liq- uid air freshener inside the vehi-
cle, do not place it near the
instrument cluster nor on the
instrument panel surface.
It may become a dangerous pro-
jectile and cause injury if the pas-
senger's air bag inflates.
B240B05L
Passenger’s front air bag
Page 78 of 328
Features of your vehicle
6
4
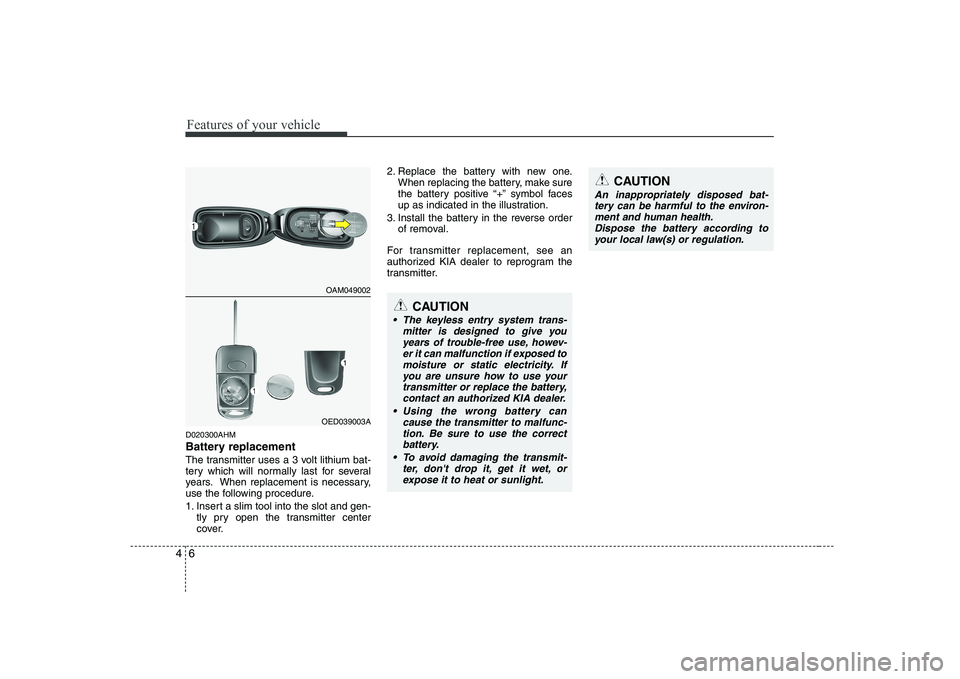
D020300AHM
Battery replacement
The transmitter uses a 3 volt lithium bat-
tery which will normally last for several
years. When replacement is necessary,
use the following procedure.
1. Insert a slim tool into the slot and gen-
tly pry open the transmitter center
cover. 2. Replace the battery with new one.
When replacing the battery, make sure
the battery positive “+” symbol faces
up as indicated in the illustration.
3. Install the battery in the reverse order of removal.
For transmitter replacement, see an
authorized KIA dealer to reprogram the
transmitter.
CAUTION
The keyless entry system trans- mitter is designed to give youyears of trouble-free use, howev-er it can malfunction if exposed tomoisture or static electricity. If
you are unsure how to use yourtransmitter or replace the battery, contact an authorized KIA dealer.
Using the wrong battery can cause the transmitter to malfunc-tion. Be sure to use the correctbattery.
To avoid damaging the transmit- ter, don't drop it, get it wet, or
expose it to heat or sunlight.
OAM049002
OED039003A
CAUTION
An inappropriately disposed bat-tery can be harmful to the environ-ment and human health. Dispose the battery according to
your local law(s) or regulation.
Page 96 of 328
Features of your vehicle
24
4
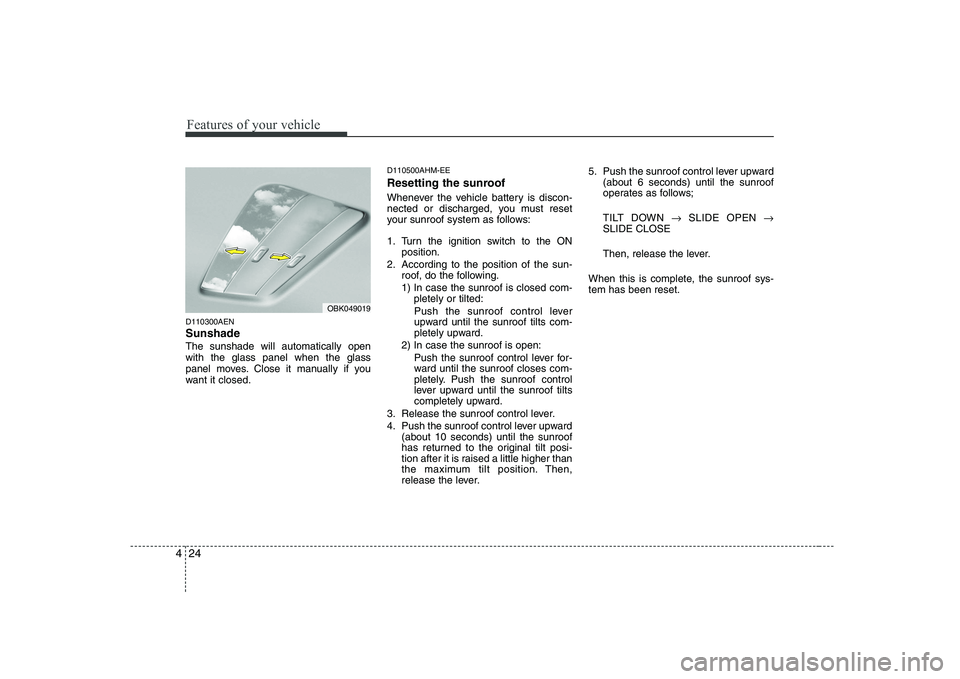
D110300AEN Sunshade The sunshade will automatically open with the glass panel when the glass
panel moves. Close it manually if you
want it closed. D110500AHM-EE
Resetting the sunroof
Whenever the vehicle battery is discon-
nected or discharged, you must reset
your sunroof system as follows:
1. Turn the ignition switch to the ON
position.
2. According to the position of the sun- roof, do the following.
1) In case the sunroof is closed com-pletely or tilted:
Push the sunroof control lever
upward until the sunroof tilts com-
pletely upward.
2) In case the sunroof is open:
Push the sunroof control lever for-
ward until the sunroof closes com-
pletely. Push the sunroof control
lever upward until the sunroof tilts
completely upward.
3. Release the sunroof control lever.
4. Push the sunroof control lever upward (about 10 seconds) until the sunroof
has returned to the original tilt posi-
tion after it is raised a little higher than
the maximum tilt position. Then,
release the lever. 5. Push the sunroof control lever upward
(about 6 seconds) until the sunroof
operates as follows;
TILT DOWN �SLIDE OPEN �
SLIDE CLOSE
Then, release the lever.
When this is complete, the sunroof sys- tem has been reset.
OBK049019
Page 102 of 328
Features of your vehicle
30
4
D140202AHM
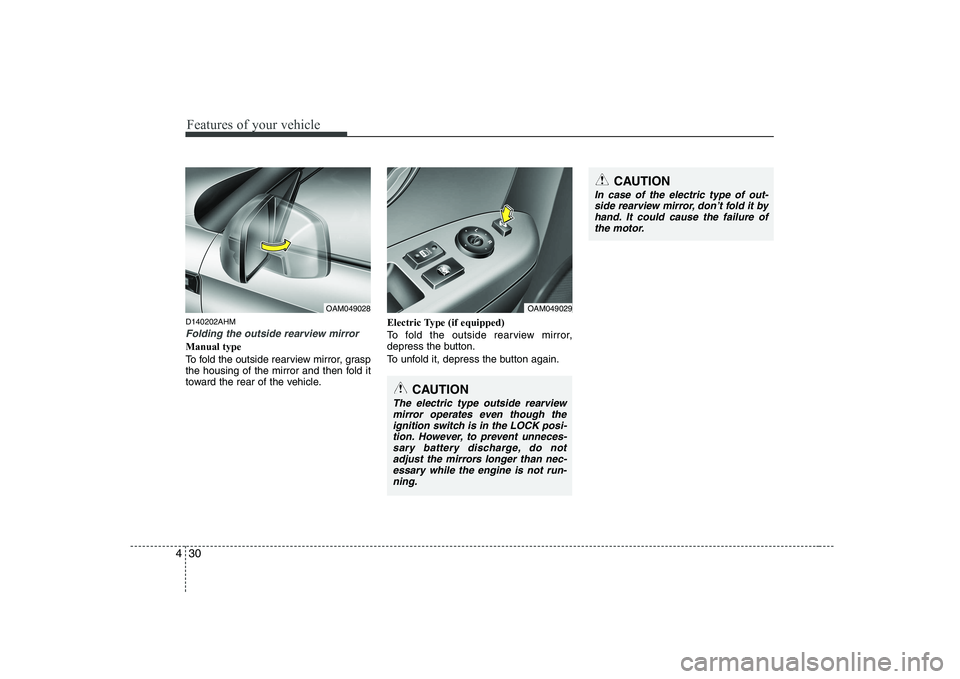
Folding the outside rearview mirror
Manual type
To fold the outside rearview mirror, grasp
the housing of the mirror and then fold it
toward the rear of the vehicle. Electric Type (if equipped)
To fold the outside rearview mirror,
depress the button.
To unfold it, depress the button again.
OAM049028OAM049029
CAUTION
In case of the electric type of out-
side rearview mirror, don’t fold it byhand. It could cause the failure of the motor.
CAUTION
The electric type outside rearview
mirror operates even though theignition switch is in the LOCK posi- tion. However, to prevent unneces- sary battery discharge, do not
adjust the mirrors longer than nec-essary while the engine is not run- ning.
Page 116 of 328
Features of your vehicle
44
4
D150328AUN-U1
Glow indicator
(Diesel engine)
The indicator illuminates when the igni-
tion switch is in the ON position. The
engine can be started after the preheat
indicator light goes off. The illuminating
time varies with the water temperature,
air temperature and battery condition.
✽✽ NOTICE
If the engine does not start within 10
seconds after the preheating is complet-
ed, turn the ignition key once more to
the LOCK position for 10 seconds, and
then to the ON position, in order to pre-heat again.
D150329AUN-U1
Fuel filter warning light (Diesel engine)
This warning light illuminates for 3 sec-
onds after the ignition switch is set to the
ON position and then it will go off. If it
lights up while the engine is running, it
indicates that water has accumulated
inside the fuel filter. If this happens,
remove the water from the fuel filter. For
more information, refer to “Fuel filter” insection 7. D150330BUN-U1
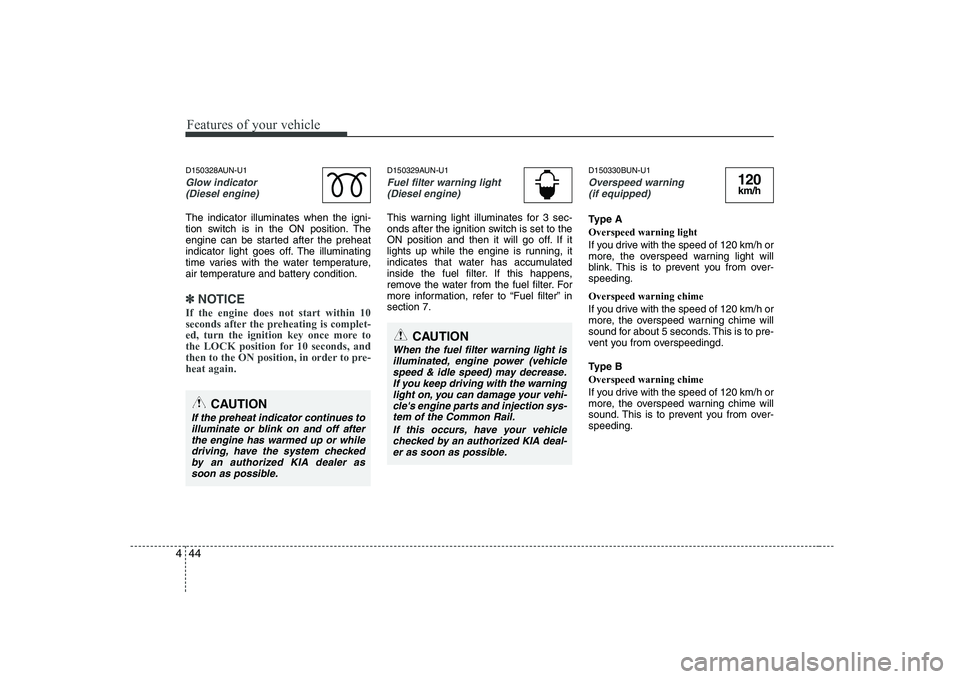
Overspeed warning
(if equipped)
Type A Overspeed warning light
If you drive with the speed of 120 km/h or
more, the overspeed warning light will
blink. This is to prevent you from over-speeding. Overspeed warning chime
If you drive with the speed of 120 km/h or
more, the overspeed warning chime will
sound for about 5 seconds. This is to pre-
vent you from overspeedingd.
Type B Overspeed warning chime
If you drive with the speed of 120 km/h or
more, the overspeed warning chime will
sound. This is to prevent you from over-speeding.
120km/h
CAUTION
When the fuel filter warning light is
illuminated, engine power (vehiclespeed & idle speed) may decrease. If you keep driving with the warninglight on, you can damage your vehi-
cle's engine parts and injection sys-tem of the Common Rail.
If this occurs, have your vehiclechecked by an authorized KIA deal-
er as soon as possible.
CAUTION
If the preheat indicator continues to illuminate or blink on and off afterthe engine has warmed up or while driving, have the system checked
by an authorized KIA dealer assoon as possible.
Page 121 of 328
449
Features of your vehicle
D190100AUN-U1
Battery saver function
The purpose of this feature is to pre-vent the battery from being dis-
charged. The system automatically
turns off the exterior lights when the
driver removes the ignition key and
opens the driver-side door.
With this feature, the parking lights will turn off automatically if the driver parkson the side of road at night.
If necessary, to keep the lights on
when the ignition key is removed, per-
form the following:
1) Open the driver-side door.
2) Turn the parking lights OFF and ON again using the light switch on the
steering column.
D190400AUN-C1
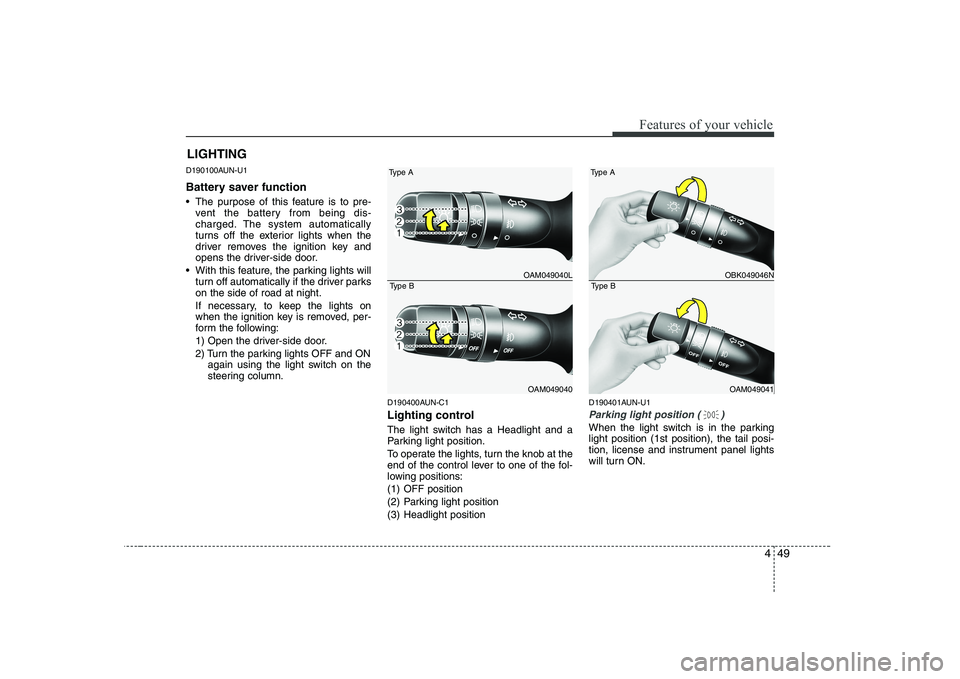
Lighting control
The light switch has a Headlight and a
Parking light position.
To operate the lights, turn the knob at the
end of the control lever to one of the fol-
lowing positions:
(1) OFF position
(2) Parking light position
(3) Headlight position D190401AUN-U1
Parking light position ( )
When the light switch is in the parking light position (1st position), the tail posi-
tion, license and instrument panel lights
will turn ON.
LIGHTING
OAM049040L
OAM049040
Type A
Type BOBK049046N
OAM049041
Type A
Type B
Page 122 of 328
Features of your vehicle
50
4
D190402AUN-C1
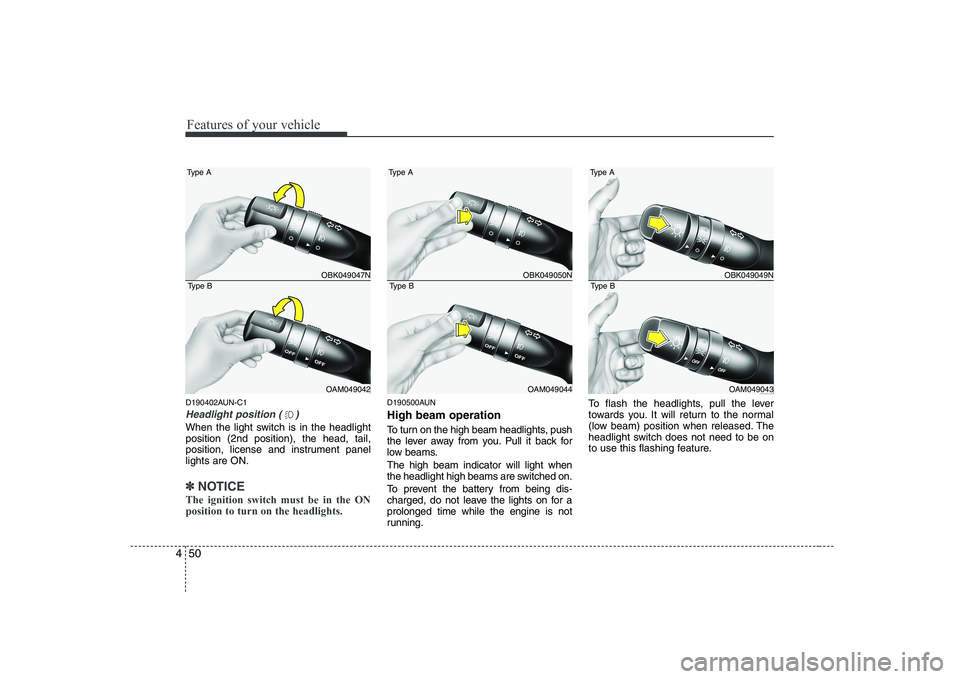
Headlight position ( )
When the light switch is in the headlight position (2nd position), the head, tail,
position, license and instrument panellights are ON.
✽✽
NOTICE
The ignition switch must be in the ON position to turn on the headlights.
D190500AUN High beam operation
To turn on the high beam headlights, push
the lever away from you. Pull it back for
low beams. The high beam indicator will light when
the headlight high beams are switched on.
To prevent the battery from being dis-
charged, do not leave the lights on for aprolonged time while the engine is not
running. To flash the headlights, pull the lever
towards you. It will return to the normal
(low beam) position when released. The
headlight switch does not need to be on
to use this flashing feature.
OBK049047N
OAM049042
Type A
Type BOBK049050N
OAM049044
Type A
Type BOBK049049N
OAM049043
Type A
Type B
Page 129 of 328
457
Features of your vehicle
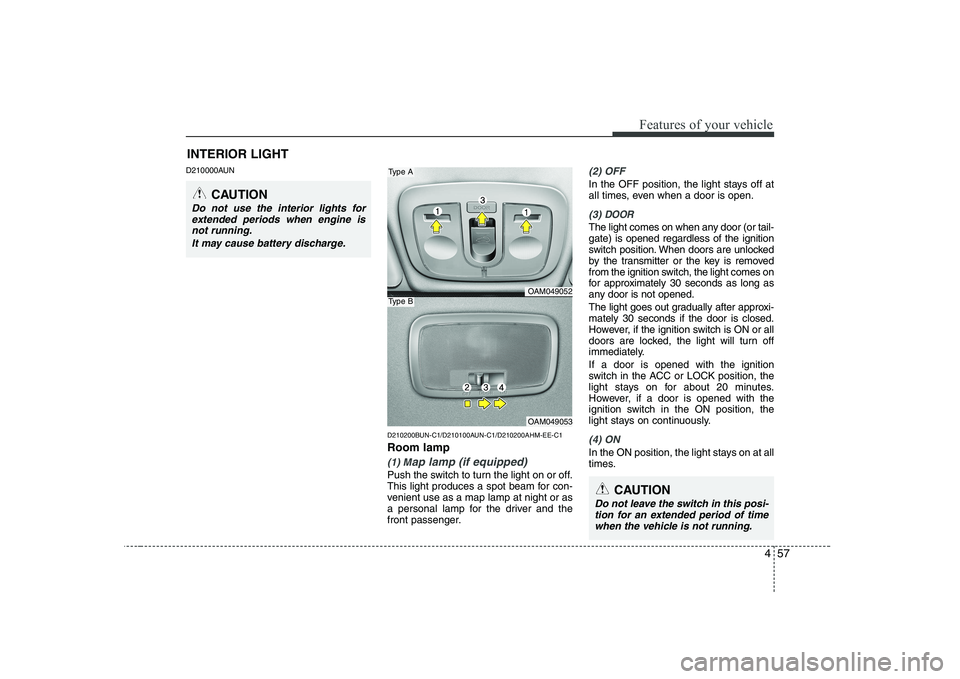
D210000AUND210200BUN-C1/D210100AUN-C1/D210200AHM-EE-C1 Room lamp
(1) Map lamp (if equipped)
Push the switch to turn the light on or off.
This light produces a spot beam for con-
venient use as a map lamp at night or as
a personal lamp for the driver and the
front passenger.
(2) OFF
In the OFF position, the light stays off at
all times, even when a door is open.
(3) DOOR
The light comes on when any door (or tail- gate) is opened regardless of the ignition
switch position. When doors are unlocked
by the transmitter or the key is removed
from the ignition switch, the light comes on
for approximately 30 seconds as long as
any door is not opened.
The light goes out gradually after approxi- mately 30 seconds if the door is closed.
However, if the ignition switch is ON or all
doors are locked, the light will turn off
immediately. If a door is opened with the ignition
switch in the ACC or LOCK position, the
light stays on for about 20 minutes.
However, if a door is opened with the
ignition switch in the ON position, the
light stays on continuously.
(4) ON
In the ON position, the light stays on at all
times.
INTERIOR LIGHT
CAUTION
Do not use the interior lights for
extended periods when engine is not running.
It may cause battery discharge.
OAM049052
OAM049053
Type A
Type B
CAUTION
Do not leave the switch in this posi-tion for an extended period of time
when the vehicle is not running.