turn signal KIA SOUL 2009 Owners Manual
[x] Cancel search | Manufacturer: KIA, Model Year: 2009, Model line: SOUL, Model: KIA SOUL 2009Pages: 328, PDF Size: 29.57 MB
Page 9 of 328
Introduction
6
1
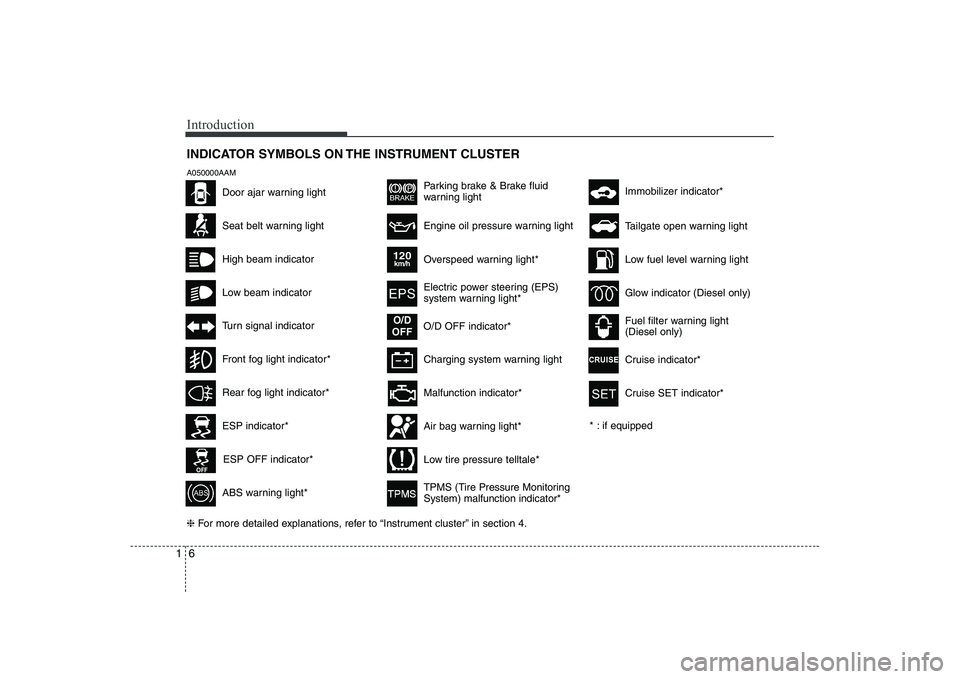
INDICATOR SYMBOLS ON THE INSTRUMENT CLUSTER
Seat belt warning light
High beam indicator
Low beam indicator
Turn signal indicator
ABS warning light*
Parking brake & Brake fluid
warning light
Malfunction indicator*
Immobilizer indicator*
Low fuel level warning light
Glow indicator (Diesel only)
Fuel filter warning light (Diesel only)
* : if equipped Tailgate open warning light
❈ For more detailed explanations, refer to “Instrument cluster” in section 4.
Charging system warning light
Door ajar warning light
A050000AAM
ESP indicator*
ESP OFF indicator*
Front fog light indicator*
Engine oil pressure warning light
Overspeed warning light*
120km/h
Electric power steering (EPS)
system warning light*
O/D OFF indicator*
O/D
OFF
Air bag warning light*
TPMS (Tire Pressure Monitoring System) malfunction indicator*
Low tire pressure telltale*
Rear fog light indicator*
Cruise indicator*
Cruise SET indicator*
Page 12 of 328
23
Your vehicle at a glance
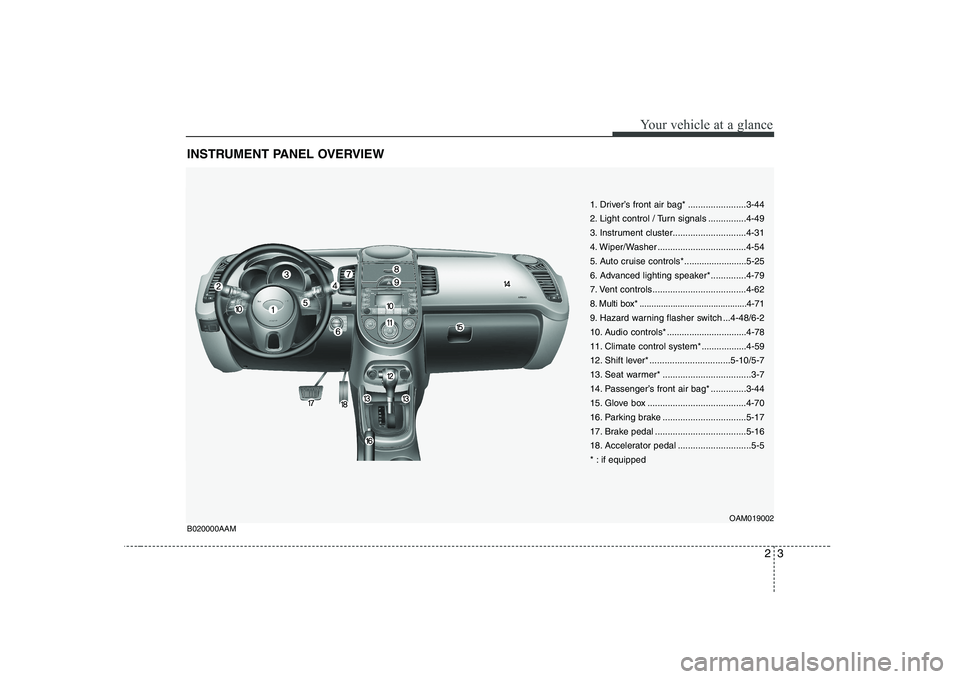
INSTRUMENT PANEL OVERVIEW
1. Driver’s front air bag* .......................3-44
2. Light control / Turn signals ...............4-49
3. Instrument cluster.............................4-31
4. Wiper/Washer ...................................4-54
5. Auto cruise controls* .........................5-25
6. Advanced lighting speaker*..............4-79
7. Vent controls.....................................4-62
8. Multi box* .............................................4-71
9. Hazard warning flasher switch ...4-48/6-2
10. Audio controls * ................................4-78
11. Climate control system*..................4-59
12. Shift lever* ................................5-10/5-7
13. Seat warmer* ...................................3-7
14. Passenger’s front air bag* ..............3-44
15. Glove box .......................................4-70
16. Parking brake .................................5-17
17. Brake pedal ....................................5-16
18. Accelerator pedal .............................5-5
* : if equipped
OAM019002
B020000AAM
Page 52 of 328
339
Safety features of your vehicle
C040900AUN-U1
How does the air bag system operate
Air bags are activated (able to inflate ifnecessary) only when the ignition
switch is turned to the ON or STARTposition.
Air bags inflate instantly in the event of serious frontal or side collision (ifequipped with side impact air bag or
curtain air bag) in order to help protect
the occupants from serious physical
injury.
There is no single speed at which the air bags will inflate.
Generally, air bags are designed to
inflate based upon the severity of a col-
lision and its direction. These two fac-
tors determine whether the sensors
produce an electronic deployment/inflation signal.
Air bag deployment depends on a number of factors including vehiclespeed, angles of impact and the densi-
ty and stiffness of the vehicles or
objects which your vehicle hits in the
collision. The determining, factors are
not limited to those mentioned above.
The front air bags will completely inflate and deflate in an instant. It is virtually impossible for you to see
the air bags inflate during an accident.
It is much more likely that you will sim-ply see the deflated air bags hanging
out of their storage compartments afterthe collision.
In order to help provide protection in a severe collision, the air bags must
inflate rapidly. The speed of air bag
inflation is a consequence of extremely
short time in which a collision occursand the need to get the air bag
between the occupant and the vehicle
structures before the occupant impacts
those structures. This speed of inflation
reduces the risk of serious or life-
threatening injuries in a severe collision
and is thus a necessary part of air bagdesign.
However, air bag inflation can also
cause injuries which can include facial
abrasions, bruises and broken bonesbecause the inflation speed also caus-
es the air bags to expand with a great
deal of force.
There are even circumstances under which contact with the steer-
ing wheel air bag can cause fatal
injuries, especially if the occupant
is positioned excessively close tothe steering wheel.
WARNING
To avoid severe personal injury or death caused by deploying air
bags in a collision, the driver
should sit as far back from the
steering wheel air bag as possi-
ble (at least 250 mm (10 inches)
away). The front passenger
should always move their seat as
far back as possible and sit backin their seat.
Air bag inflates instantly in an event of a collision, passengers
may be injured by the air bag
expansion force if they are not in
a proper position.
Air bag inflation may cause injuries including facial or bodily
abrasions, injuries from broken
glasses or burns.
Page 75 of 328
43
Features of your vehicle
D010300CUN-U1
Immobilizer system (if equipped)
Your vehicle may be equipped with an
electronic engine immobilizer system to
reduce the risk of unauthorized vehicle
use.
Your immobilizer system is comprised of
a small transponder in the ignition key
and electronic devices inside the vehicle.
With the immobilizer system, whenever
you insert your ignition key into the igni-
tion switch and turn it to ON, it checks
and determines and verifies if the ignition
key is valid or not.
If the key is determined to be valid, the
engine will start.
If the key is determined to be invalid, the
engine will not start.
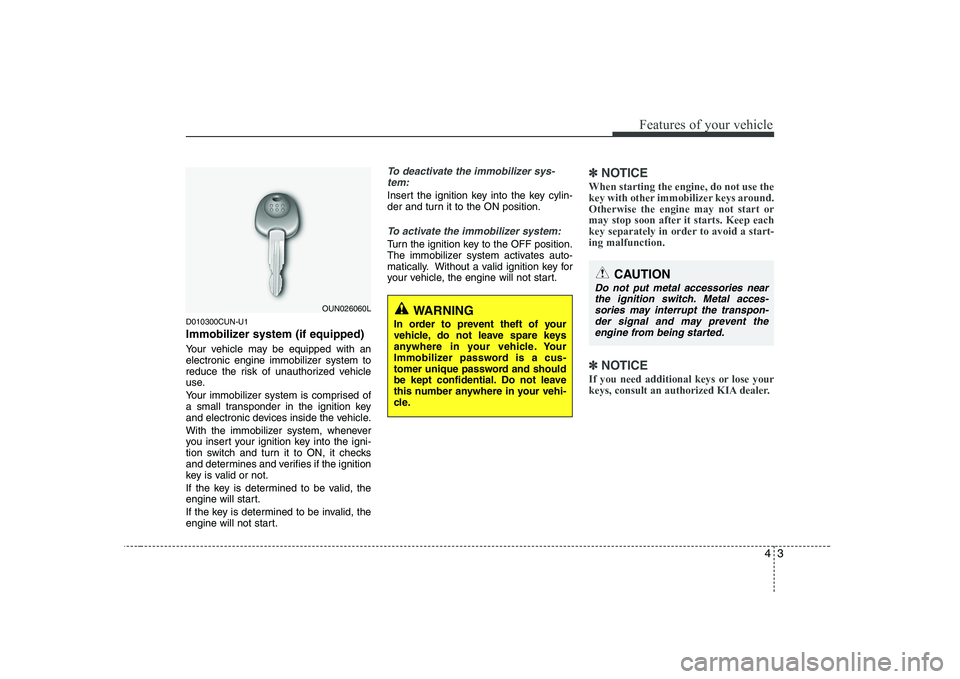
To deactivate the immobilizer sys-tem:
Insert the ignition key into the key cylin-
der and turn it to the ON position.
To activate the immobilizer system:
Turn the ignition key to the OFF position.
The immobilizer system activates auto-
matically. Without a valid ignition key for
your vehicle, the engine will not start.
✽✽ NOTICE
When starting the engine, do not use the
key with other immobilizer keys around.Otherwise the engine may not start or
may stop soon after it starts. Keep each
key separately in order to avoid a start-ing malfunction.
✽
✽ NOTICE
If you need additional keys or lose your
keys, consult an authorized KIA dealer.
OUN026060L
CAUTION
Do not put metal accessories near the ignition switch. Metal acces- sories may interrupt the transpon-
der signal and may prevent the engine from being started.
WARNING
In order to prevent theft of your
vehicle, do not leave spare keys
anywhere in your vehicle. Your
Immobilizer password is a cus-
tomer unique password and should
be kept confidential. Do not leave
this number anywhere in your vehi-
cle.
Page 103 of 328
431
Features of your vehicle
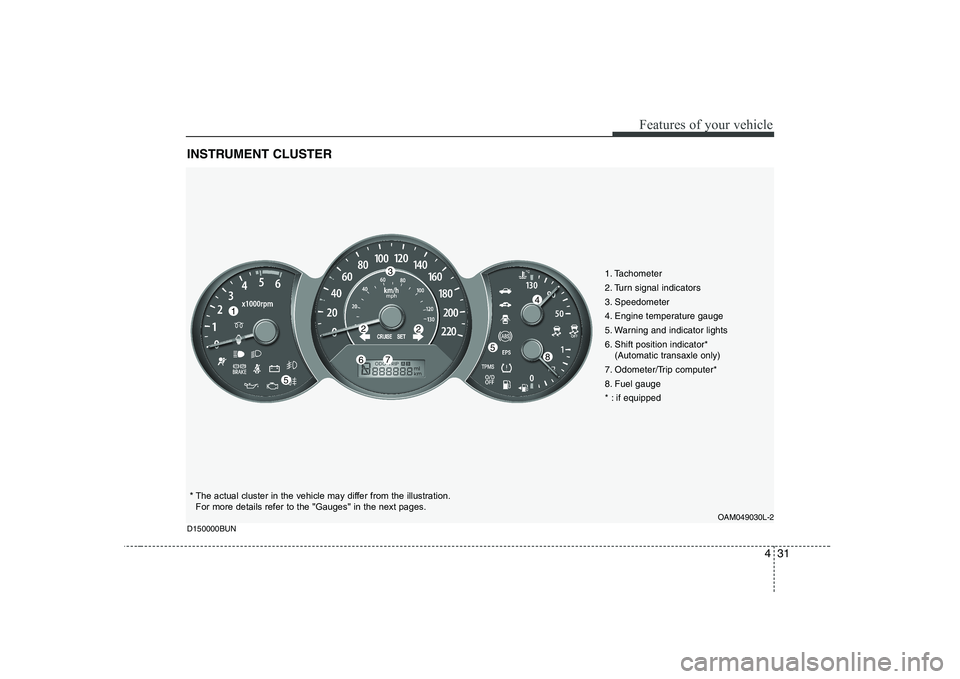
INSTRUMENT CLUSTER
1. Tachometer
2. Turn signal indicators
3. Speedometer
4. Engine temperature gauge
5. Warning and indicator lights
6. Shift position indicator*(Automatic transaxle only)
7. Odometer/Trip computer*
8. Fuel gauge
* : if equipped
OAM049030L-2
D150000BUN
14
5867
22
3
5
* The actual cluster in the vehicle may differ from the illustration. For more details refer to the "Gauges" in the next pages.
Page 110 of 328
Features of your vehicle
38
4
D150307AUN
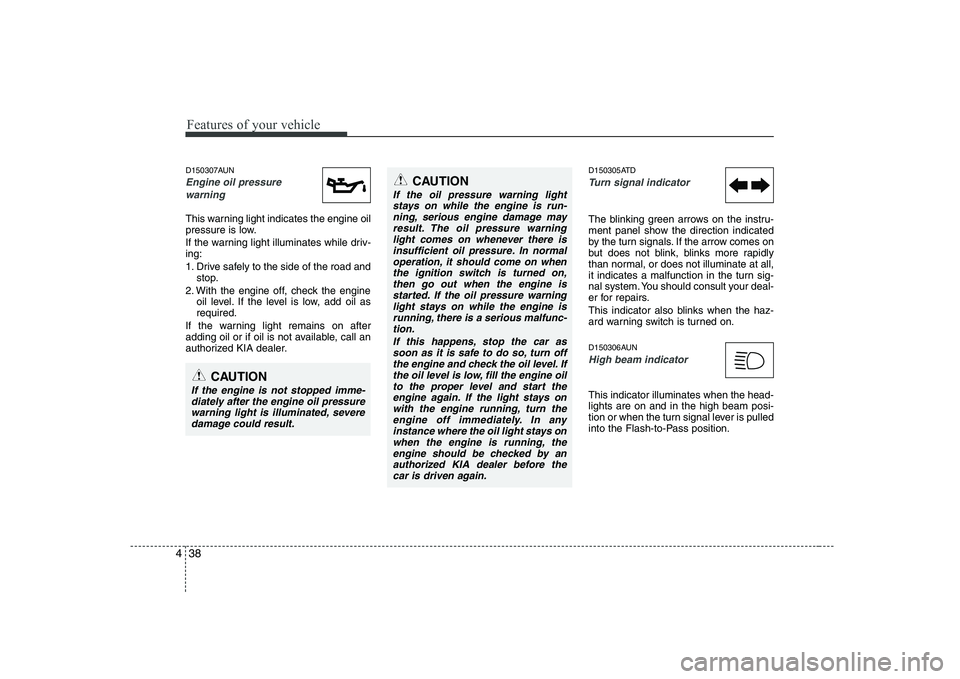
Engine oil pressure
warning
This warning light indicates the engine oil
pressure is low.
If the warning light illuminates while driv- ing:
1. Drive safely to the side of the road and stop.
2. With the engine off, check the engine oil level. If the level is low, add oil as required.
If the warning light remains on after
adding oil or if oil is not available, call an
authorized KIA dealer. D150305ATD
Turn signal indicator
The blinking green arrows on the instru-
ment panel show the direction indicated
by the turn signals. If the arrow comes on
but does not blink, blinks more rapidly
than normal, or does not illuminate at all,
it indicates a malfunction in the turn sig-
nal system. You should consult your deal-
er for repairs.
This indicator also blinks when the haz-
ard warning switch is turned on.
D150306AUN
High beam indicator
This indicator illuminates when the head- lights are on and in the high beam posi-
tion or when the turn signal lever is pulled
into the Flash-to-Pass position.
CAUTION
If the engine is not stopped imme-
diately after the engine oil pressure
warning light is illuminated, severe damage could result.
CAUTION
If the oil pressure warning light
stays on while the engine is run-ning, serious engine damage may result. The oil pressure warning
light comes on whenever there isinsufficient oil pressure. In normal operation, it should come on when the ignition switch is turned on,
then go out when the engine is started. If the oil pressure warninglight stays on while the engine isrunning, there is a serious malfunc-
tion.
If this happens, stop the car assoon as it is safe to do so, turn off the engine and check the oil level. If
the oil level is low, fill the engine oilto the proper level and start the engine again. If the light stays on with the engine running, turn the
engine off immediately. In anyinstance where the oil light stays on when the engine is running, theengine should be checked by an
authorized KIA dealer before thecar is driven again.
Page 120 of 328
Features of your vehicle
48
4
D330000AHM-EE
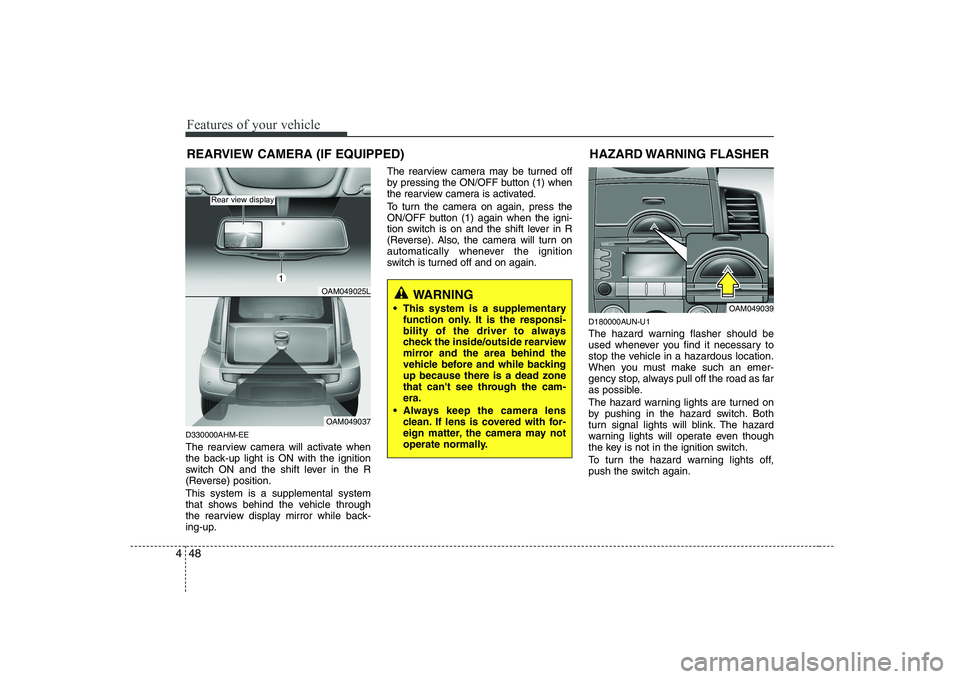
The rearview camera will activate when
the back-up light is ON with the ignition
switch ON and the shift lever in the R
(Reverse) position. This system is a supplemental system
that shows behind the vehicle through
the rearview display mirror while back-
ing-up. The rearview camera may be turned off
by pressing the ON/OFF button (1) when
the rearview camera is activated.
To turn the camera on again, press the
ON/OFF button (1) again when the igni-
tion switch is on and the shift lever in R
(Reverse). Also, the camera will turn on
automatically whenever the ignition
switch is turned off and on again.
D180000AUN-U1
The hazard warning flasher should be
used whenever you find it necessary to
stop the vehicle in a hazardous location.
When you must make such an emer-
gency stop, always pull off the road as far
as possible.
The hazard warning lights are turned on
by pushing in the hazard switch. Both
turn signal lights will blink. The hazard
warning lights will operate even though
the key is not in the ignition switch.
To turn the hazard warning lights off,
push the switch again.HAZARD WARNING FLASHER
OAM049039
WARNING
This system is a supplementary function only. It is the responsi-
bility of the driver to always
check the inside/outside rearview
mirror and the area behind the
vehicle before and while backingup because there is a dead zone
that can't see through the cam-era.
Always keep the camera lens clean. If lens is covered with for-
eign matter, the camera may not
operate normally.
REARVIEW CAMERA (IF EQUIPPED)
OAM049025L
OAM049037
Rear view display
1
Page 123 of 328
451
Features of your vehicle
D190600AUN-C1
Turn signals and lane change sig- nals
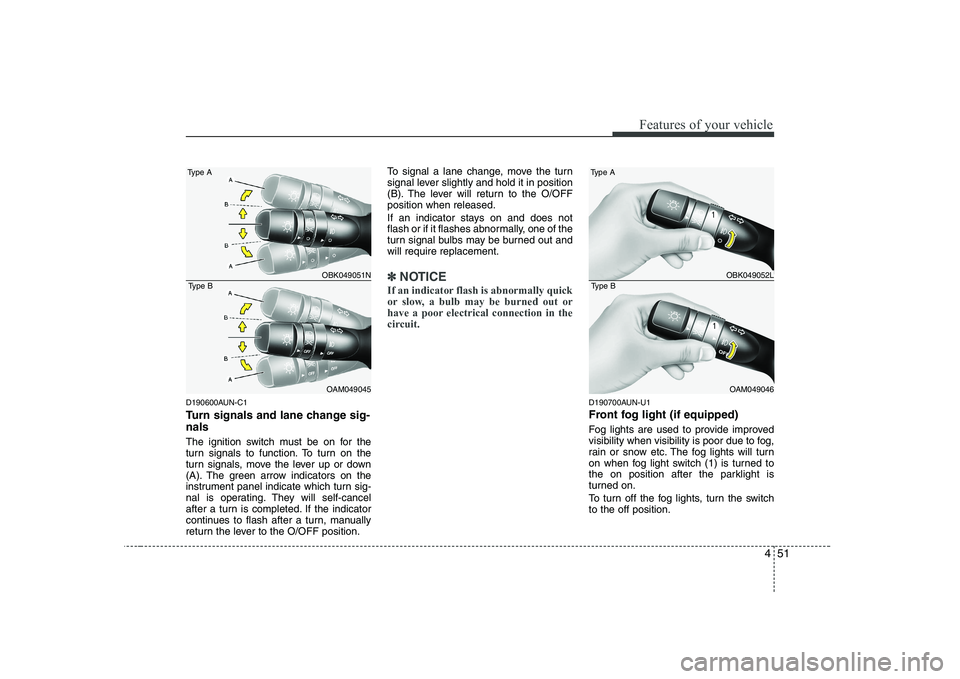
The ignition switch must be on for the
turn signals to function. To turn on the
turn signals, move the lever up or down
(A). The green arrow indicators on the
instrument panel indicate which turn sig-
nal is operating. They will self-cancel
after a turn is completed. If the indicator
continues to flash after a turn, manually
return the lever to the O/OFF position.To signal a lane change, move the turn
signal lever slightly and hold it in position
(B). The lever will return to the O/OFFposition when released.
If an indicator stays on and does not
flash or if it flashes abnormally, one of the
turn signal bulbs may be burned out andwill require replacement.
✽✽
NOTICE
If an indicator flash is abnormally quick
or slow, a bulb may be burned out or
have a poor electrical connection in the
circuit.
D190700AUN-U1
Front fog light (if equipped)
Fog lights are used to provide improved
visibility when visibility is poor due to fog,
rain or snow etc. The fog lights will turn
on when fog light switch (1) is turned to
the on position after the parklight is
turned on.
To turn off the fog lights, turn the switch to the off position.
OBK049051N
OAM049045
Type A
Type BOBK049052L
OAM049046
Type A
Type B
Page 152 of 328
Features of your vehicle
80
4
1. ON : The light turns on.
2. MOOD : The light shade changes
automatically at regular inter-
val.
3. MUSIC : The light blinks or changes shade according to the
sound of the audio.
If the audio is not turned on,
the light does not turn on.
4. OFF : The light turns off.
5. +/- : When the lights are on, push the illumination button to adjust the
light intensity.
✽✽NOTICE
The lighting around the front speaker may not illuminate when the sound of
the audio is low.
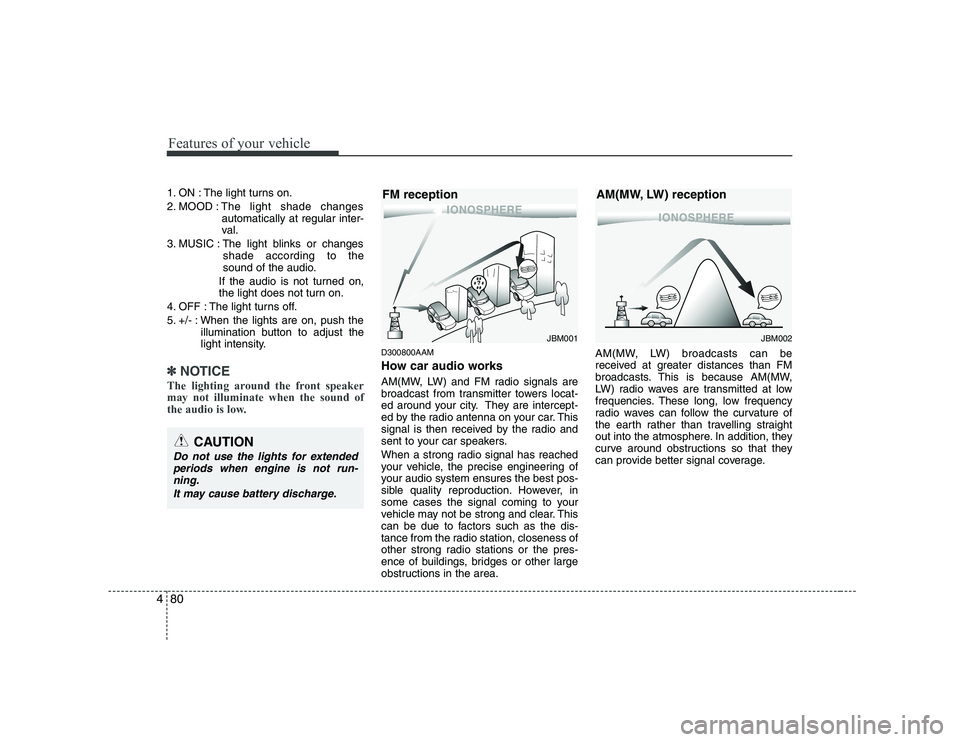
D300800AAM
How car audio works
AM(MW, LW) and FM radio signals are
broadcast from transmitter towers locat-
ed around your city. They are intercept-
ed by the radio antenna on your car. This
signal is then received by the radio and
sent to your car speakers.
When a strong radio signal has reached
your vehicle, the precise engineering of
your audio system ensures the best pos-
sible quality reproduction. However, in
some cases the signal coming to your
vehicle may not be strong and clear. This
can be due to factors such as the dis-
tance from the radio station, closeness of
other strong radio stations or the pres-
ence of buildings, bridges or other large
obstructions in the area. AM(MW, LW) broadcasts can be
received at greater distances than FM
broadcasts. This is because AM(MW,
LW) radio waves are transmitted at low
frequencies. These long, low frequency
radio waves can follow the curvature of
the earth rather than travelling straight
out into the atmosphere. In addition, they
curve around obstructions so that they
can provide better signal coverage.
¢¢¢
JBM001
FM reception
CAUTION
Do not use the lights for extended
periods when engine is not run-ning.
It may cause battery discharge.
¢¢¢¢¢¢
JBM002
AM(MW, LW) reception
Page 212 of 328
Driving your vehicle
42
5
E140401AUN
Following distance
Stay at least twice as far behind the vehi-
cle ahead as you would when driving
your vehicle without a trailer. This can
help you avoid situations that require
heavy braking and sudden turns.
E140402AUN
Passing
You’ll need more passing distance up
ahead when you’re towing a trailer. And,
because of the increased vehicle length,
you’ll need to go much farther beyond the
passed vehicle before you can return to
your lane.
E140403AUN
Backing up
Hold the bottom of the steering wheel
with one hand. Then, to move the trailer
to the left, just move your hand to the left.
To move the trailer to the right, move your
hand to the right. Always back up slowly
and, if possible, have someone guide
you. E140404AUN
Making turns
When you’re turning with a trailer, make
wider turns than normal. Do this so your
trailer won’t strike soft shoulders, curbs,
road signs, trees, or other objects. Avoid
jerky or sudden maneuvers. Signal well
in advance.
E140405AUN
Turn signals when towing a trailer
When you tow a trailer, your vehicle has
to have a different turn signal flasher and
extra wiring. The green arrows on your
instrument panel will flash whenever you
signal a turn or lane change. Properly
connected, the trailer lights will also flash
to alert other drivers you’re about to turn,
change lanes, or stop.
When towing a trailer, the green arrows
on your instrument panel will flash for
turns even if the bulbs on the trailer are
burned out. Thus, you may think drivers
behind you are seeing your signals
when, in fact, they are not. It’s important
to check occasionally to be sure the trail-
er bulbs are still working. You must also
check the lights every time you discon-
nect and then reconnect the wires.
Do not connect a trailer lighting system
directly to your vehicle’s lighting system.
Use only an approved trailer wiring har-
ness.An authorized KIA dealer can assist you
in installing the wiring harness. E140406ASA-C1Driving on grades
Reduce speed and shift to a lower gear
before you start down a long or steep
downgrade. If you don’t shift down, you
might have to use your brakes so much
that they would get hot and no longer
operate efficiently.
On a long uphill grade, shift down and
reduce your speed to around 70 km/h (45mph) to reduce the possibility of engine
and transaxle overheating.
If your trailer weighs more than the max-
imum trailer weight without trailer brakes
and you have an automatic transaxle,
you should drive in D (Drive) when tow-
ing a trailer.
Operating your vehicle in D (Drive) when
towing a trailer will minimize heat build up
and extend the life of your transaxle.
WARNING
Failure to use an approved trailer wiring harness could result in dam-
age to the vehicle electrical system
and/or personal injury.